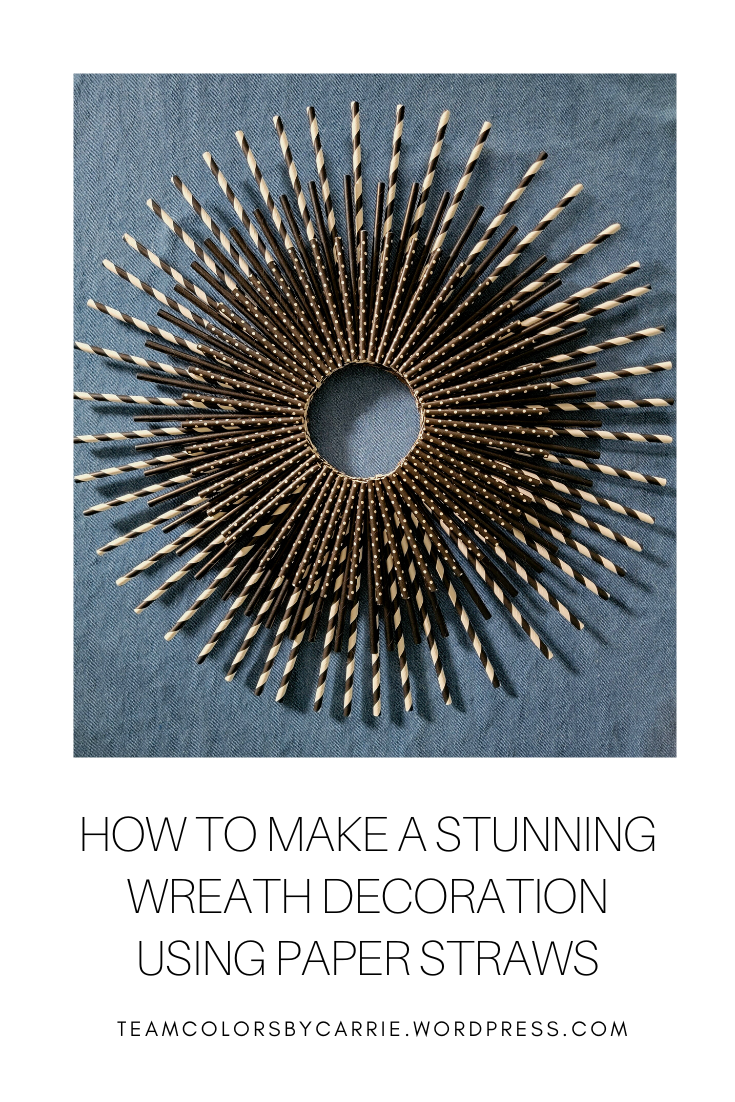
Are you starting to plan for football game day parties, to gather with friends and family to watch your favorite teams play? Now’s the perfect time to upgrade your tailgating or homegating party décor with a new decorative wreath that you can make yourself using paper straws!
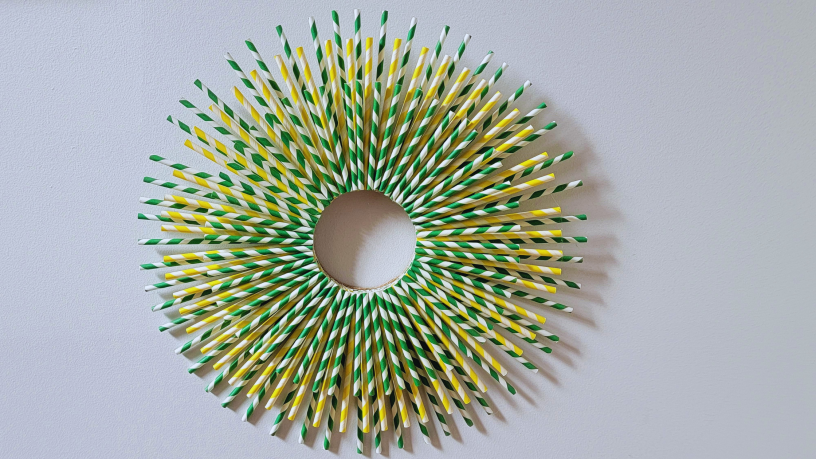
I chose green and yellow straws for my first wreath (Go Packers!), but feel free to choose your own favorite team colors! I also picked up some paper straws in black and white, to make a wreath to hang in my office for a unique piece of wall art. So use your imagination, and have some fun!
Ready to get started?
Let’s go!
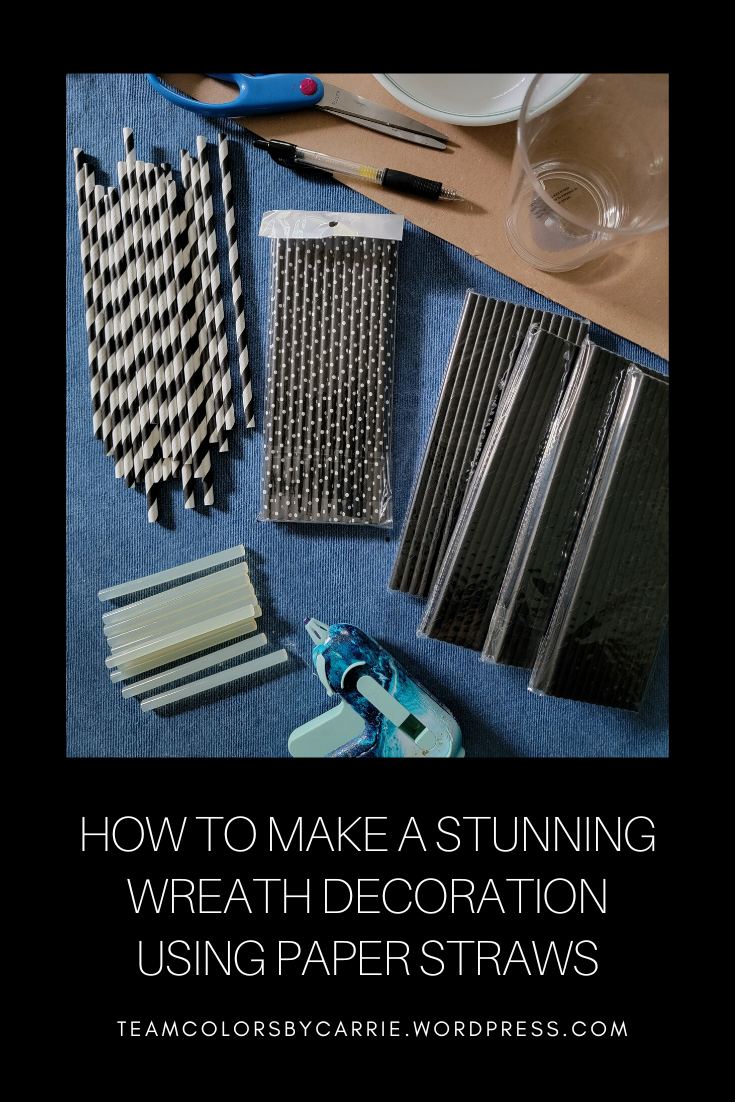
Step 1 – Gather Your Supplies
- 300 Paper straws in 3 different colors or patterns (100 each)
Pro tip – save any leftovers for another project (coming soon)! - Thick cardboard, at least 6″ square
- Hot glue gun and glue sticks
- Scissors
- Round objects to trace to create about 6″ and 4″ circles (I used a bowl and a cup)
- Pen or pencil
- Ruler
- Ribbon, string or twine for hanging (not shown)
- Paint or markers to color the cardboard to match straw color (optional)

.
Step 2 – Create a Base for the Wreath
Draw a circle on the cardboard by tracing around the larger object. Then center the smaller object inside that circle, and trace around it.
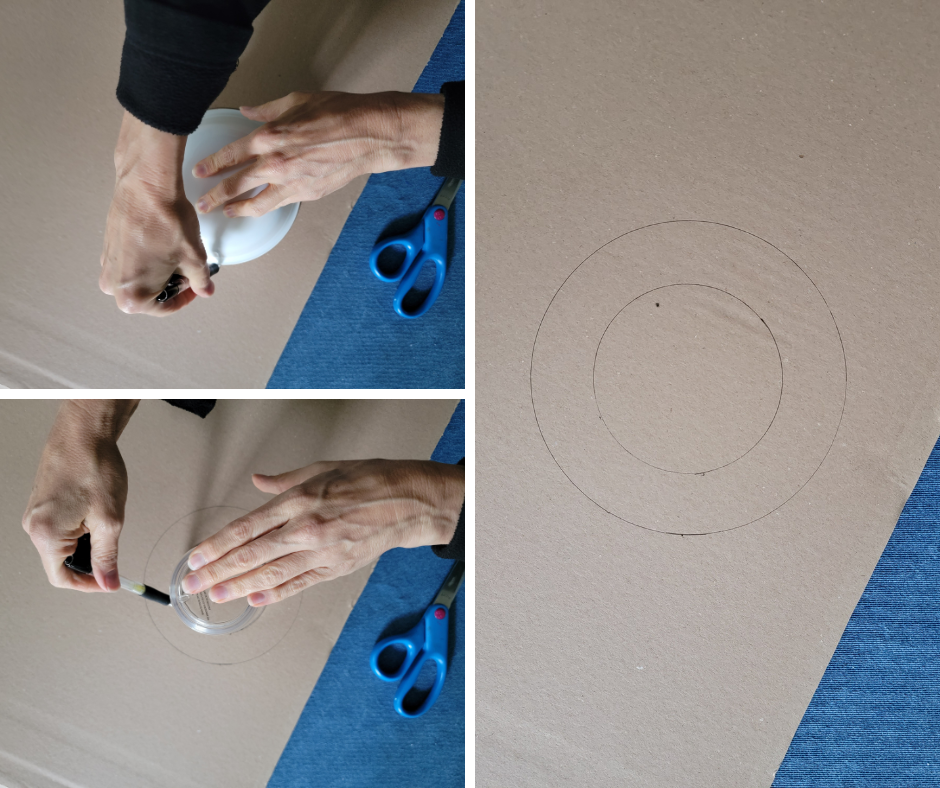
If desired, use some paint or a marker to color between the 2 circles. Cut the circles out, discarding the small inner circle. It’s okay if the cardboard gets a little wrinkled when you are cutting it out, because it will be covered by straws.

.
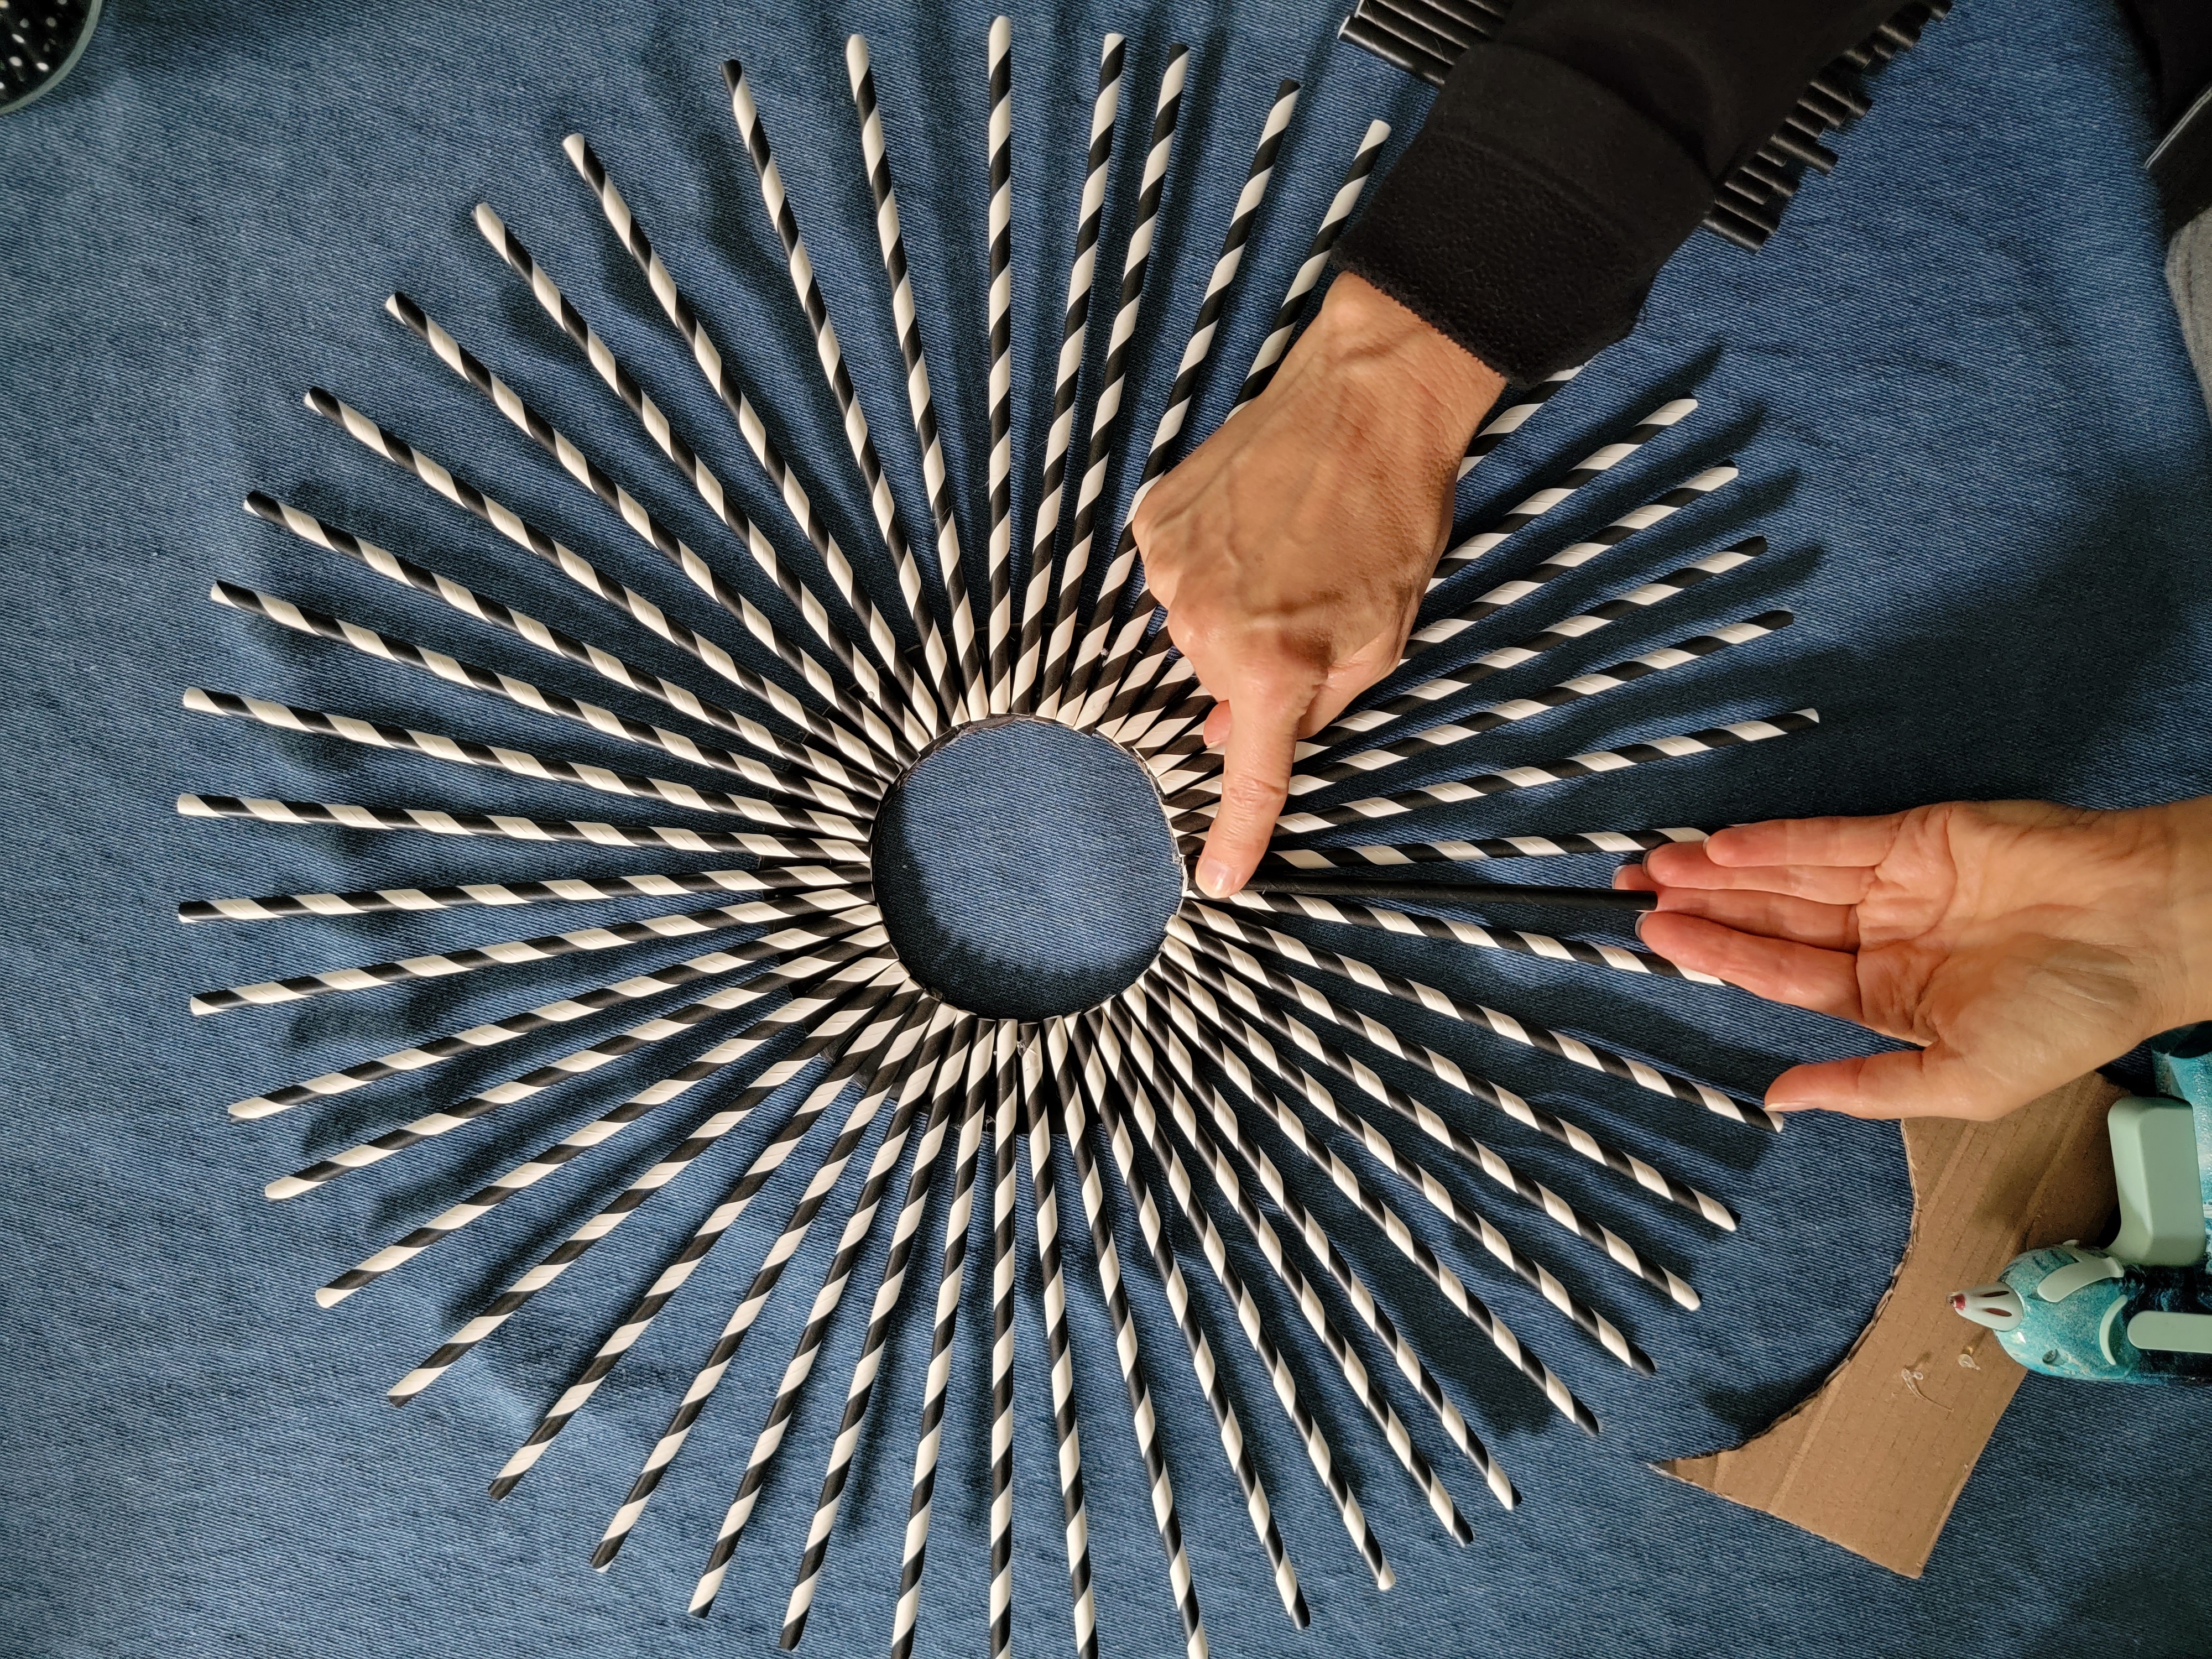
Step 3 – Glue on Bottom Layer of Straws
Working in small sections, start gluing one set of straws onto the base, aligning the ends of the straws with the inner edge of the cardboard circle. I found it easiest to apply a small amount of glue to the cardboard, then lay 2 or 3 straws down onto the glue.

Continue this process until there are straws all the way around the cardboard circle.

.
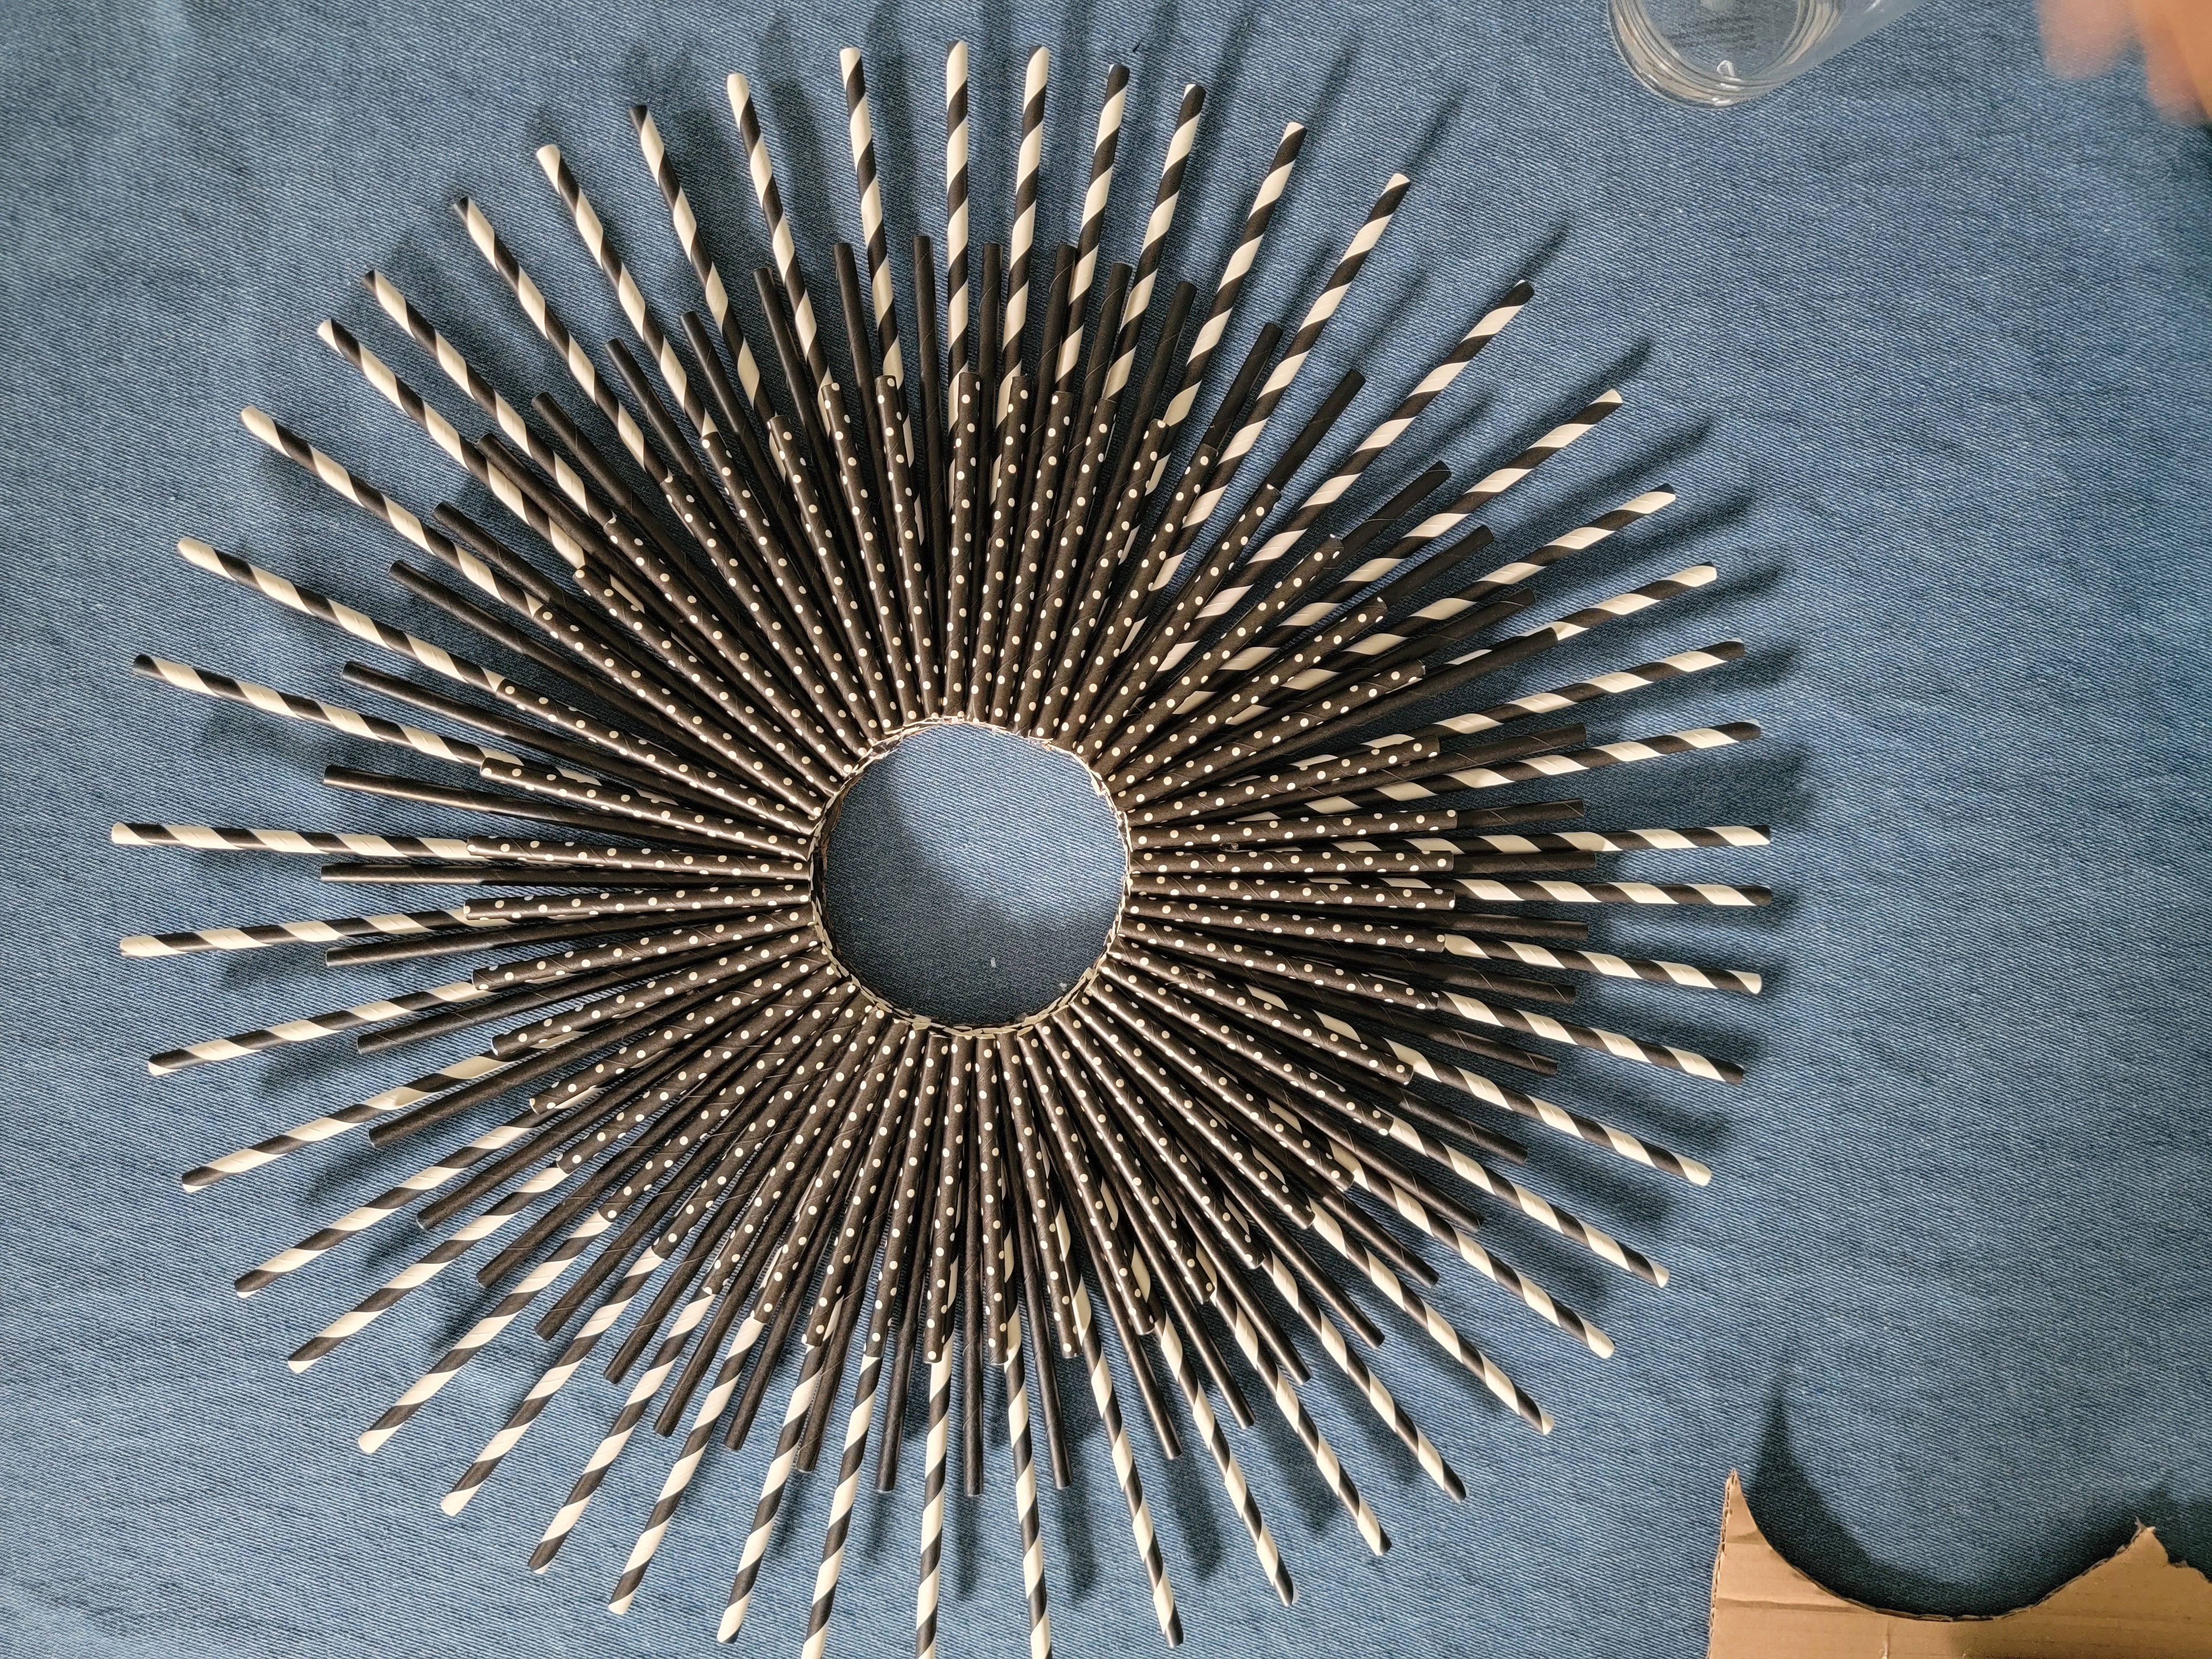
Step 4 – Middle Layer of Straws
Select your straws for the middle layer, and cut them to about 2/3 of their length. My solid black straws were 8″ long, so I cut them to about 5-1/2″.
Glue these straws in the gaps between the bottom layer of straws, cut edge aligned with the inside circle. I glued just one straw at a time, and held it in place until the glue cooled, to prevent it from sinking down into the gap.
Continue this process until you complete the circle:

.
Step 5 – Top Layer of Straws
Cut the last set of straws in half (you’ll only need half as many straws of this set, since you’ll get 2 pieces for your wreath from each straw.
Use the same process as in step 4, gluing just one straw at a time, cut edge in, and holding it in place while the glue sets.

Continue adding straws until the circle is complete:
I didn’t think of this until after I was done, but it might help you get the inside edges a little smoother! Place the same object you used to draw your inner circle inside the wreath opening, to align your straw edges against! Just be careful not to glue it to the wreath.

.
Step 5 – Prepare for Hanging
Cut a 6-8 inch piece of your string, and fold it to form a loop. Glue the cut ends to the back of the cardboard circle.

Once the glue cools, you are ready to hang the wreath!

.
I hope you enjoy your new wreath. But please remember that this is an indoor wreath only, as the paper straws won’t hold up well to the weather!
Drop me a comment if you decide to give this craft project a try.
And save those leftover straws and pieces of straws, because I’ve got another project coming up that will use the leftovers and match your wreath!
See you next week.
Carrie
.