Hello sports fans!
Wasn’t this a great weekend for sports? Did you catch a baseball or soccer game, the NHL or NBA playoffs, or maybe the Kentucky Derby? There is so much to choose from this time of year!
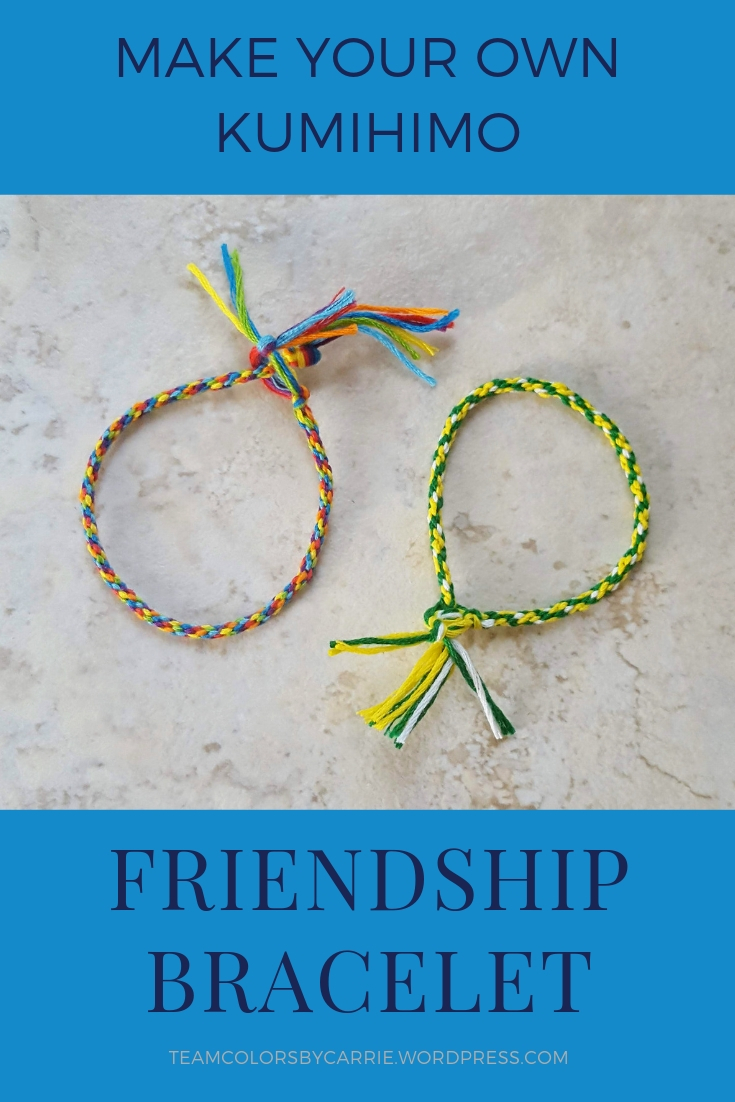
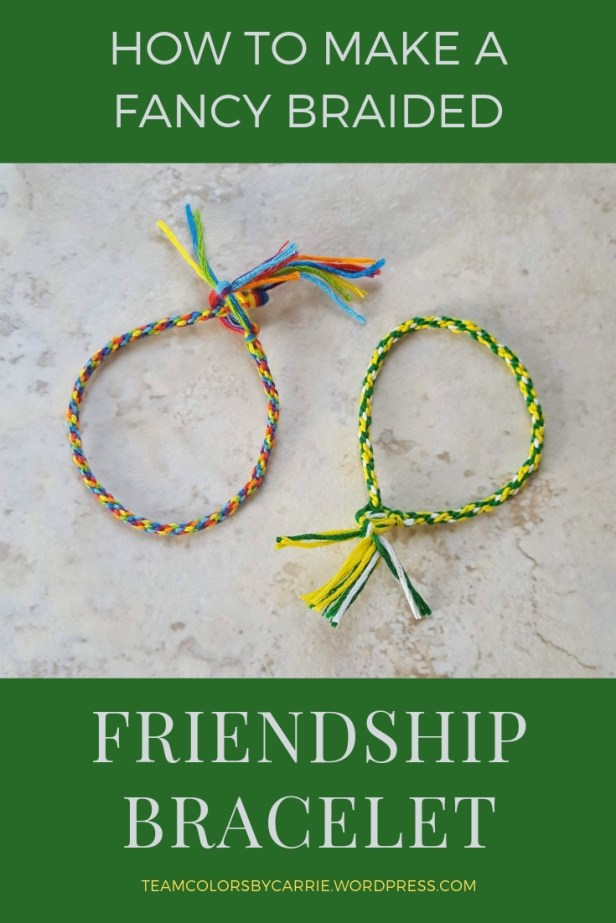
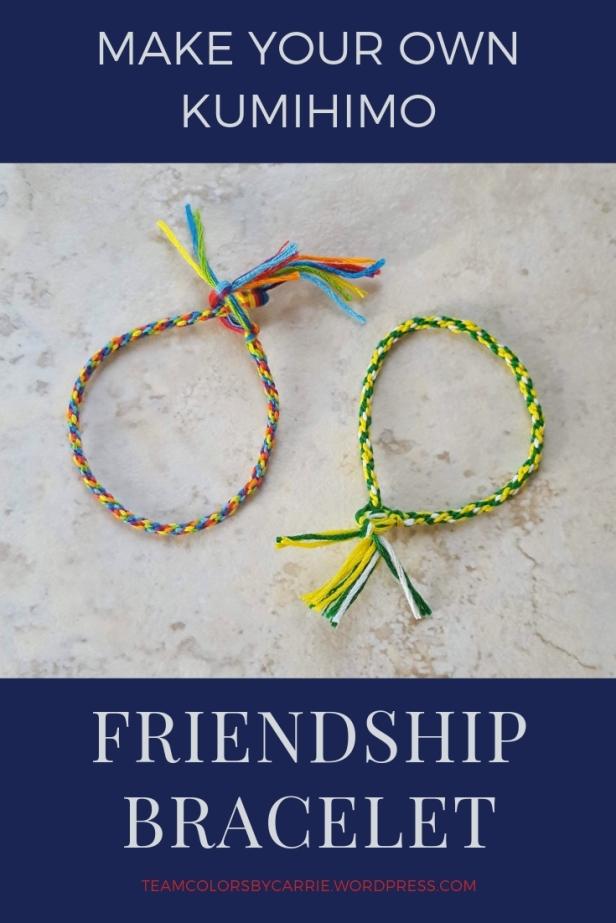
Today I’m here with another easy project for showing off your team colors on game day, no matter what you choose as your favorite sport! Lightweight and perfect for the summer months, the finished bracelet looks a lot more complicated than it really is!
It’s also a great project for teens or pre-teens, for a new way to impress their friends with a fancy friendship bracelet (yes, these string bracelets are still around and more popular than ever with the kids)! And they can tell their friends this is the Japanese style of braiding called Kumihimo!
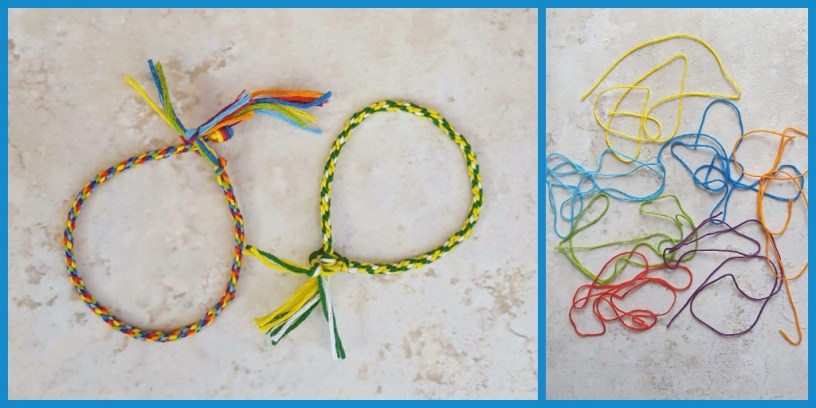
I made my personal bracelets in my favorite team colors. I also made the pretty rainbow bracelet, to make it easier to follow the steps and the pictures, and because rainbows are pretty!

Step 1 – Collect the Supplies
- Embroidery Floss (rainbow floss sets available HERE)
- Cardboard
- Pen
- Scissors
- Ruler (optional, not shown)

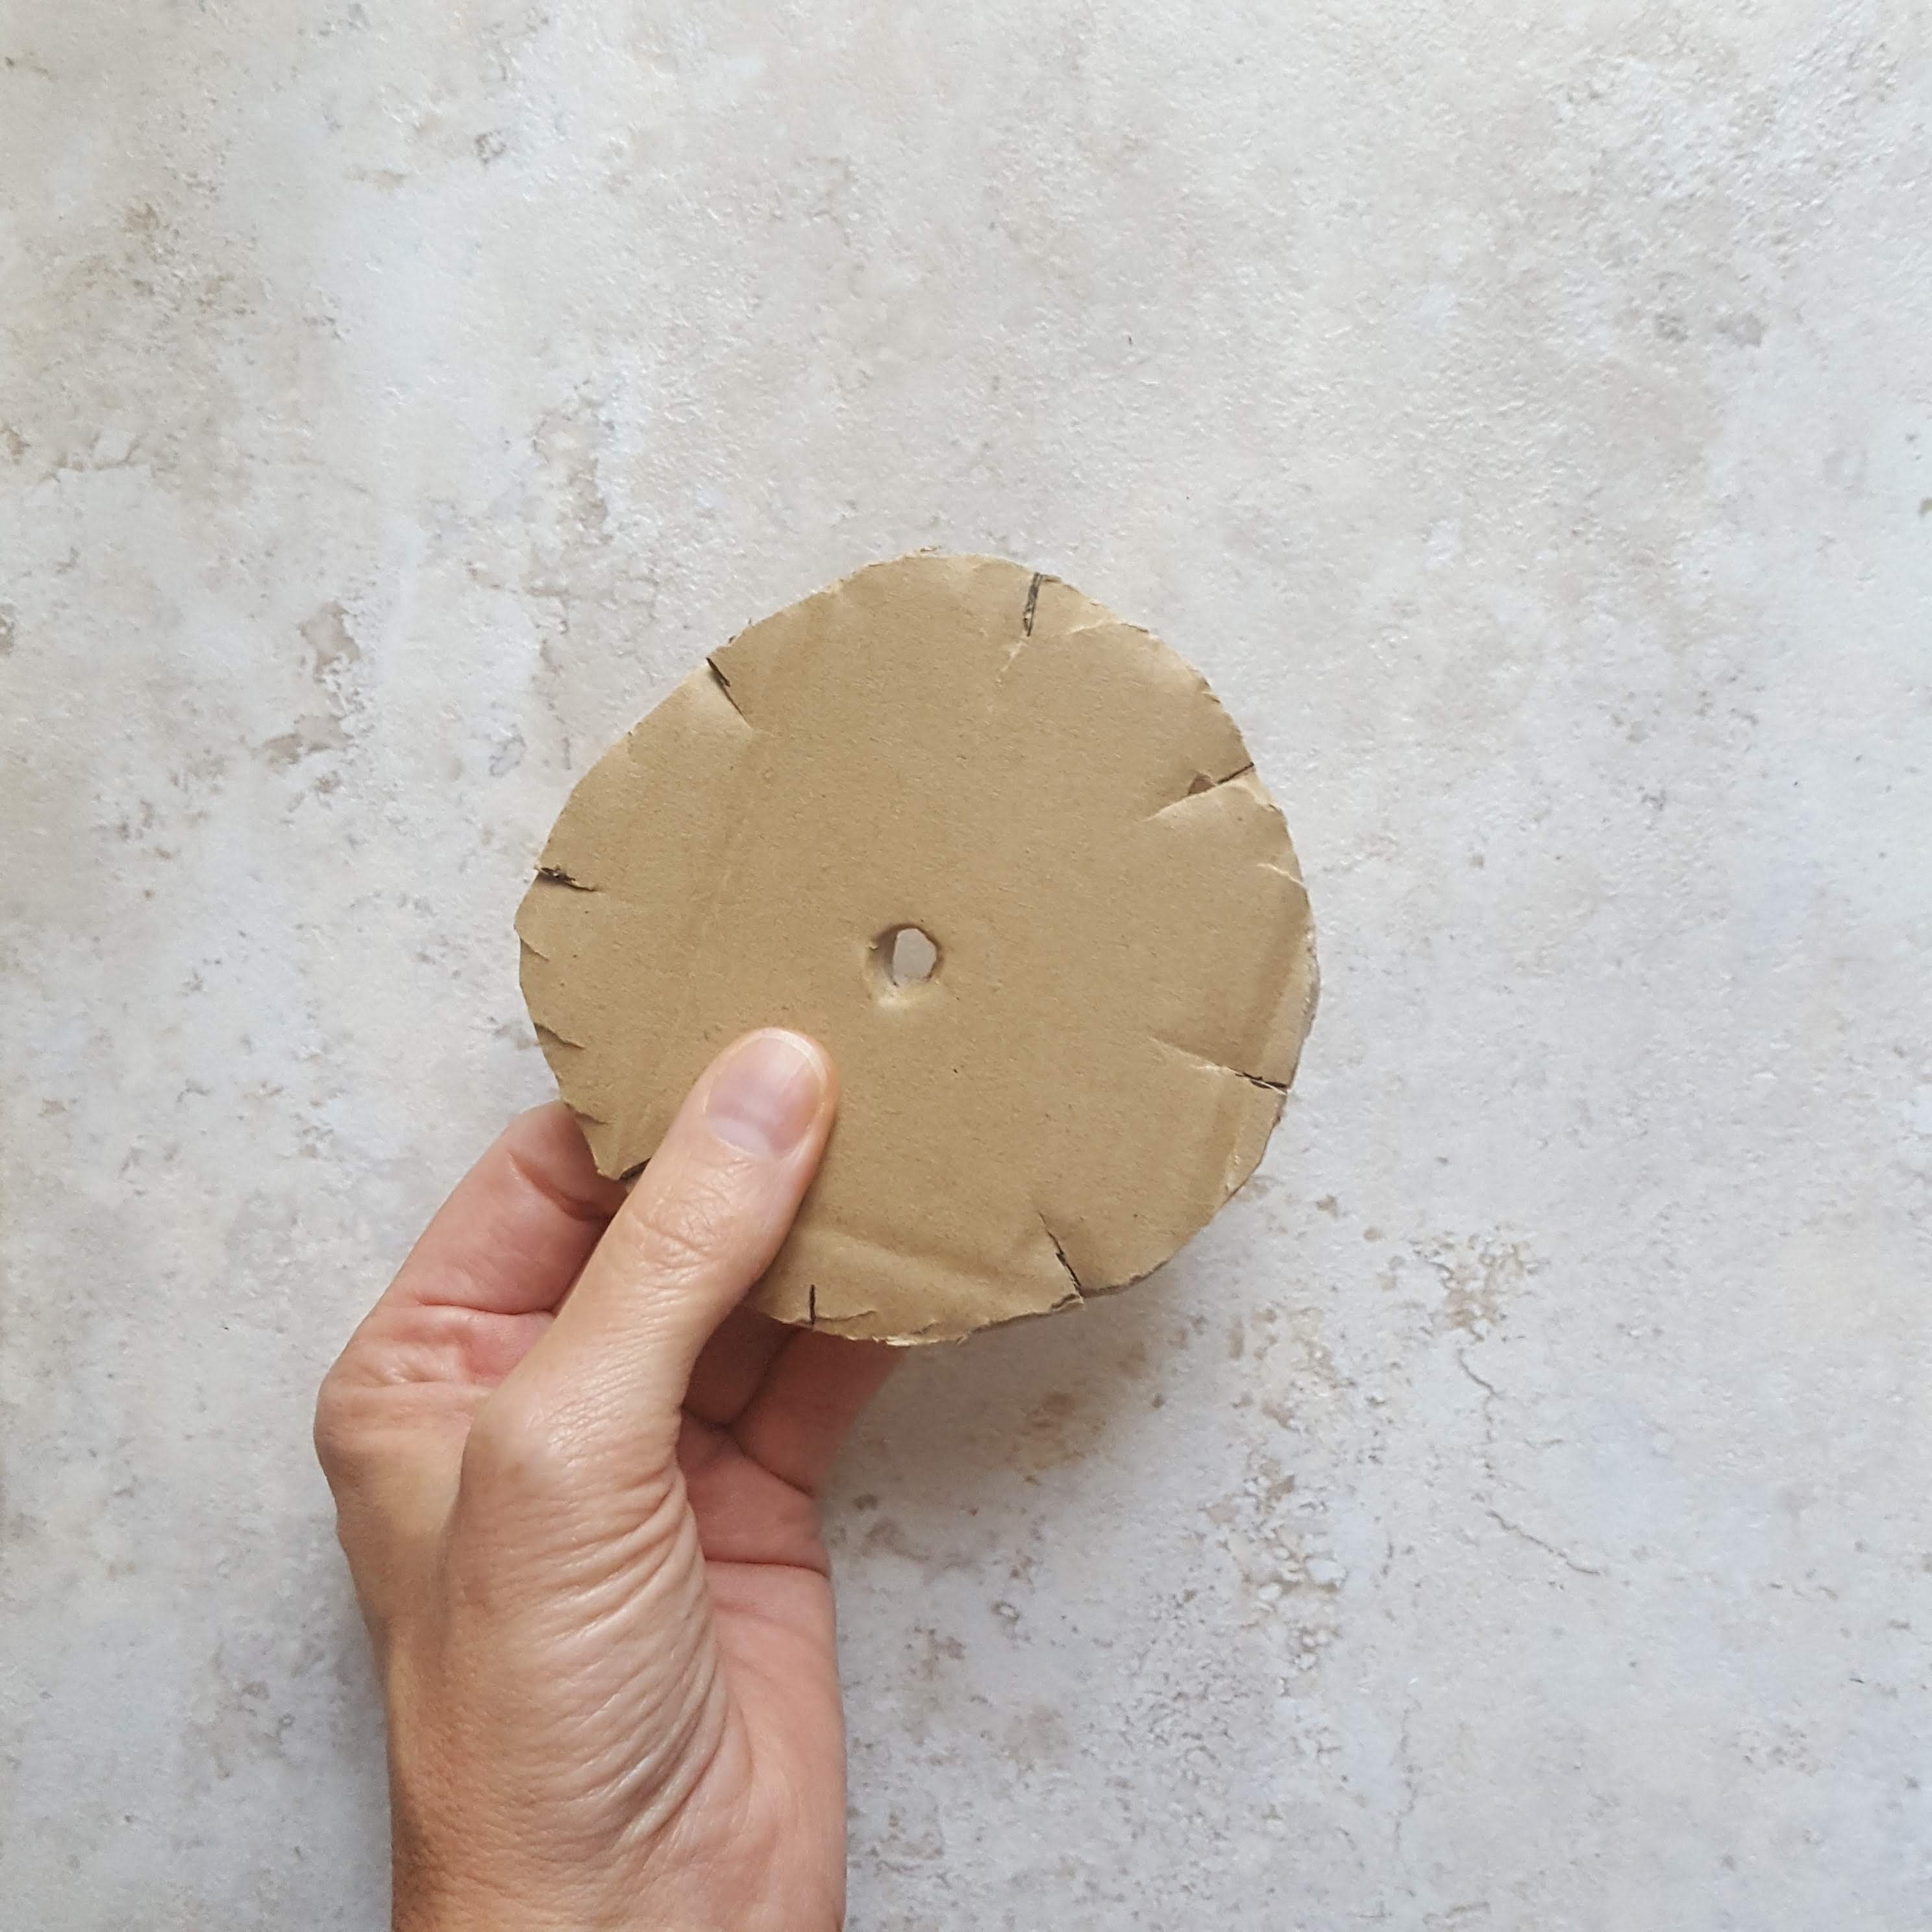
Step 2 – Prepare the cardboard
- Cut the cardboard into a circle, 4 or 5 inches in diameter
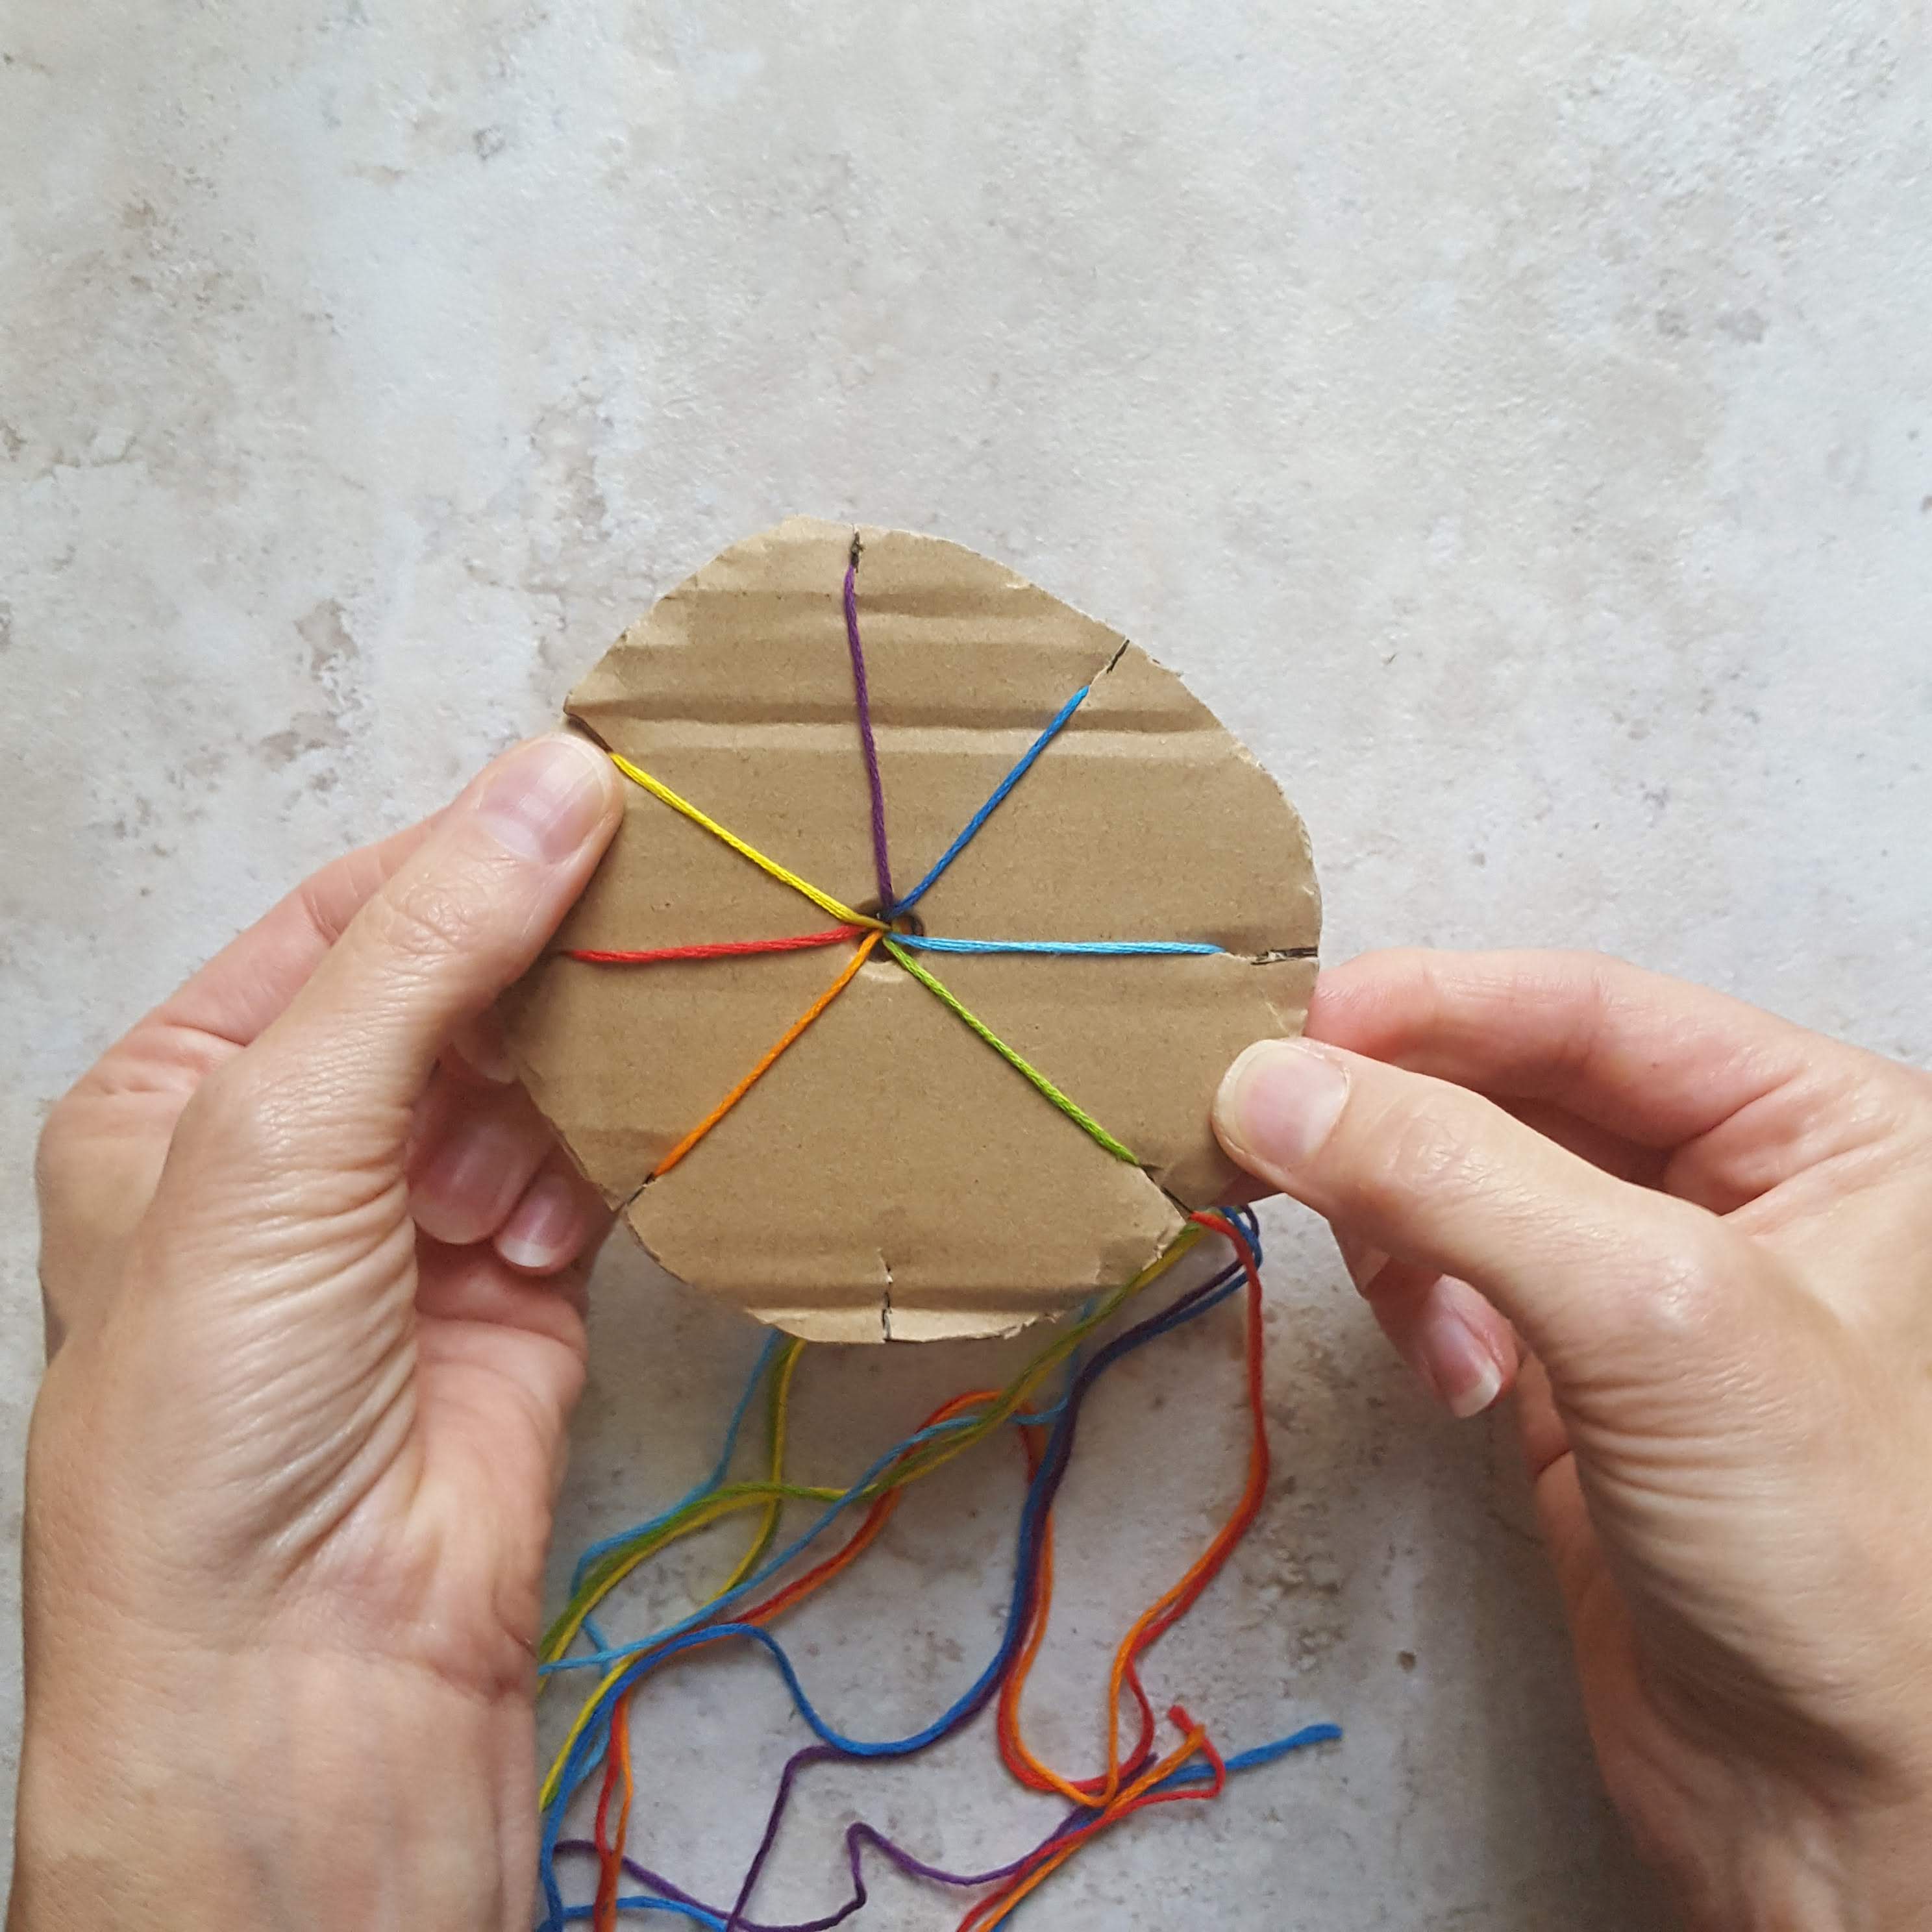
- Place 8 marks around the edge of the circle, evenly spaced
- Cut a slit at each mark in the cardboard
- Punch a hole in the center of the cardboard


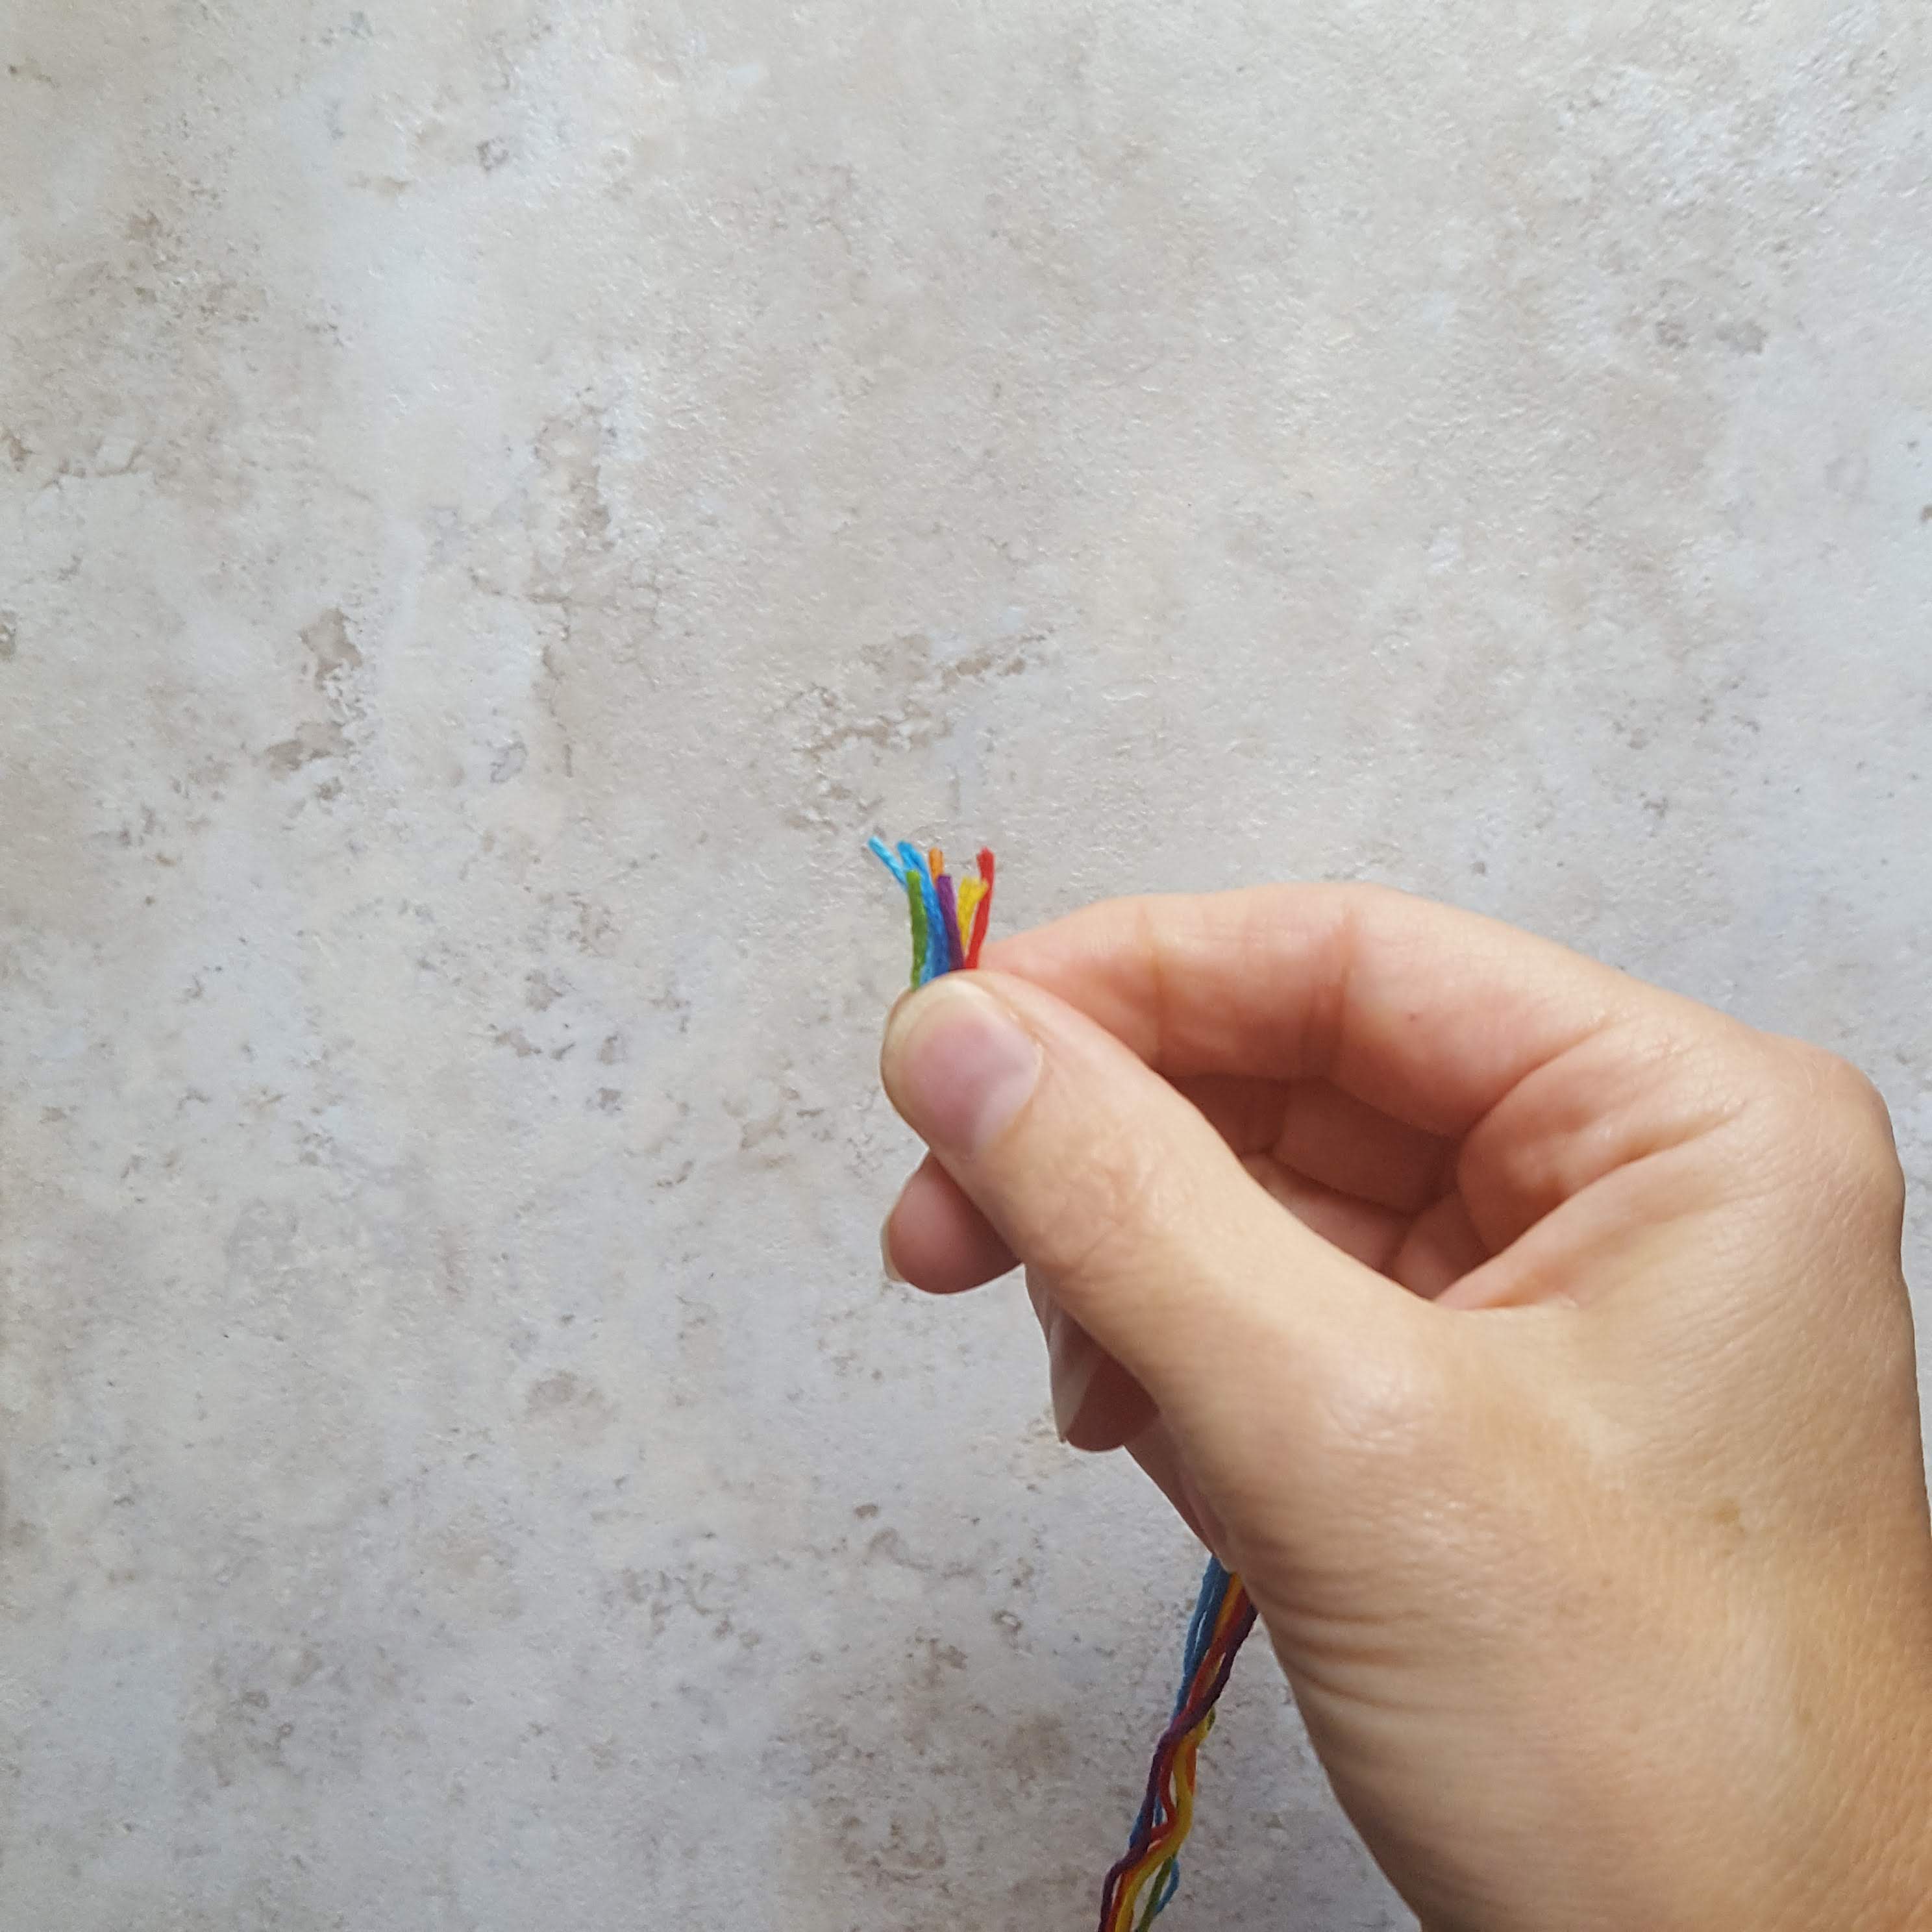
Step 3 – Prep the embroidery floss
- Cut 7 pieces of embroidery floss, each about 2 feet long
- Align the ends
- Tie a simple overhand knot near those ends


- Push the open ends through the hole in the cardboard, and pull until the knotted end reaches the hole (make a second knot if needed, so it doesn’t pull through)
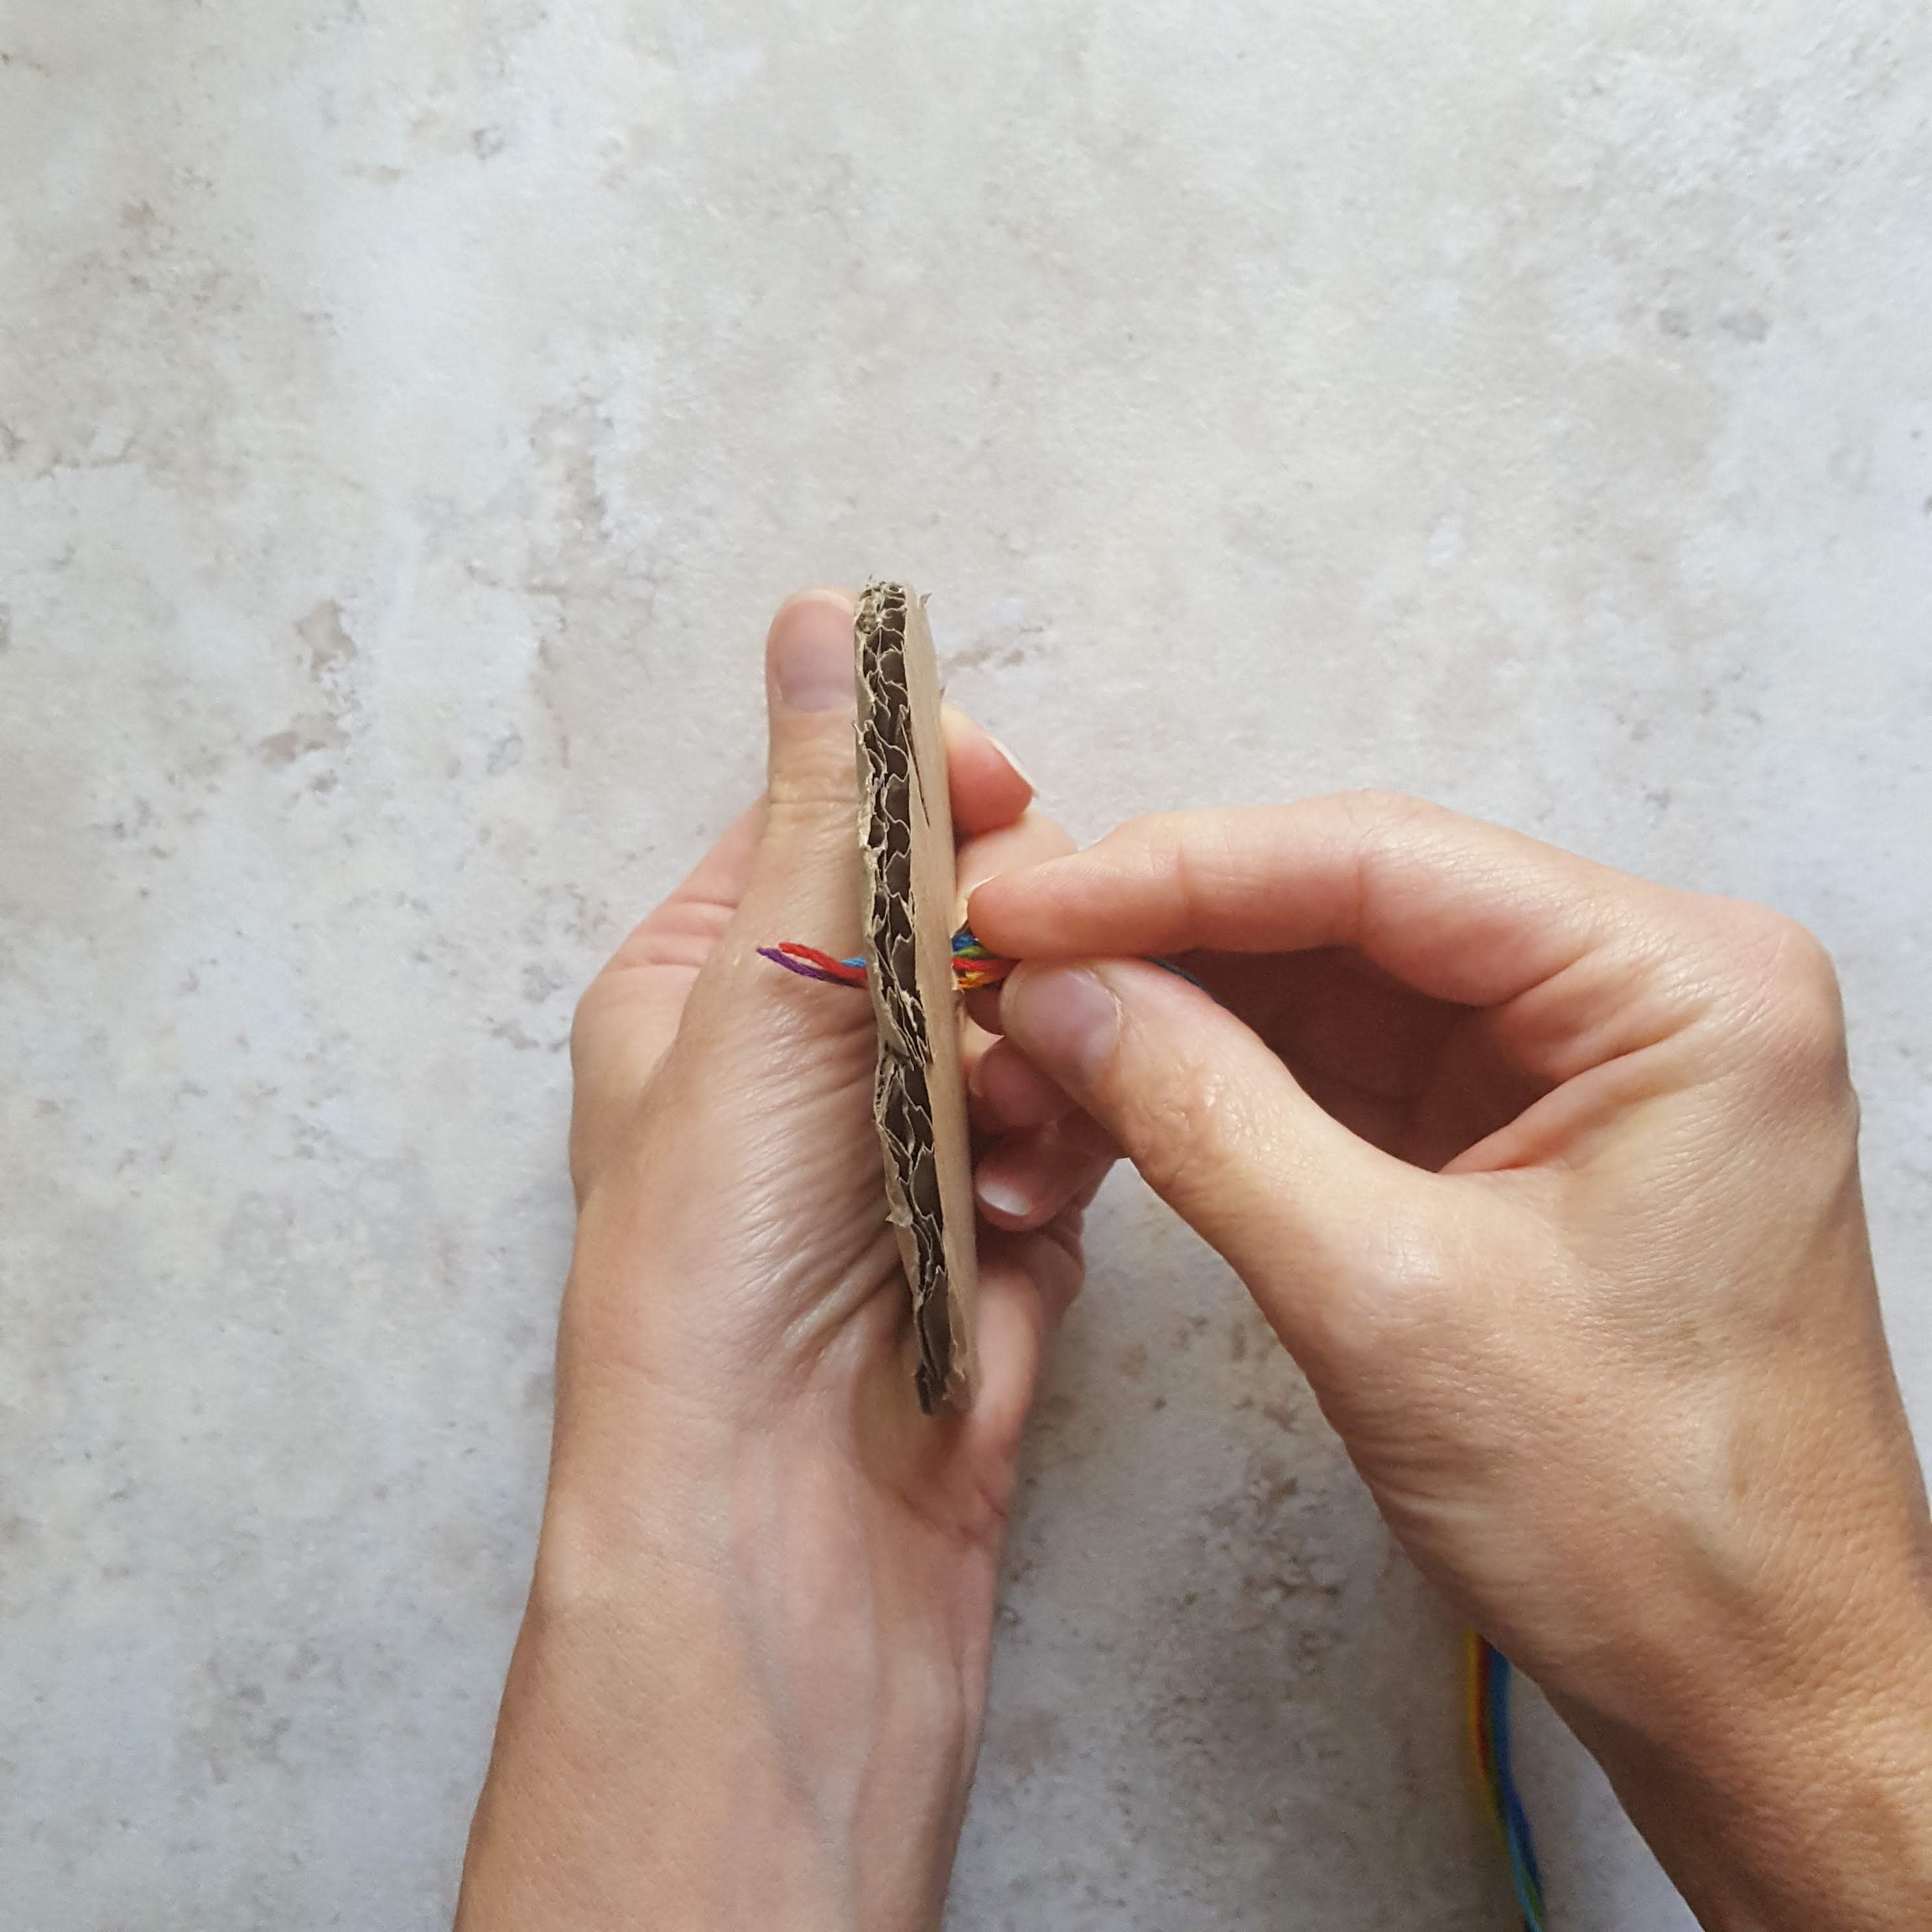


- Loosely pull one thread of embroidery floss through each slit in the cardboard (you will have 1 slit without a thread)

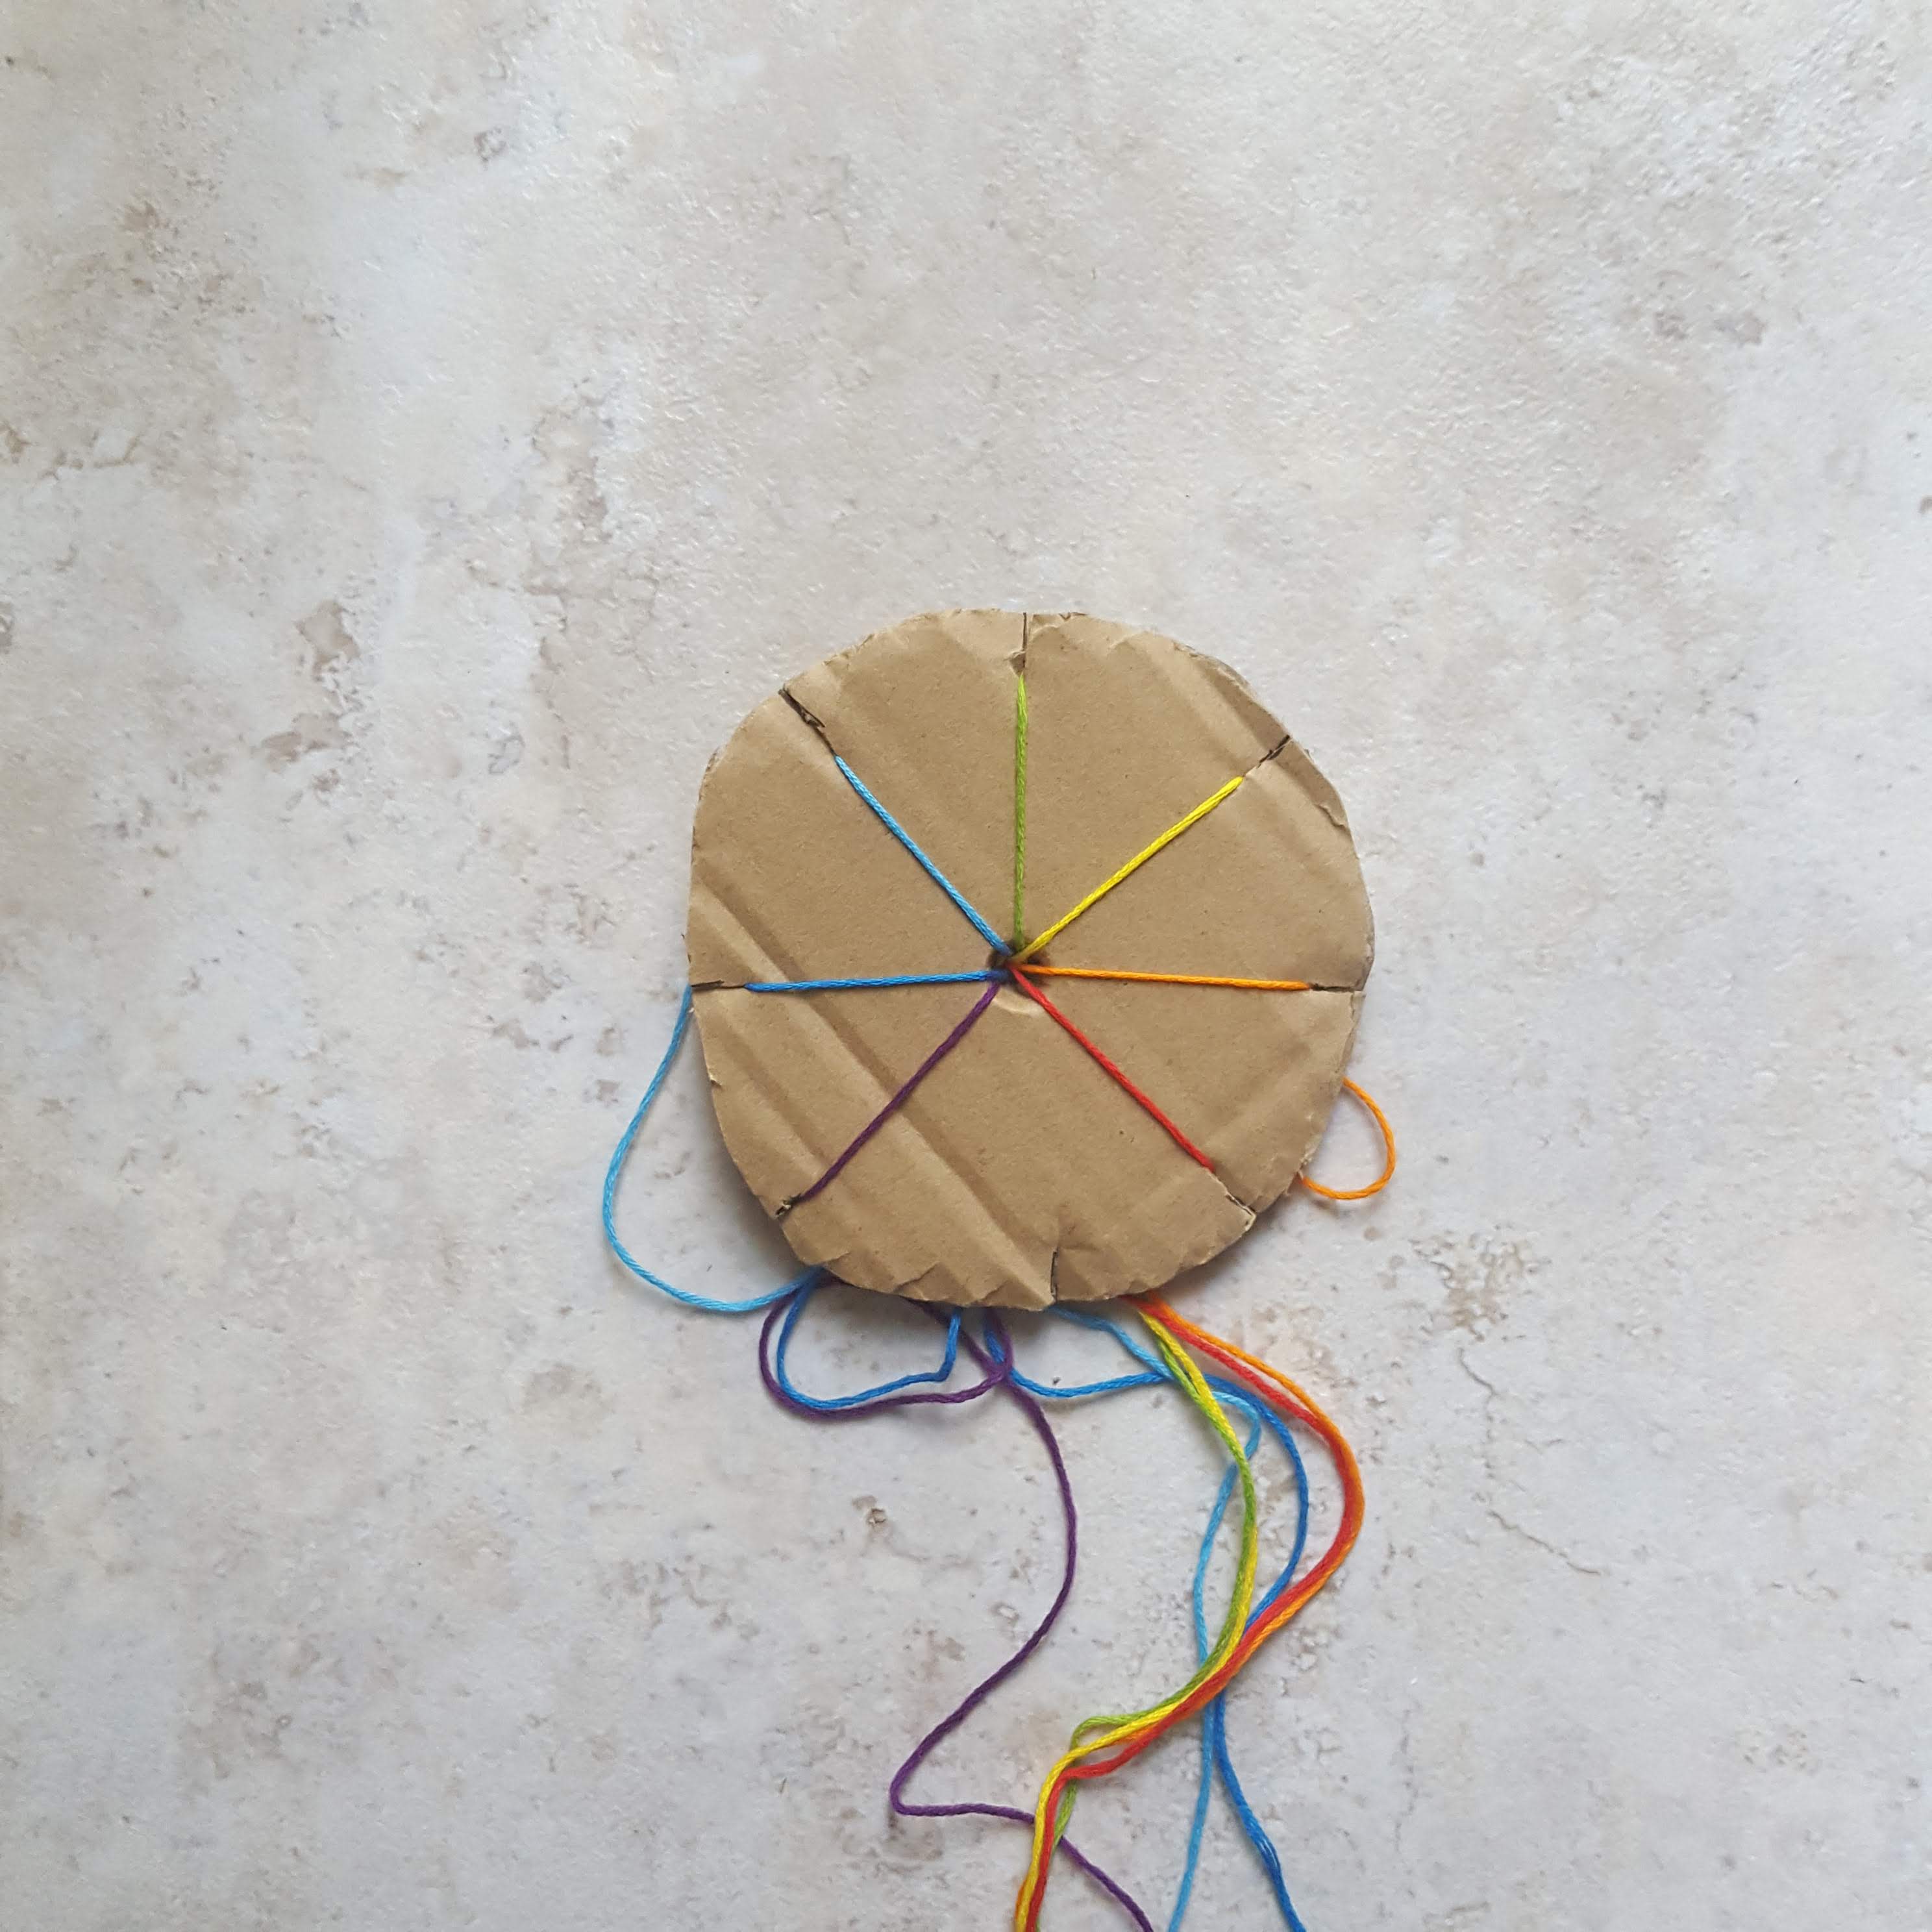
Step 4 – Braid
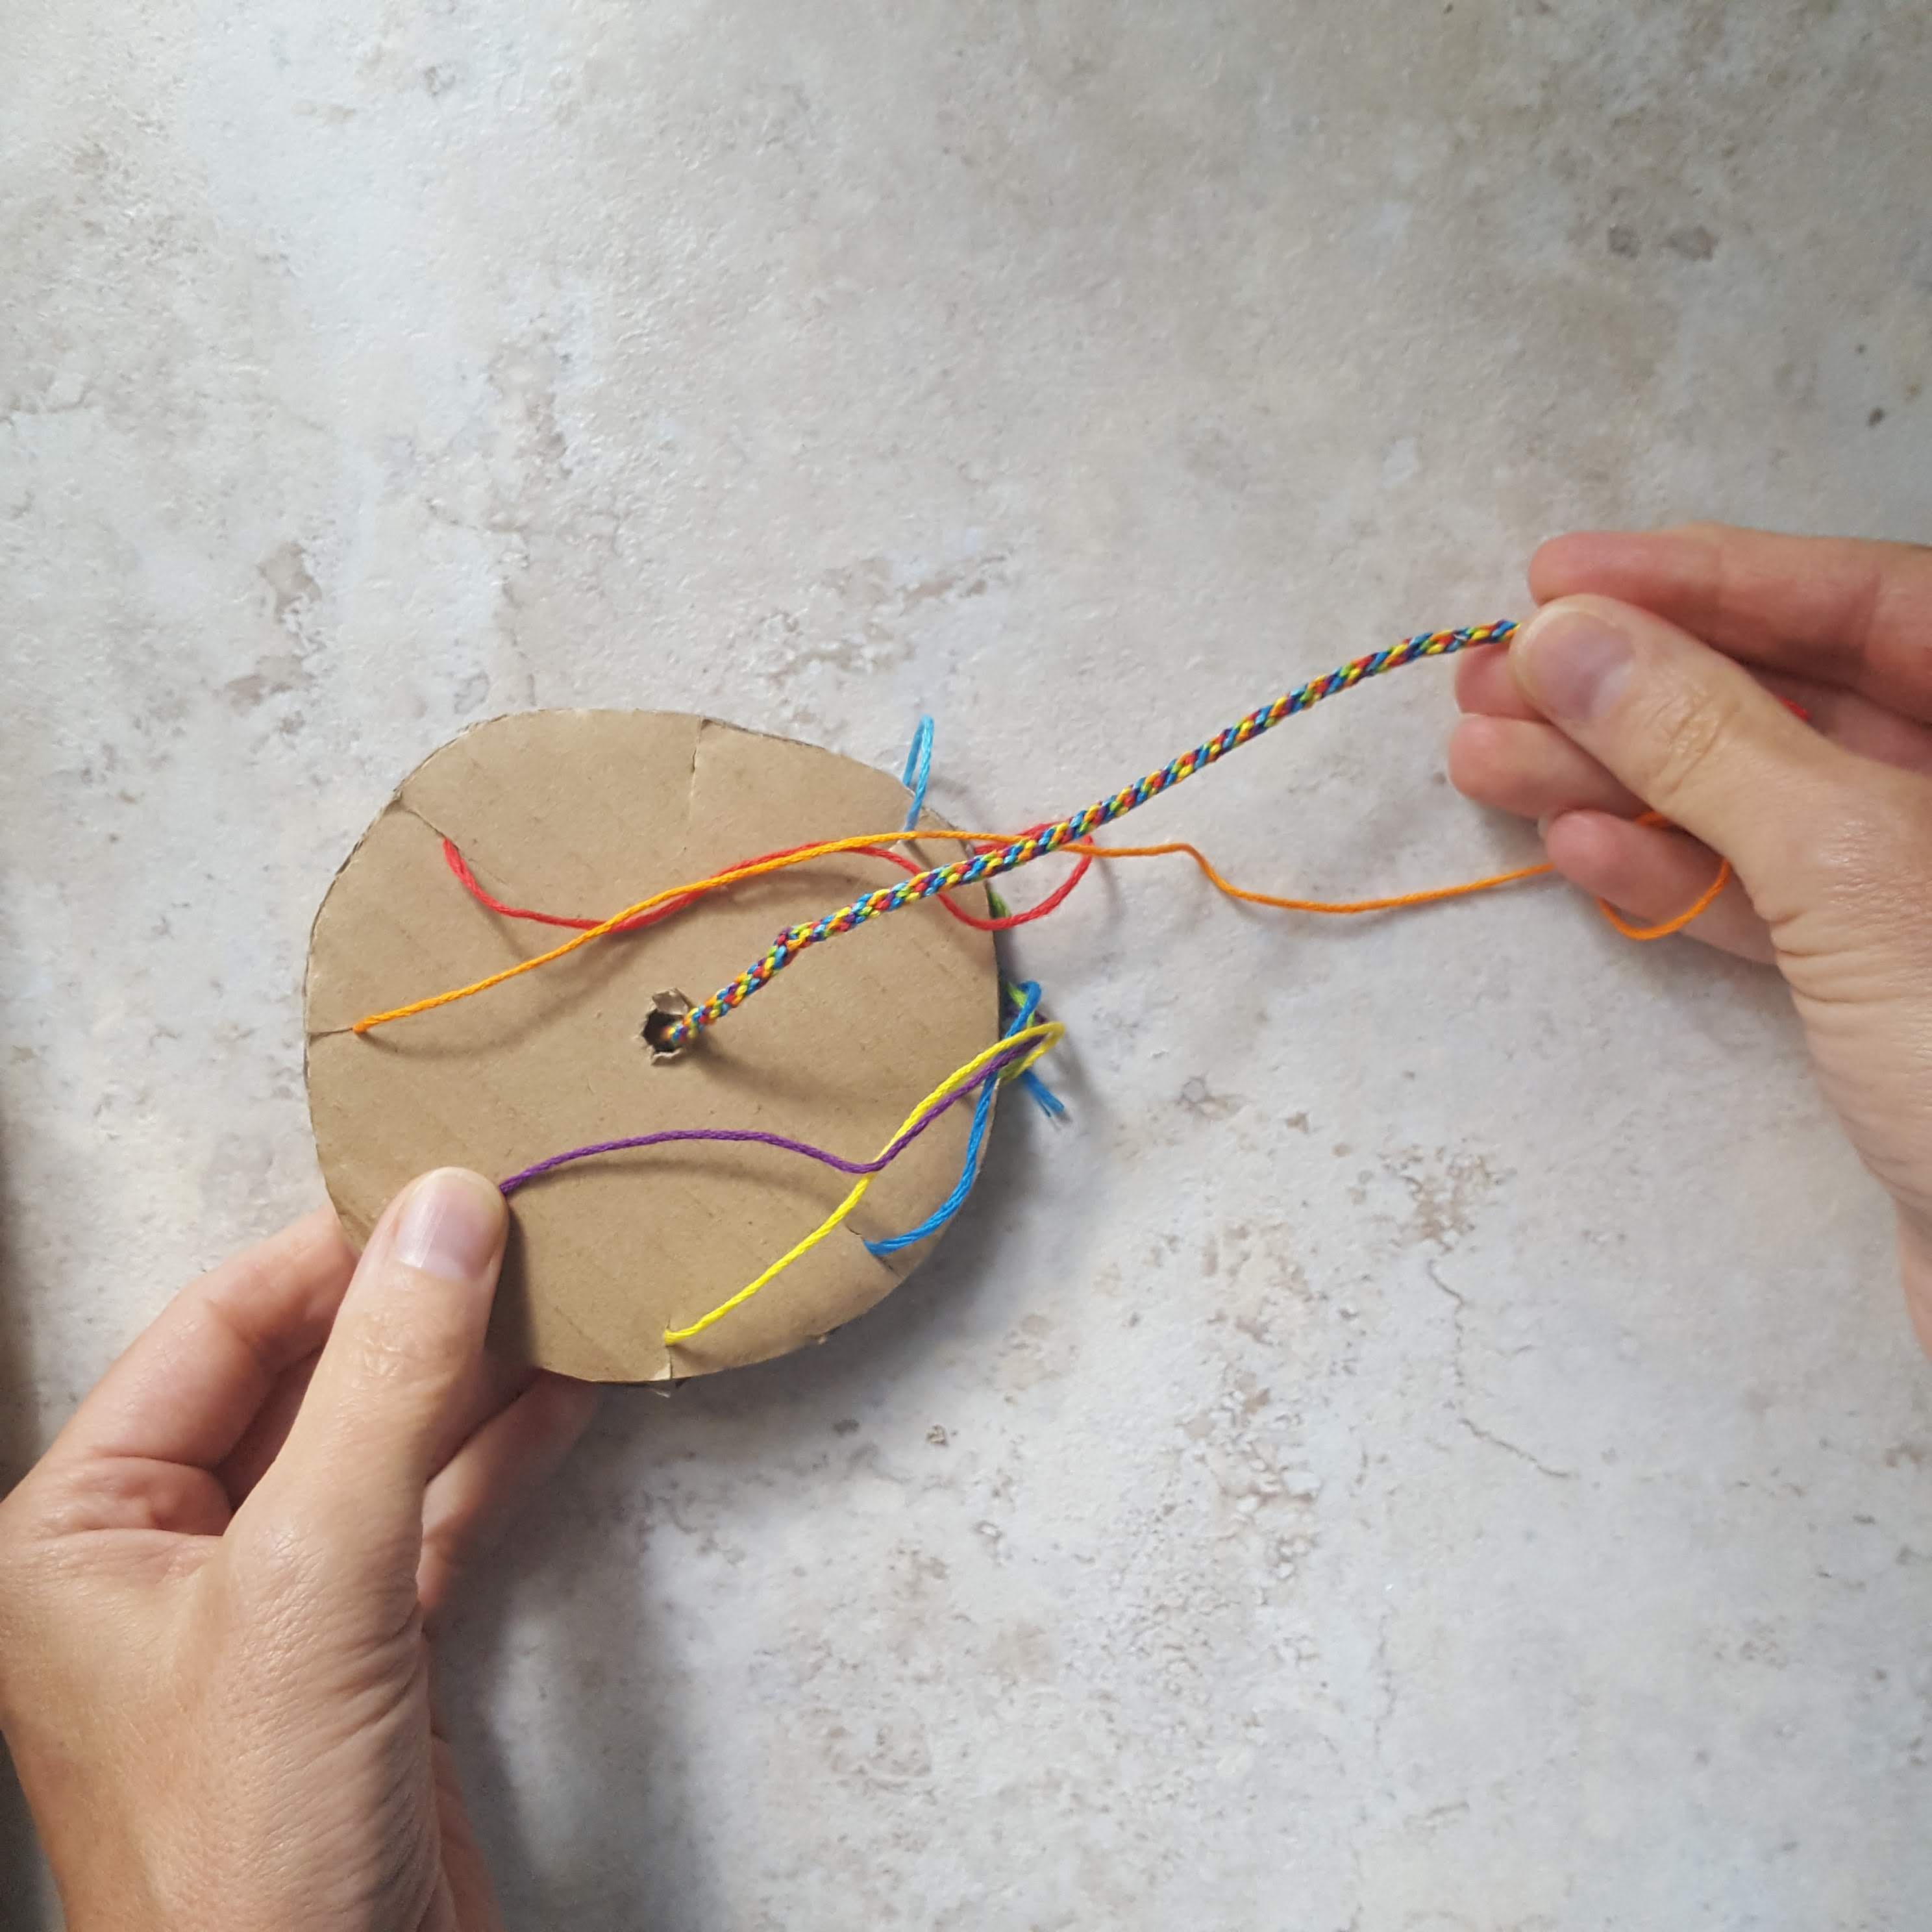
- Position the slit without a thread directly in front of you
- Take the top right thread, and move it to the empty slit


- Rotate the cardboard to position the “new” empty slit in front of you
- Take the top right thread, and move it to the empty slit


- Repeat these steps, and watch the braid grow under the cardboard!
- Continue until the braid is the right size to go around your wrist.
- NOTE: straighten out all the loose threads once in a while, so they don’t get too tangled
- It also helps to periodically pull down on the braid as is it forms, to keep it straightened out

Step 5 – Finishing up
- Once the braid is the size of your wrist, carefully remove all of the threads from the cardboard, and pull your braid out


- Use the loose ends to tie a knot at the end of the braid
- Tie another knot about ½” from the first, leaving a loop just big enough for the knot on the other end
- Trim the loose ends


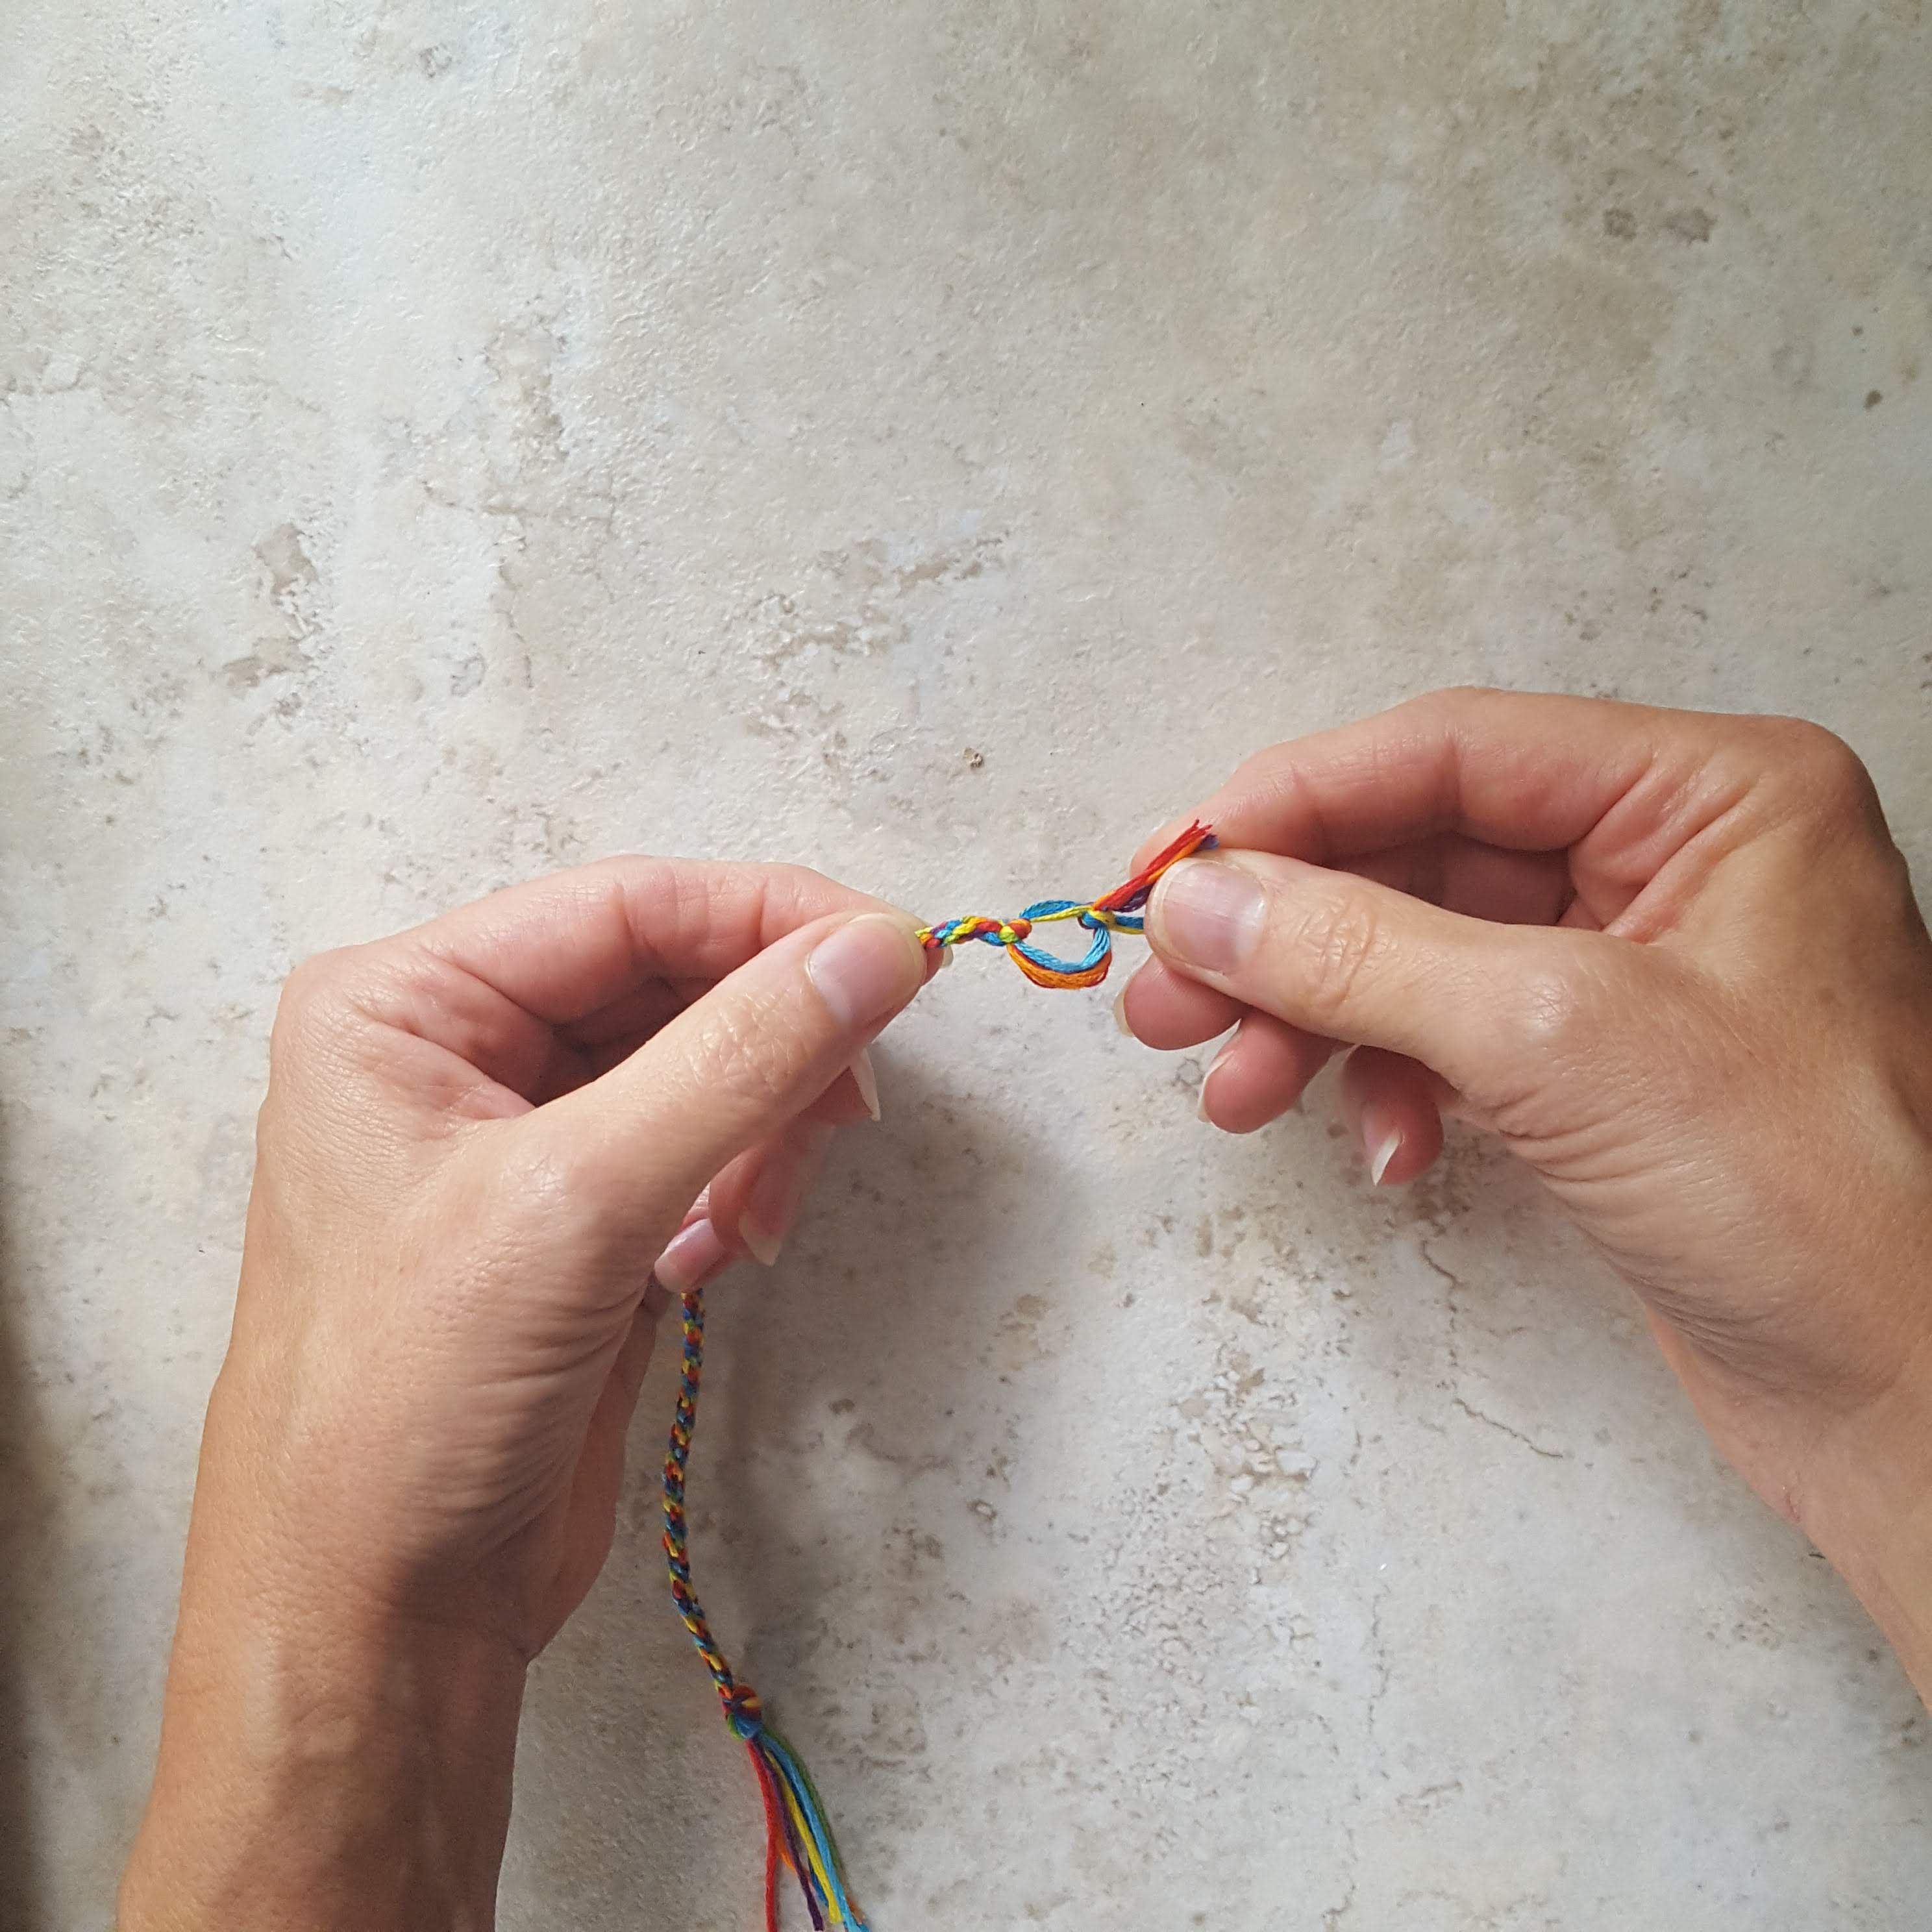
- Wrap around your wrist, and push the knot through the loop

Aren’t these bracelets fun? You can quickly whip up a batch for all your friends or fellow sports moms!
Until next week,
Carrie
PIN your favorite for later: