Hello everyone! I hope you all had a wonderful Thanksgiving weekend, and scored some great bargains on Black Friday, Small Business Saturday or Cyber Monday!
I also hope that your sports teams did better than mine did over the weekend! My Wisconsin Badgers struggled on Saturday, lost to Minnesota, and now are just waiting to see which Bowl Game they will be playing in come December. And my Green Bay Packers continued to play well below expectations, and have been all but eliminated from the playoff picture. I’ll still be wearing my green and gold, but ugh, that was painful to watch!
So on to happier things!
As I promised last week, I’m back to show you some more ideas for making your own Christmas cards, using purchased card blanks and wonderful Washi tape! If you missed part 1 last week, check it out HERE!
Are you ready to give them a try?
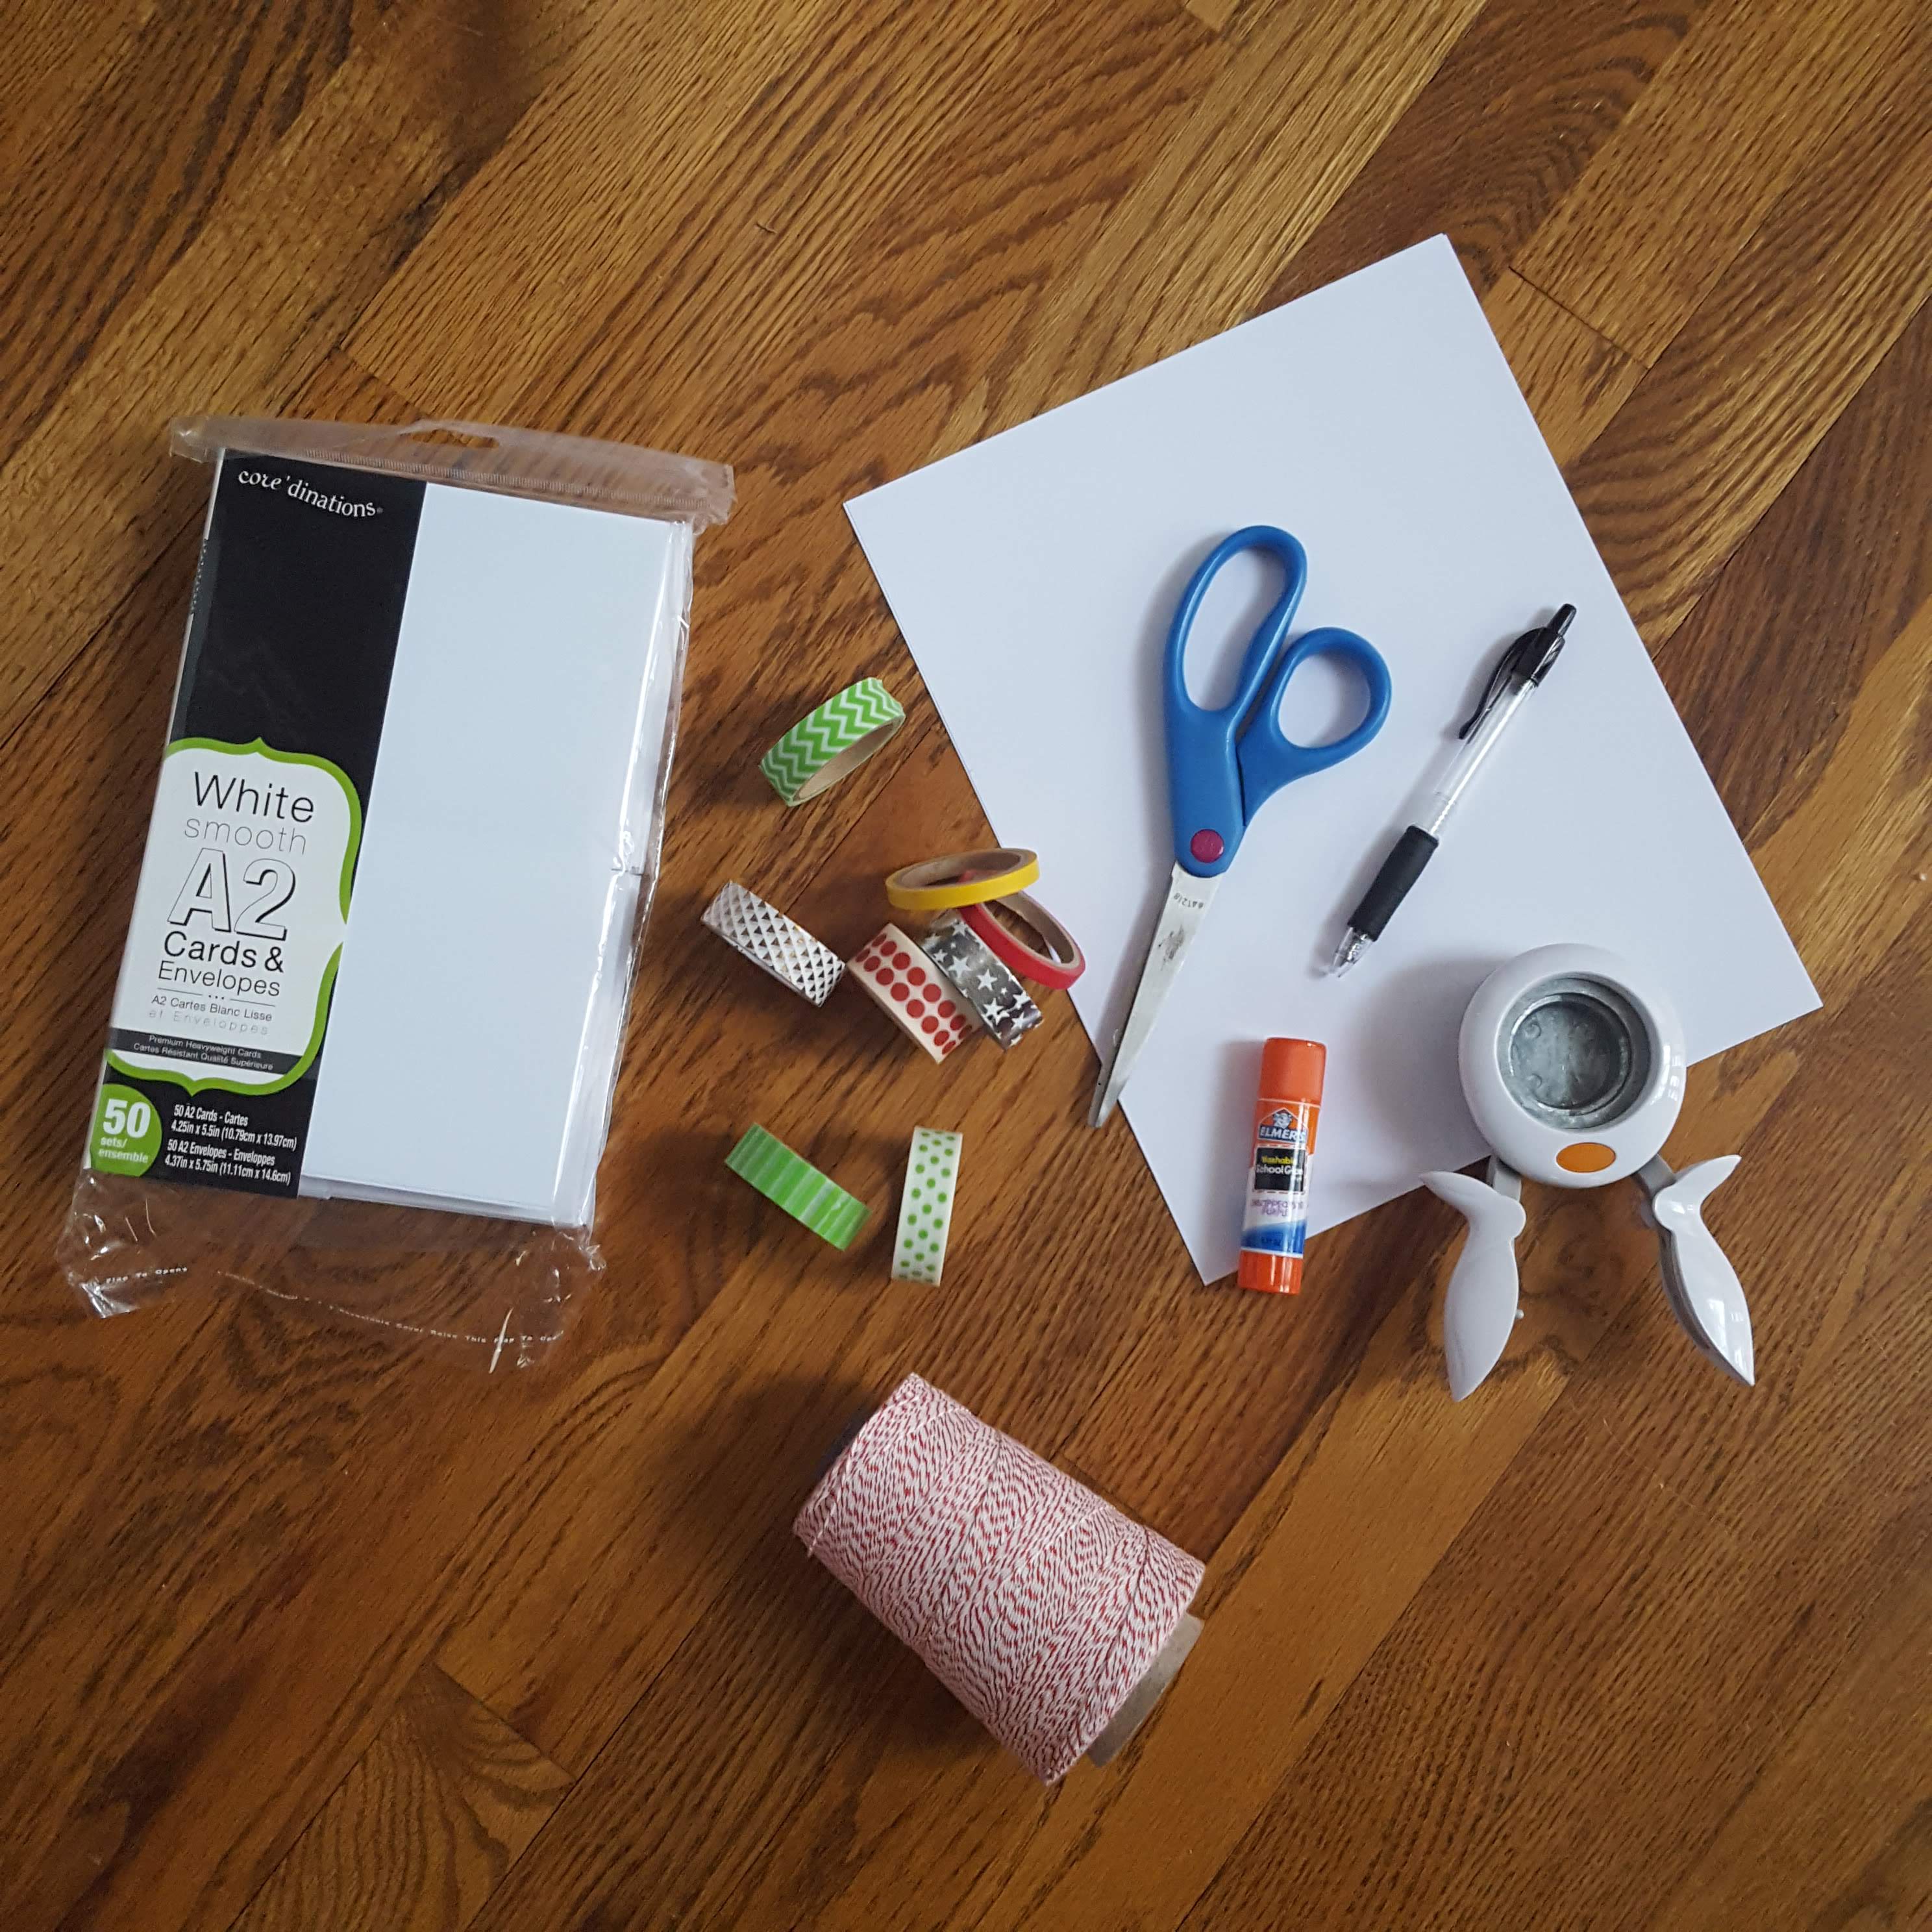
Gather the following supplies:
- Blank cards and envelopes (mine are 4-1/4” by 5-1/2”)
- Washi tape in holiday colors (the choice is up to you)
- Baker’s twine
- Blank paper (I used printer paper)
- Circle punch
- Glue stick
- Pen
- Scissors
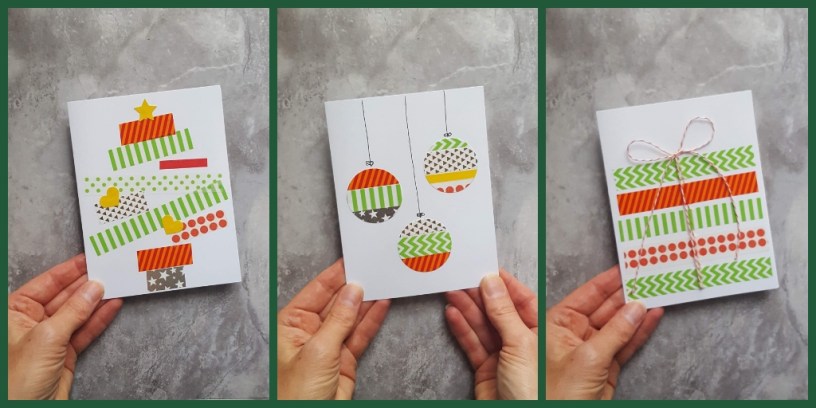
Design 1 – Washi Tape Gift Box
- Lay your folded card on a flat surface
- Cut a piece of bakers twine that is about 4 times the height of the card
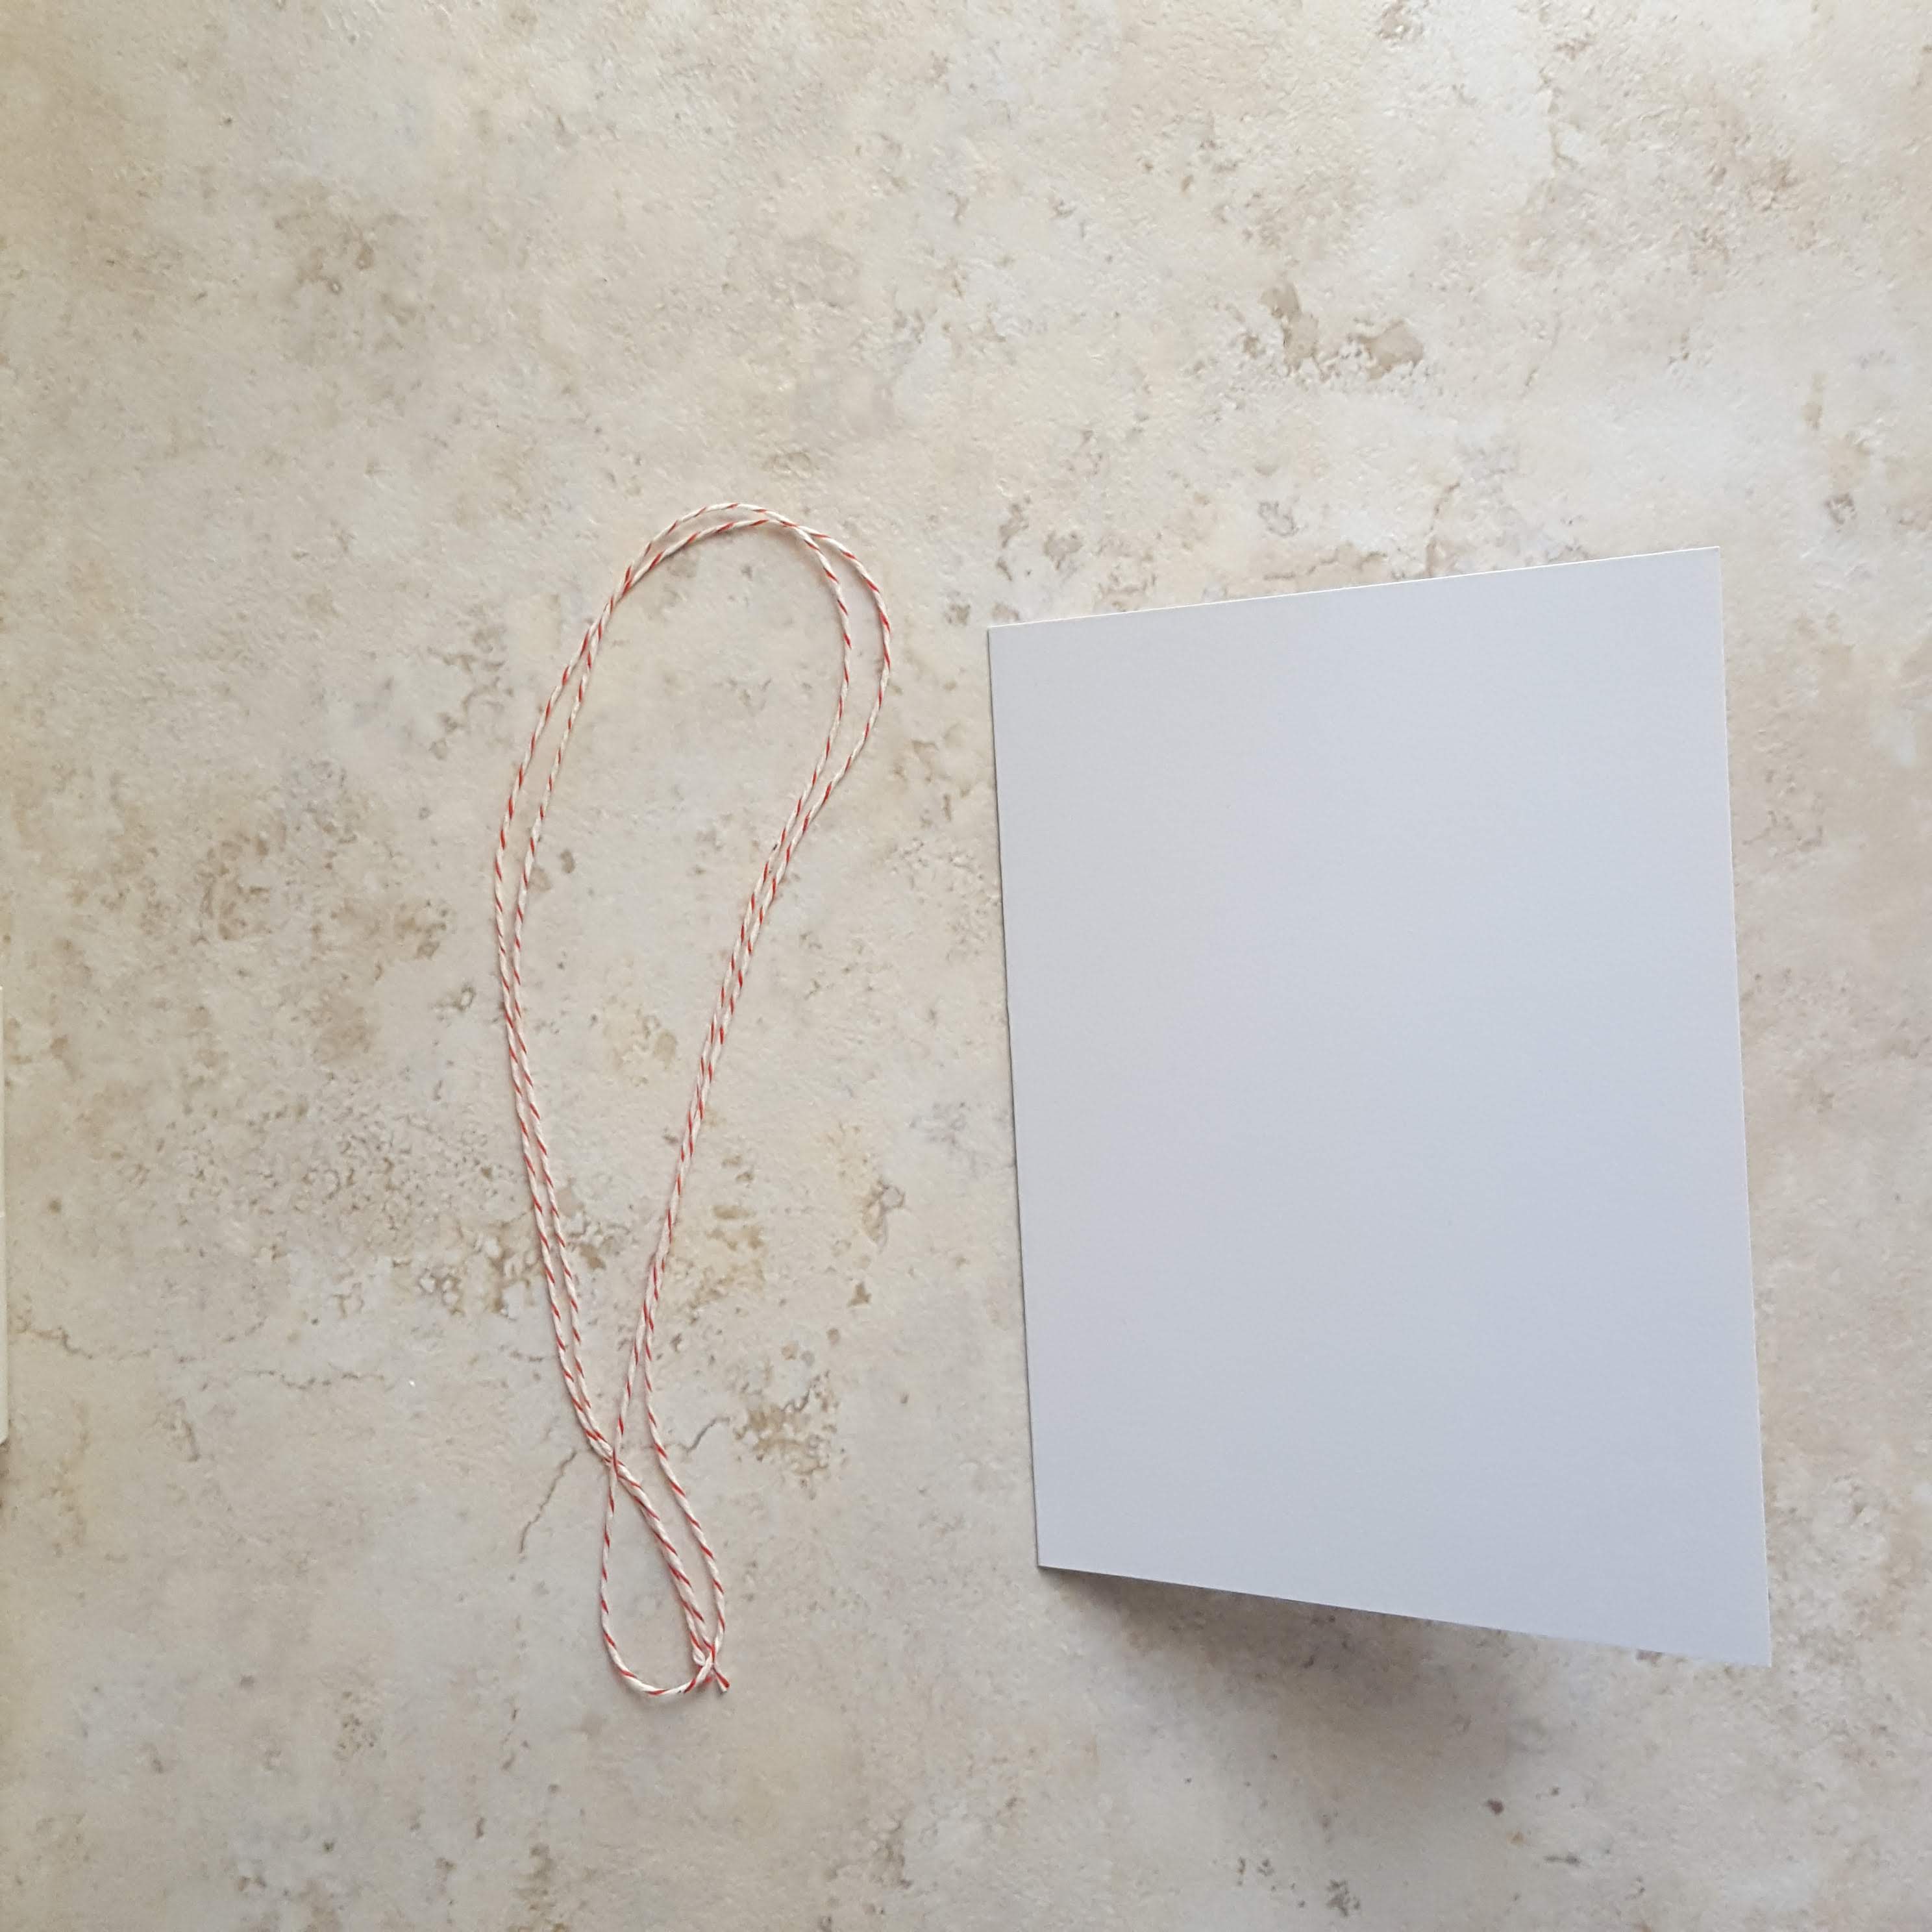
- Fold the twine in half, and lay it on top of the card so the fold is below the bottom of the card
- Unfold the twine so just one side is still on the card

- Place a long piece of washi tape straight across the bottom of the card, over the twine
- Take a second piece of washi tape, and line it up with the first, leaving a small gap

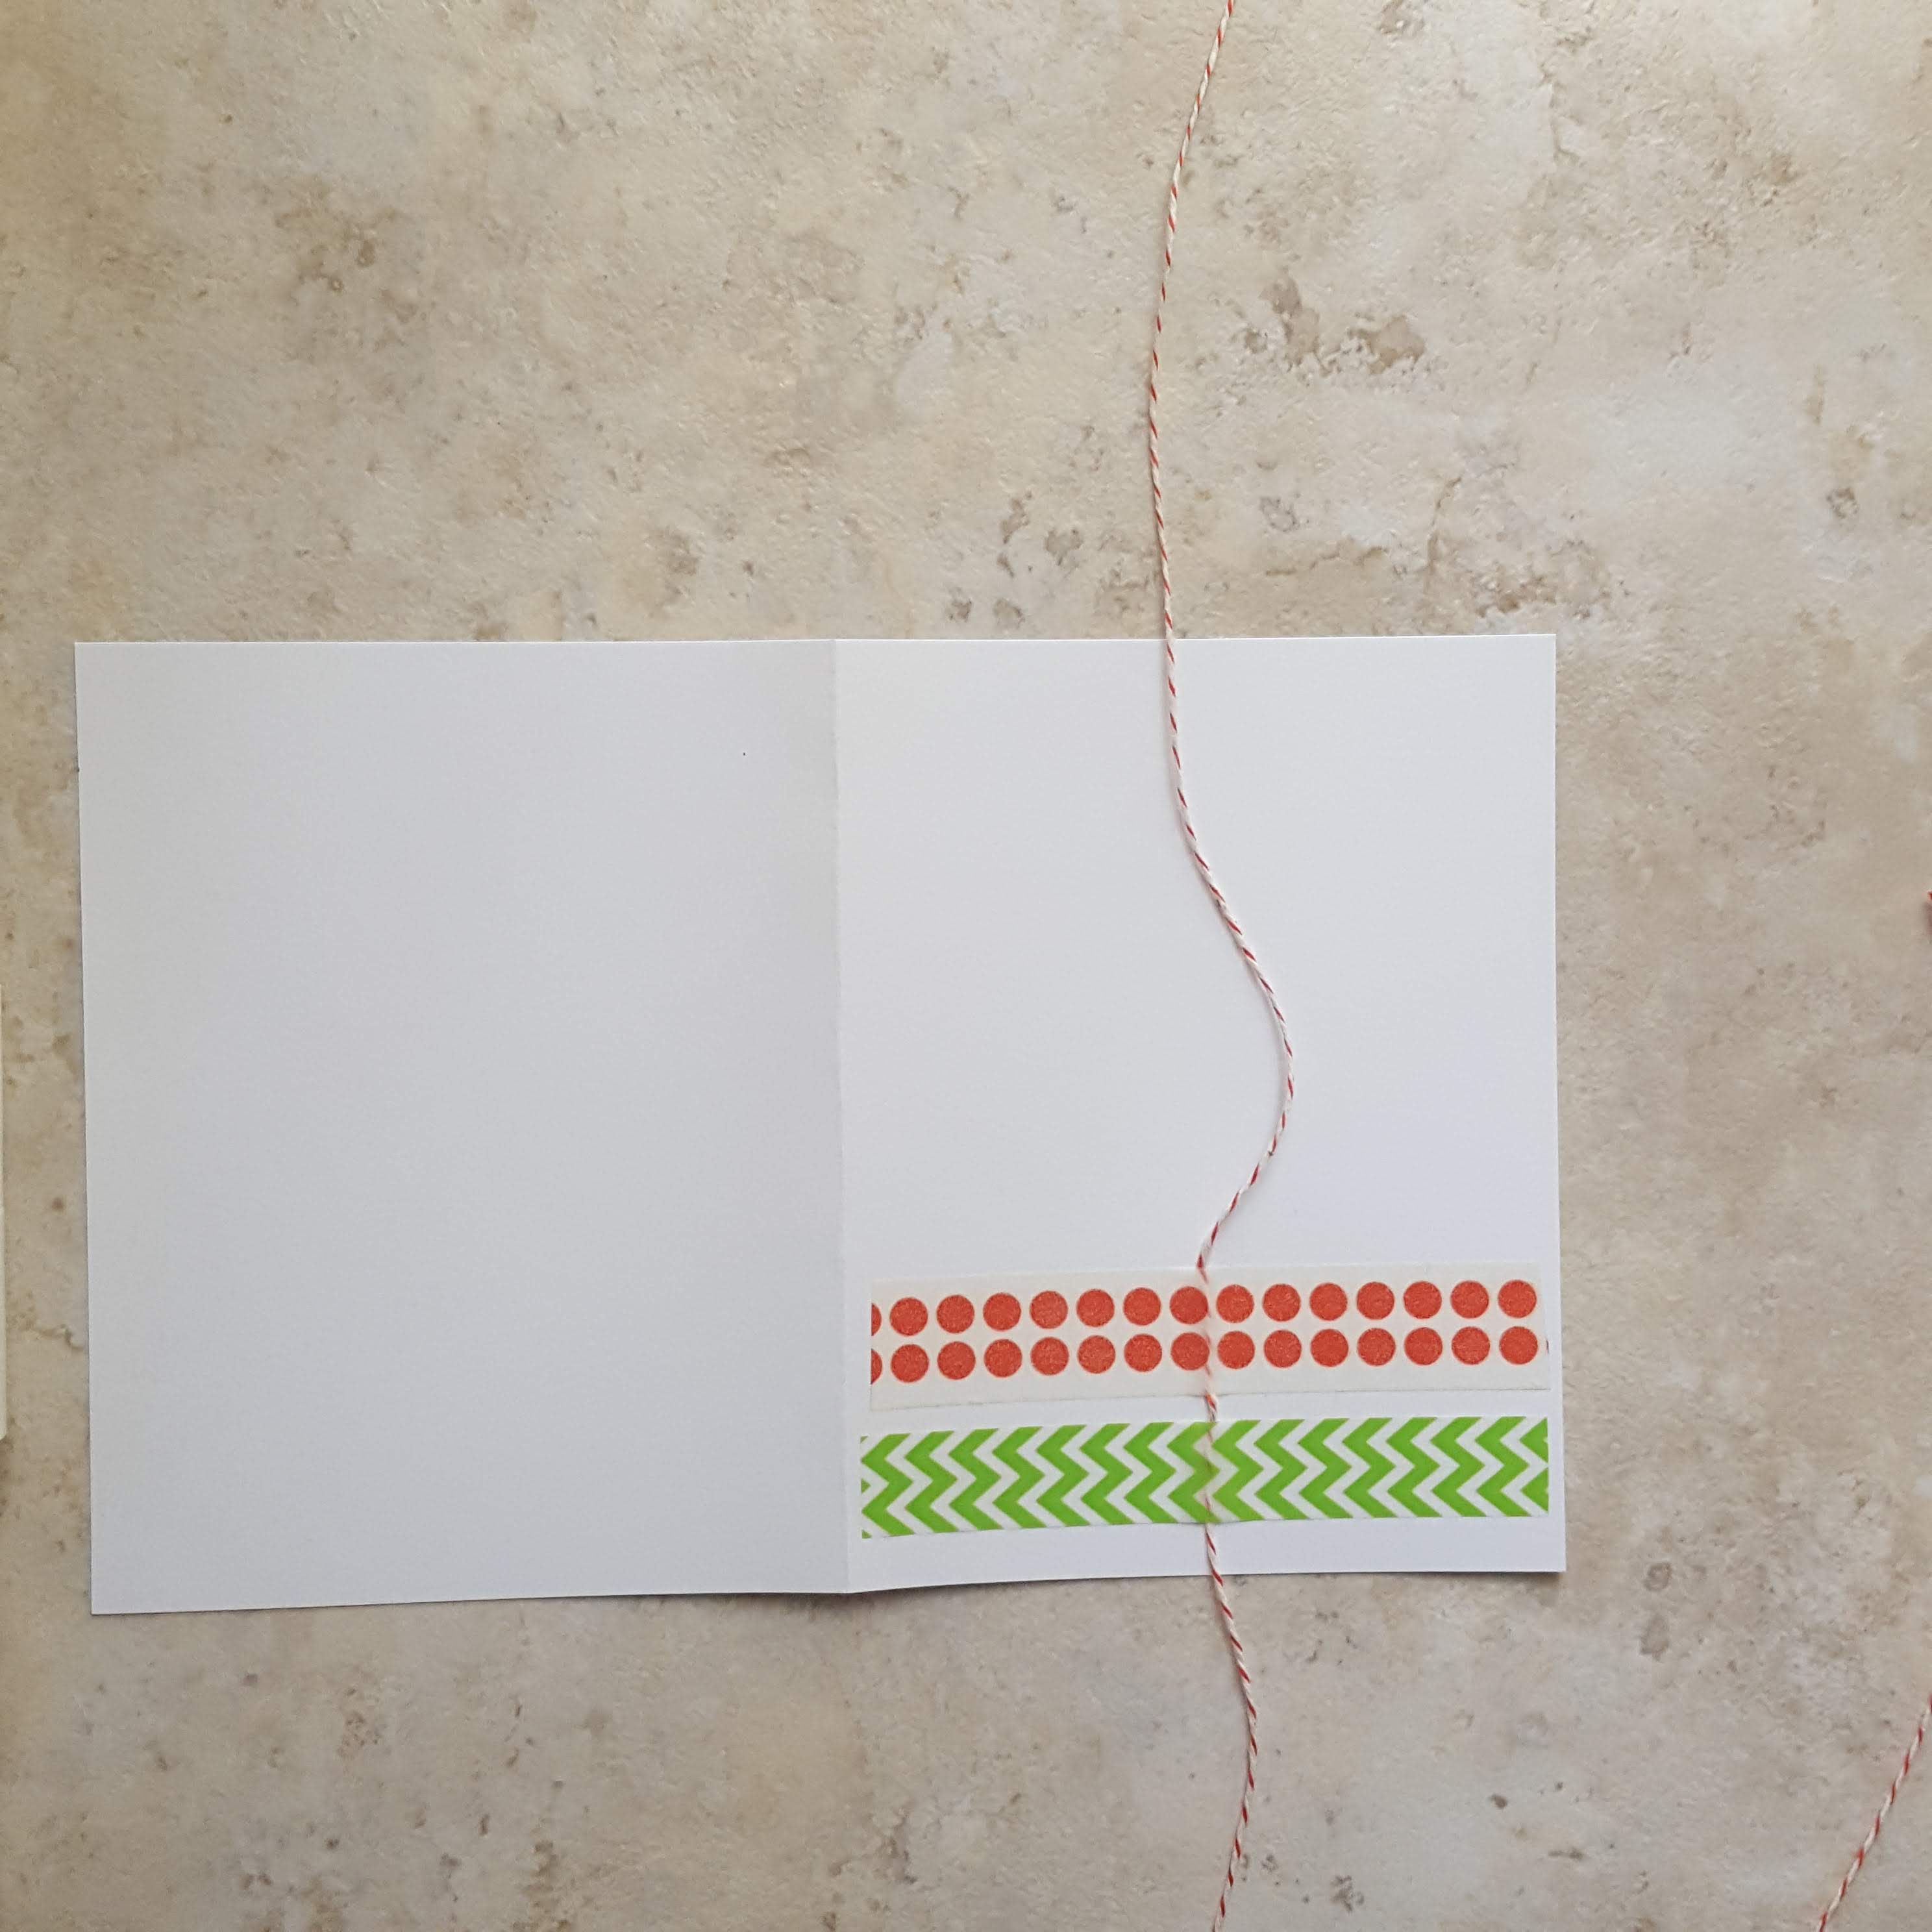
- Continue adding pieces of washi tape until you’ve covered most of the front of the card, and created a box shape
- Re-fold the twine, and tie a bow at the top of the box
- A dab of glue under the knot will hold it in place
- Trim the ends of the twine


Design 2 – Christmas Ornaments
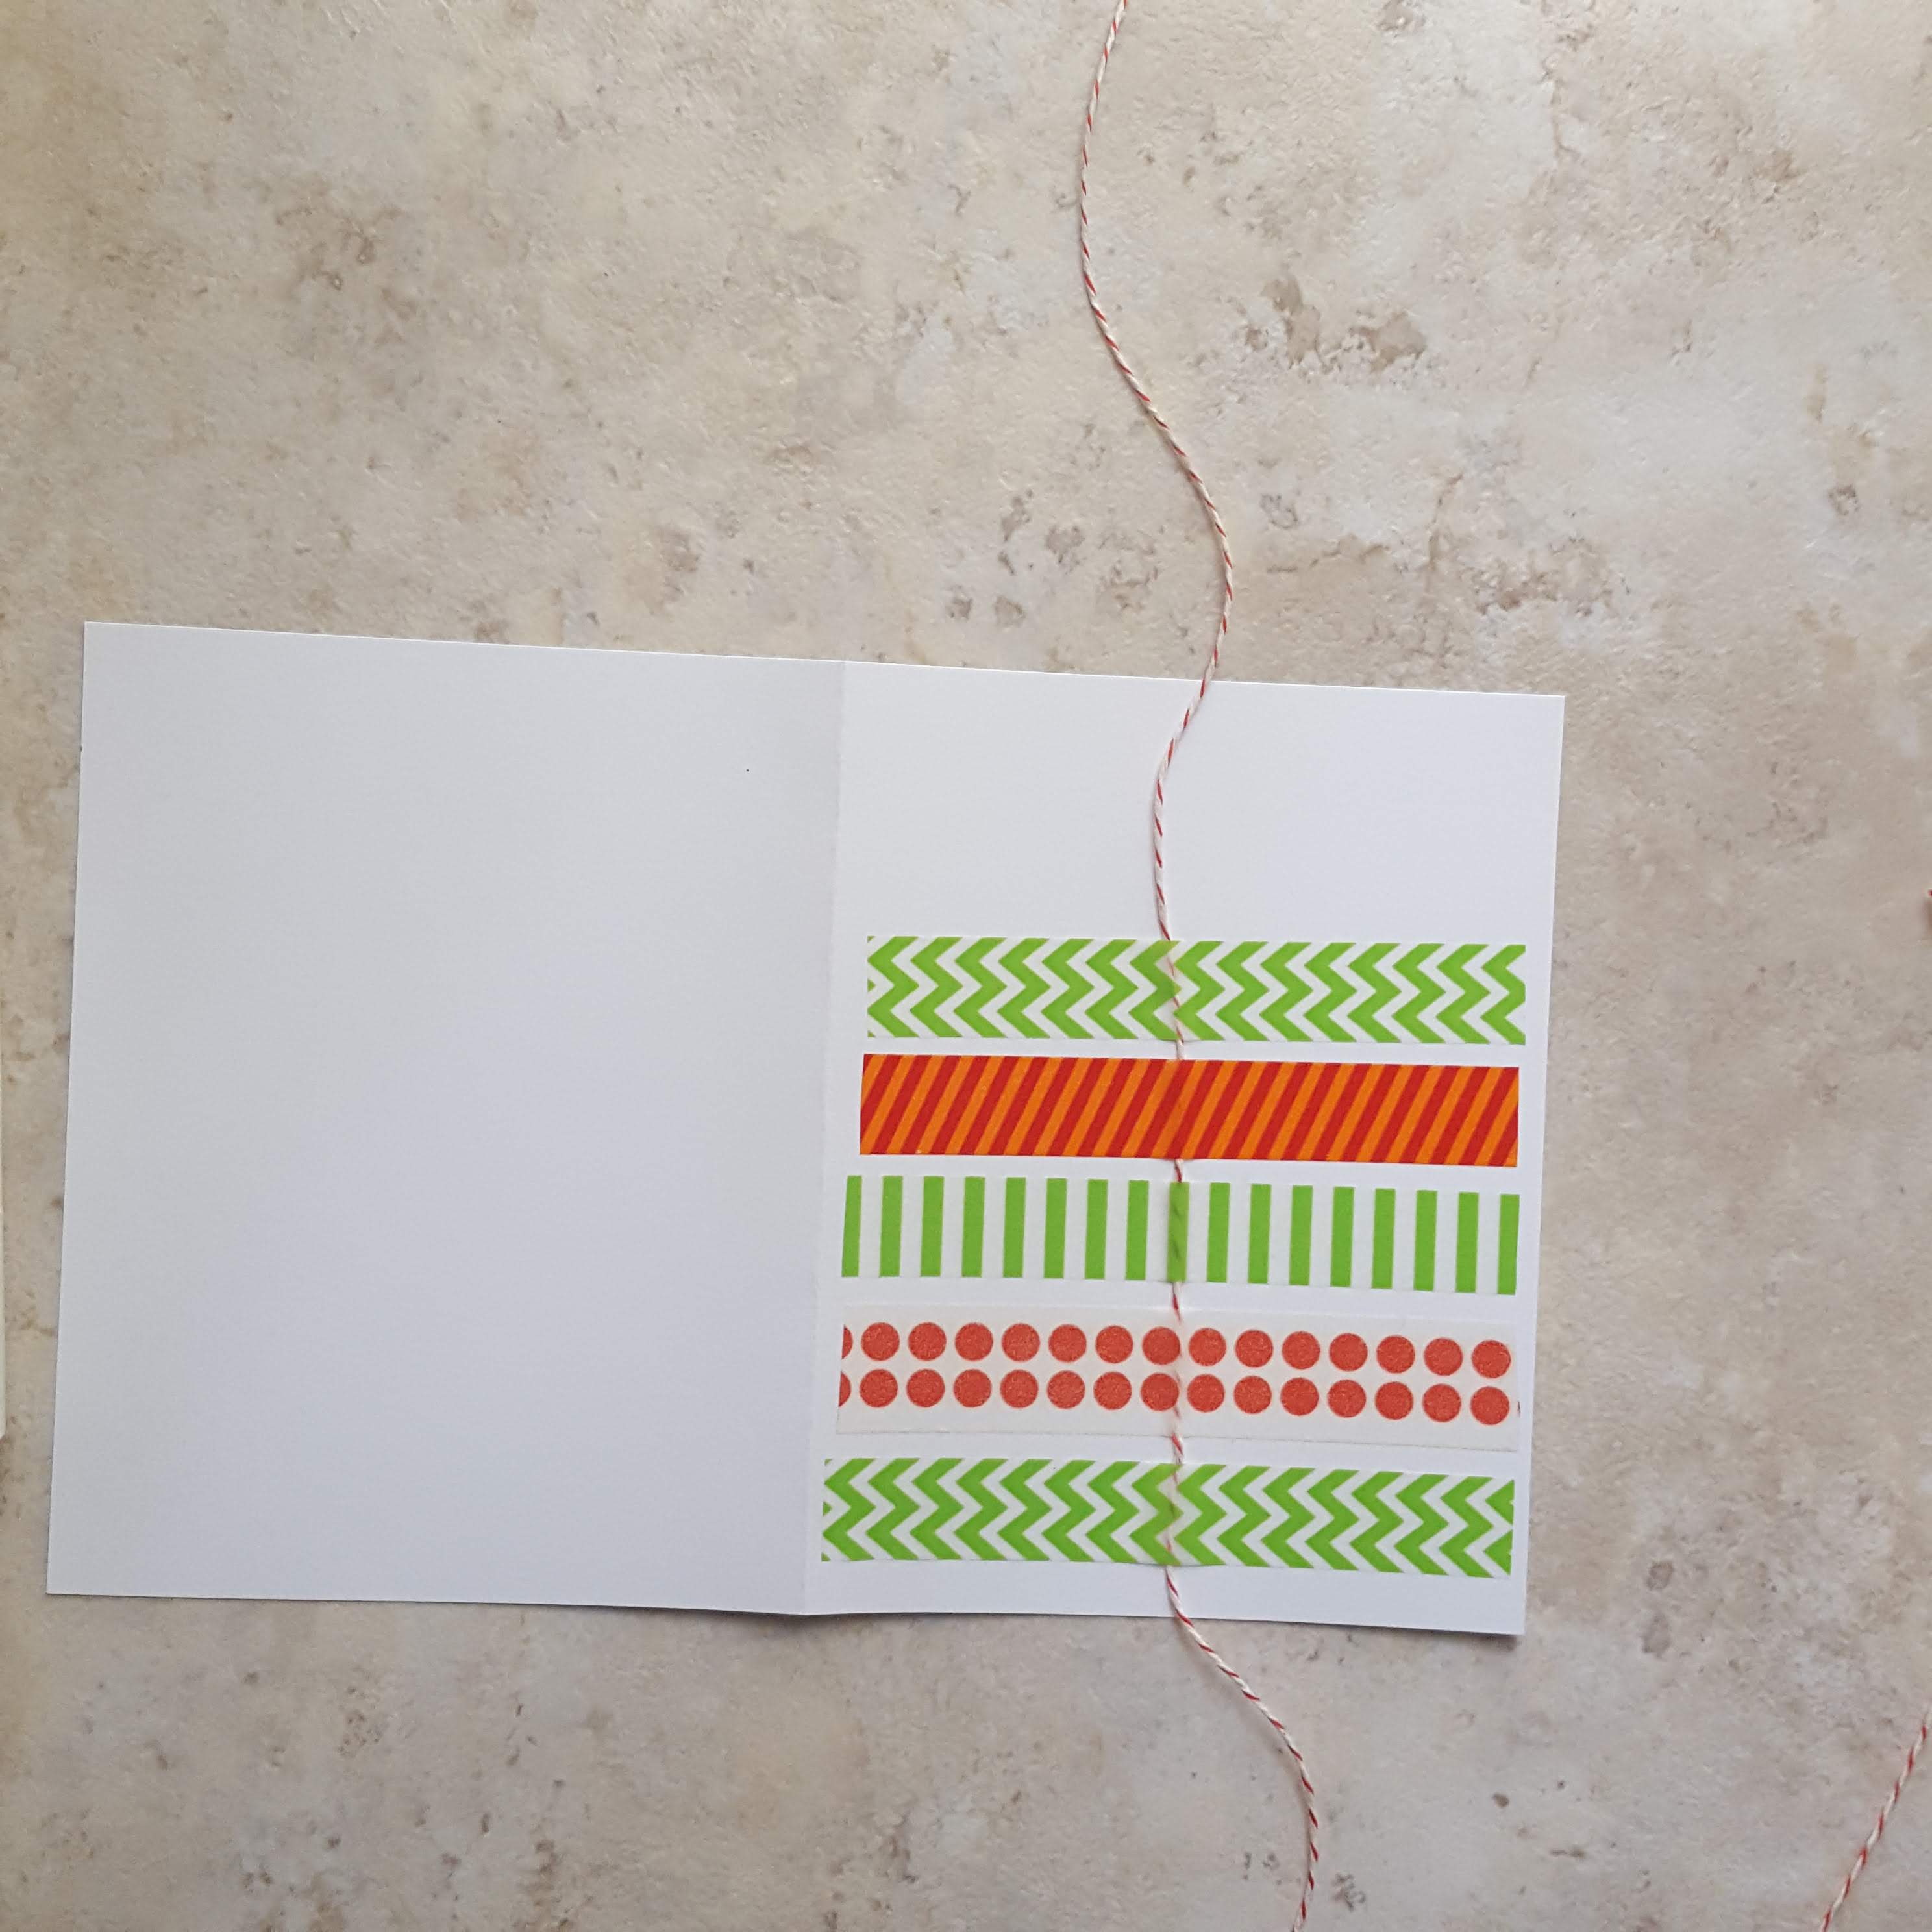
- Lay a piece of blank paper on a flat surface
- Cover about 1/3 of it with washi tape

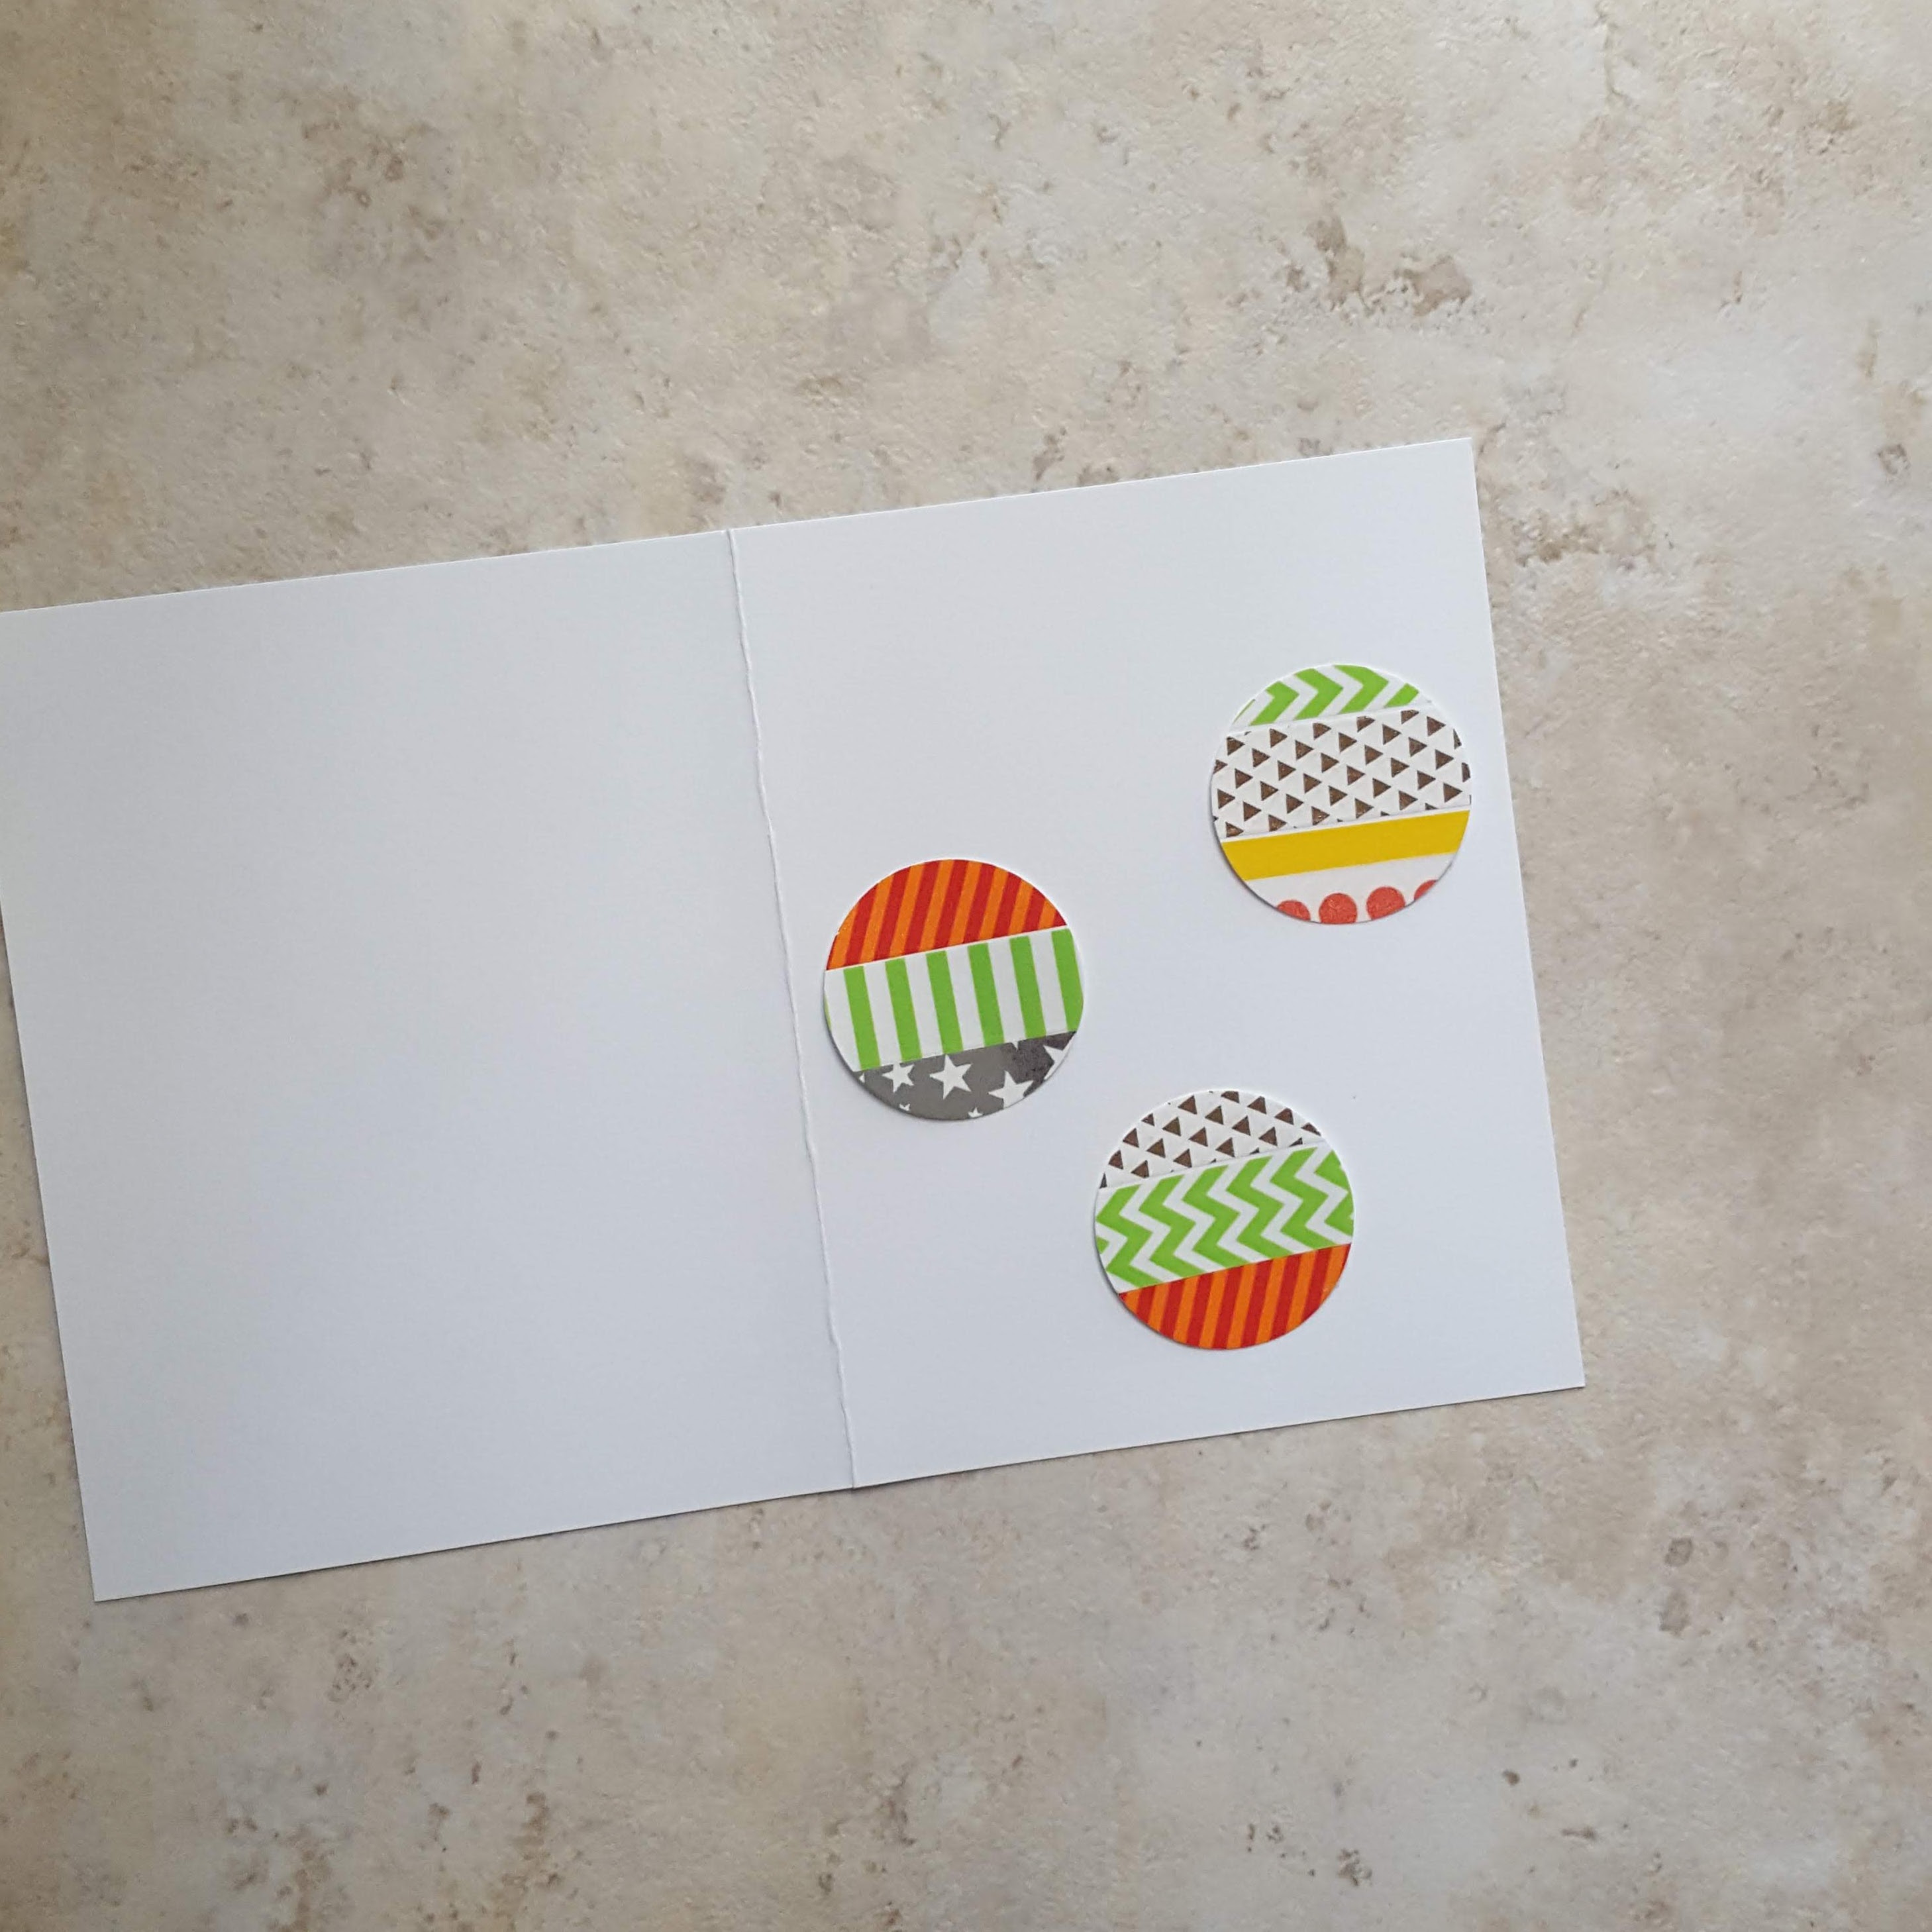
- Use the circle punch to cut out random circles for the ornaments

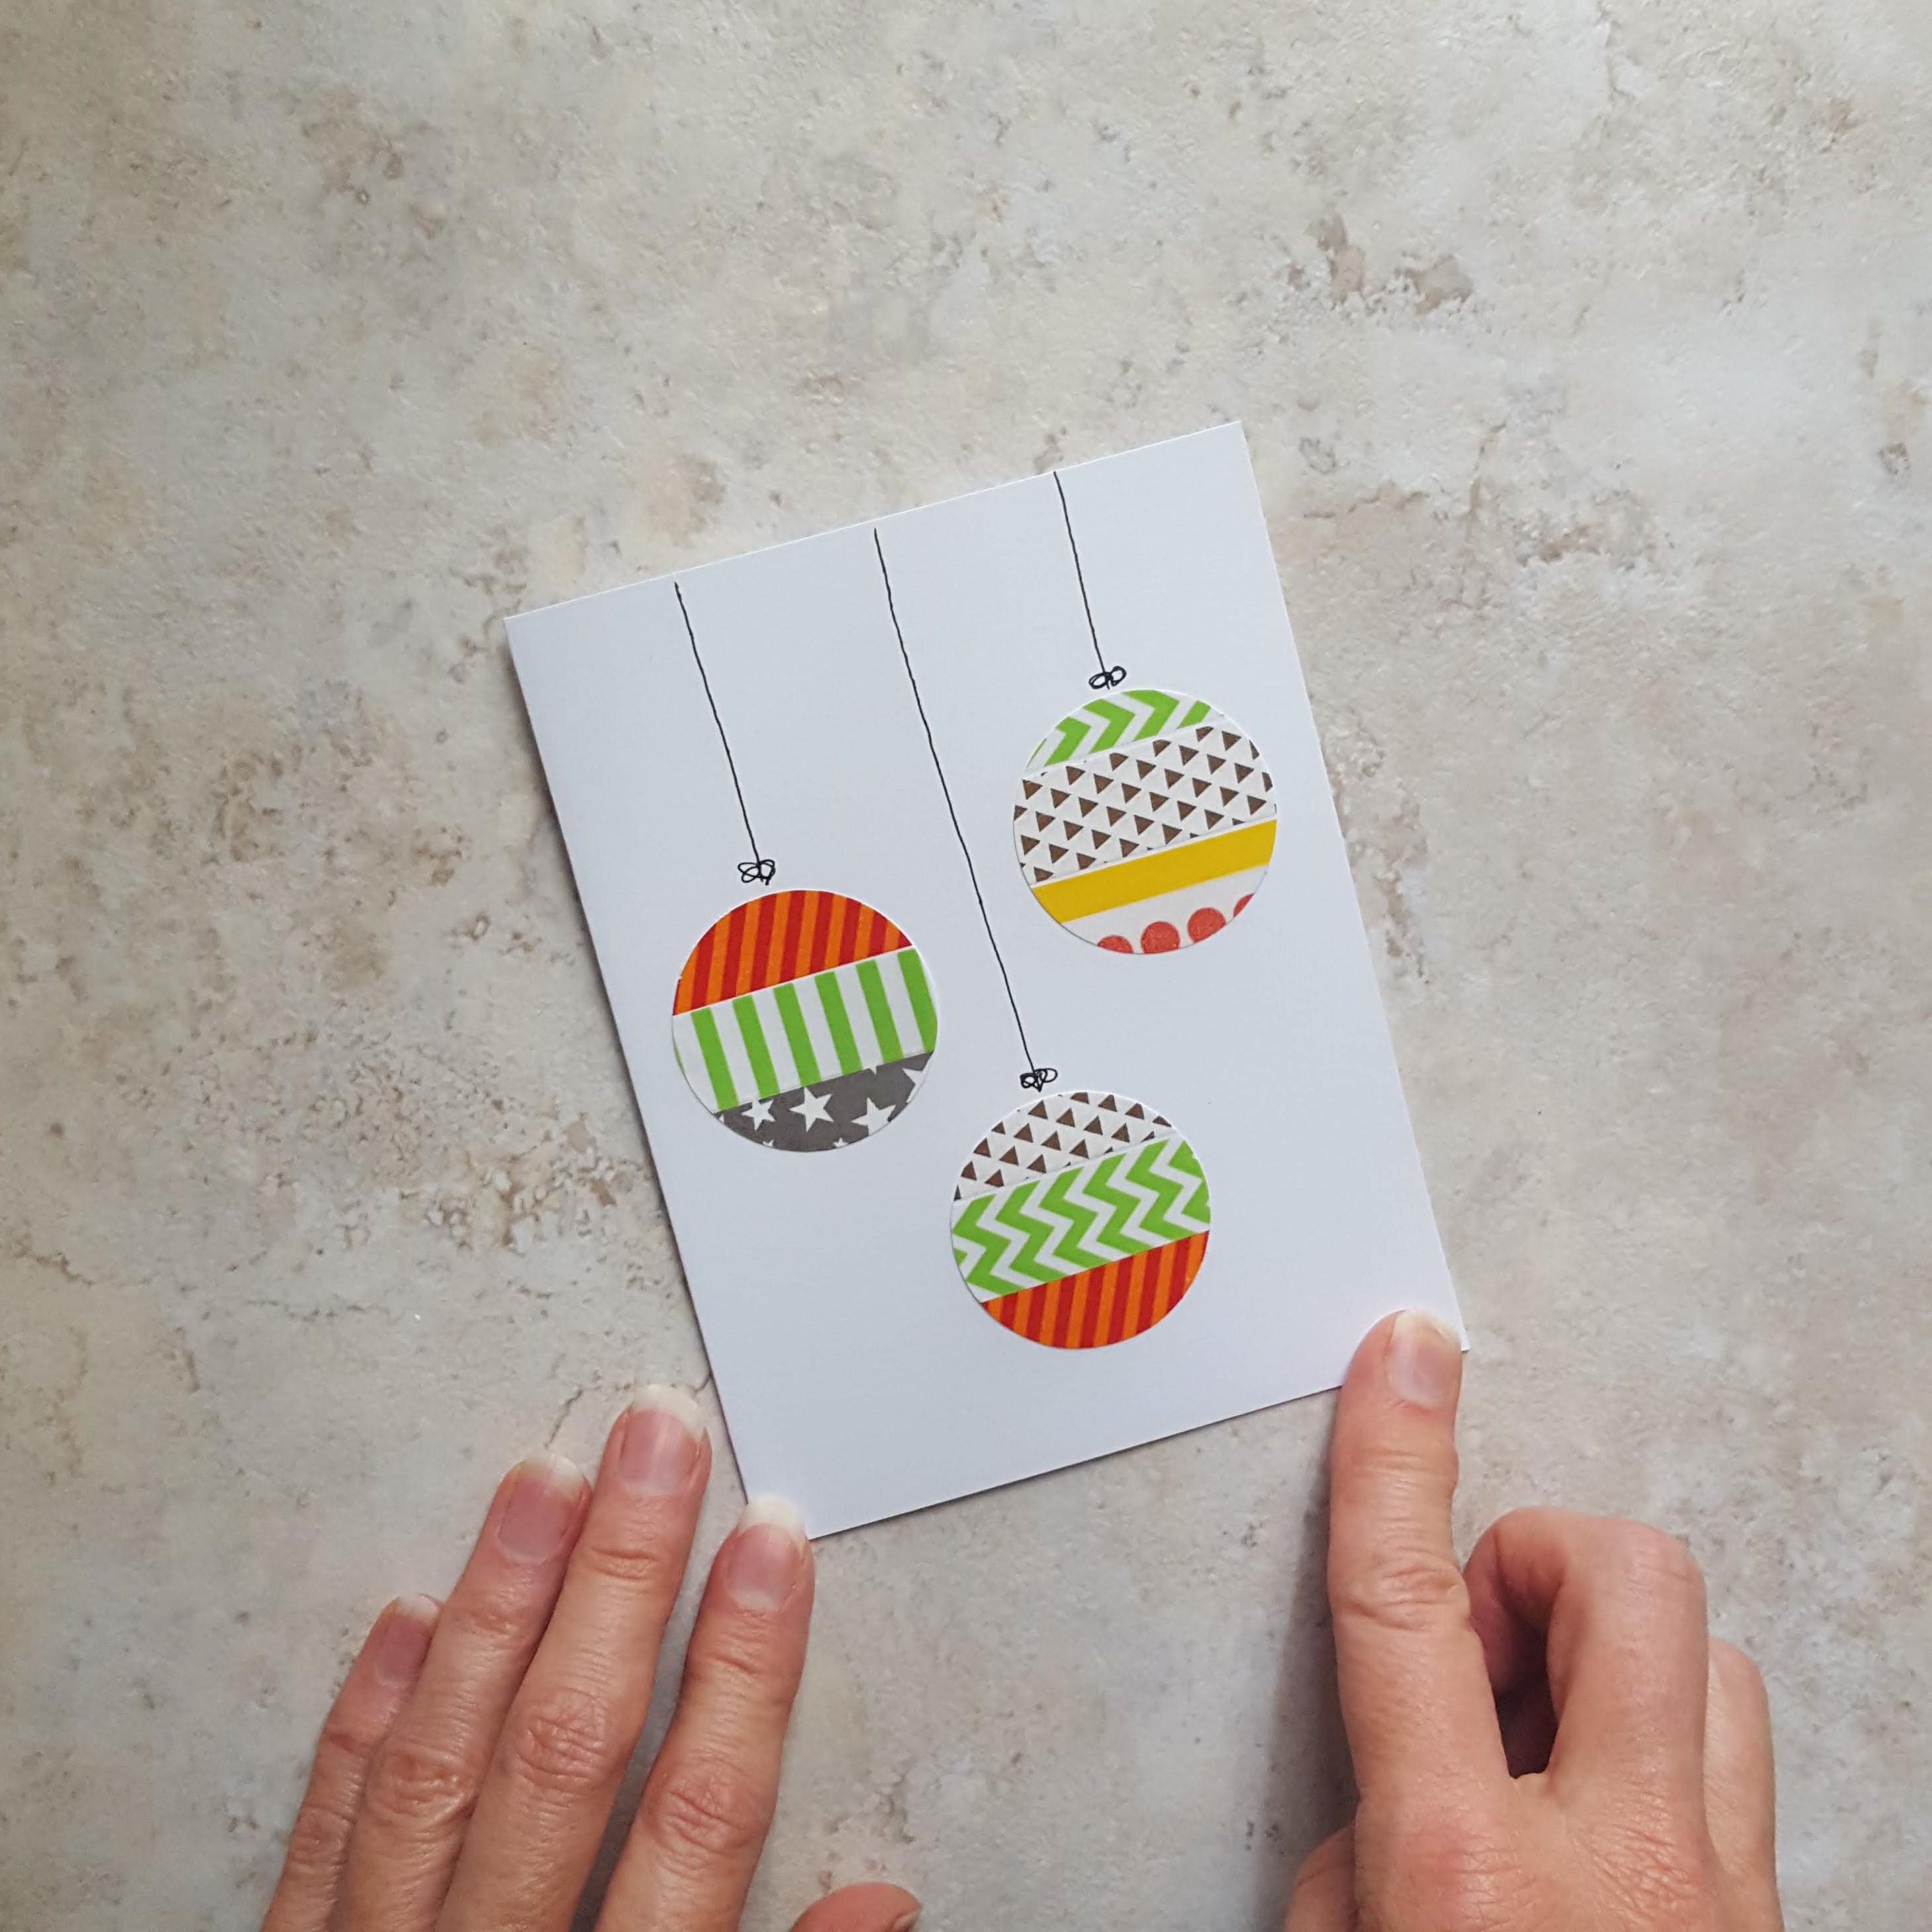
- Arrange some of the ornaments on the front of the card, then glue in place
- Use the pen to draw lines to “hang” the ornaments from the top of the card

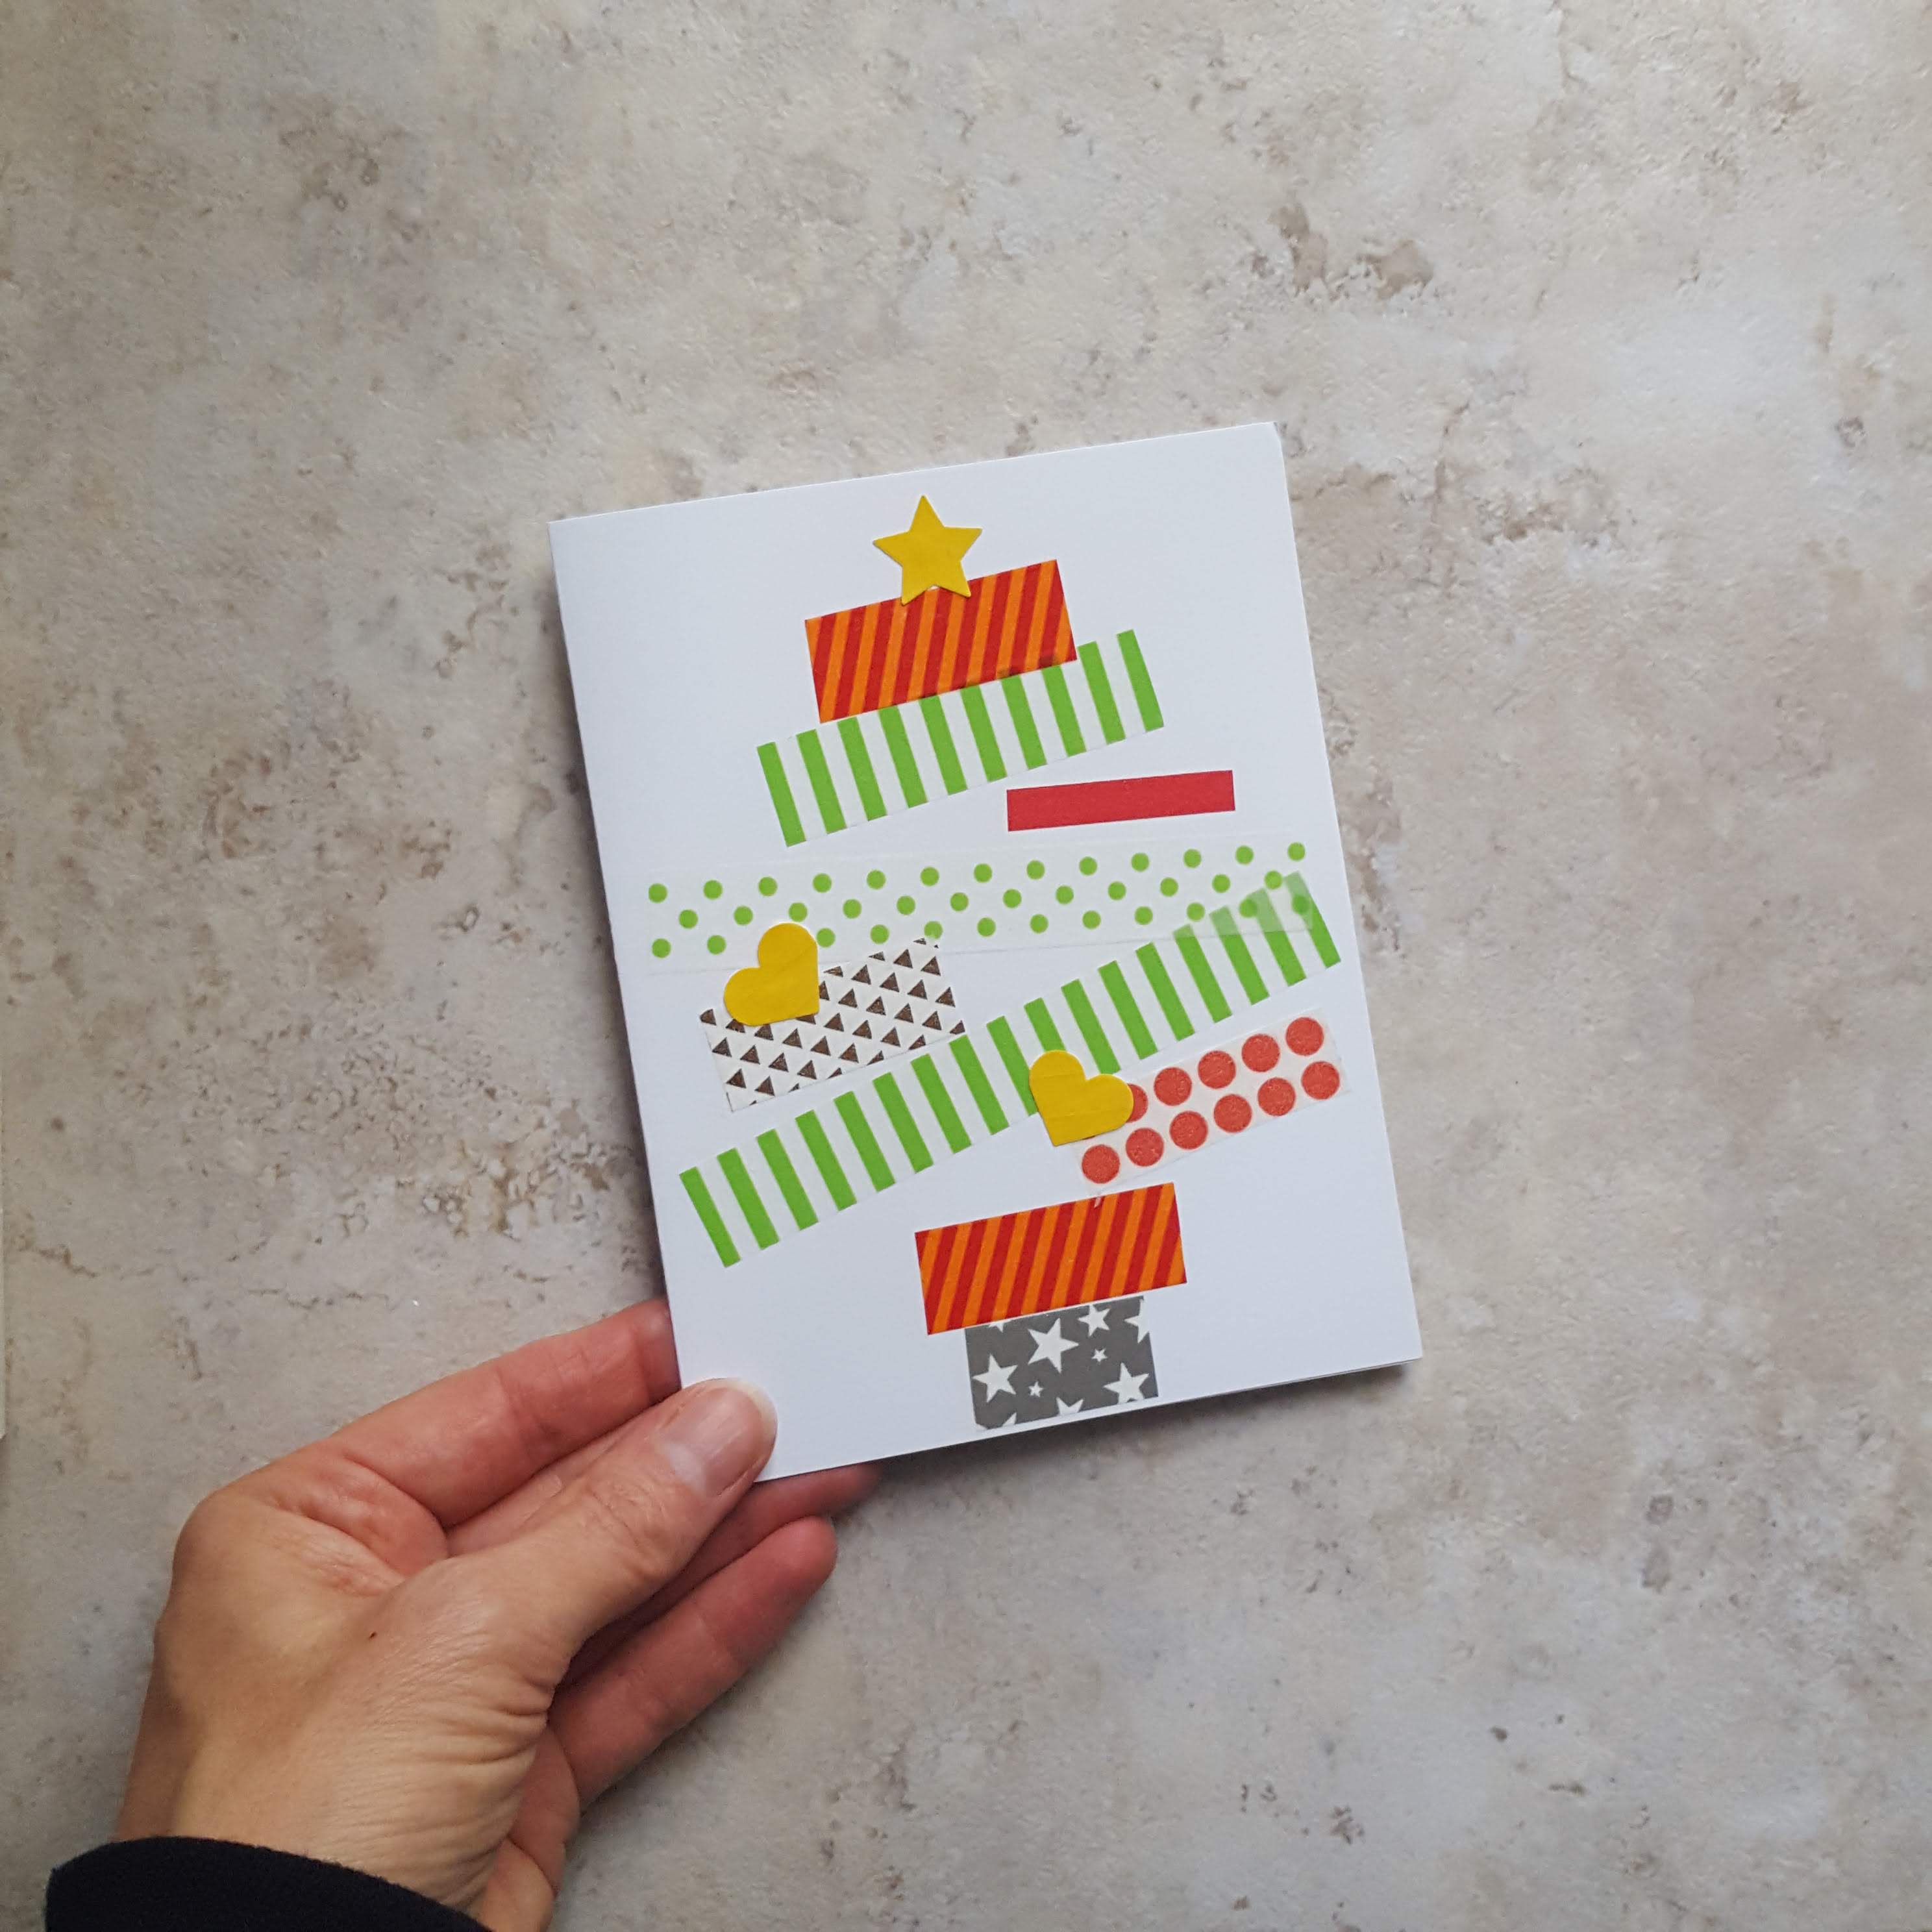
Design 3 – Christmas Tree
- Apply strips of washi tape to the front of the card, at various angles, to create a tree shape

- Apply washi tape to a small scrap of paper, then cut out star and heart shapes
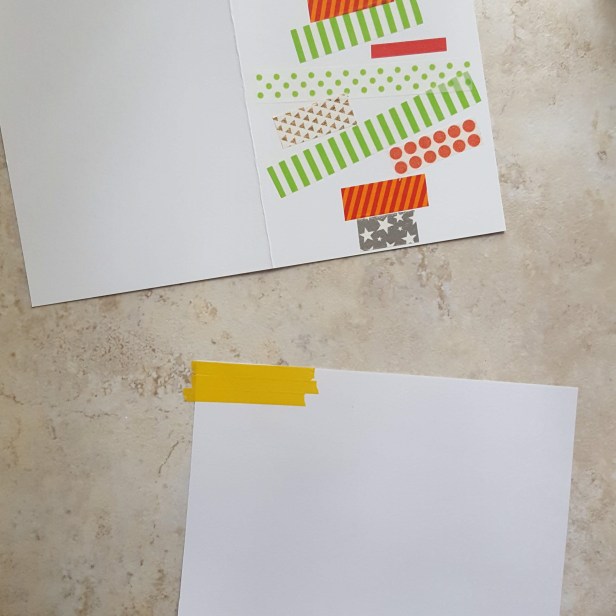

- Glue the star and hearts to the tree.
Aren’t these fun?

I have one more Washi tape post coming your way, for creating your own gift tags, so make sure you are subscribed to the blog so you don’t miss anything!
Share with a friend who might like these (and other) crafts too!
Until next week,
Carrie


Cute, Cute, Cute! Love your simple but quick ideas!
LikeLike
Thanks so much! Let me know if you give them a try!
LikeLike