Hey there, jewelry enthusiasts and sports fans! If you’re looking to combine your love for crafting with your team spirit, you’ve come to the right place. In this blog post, I’ll walk you through the steps to create your very own braided friendship bracelets in your favorite sports team colors. Whether you’re supporting your child’s youth team or gearing up for the next big game, these bracelets are the perfect way to showcase your team pride in style. Grab your favorite colored cords, and let’s get started!
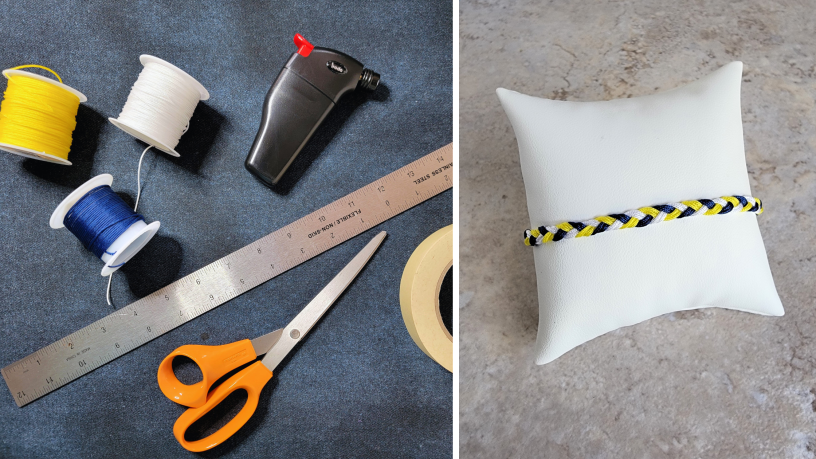
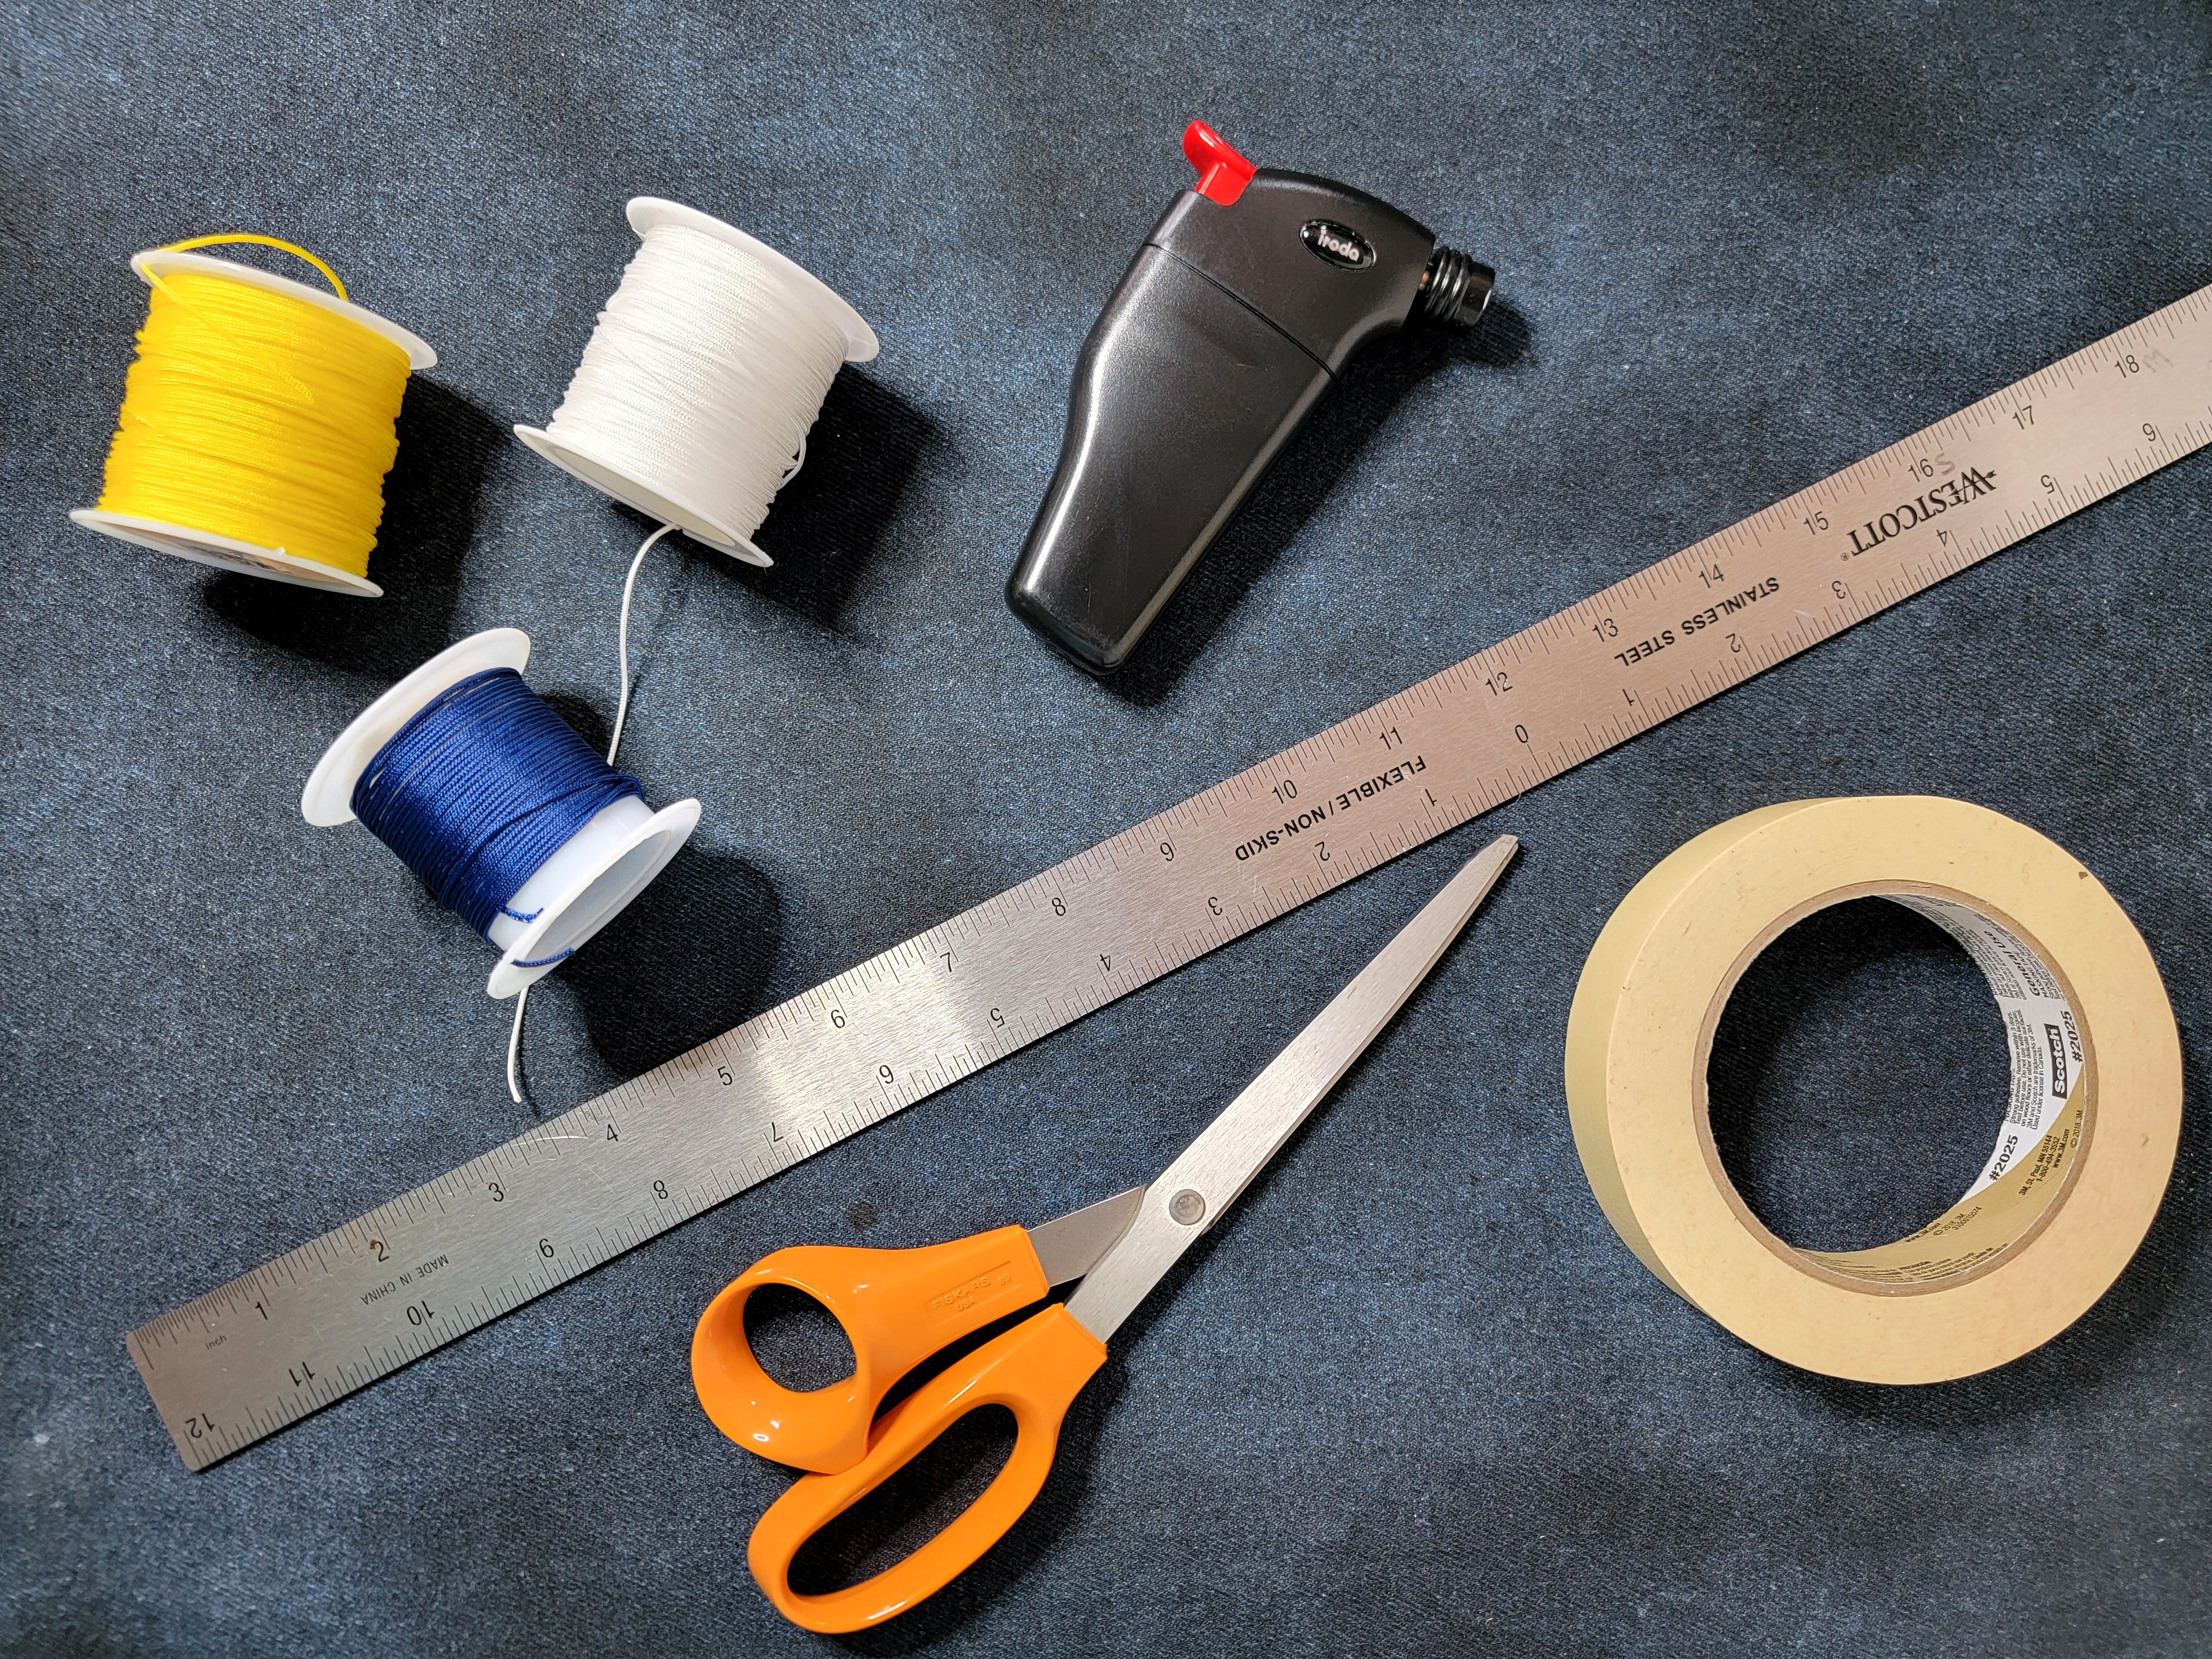
Step 1 – Gather what you need:
- Knotting cord in 3 colors (I used 1mm)
- Ruler or measuring tape
- Scissors
- Lighter
- Tape
.
Step 2 – Prep the Cords
Cut 6 cords to 20-inch lengths (2 of each color).
Gather the ends of all 6 cords and tie them together with a simple overhand knot, about 5 inches from the ends.

Tape the knotted ends to a flat surface.
Separate the cords into pairs of the same color.

.
Step 3 – Braid the Bracelet
You’ll be making a normal braid, except with double cords instead of just one at a time. Keep the pairs of cords as flat as possible during the process, so they don’t get twisted:
Move the left-hand pair of cords over the center pair (it becomes the new center pair).
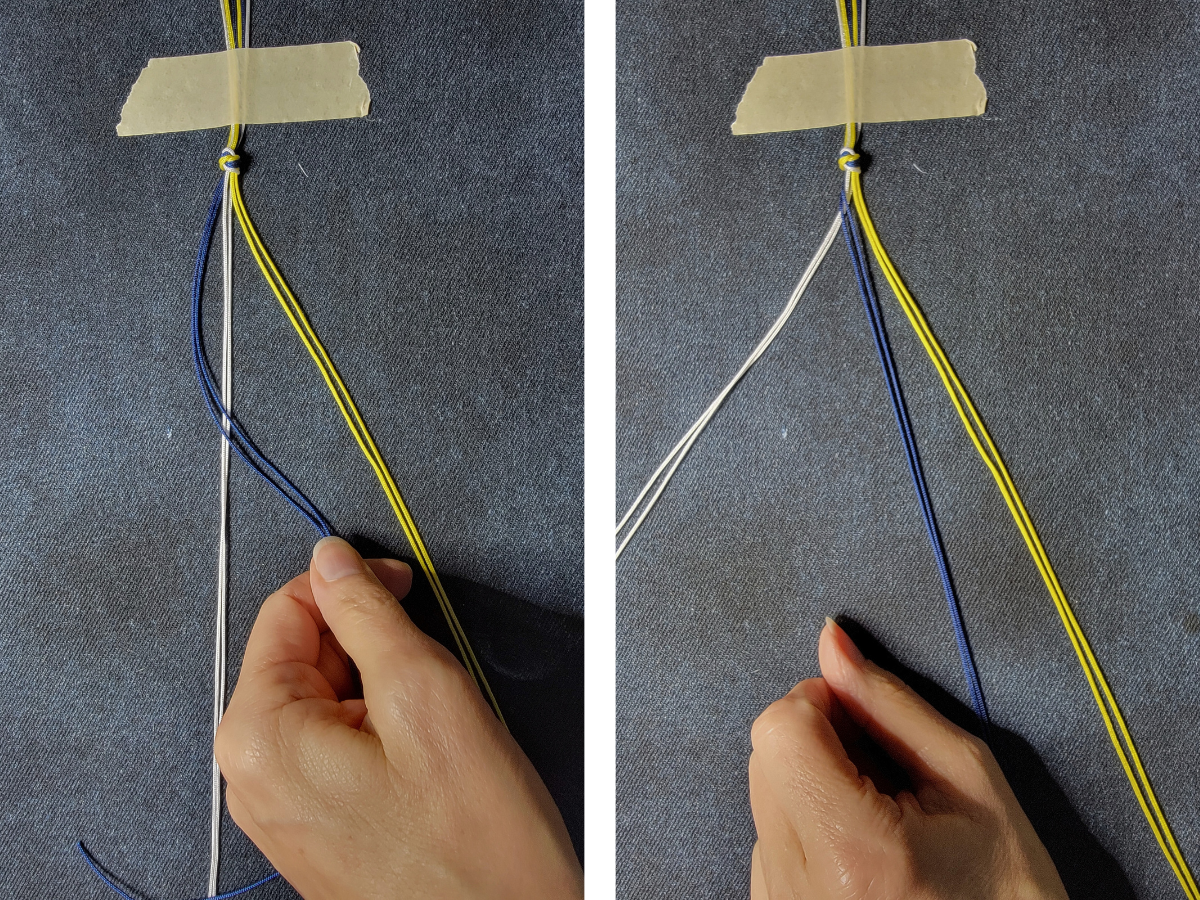
Then move the right-hand pair of cords over the center pair (it becomes the new center pair).
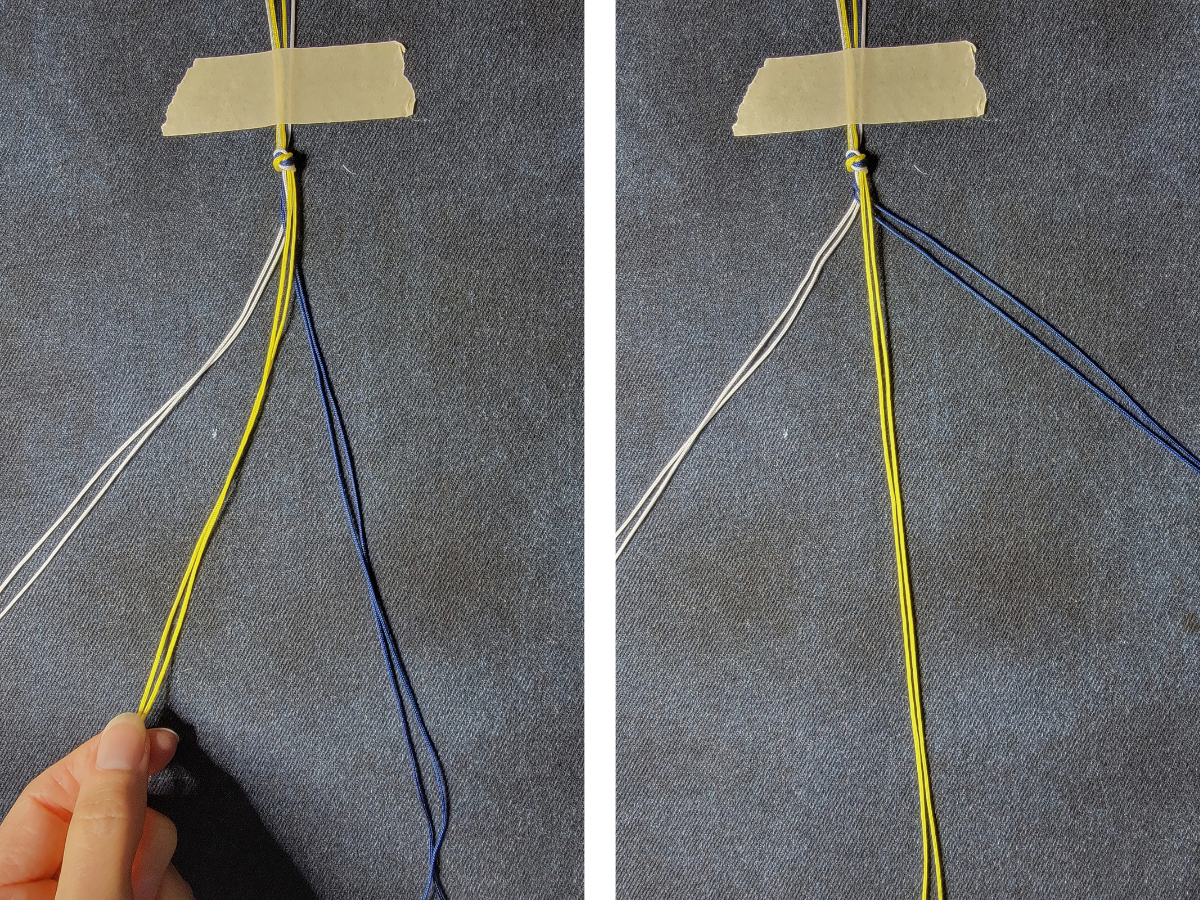
Continue this pattern, left then right, until you reach a braid of 5 to 7 inches long (about 1″ smaller than your wrist measurement). It helps to snug up the cords after each crossover, and to keep hold of the braid as you go.

.
Step 4 – Finishing the Ends
Pull aside a single cord from the outside edge to tie a simple overhand knot around all the other cords. Repeat with a second overhand knot.
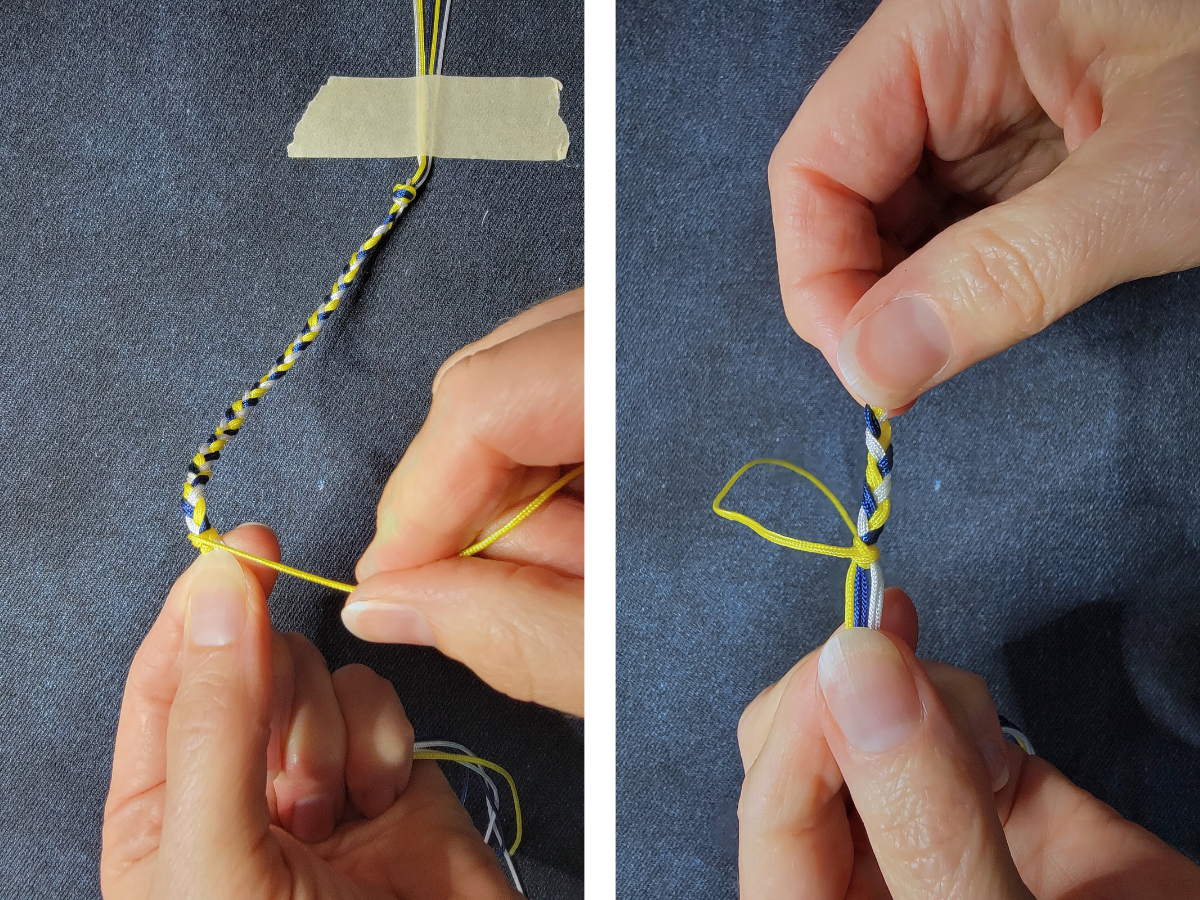
Cut off all the cords close to the knot, except for the cord you used to make the knot. Set trimmed ends aside, as you’ll need one of these later.
Use the lighter to melt the ends of the cut cords, until they all melt securely together and to the knot.

Remove the tape from the start of the bracelet and untie the large overhand knot.
Repeat the steps above on the cords on this end of the bracelet. This will leave you with a single cord tail at each end of the bracelet.
.
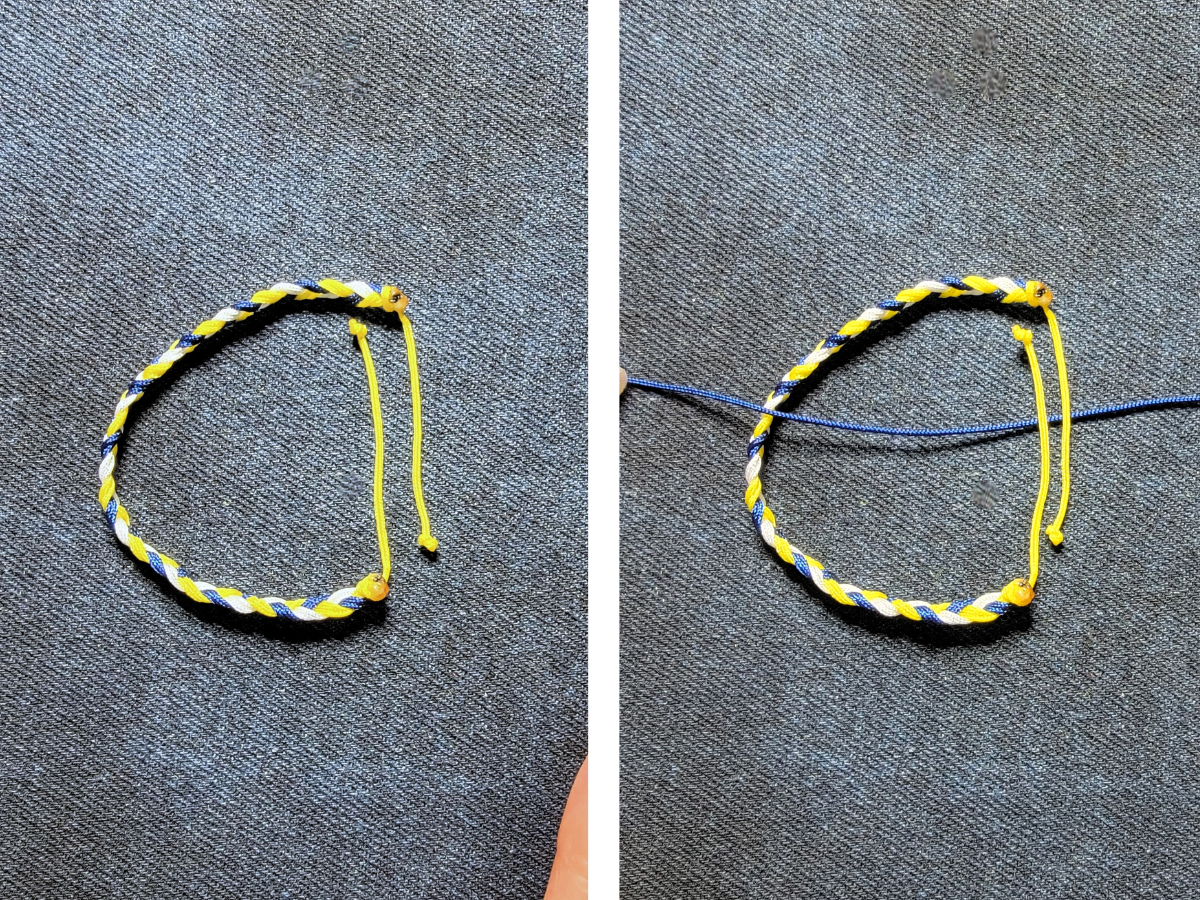
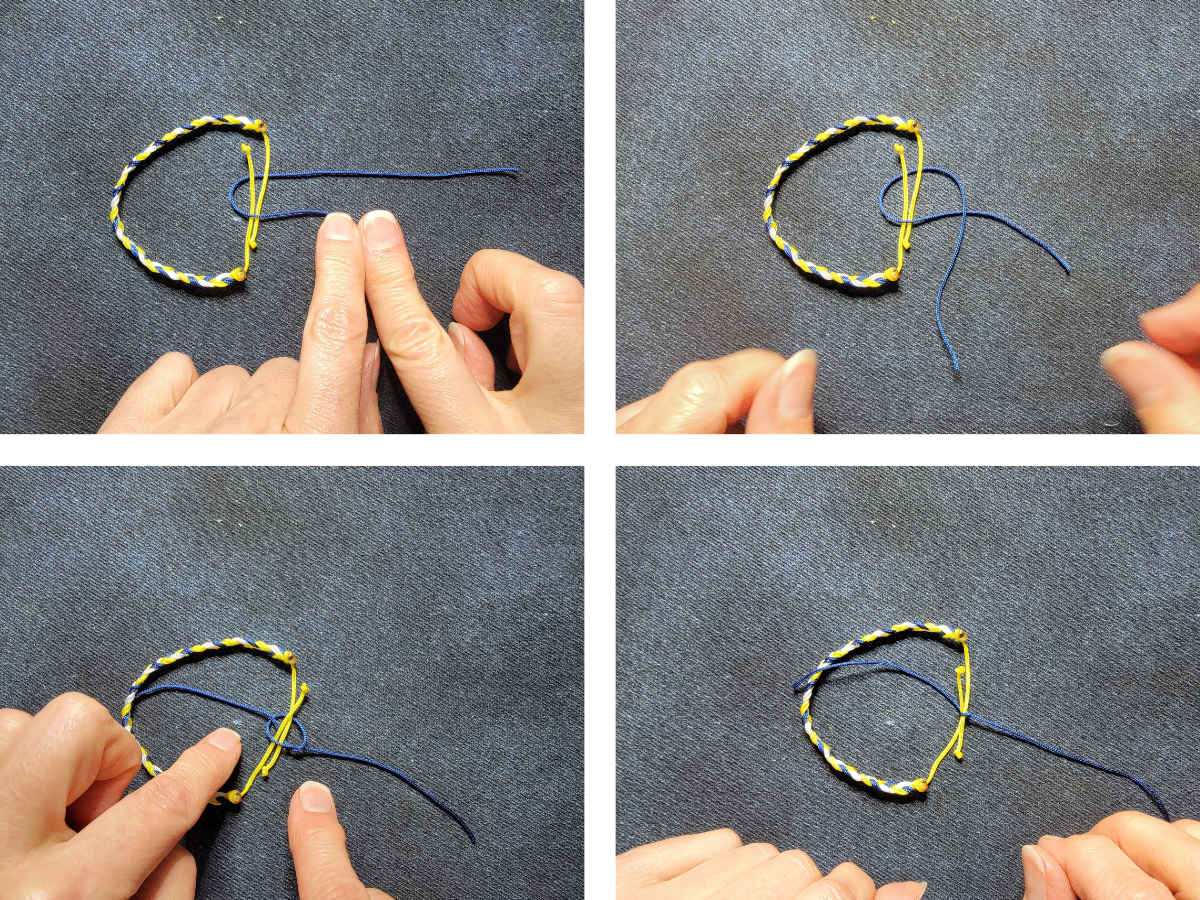
Step 5 – Creating Sliding Knot Closure
Tie a simple overhand knot on both cord ends, about 3” from the braid, and trim.
Curve your bracelet into a circle, making sure it isn’t twisted and that the loose tails are parallel to each other.
Take one of the cords you trimmed off and set aside in step four and slide it under the overlapped loose tails.
Take the left side of this new cord and cross it over the 2 tails.
Pick up the right side of the cord and cross it over the left side cord you just put over the 2 tails.
Then slide it under the tails, and up through the loop created on the left side.
Pull snug.
Now take the cord on the right side and cross it over the tails.
Pick up the left side cord and cross it over the right side you just put over the 2 tails.
Then slide it under the tails, and up through the loop created on the right side.
Pull snug.
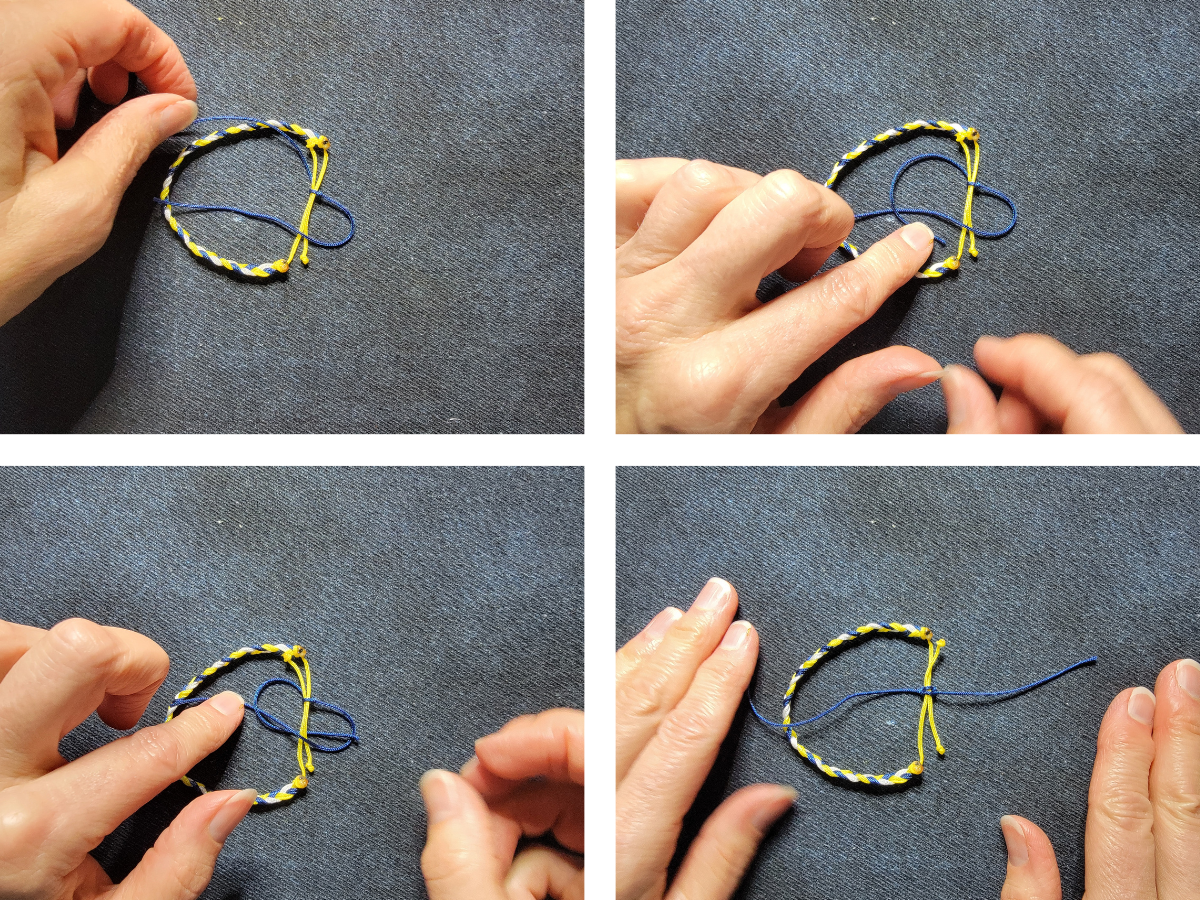
Repeat 2 more times, once starting with the cord on the left, and once with the cord on the right, to complete your sliding knot!
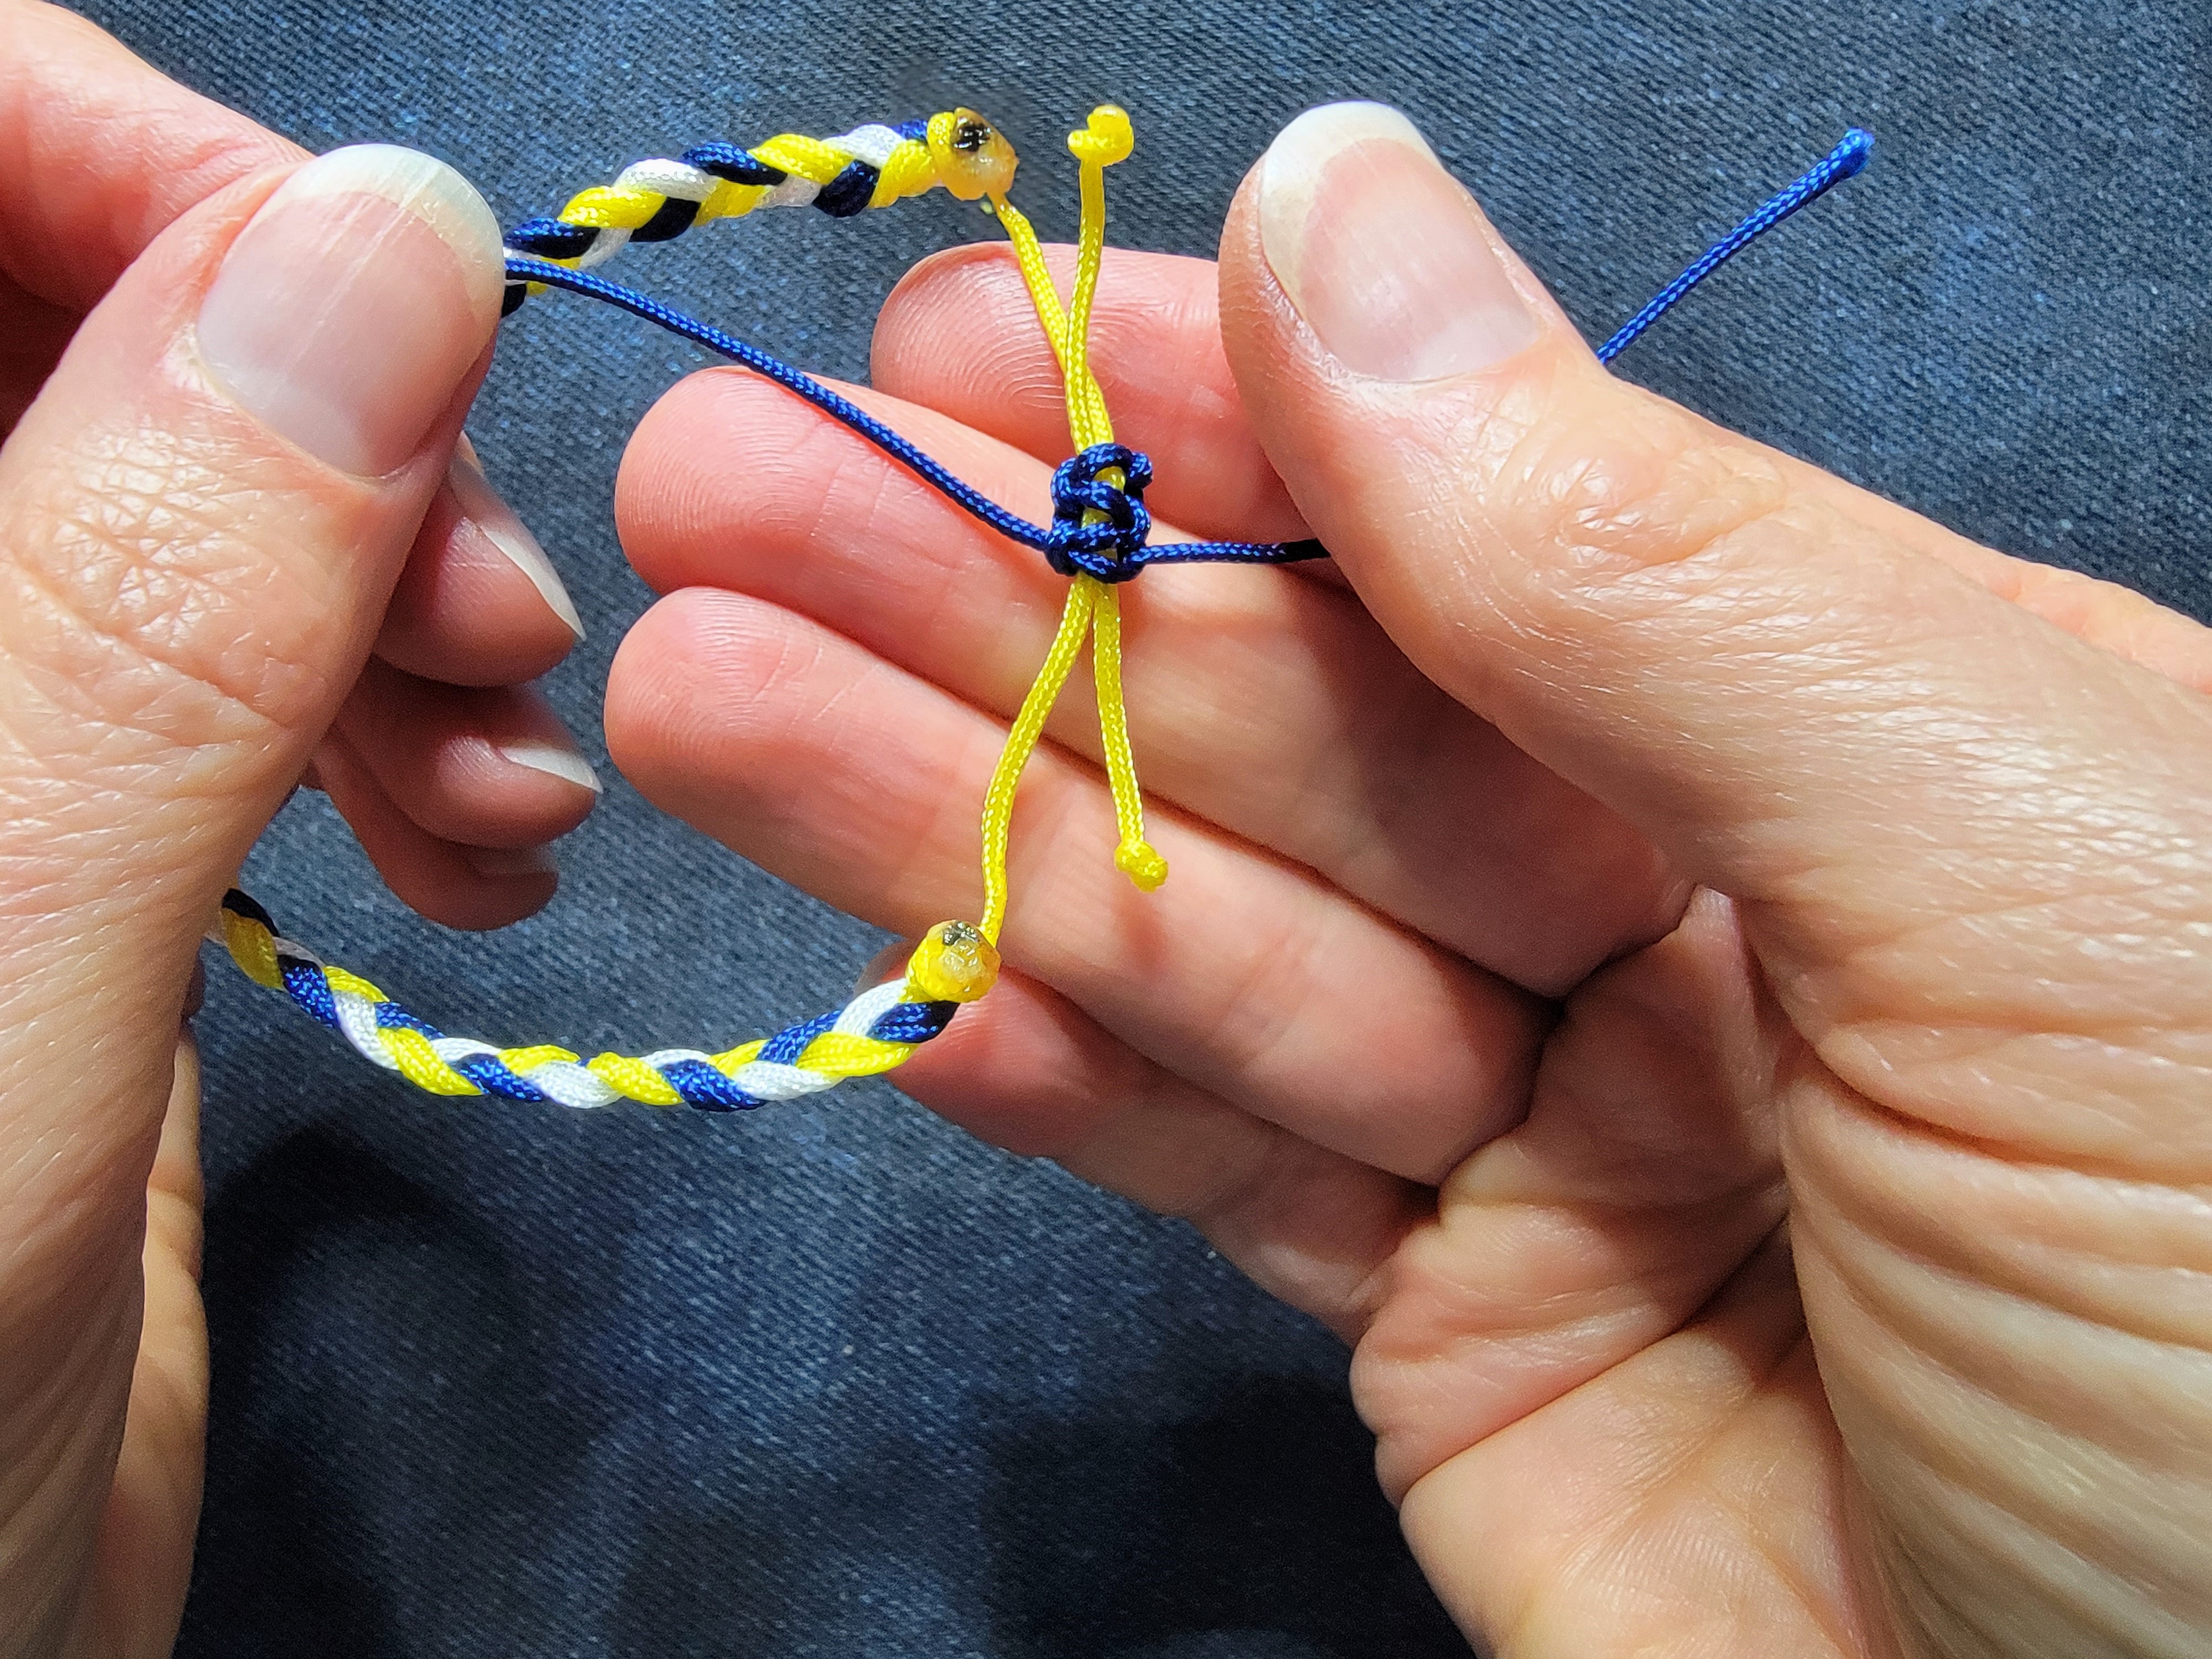
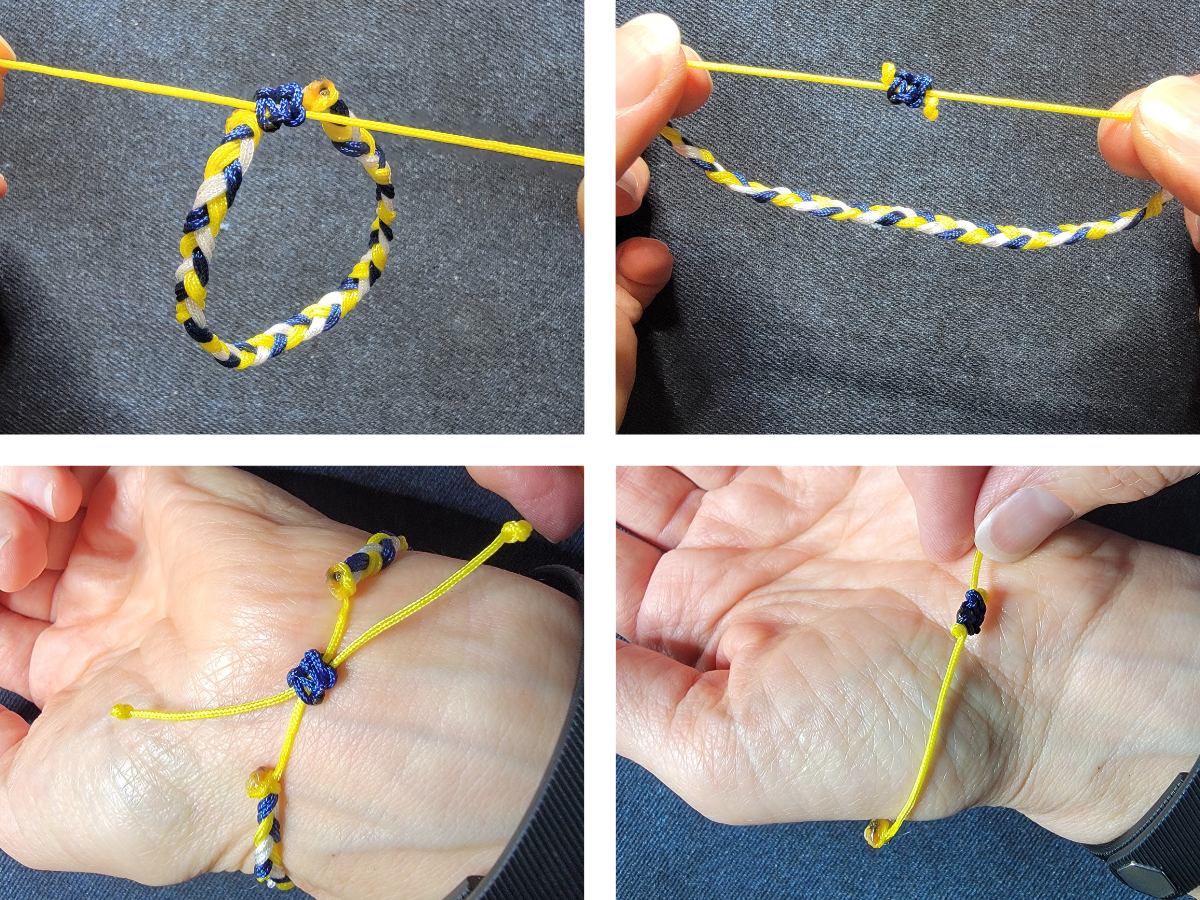
Trim the ends and melt them to the knot (being careful to not melt it to the tail cords).

Your bracelet is finished, and ready to wear! To tighten the bracelet, pull on the tails. To loosen the bracelet, pull on the ends of the bracelet.
And there you have it! You’ve just crafted a stylish and personalized braided friendship bracelet that proudly displays your team’s colors. These bracelets make great gifts for fellow fans, teammates, or even as a treat for yourself.
Remember, the key to a great friendship bracelet is the love and effort you put into making it. So, wear your team spirit on your wrist with pride and enjoy every moment of the game day festivities.
Happy crafting, and go team!
Carrie