
Some of my favorite Christmas decorations are the ones that tell a story. This mini journal ornament is such a fun way to capture special moments — photos, little notes, dates, or even inside jokes — and hang them right on your tree. It’s simple to make, easy to personalize, and becomes more meaningful every year you pull it out of your ornament box.
I have a green and gold tree in my den, filled with Green Bay Packers ornaments, so I chose a little journal filled with pictures from football games we’ve attended over the years. Such wonderful memories, starting when our kids were little.
Ready to pull together some of your special memories, to hang on your tree? Let’s get started!
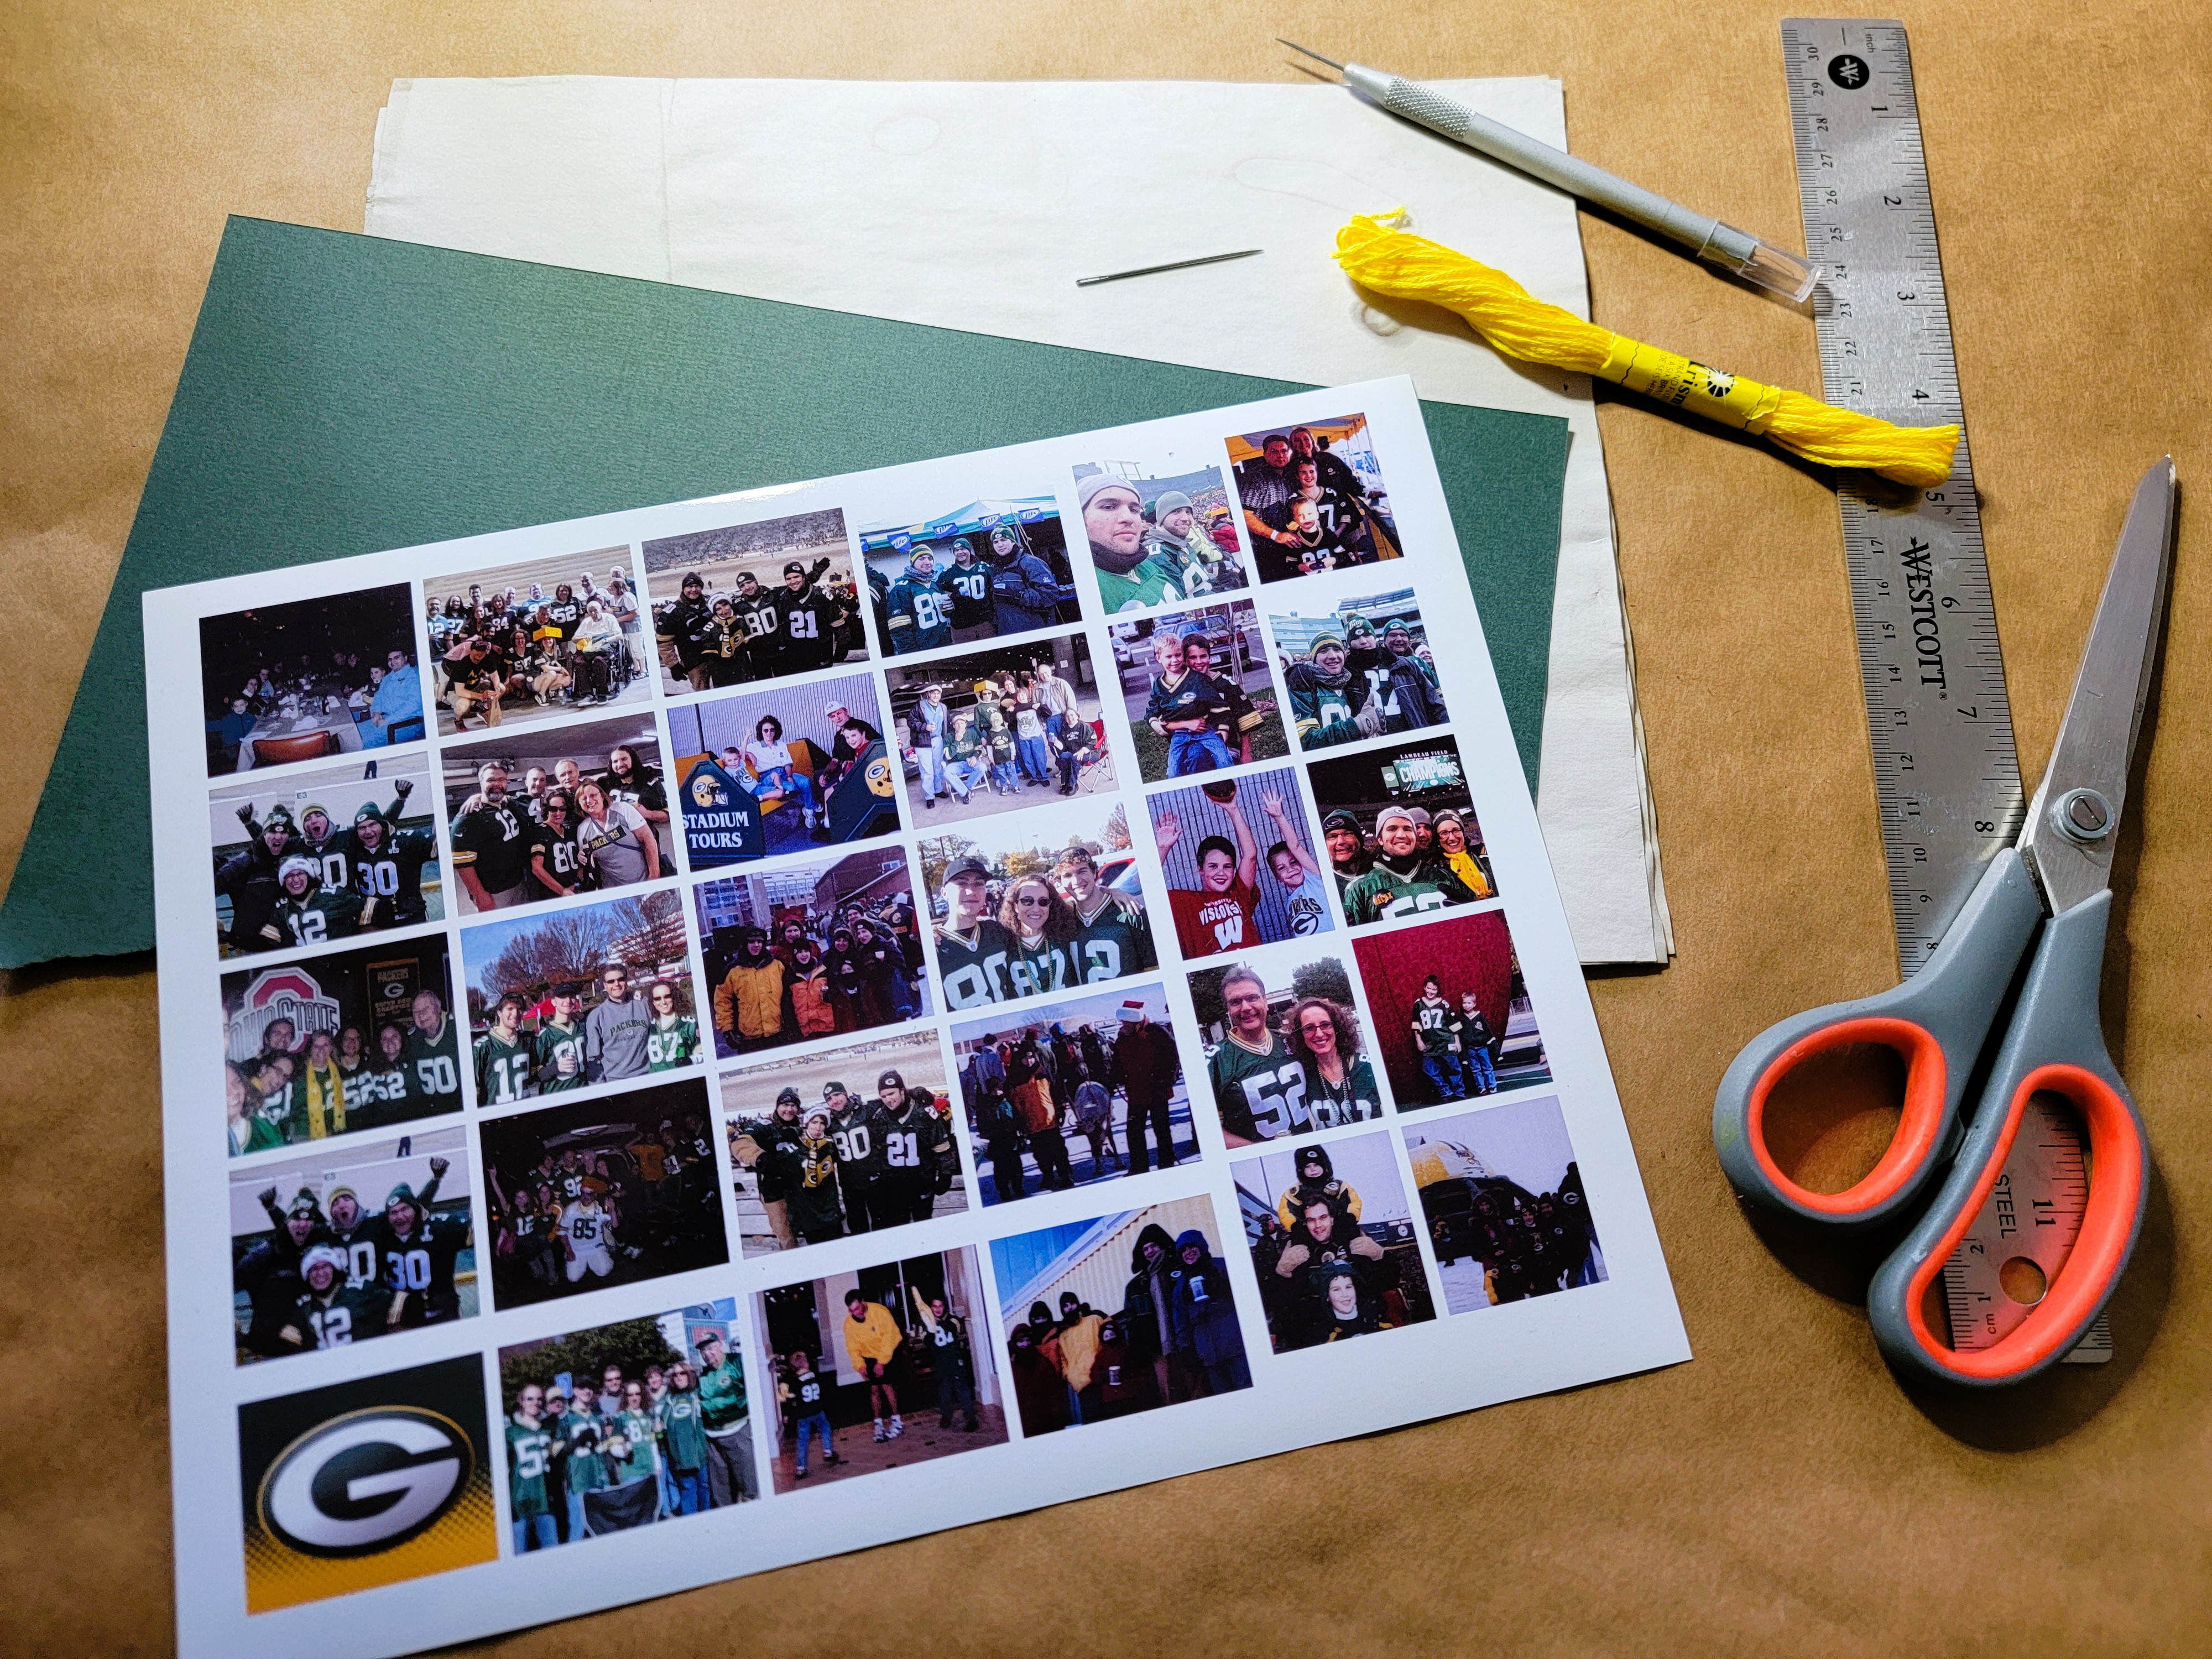
Step 1 – Gather Materials
You need the following:
- Printer or copy paper (for the pages)
- Heavier weight paper / colored cardstock (for the cover)
- Scissors
- A ruler
- Household glue (not shown)
- Paper clips (not shown)
- Embroidery floss, baker’s twine or similar thread
- A small awl or pokey tool (optional)
- Needle (with an eye big enough for your thread)
- Small photos (see step 2 for how to)
.
Step 2 – Prepare Your Photos
There are several methods for getting your photos into a small size to fit your ornament. Many photo apps give you the option to print out a sheet with thumbnail sizes.
I use the Canva app and have created a template for the sizes of photos I used. You can access the template below, then upload your photos to the app, and drag and drop them into the photo grids. Once you have all your photos, go to Share, then Download the file so you can print it.
https://www.canva.com/design/DAG6Ncfb3FU/JEfMGu0TA5B09v6OHb6w6A/edit
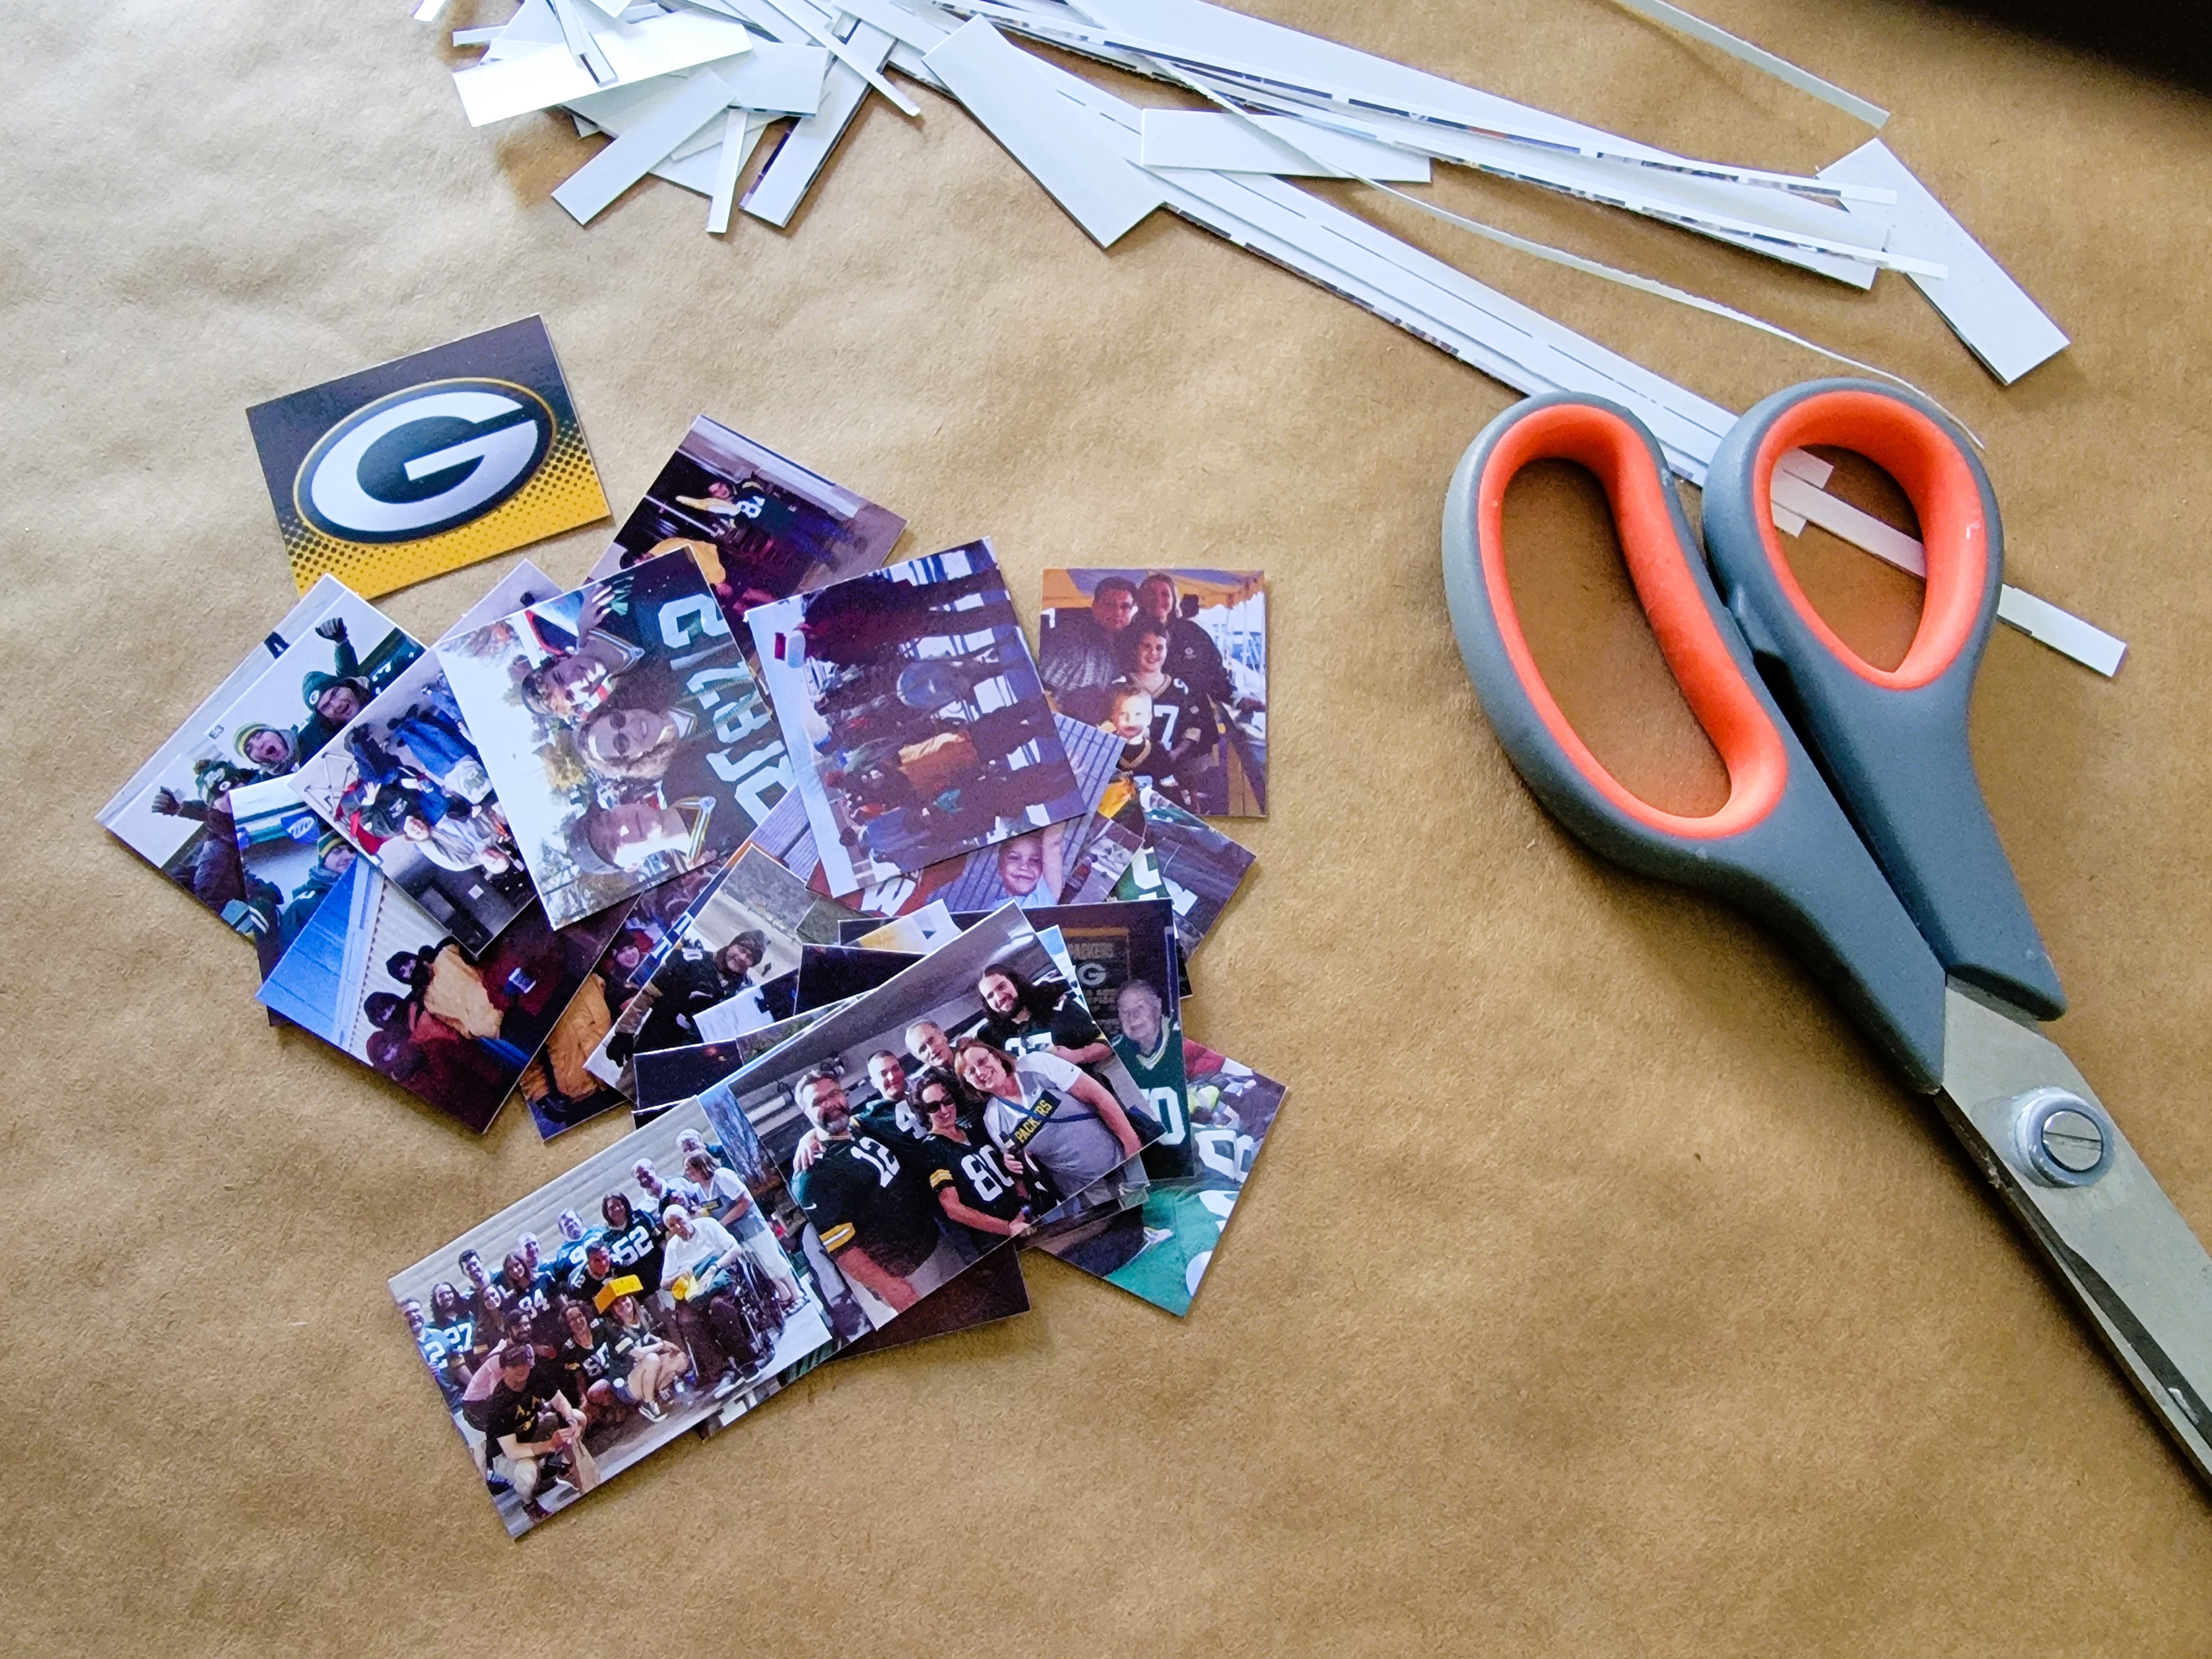
After printing, you’ll need to cut out all of your photos.
.
Step 3 – Determine Number of Paper Pieces Needed
- Count the number of photos you want to include.
- Decide if you want one photo on every page, or if you want to use alternate pages to write a caption (see below).
- If you choose one photo on every page, you’ll need 1 paper strip for every 4 photos.
- If you want to leave every other page black, you’ll need 1 paper strip for every 2 photos.
- I have 29 photos, and want one on every page, so I need 8 paper strips (8 x 4 = 32, with a few blank pages at the back).
.
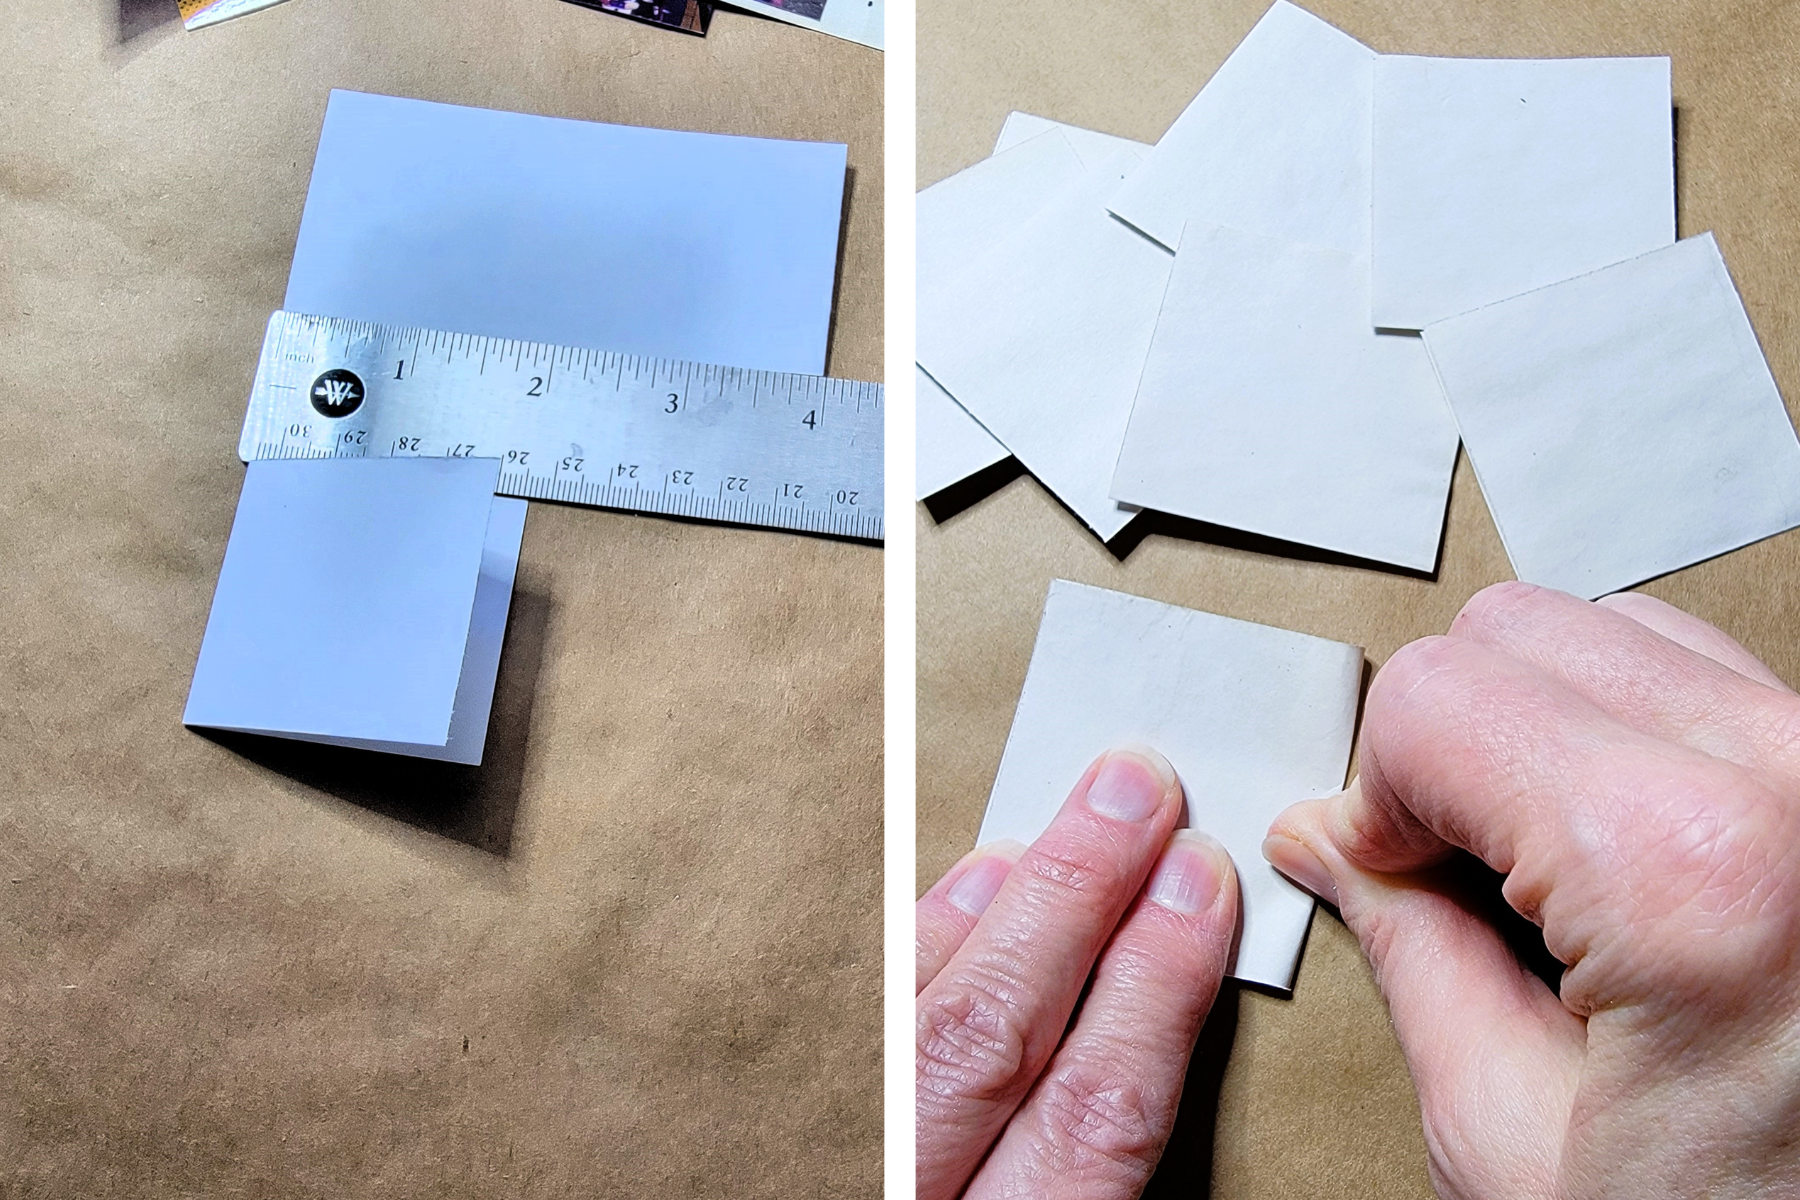
Step 4 – Cut and Fold the Paper Strips
- To determine the size of your paper strips, you first need to measure the size of your photos.
- If you used my Canva template, your photos will be 1-3/4” x 1-3/8” and 1-1/4” x 1-1/2”.
- I wanted to leave room around the photos for my captions, so decided each page will be 2” high x 2” wide.
- Your paper strips will be same height but double the width. Mine are 2” high by 4” wide.
- Cut the number of paper strips you calculated in step 3.
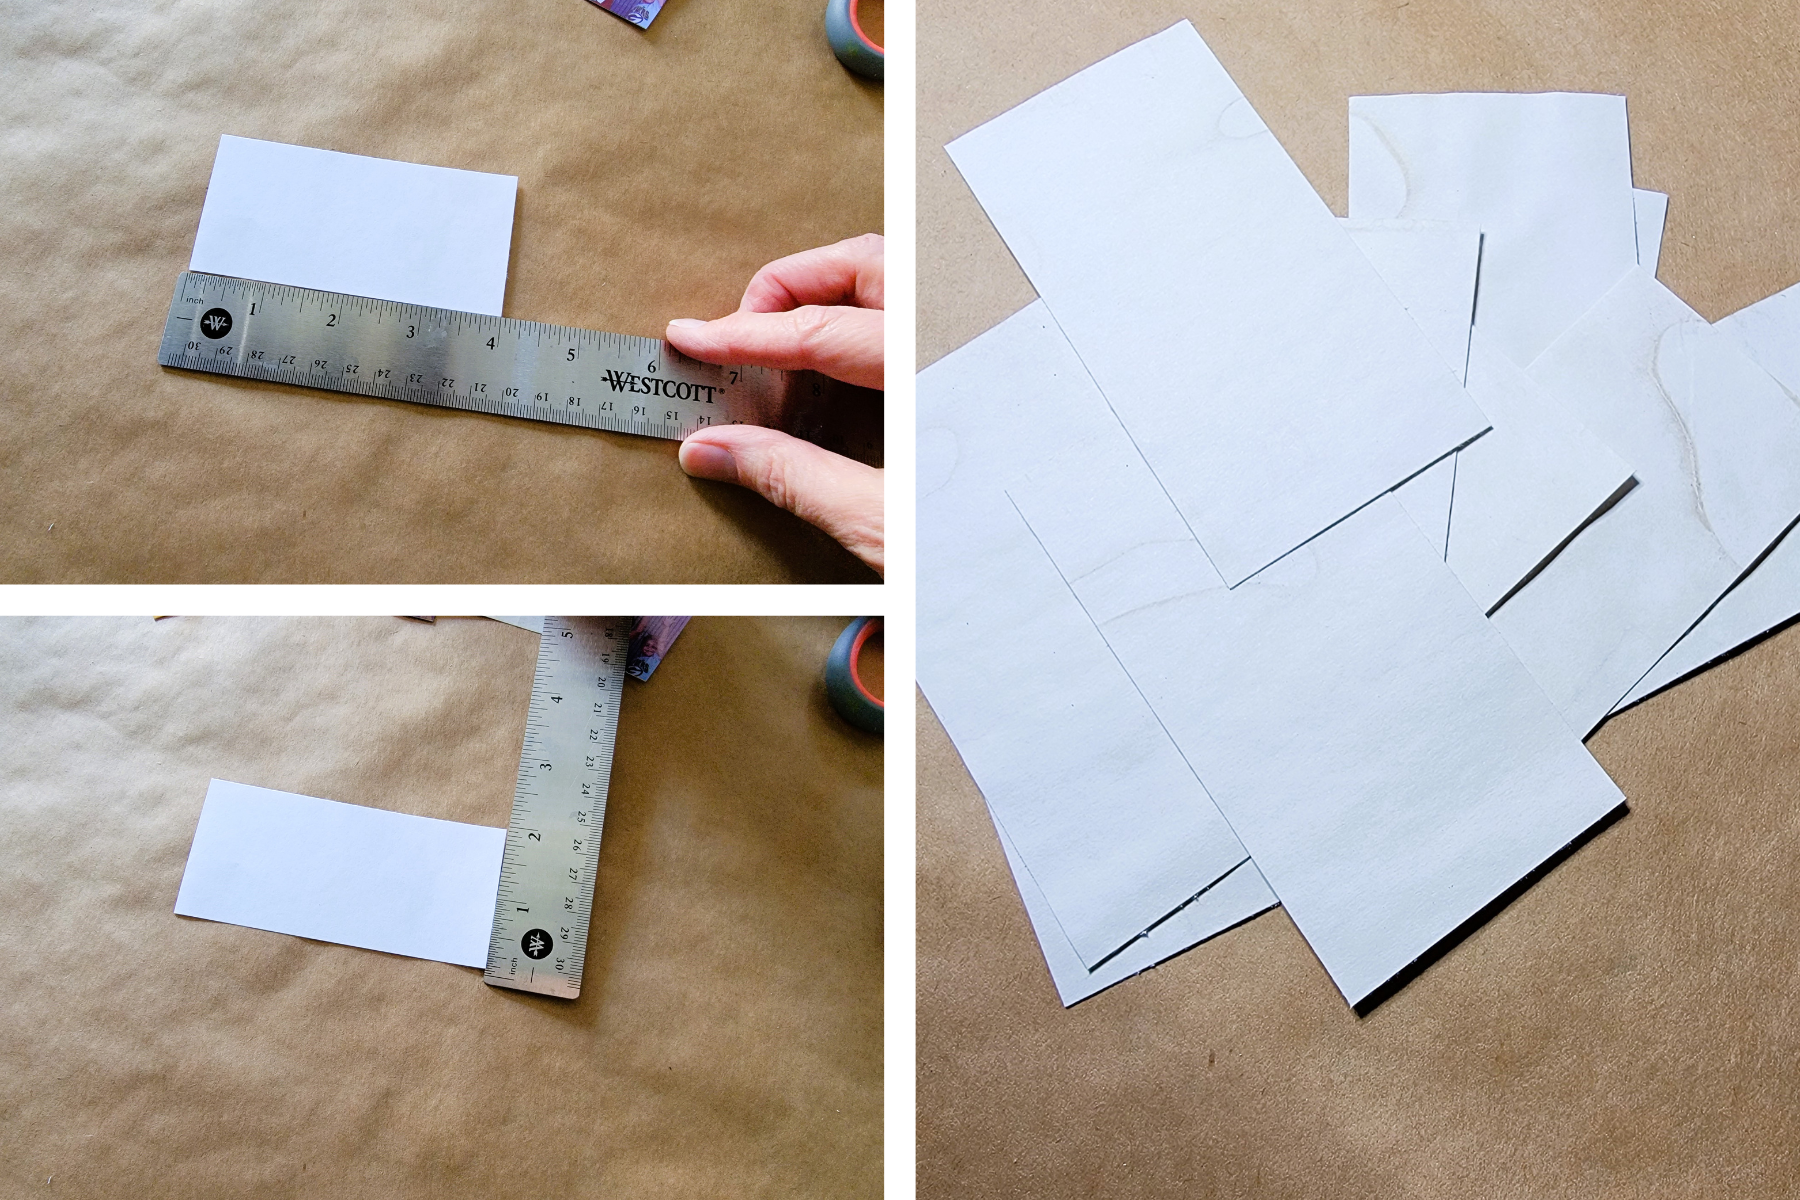
- Fold each of the paper strips in half, and use your thumbnail to get a good crease on the folded edge.
.
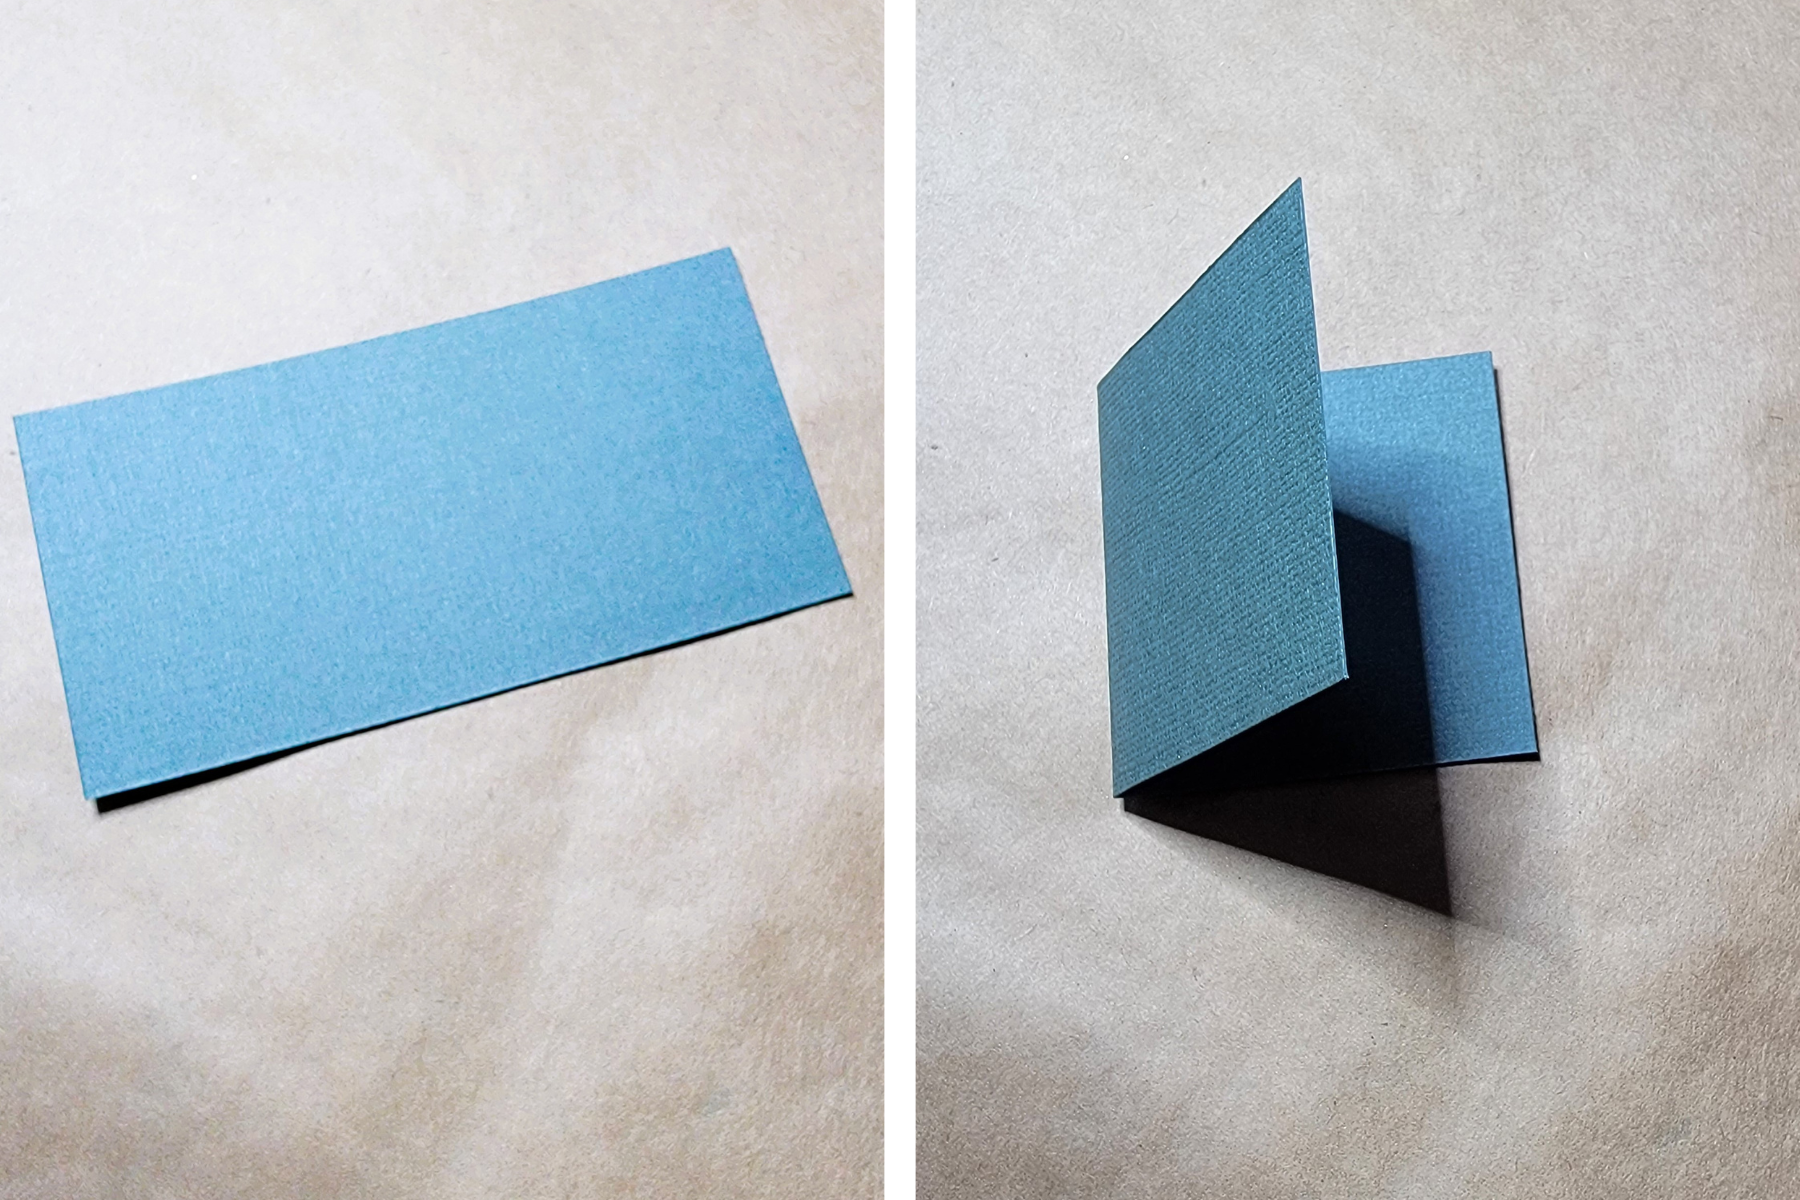
Step 5 – Cut and Fold the Cover
- You will need a cover piece slightly larger than the paper strips you just cut. I added ¼” to both the height and width and cut my piece of cardstock to 4-1/4” x 2-1/4”.
- Fold the cover in half, and use your thumbnail to get a good crease on the folded edge.
.
Step 6 – Assemble Pages and Cover
- Stack the folded paper strips on top of each other, aligning the folds and paper edges.
- Place the folded papers on the cover, keeping the pages in the center of the cover.
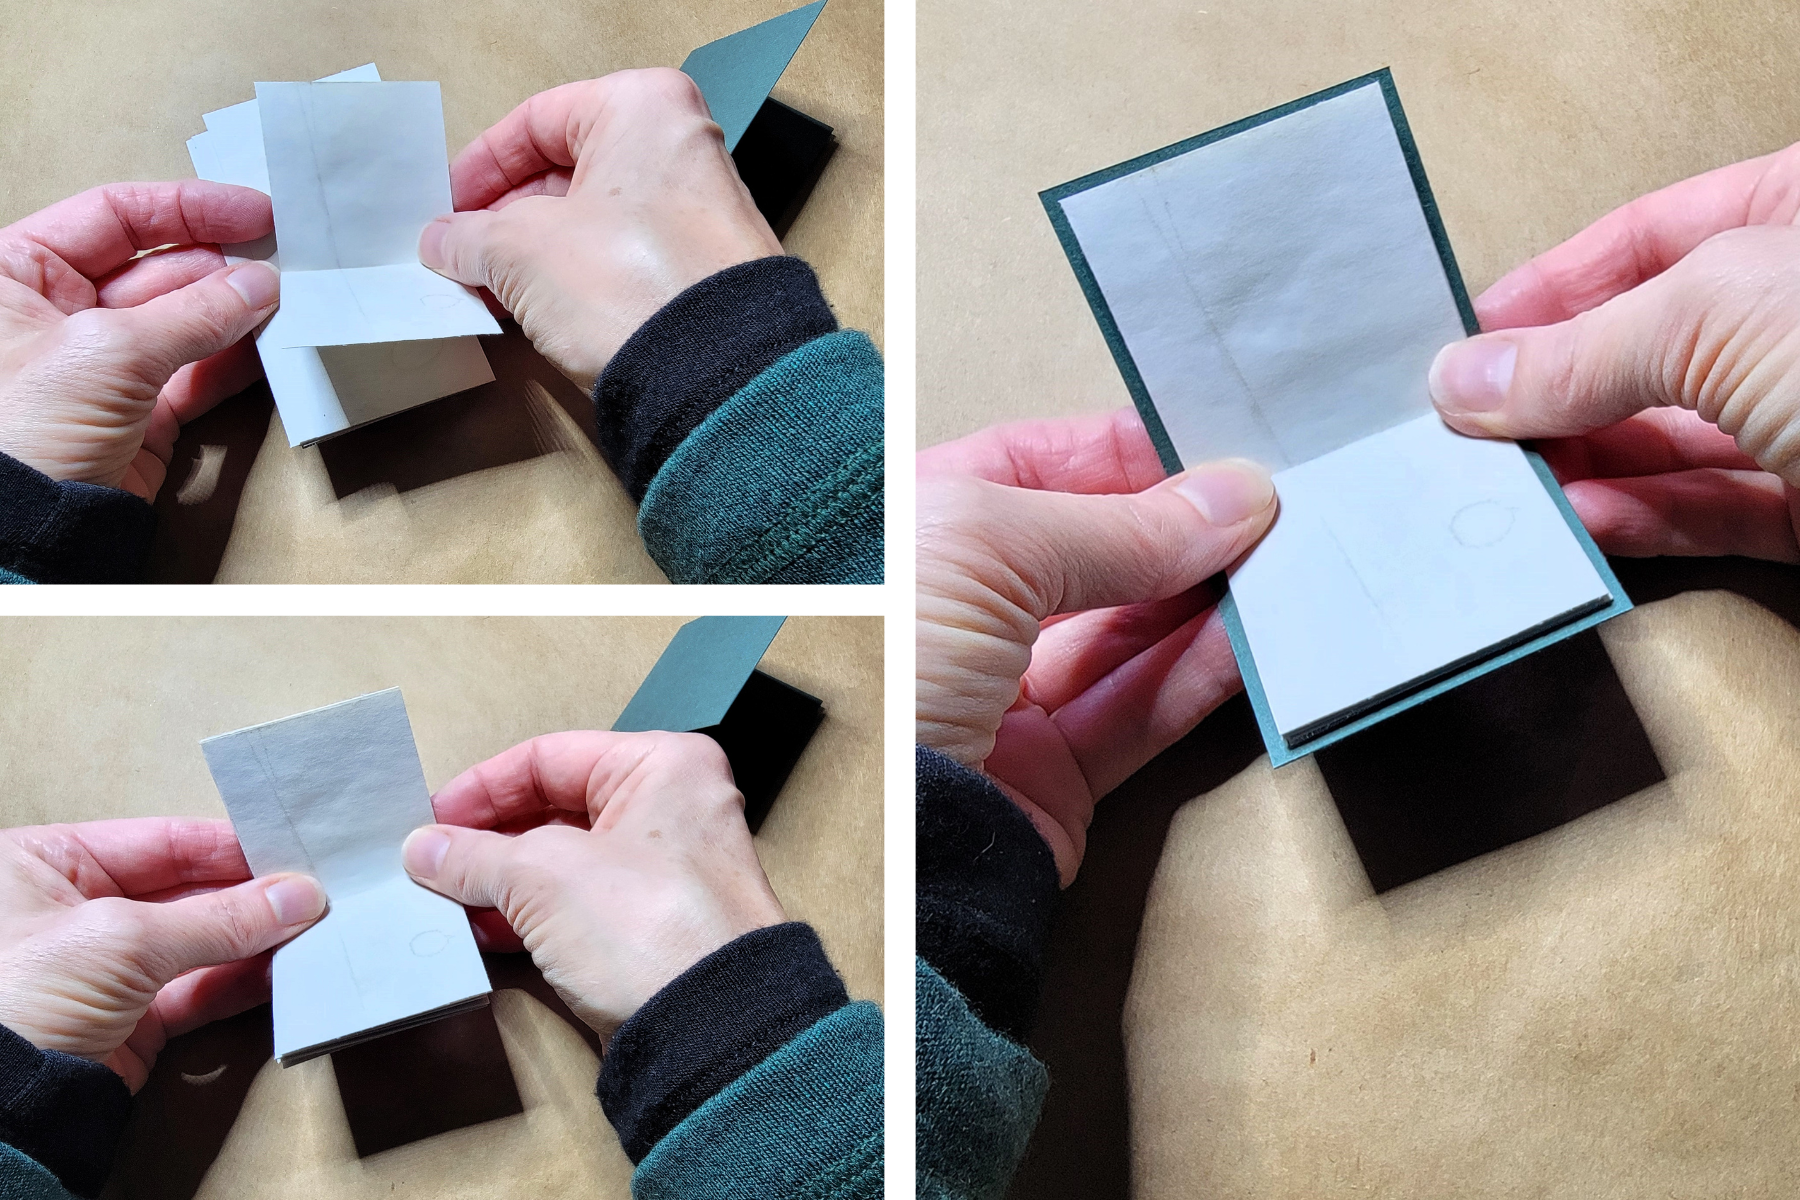
.
- Paper clip the papers to the cover, making sure there are no gaps between the folds of the paper and the fold of the cover.
.
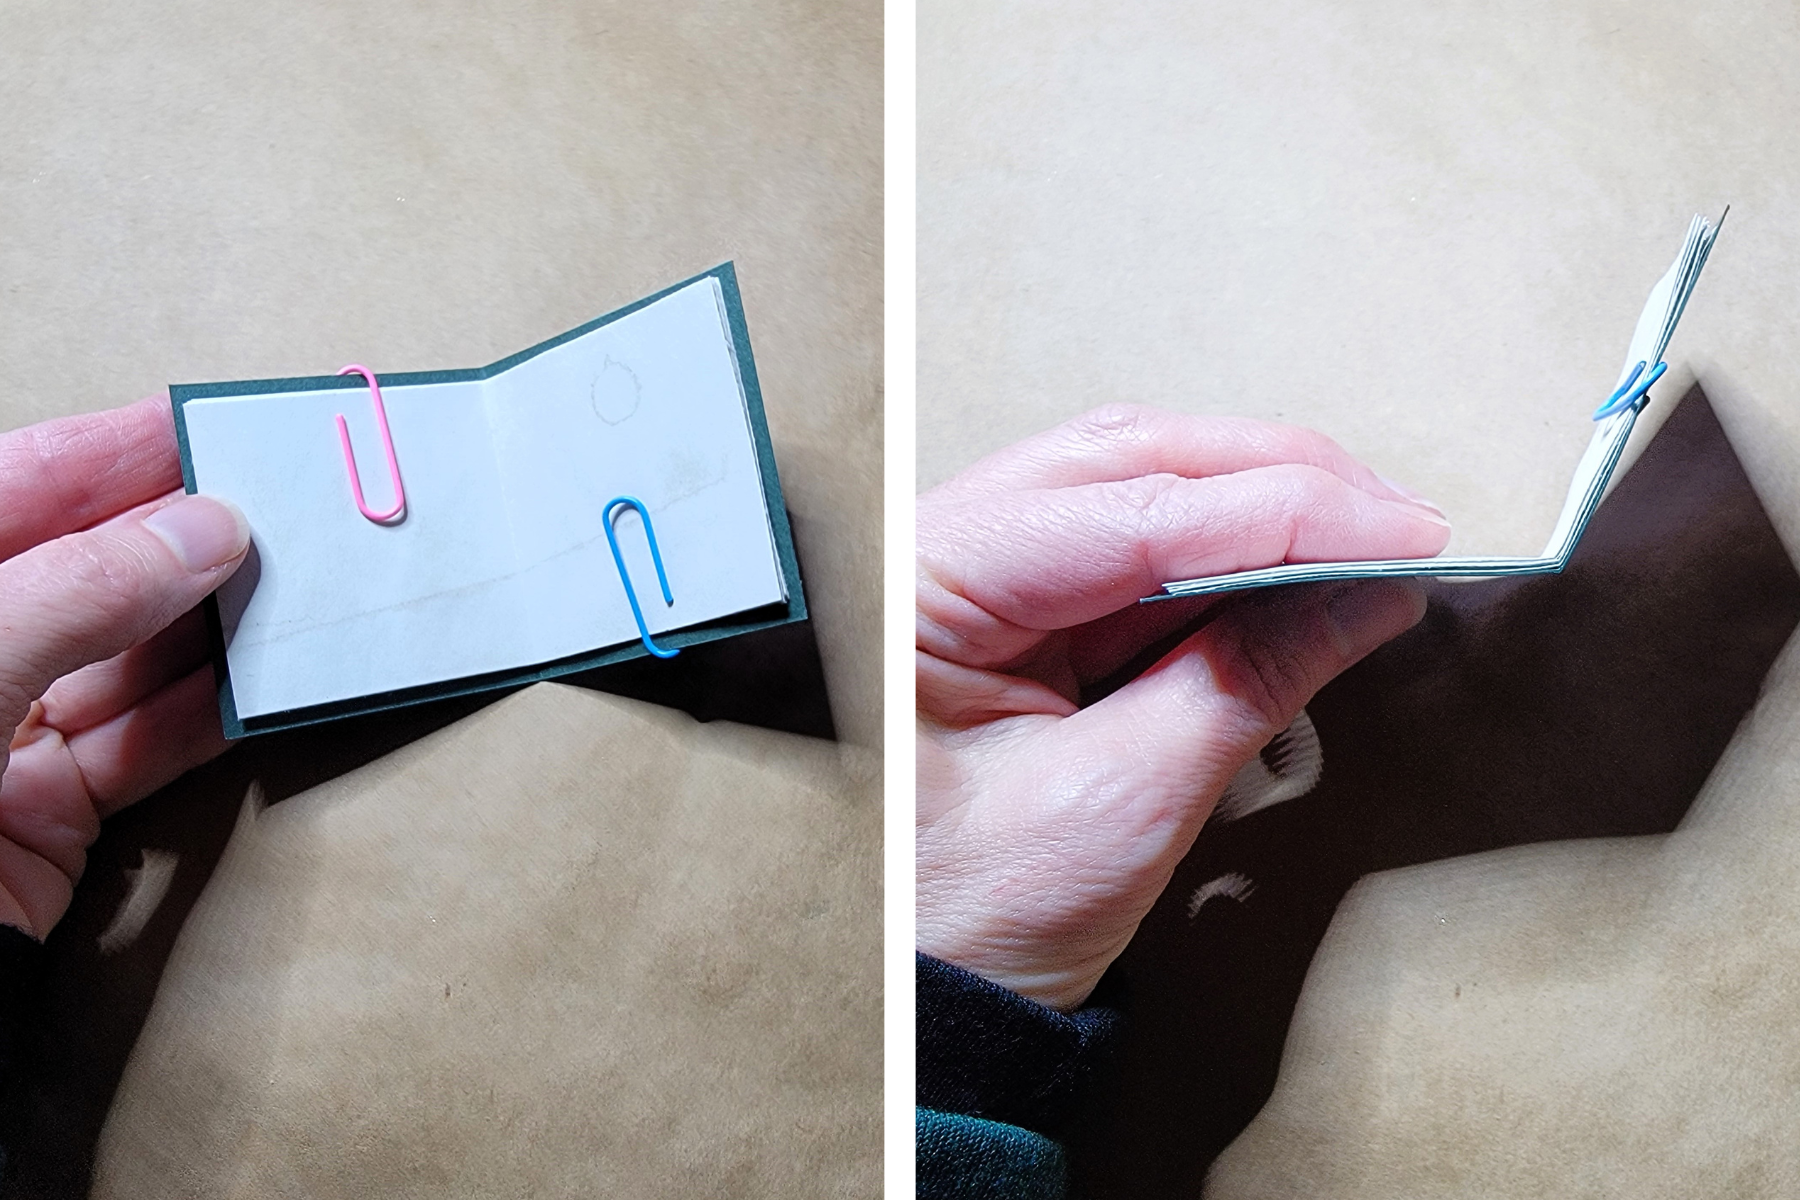
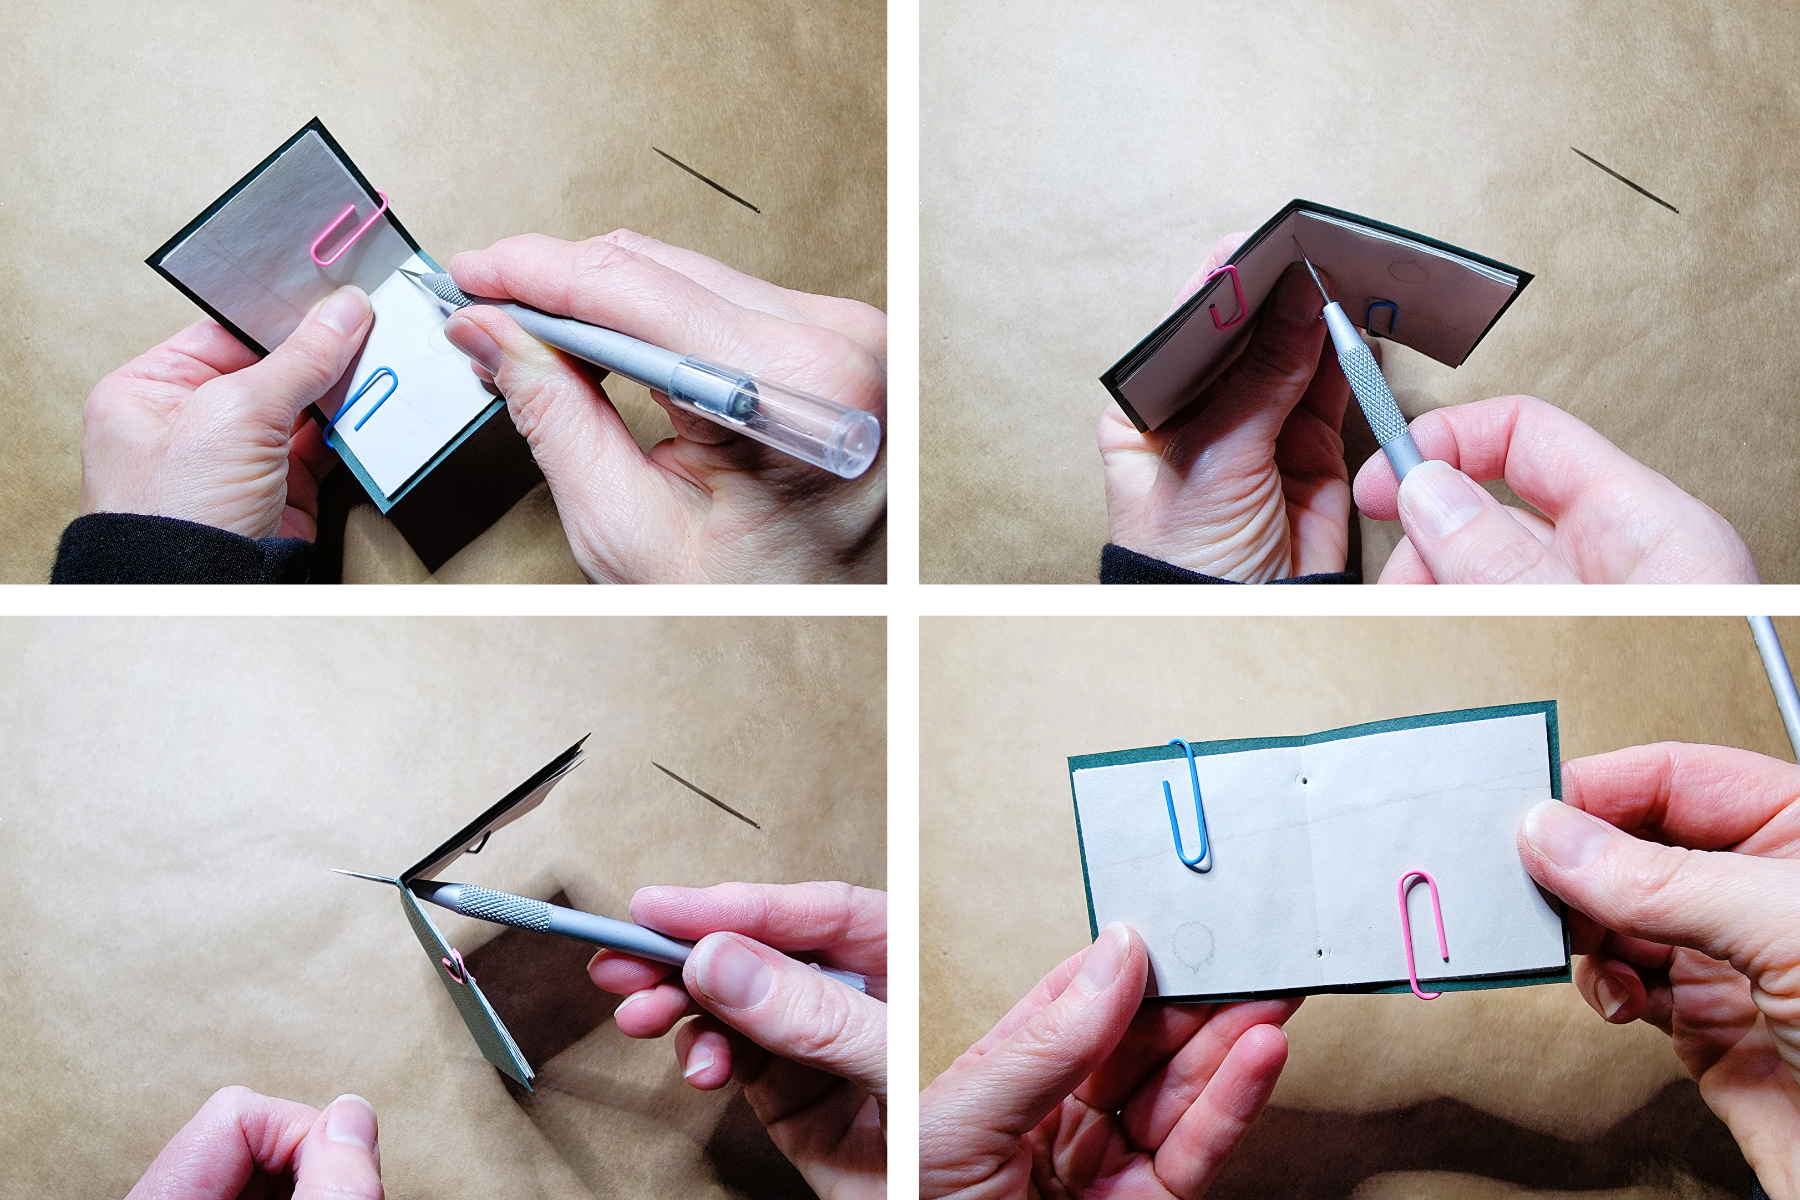
Step 7 – Sew the Pages into the Cover
- Using your awl, pokey tool or the needle, poke a hole through folds of the pages and the cover, about ½” from the top. Be careful to go straight through all the folds.
- Create a second hole about ½” from the bottom.
.
- Cut about 12” of your twine and thread it through the needle.
- From the outside of the cover, push needle through one set of holes in the fold, making sure you go through all of the pages inside. Pull the needle and twine through the hole, leaving a few inches outside.
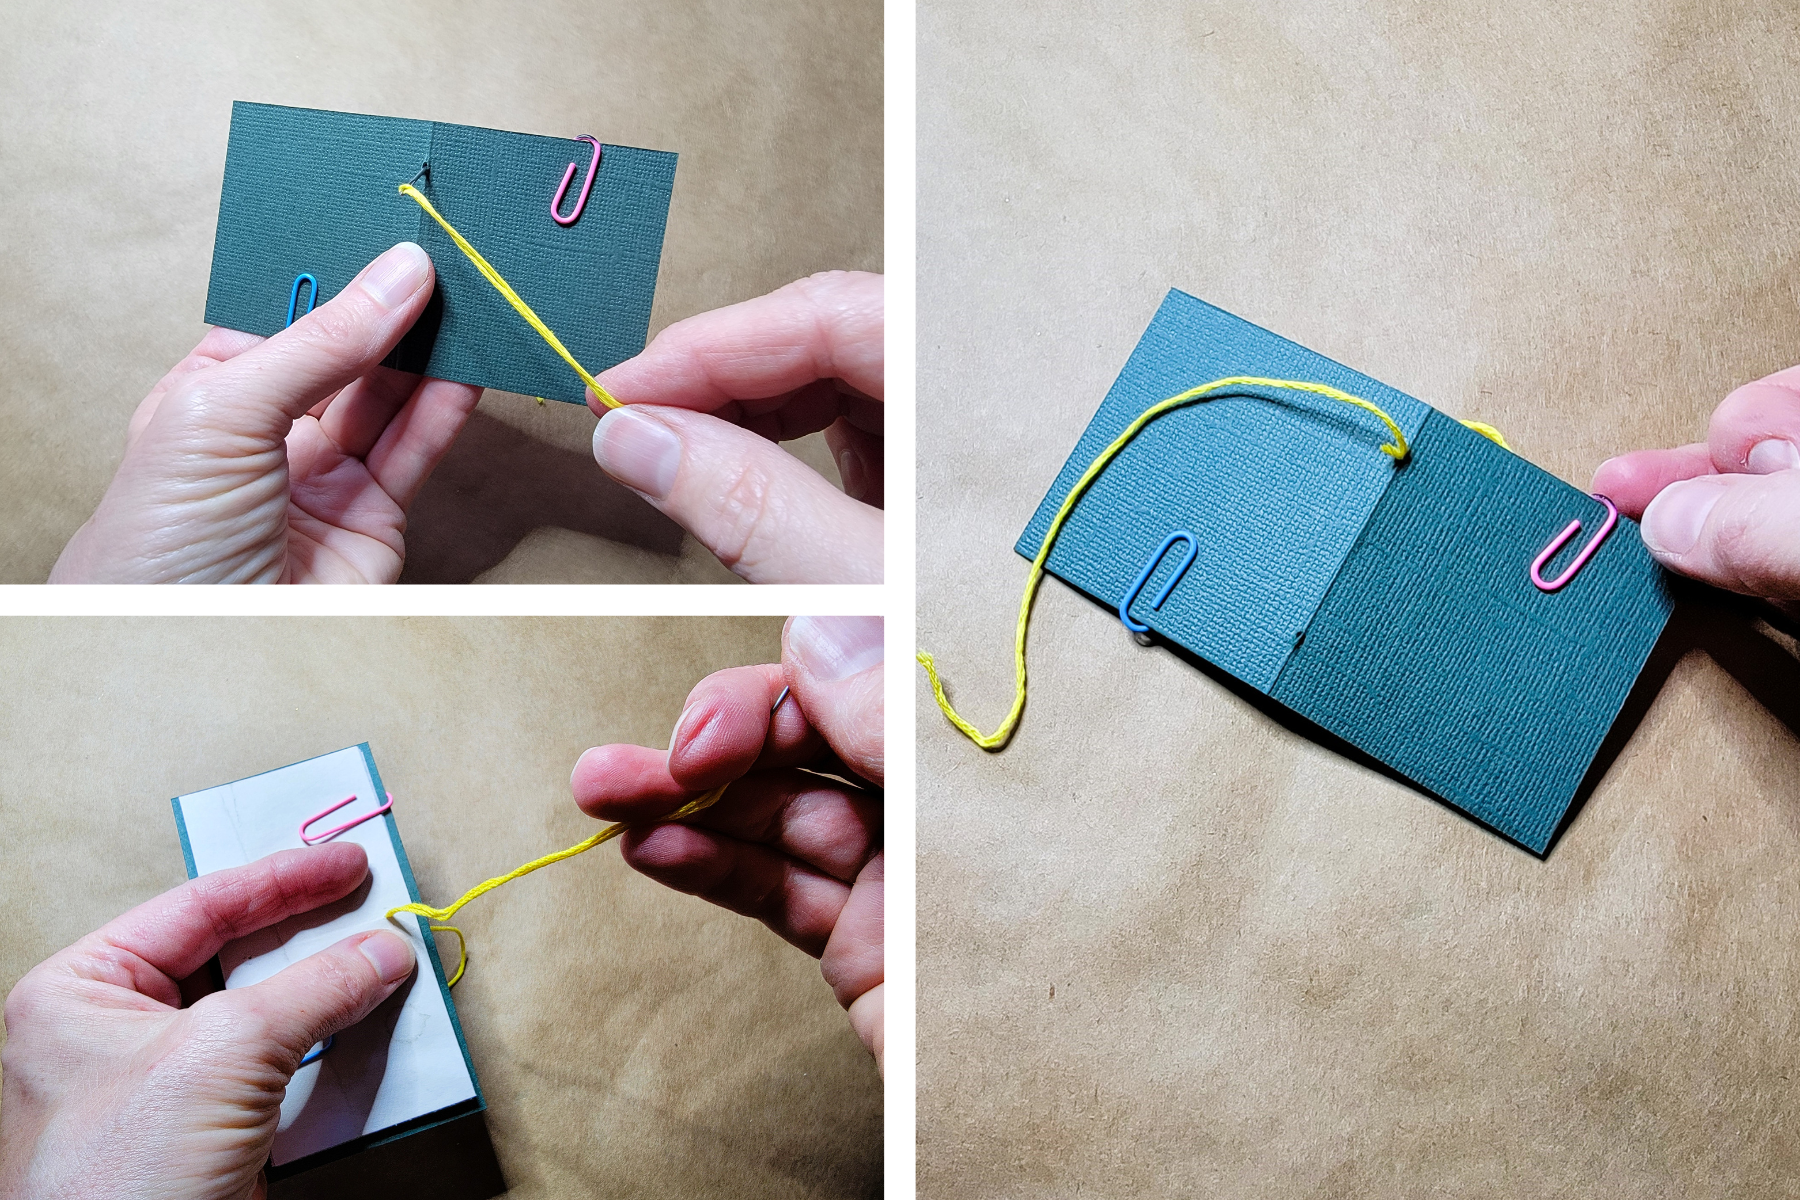
- From the inside, push the needle back out through the second set of holes, and pull snug.
- Remove the needle from the twine.
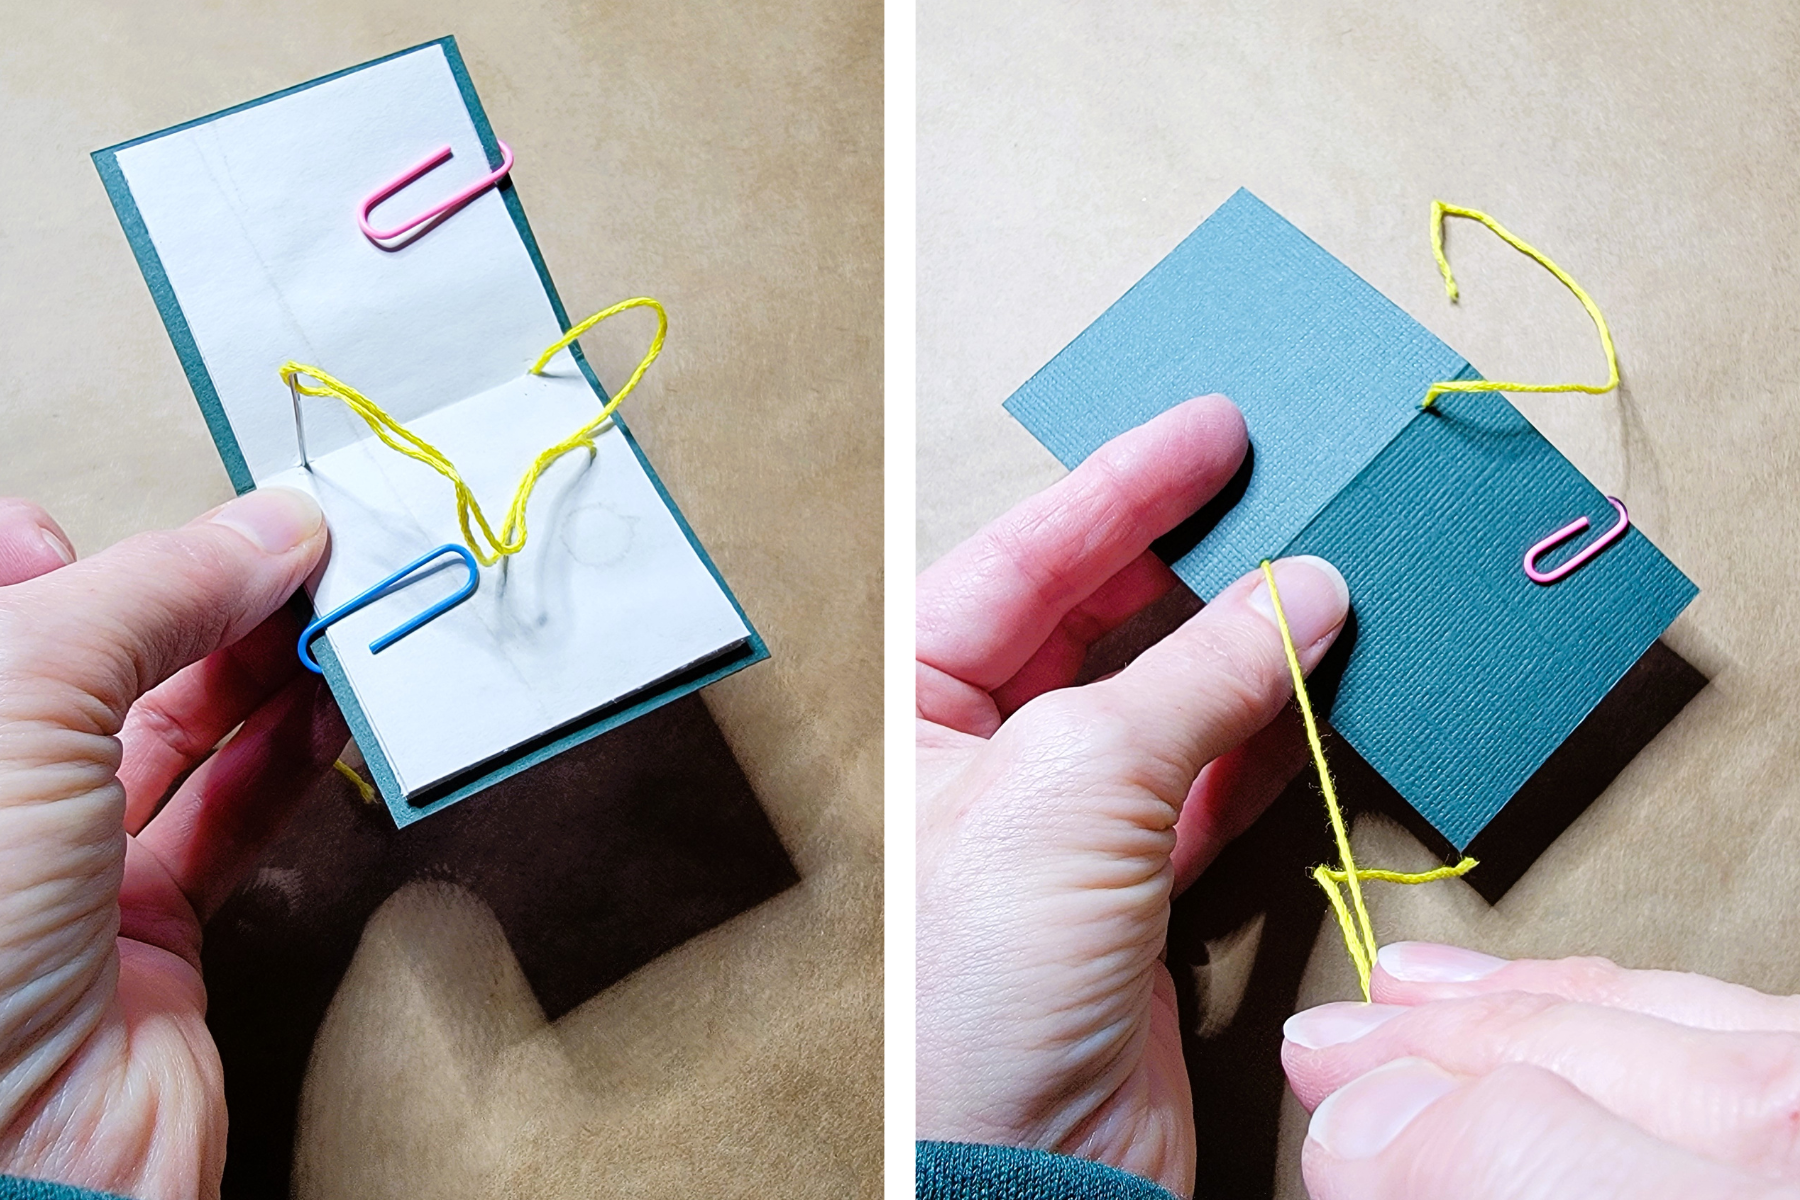
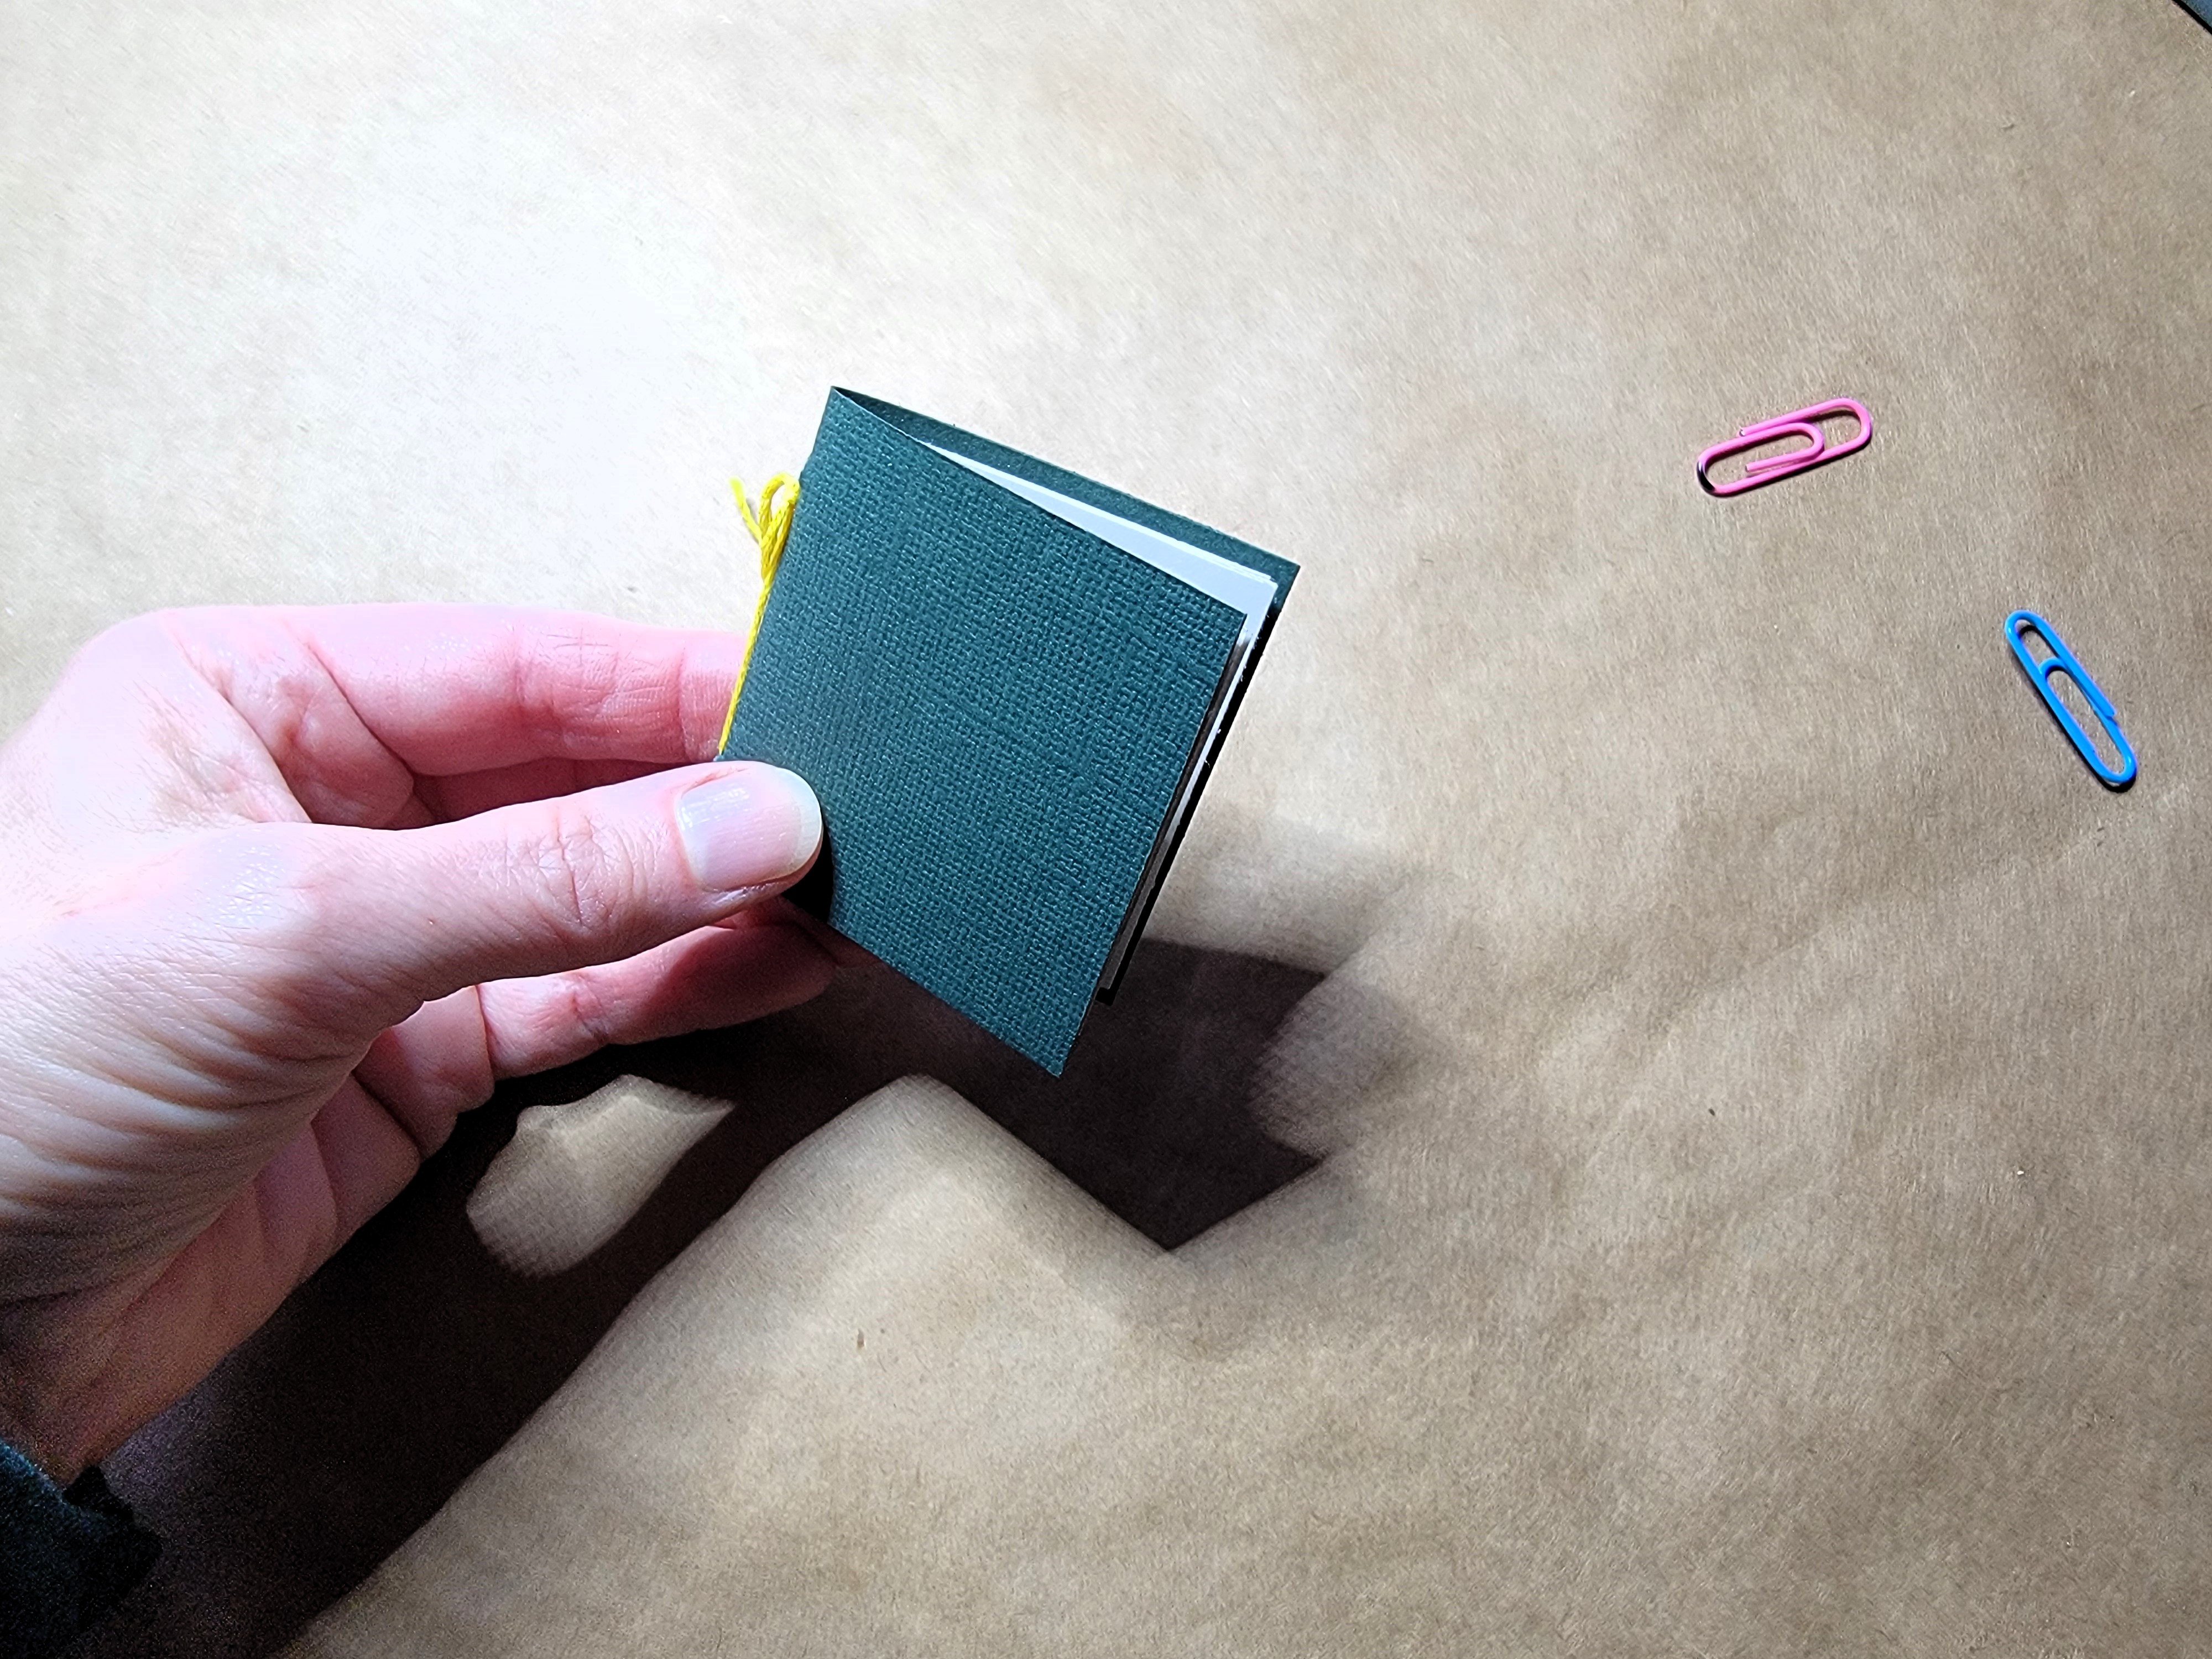
- Pull on both ends of the twine to make sure it’s holding the pages in tight, then tie a knot. You can place the knot anywhere you like, and leave it long, or trim as desired. I put mine near the top, to use as a tassel.
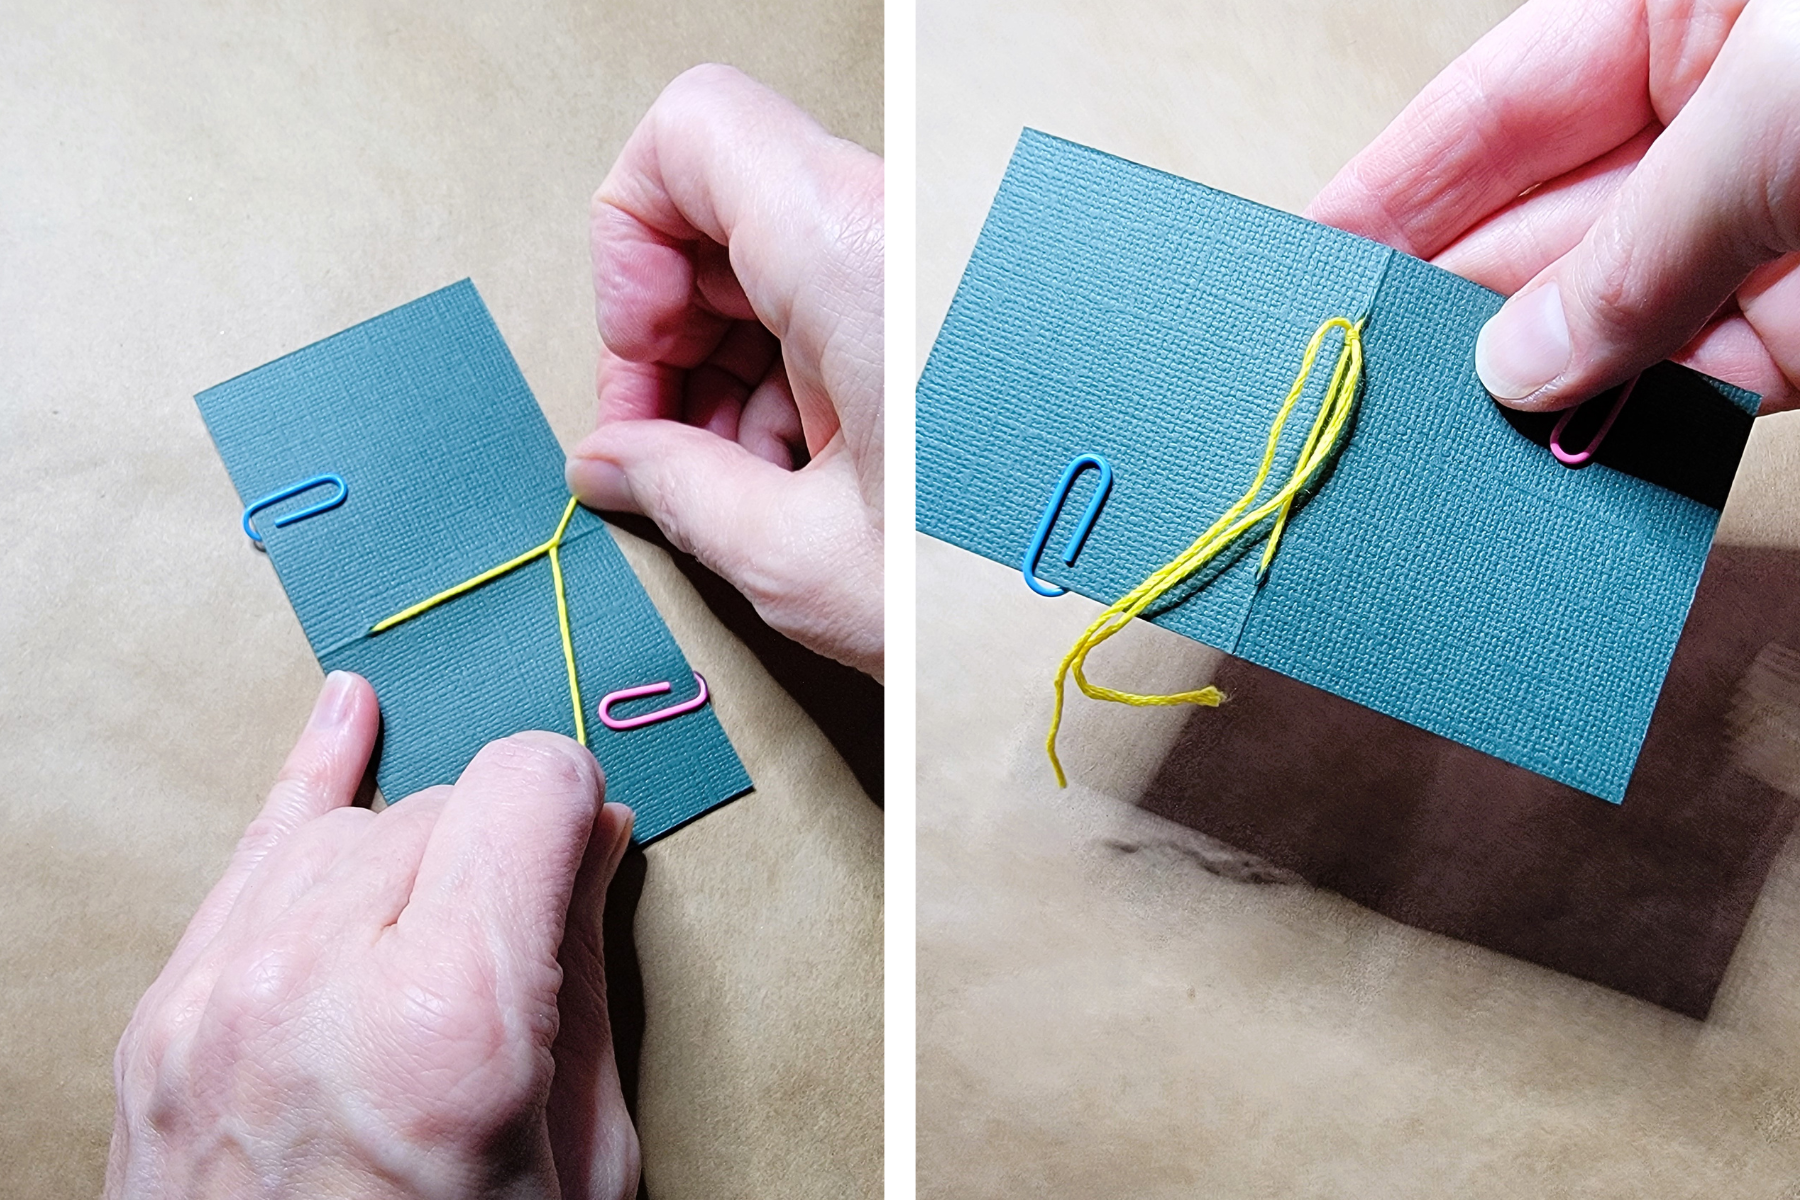
- Remove the paper clips, and your little book is ready to decorate!
.
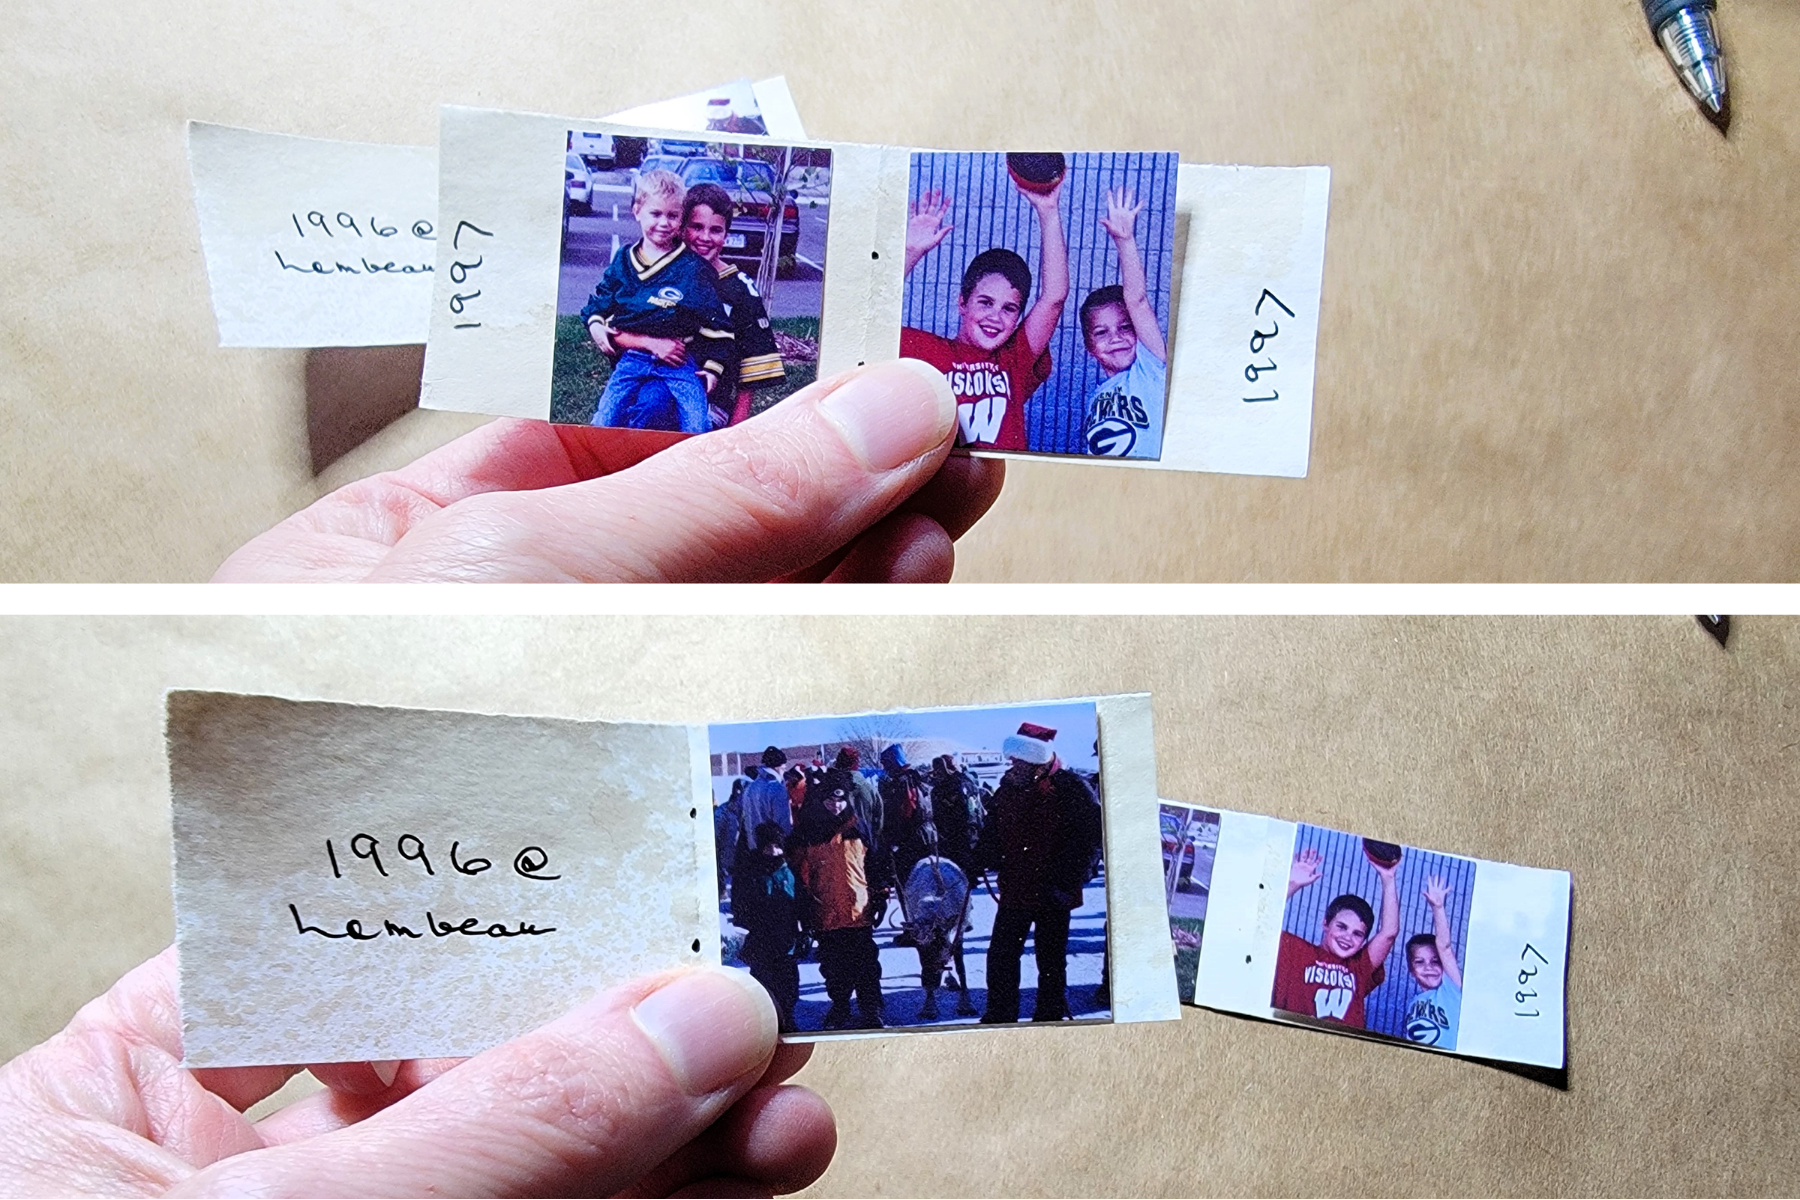
Step 8 – Add Photos and Captions
- Glue the photos onto the pages. You can add one to the cover, too!
- Add captions as desired.
- Adding beads to your tassel is an option, too! Be creative and have fun!
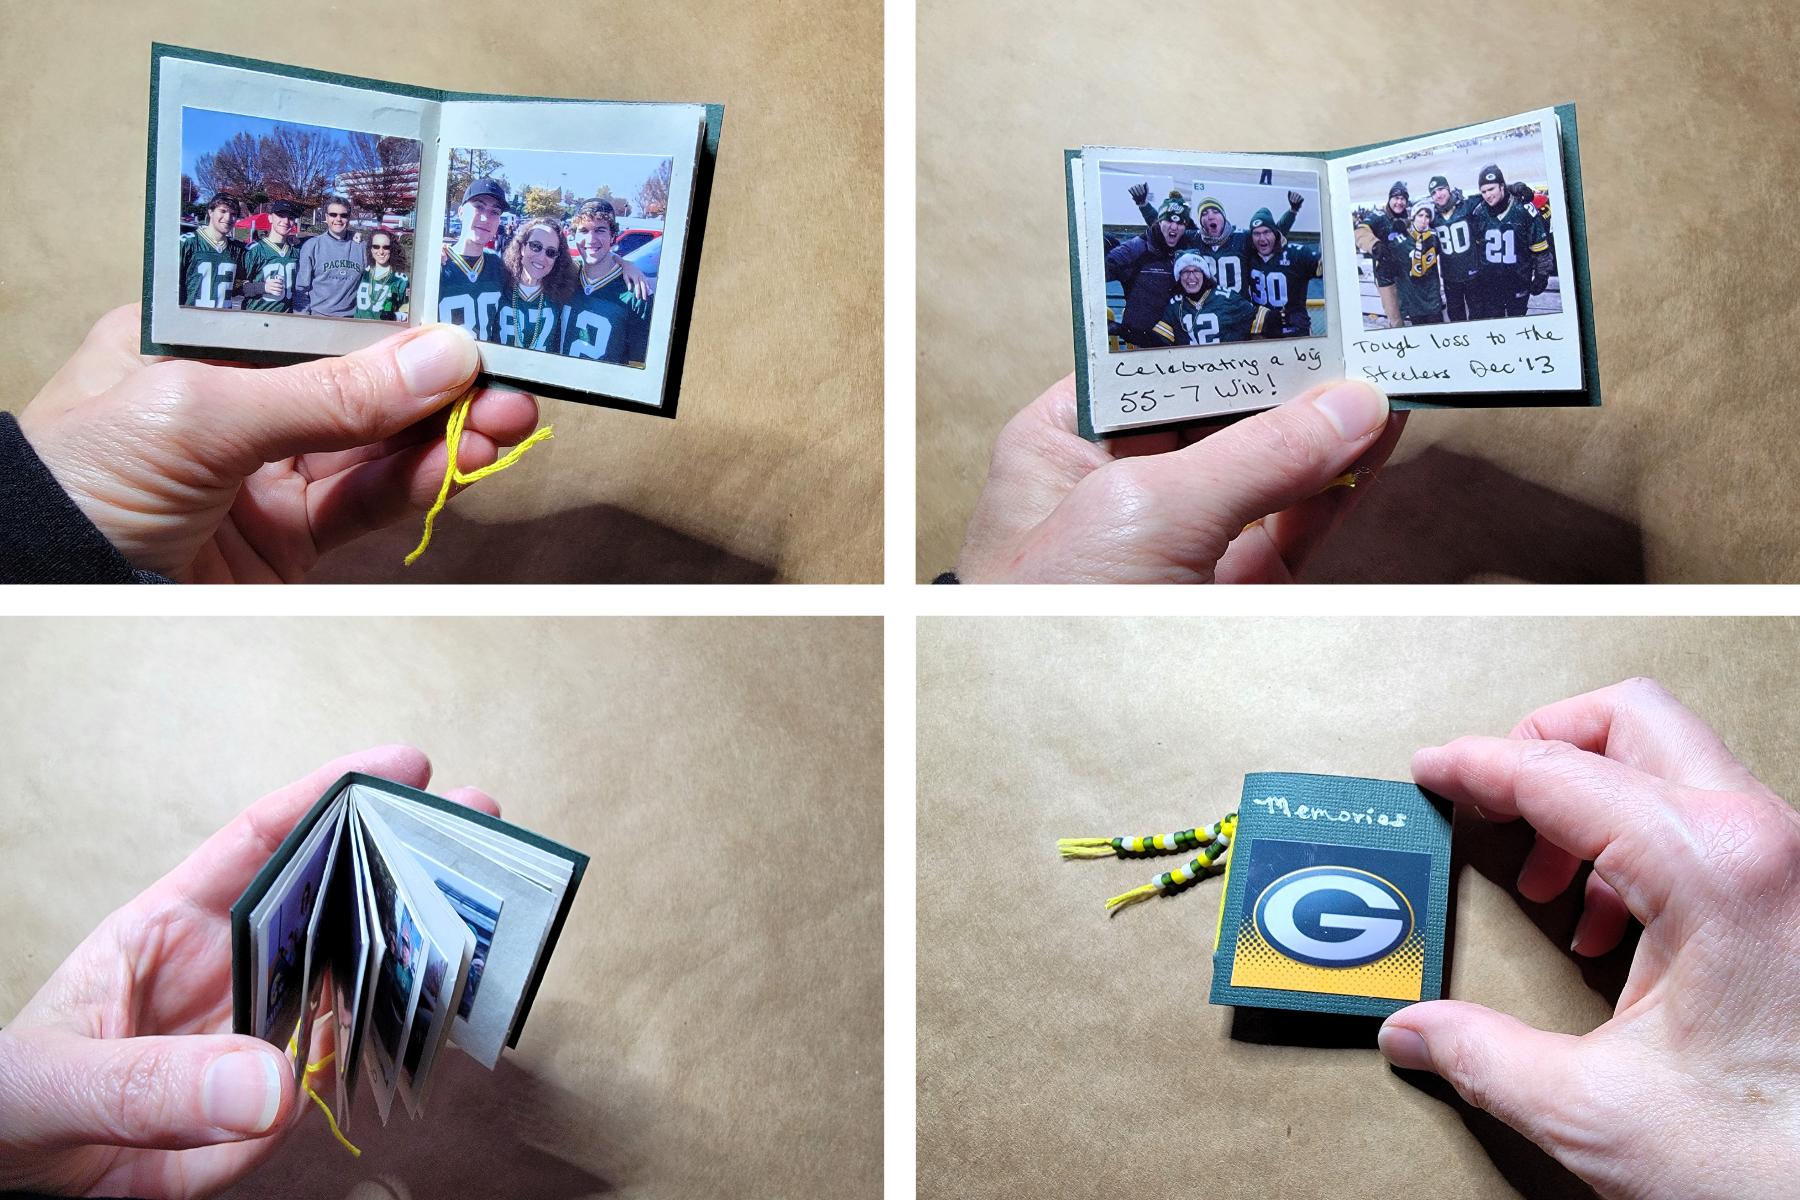
Attach an ornament hook to the twine, and hang your masterpiece on your tree!

This tiny journal may be small, but it’s packed with heart. Whether you fill it with photos, handwritten memories, or both, it’s a keepsake you’ll love revisiting each holiday season. I hope this project inspires you to slow down, get crafty, and hold onto the little moments that make Christmas so special. If you make one, I’d love to see how you fill yours! 🎄📓✨
See you in the new year. Happy Holidays!
Carrie
.