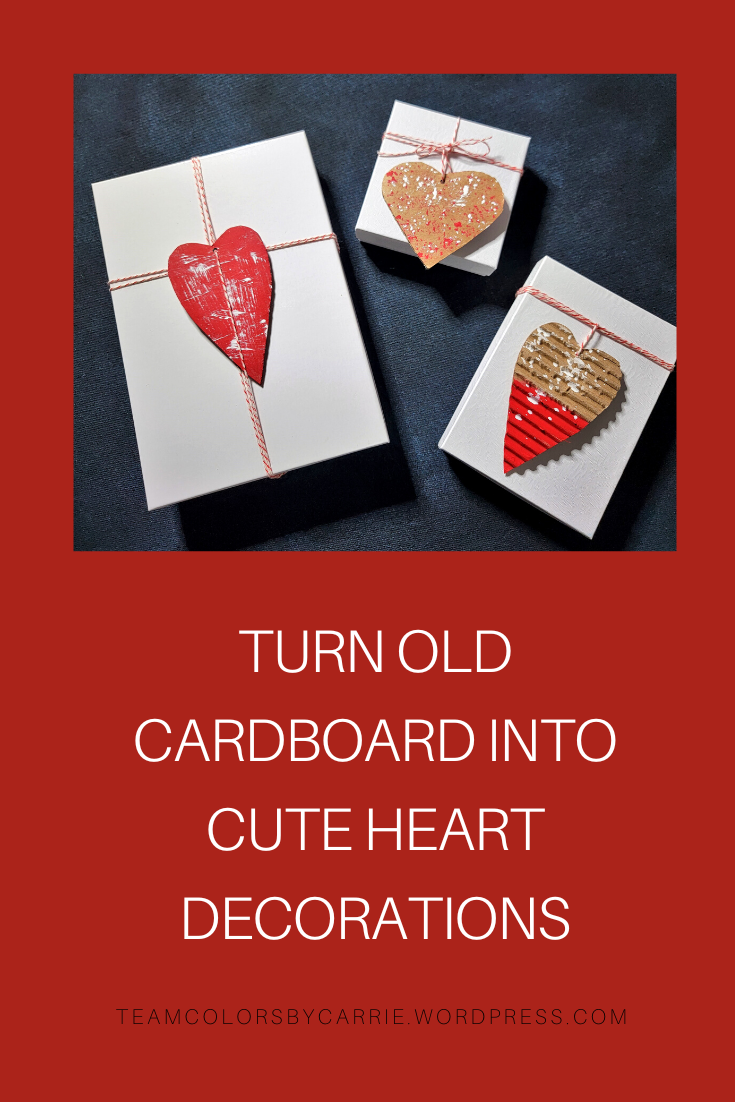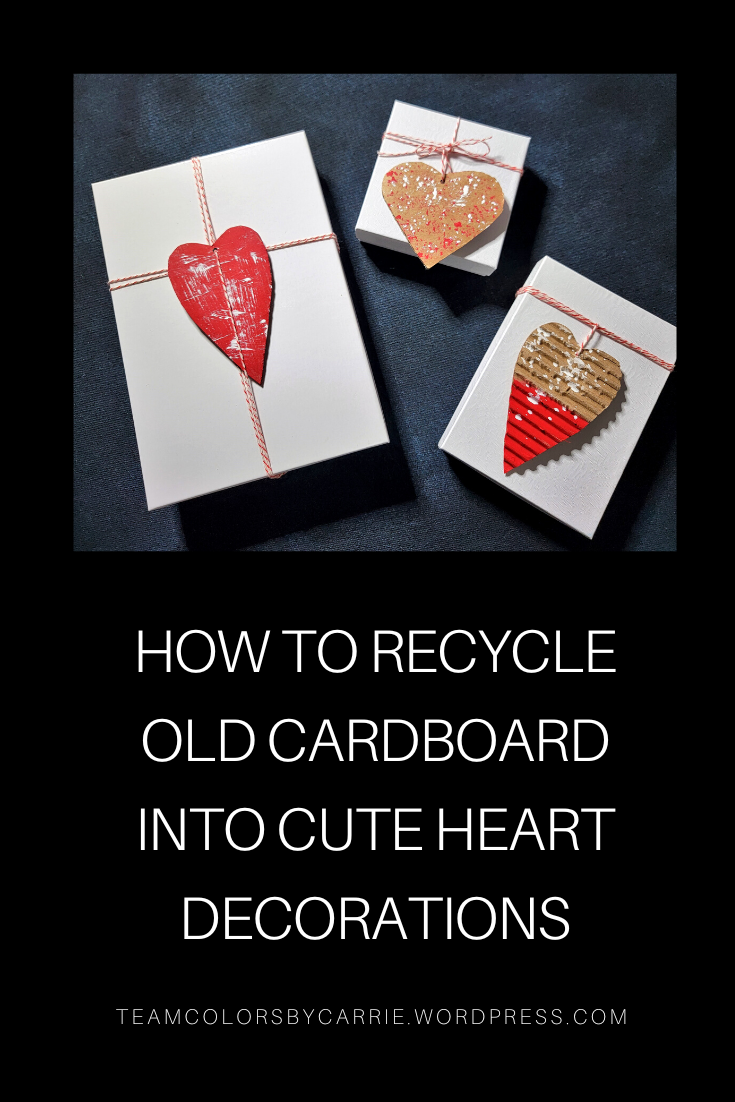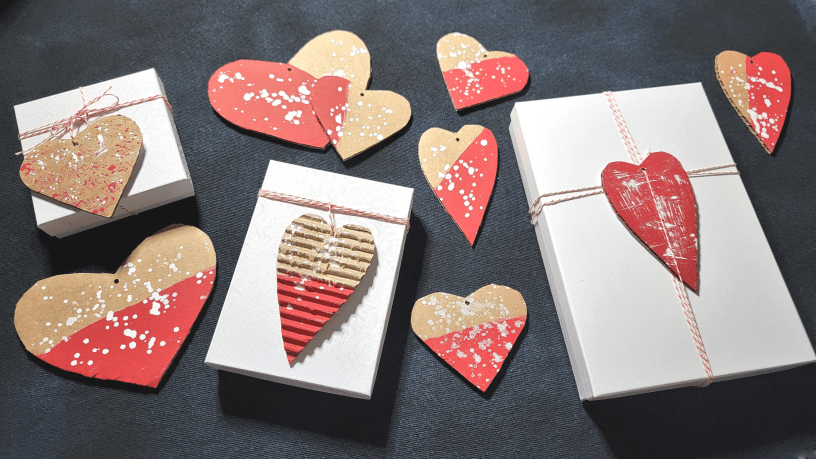
Hearts are often seen as a symbol for love and Valentines Day, but they are everywhere lately, and not just for the holidays! So when I recently saw a video of someone recreating wooden heart ornaments she had purchased for Christmas, I knew I wanted to give it a try.
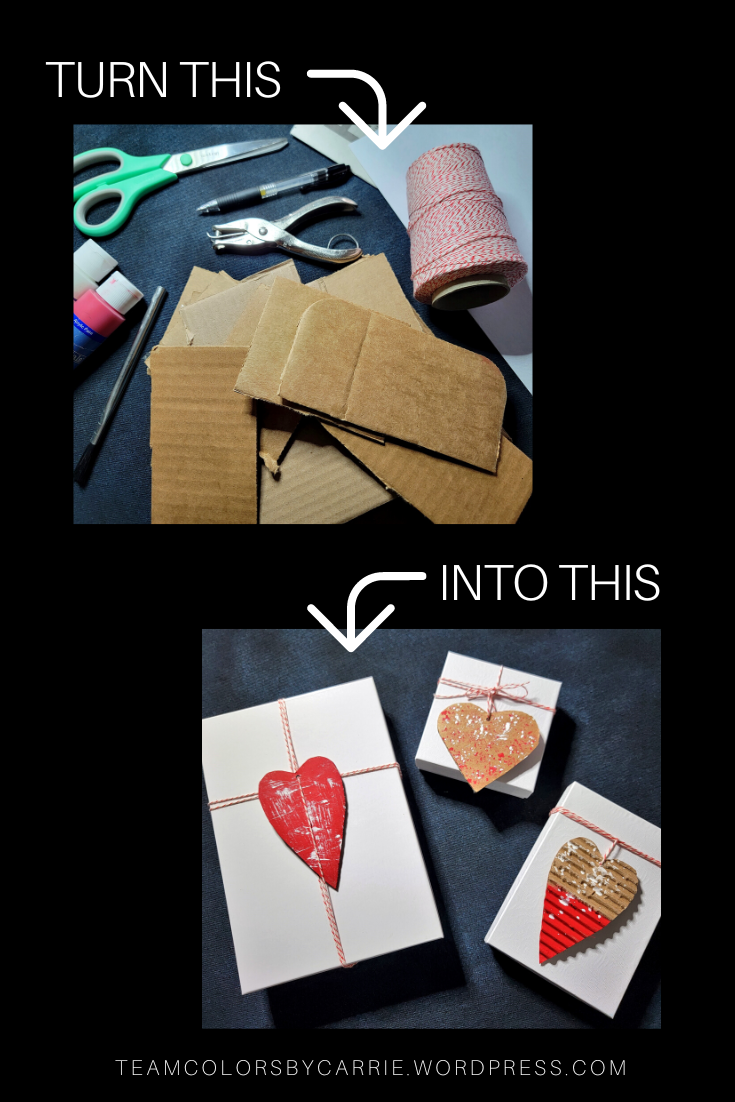
But the first thing on supply list was corrugated paper. I didn’t have any, and I didn’t want to buy some just for one craft project, so I took a look around the house. One thing we have an endless supply of is those boxes that seem to arrive on our front doorstep every other day. So cardboard hearts it was!
I hope you give this easy project a try!
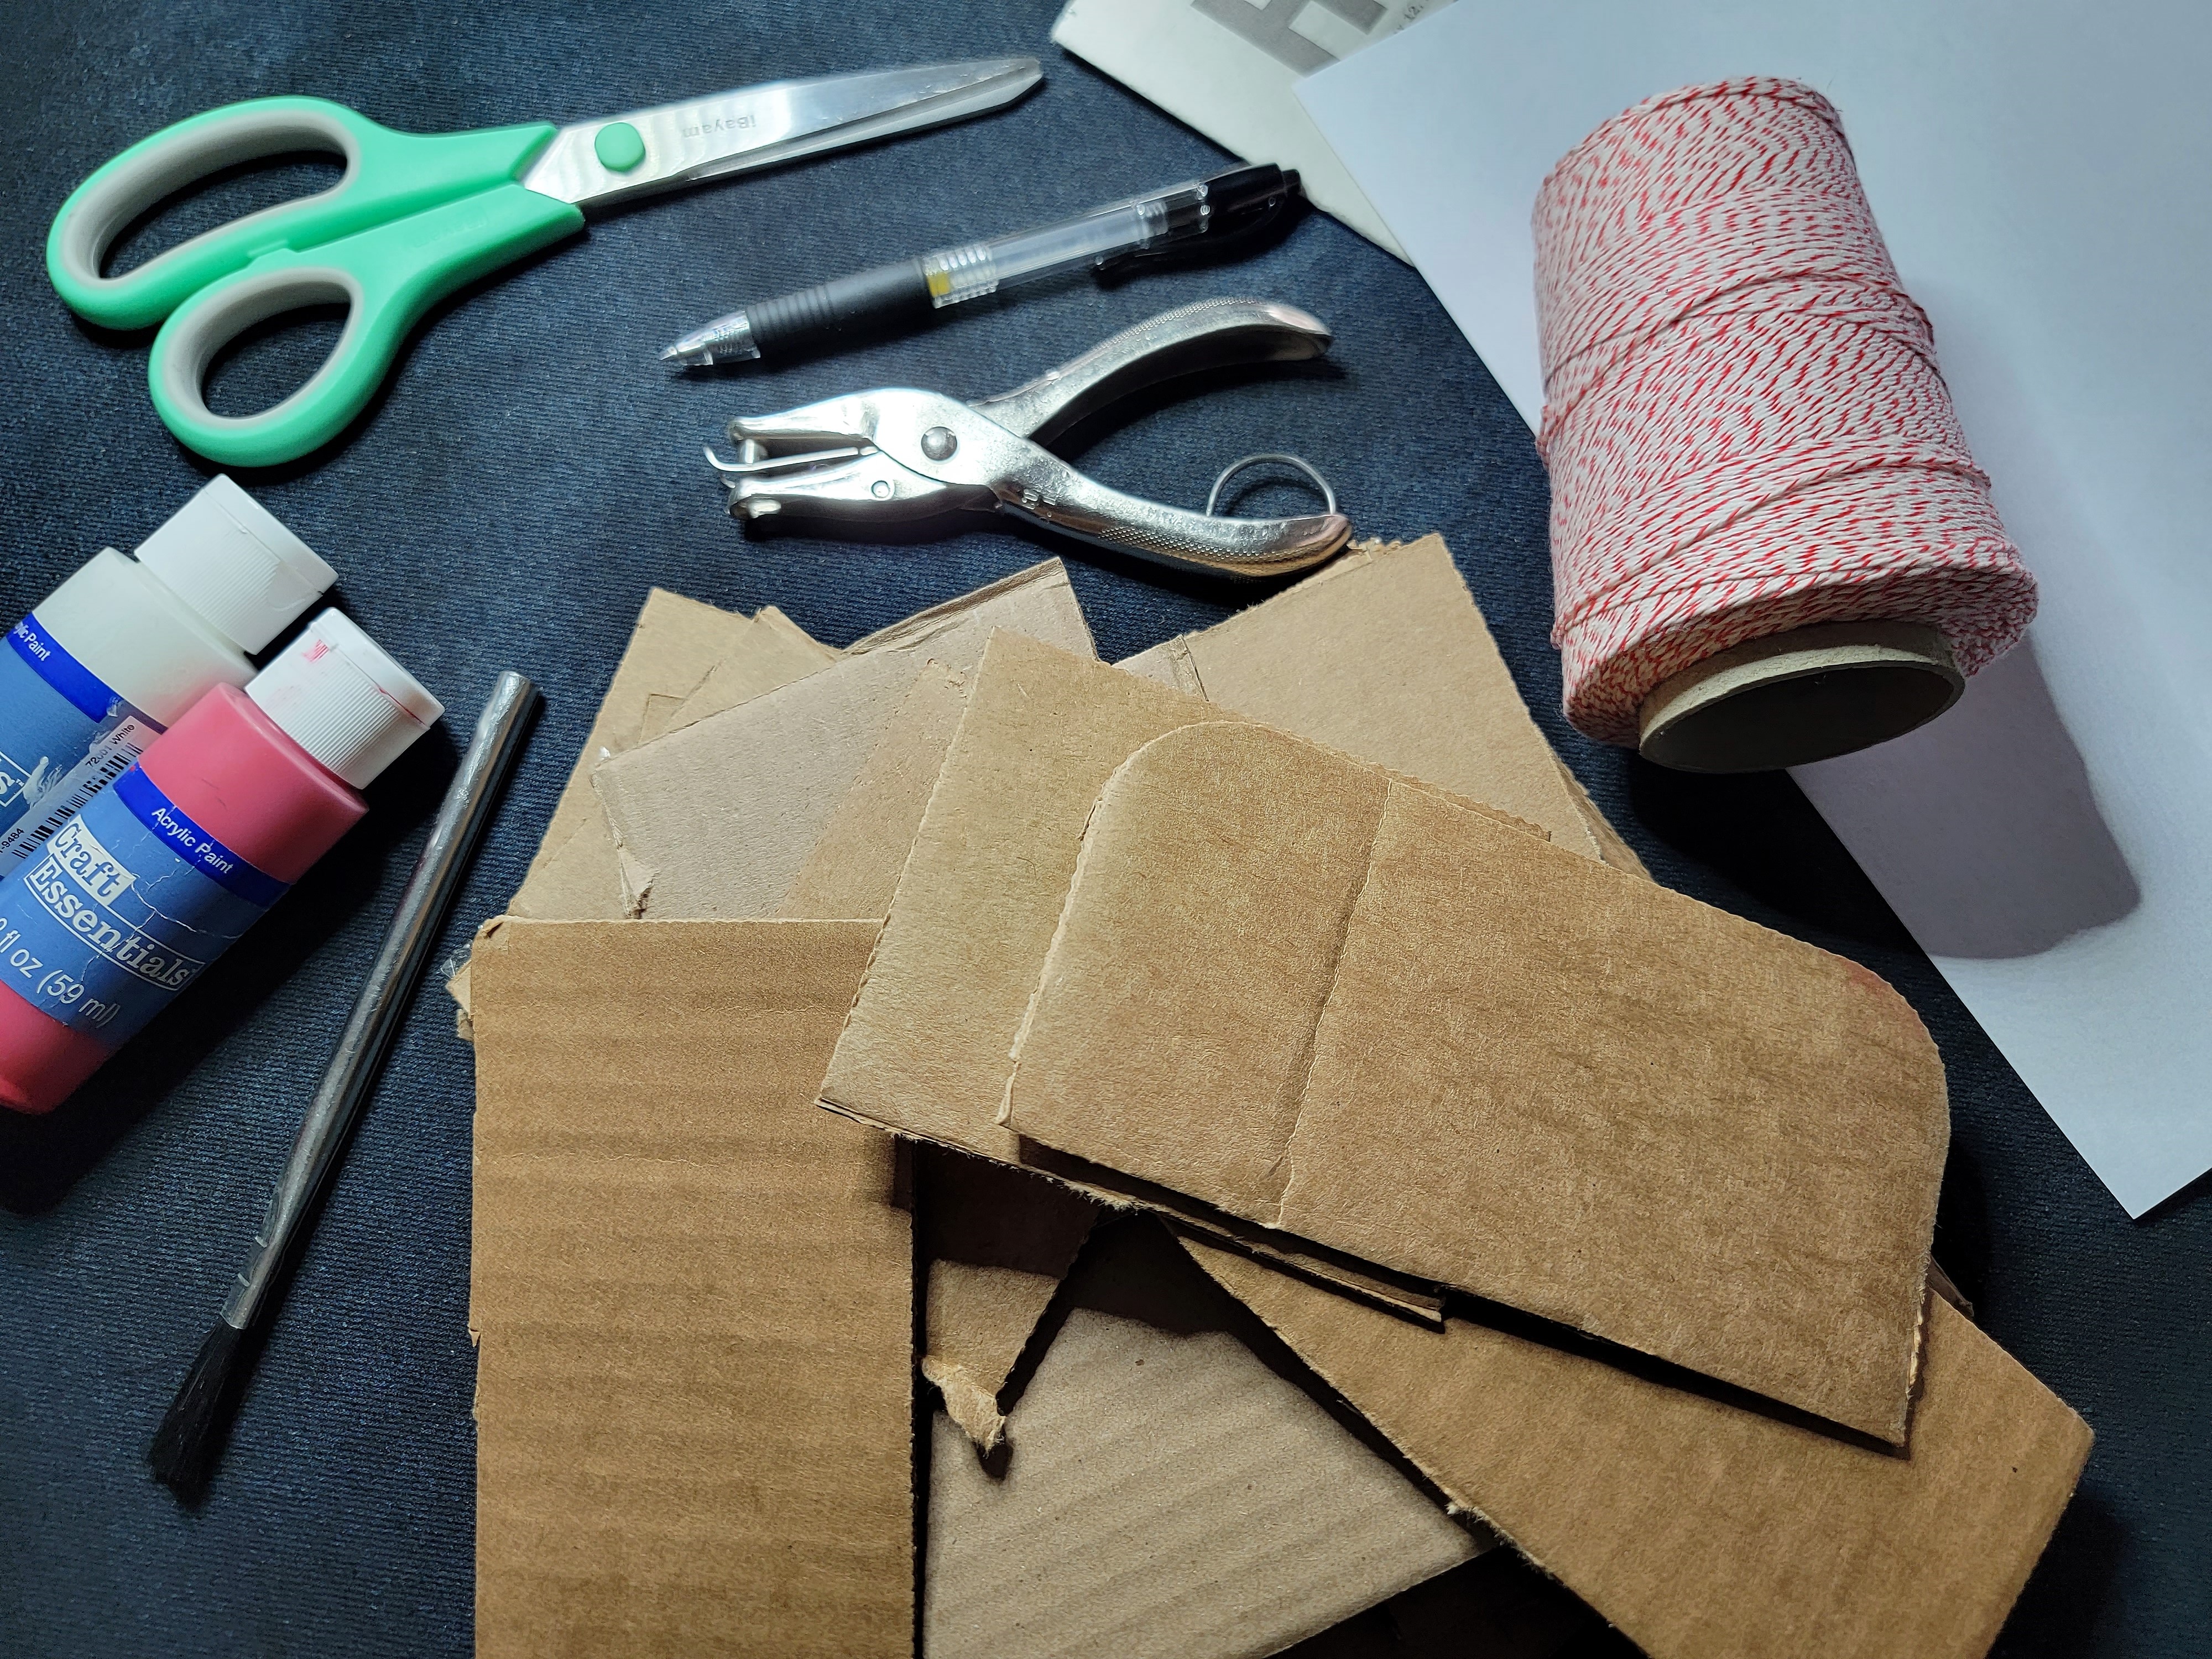
One – Gather Supplies
- Pieces of cardboard (cut from old boxes)
- Red and white acrylic paint
- Twine or string or yarn
- Paintbrush
- Scissors
- Hole punch
- 1 piece of paper (anything you can draw on and cut out)
- Pen or pencil
- Newspaper (or something to protect your work surface)
.
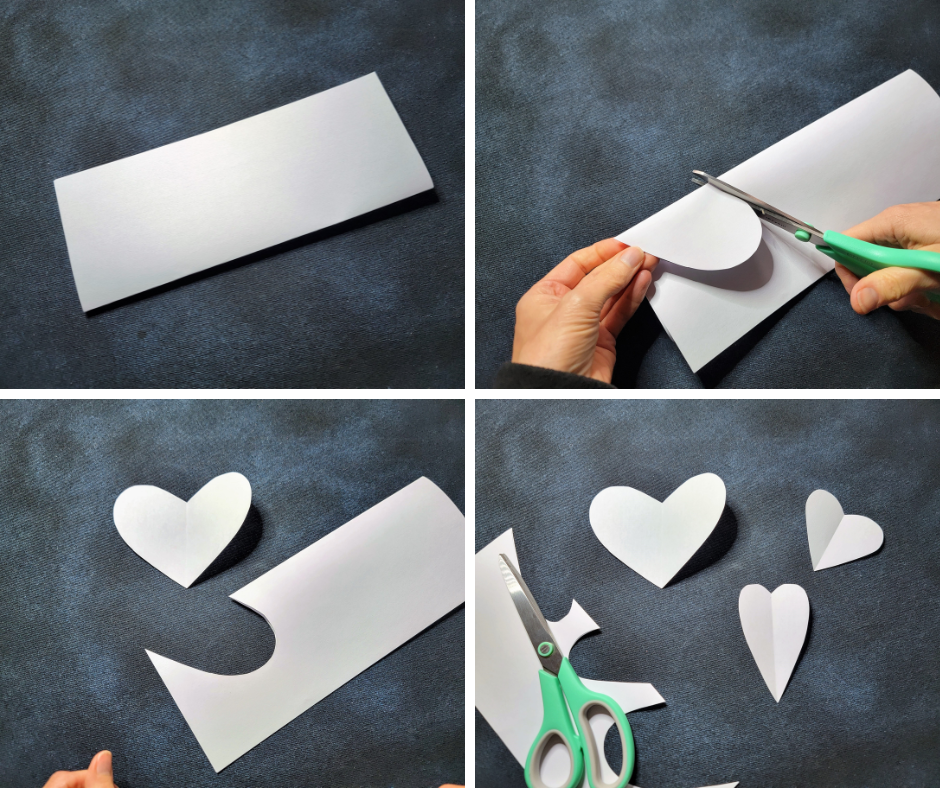
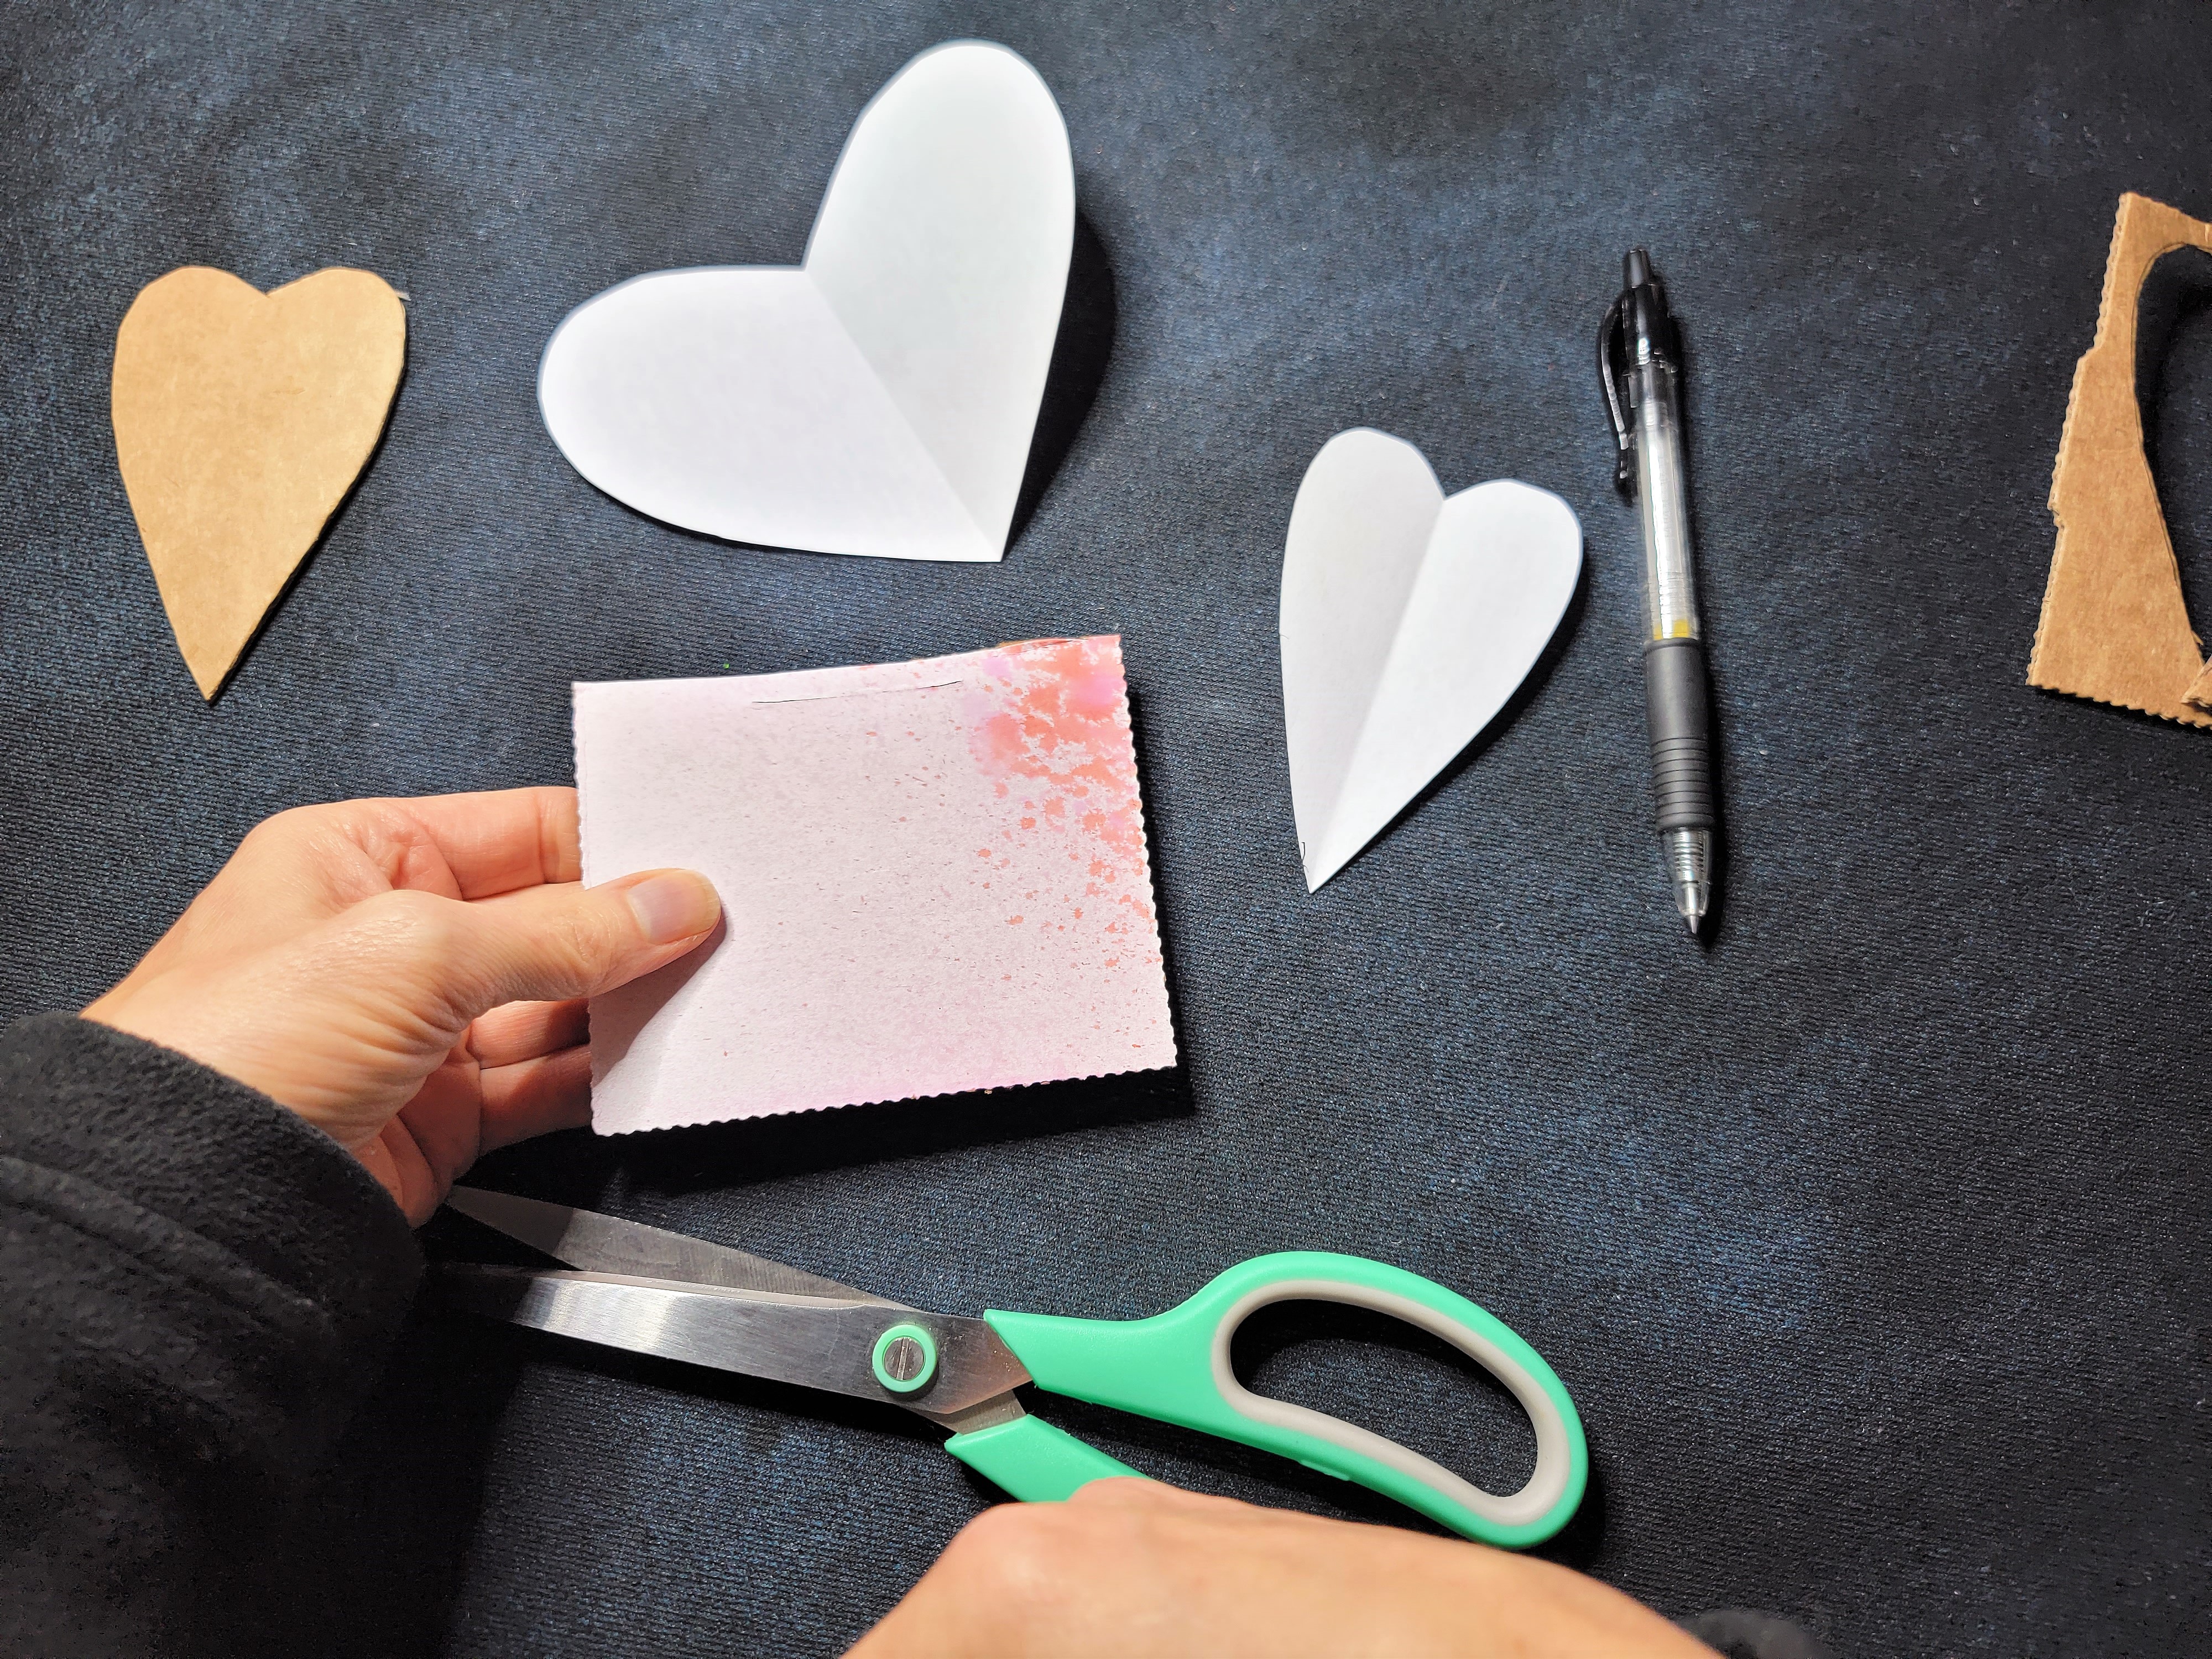
Two – Create Heart Templates
Fold your piece of paper in half.
Draw half of a heart shape, then cut out.
Repeat for various heart shapes and sizes (optional). I made three different hearts, but you could do them all the same, or all different!
.
Three – Make a Cardboard Heart
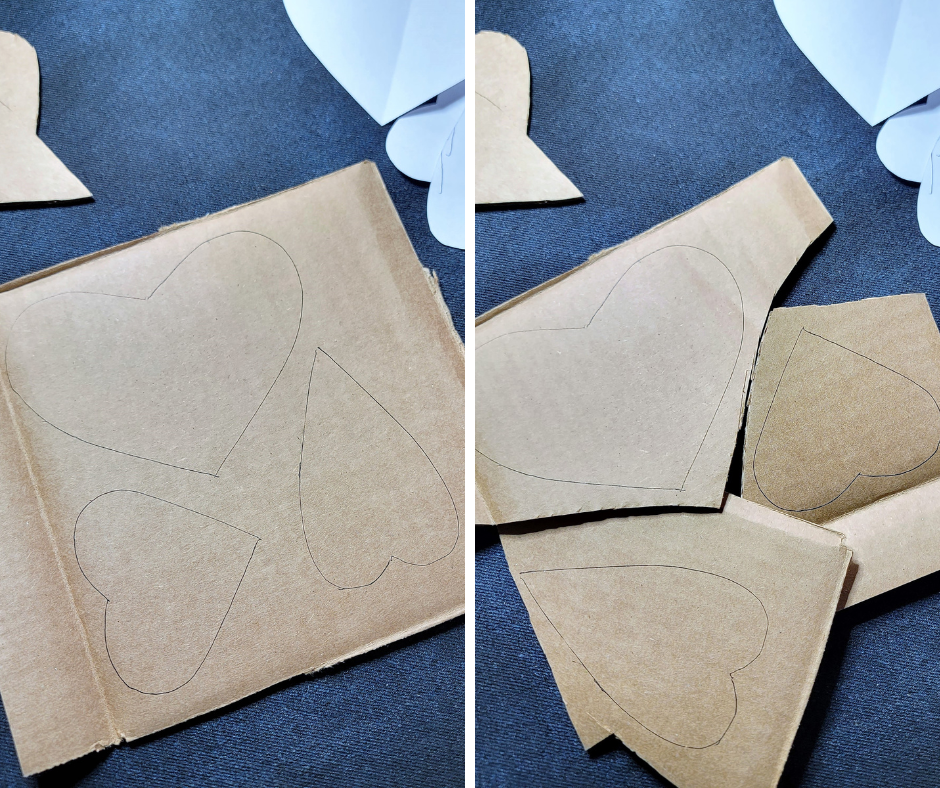
Trace one of your heart templates onto a piece of cardboard.
Cut it out.
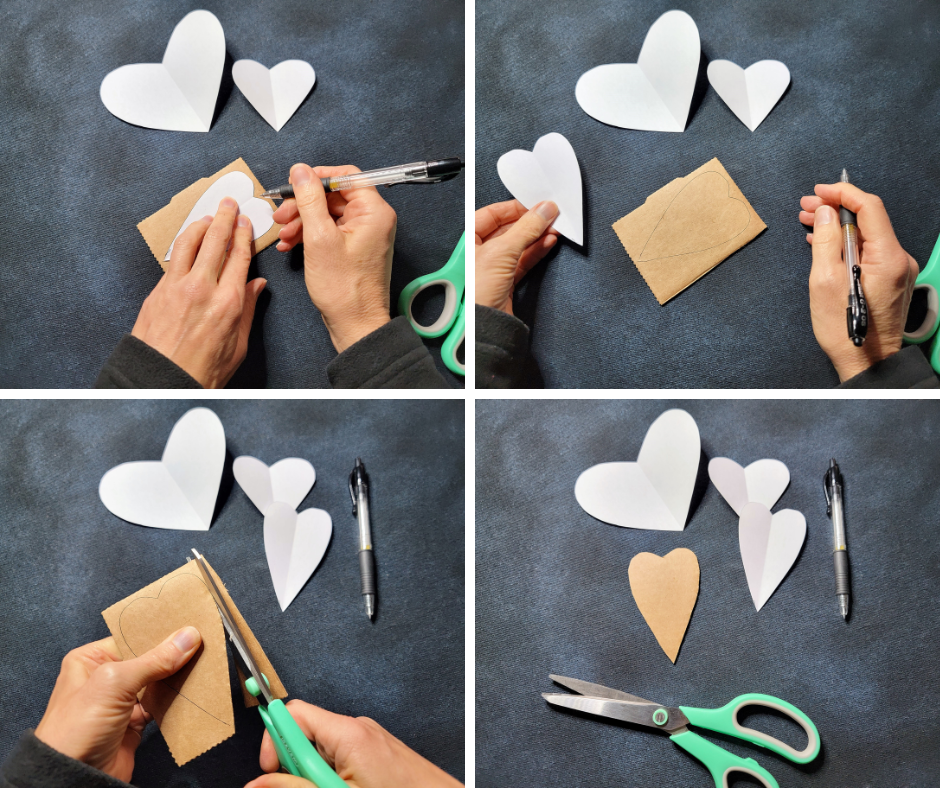
I suggest tracing your heart on the side of the cardboard that was the outside of the box it came from (where there might be printing or dirt marks). That way, the front side of your heart will be clean, and if you don’t cut perfectly on the lines, they’ll be on the back of your heart.
If you have larger pieces of cardboard, trace your hearts, then cut the larger piece into smaller pieces to make it easier to cut around the heart shape.
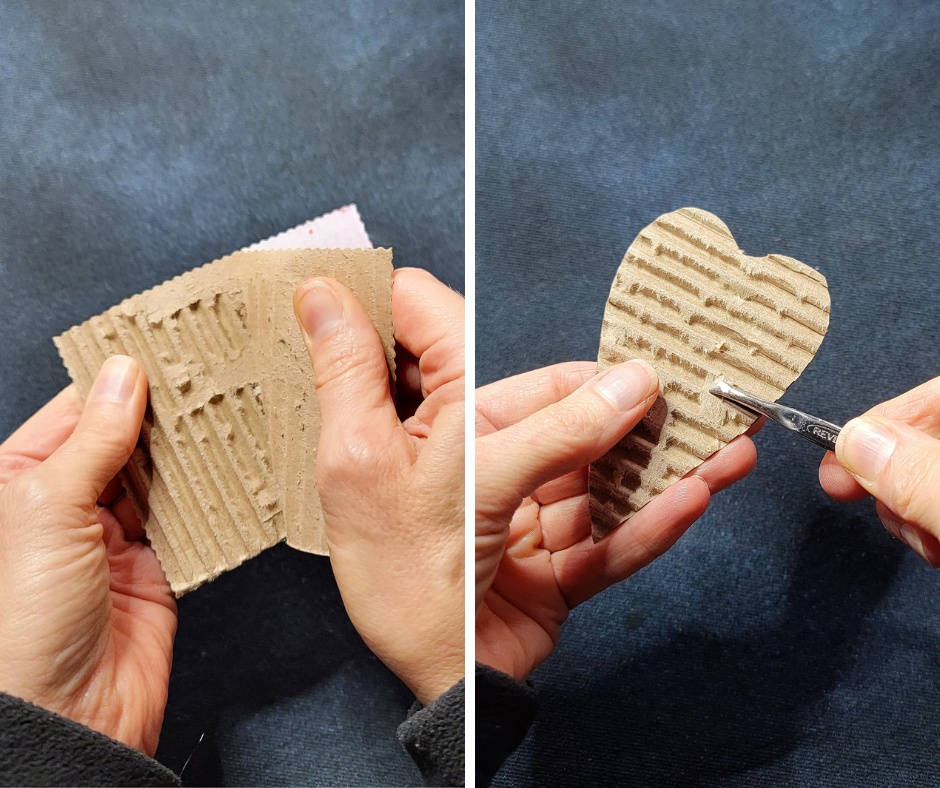
For a little different look, peel off one layer of the cardboard to expose the corrugation. You can use a tweezers to pull off the last little bits.
.
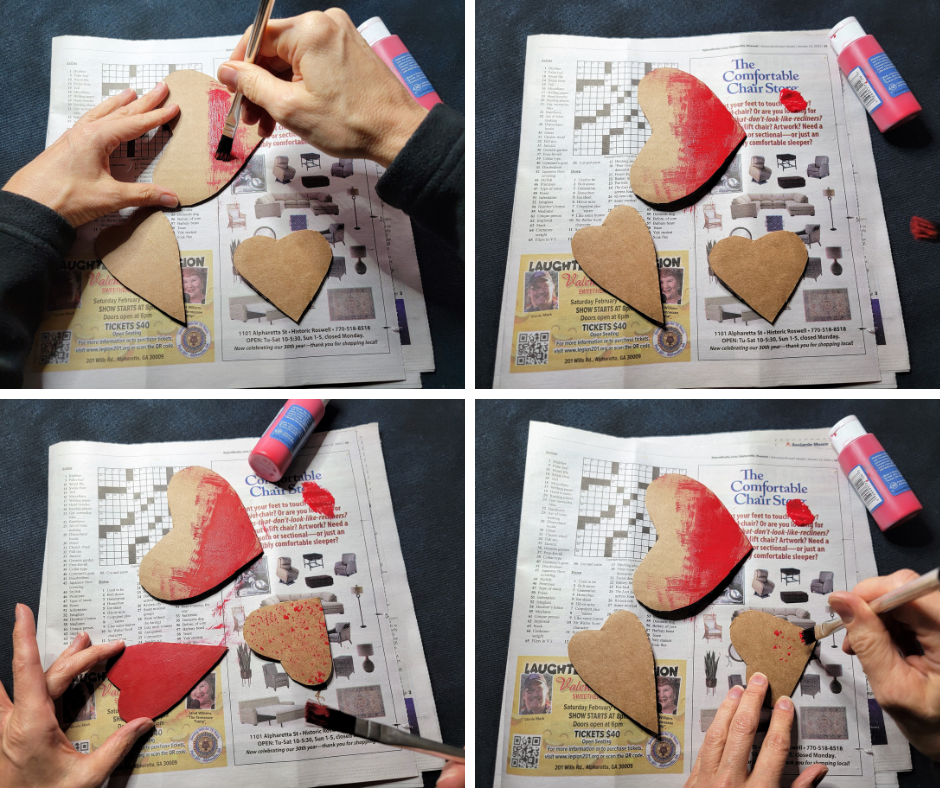
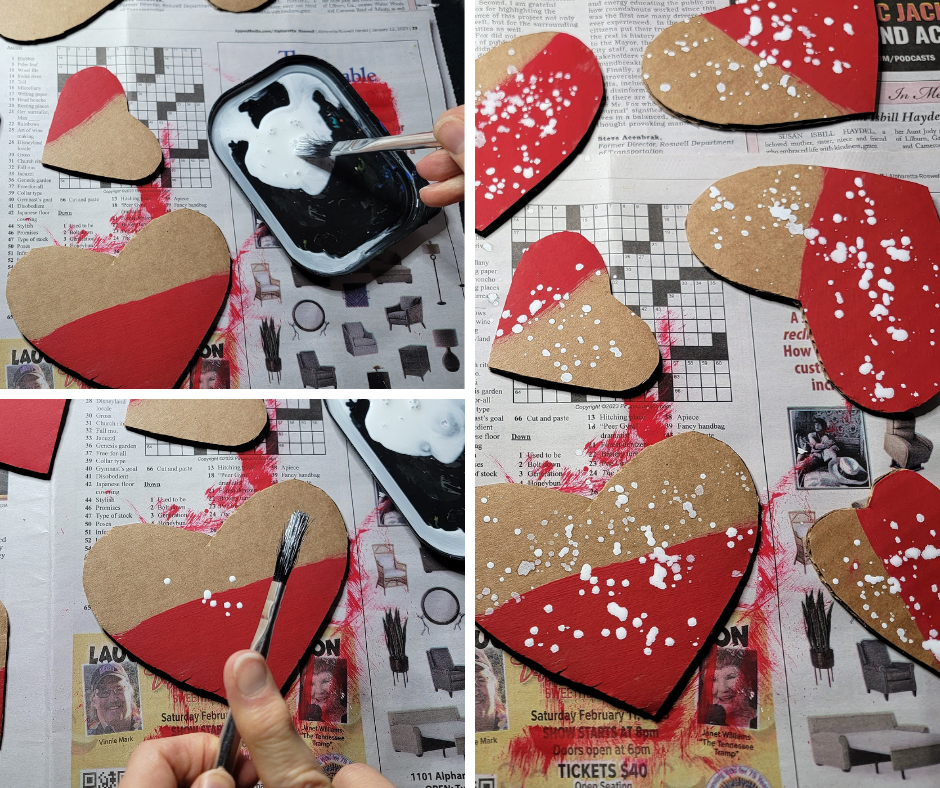
Four – Paint the Red Basecoat
Spread out several layers of newspaper to protect your work surface.
Squeeze some red paint directly onto the newspaper.
Use your paintbrush to paint your hearts red, any way you choose. You can paint the entire heart, half of the heart, or tap the end of the brush perpendicular to the heart to create a dotted look.
Let the paint dry completely, and clean your paintbrush.
.
Five – Splatter Paint the White Dots
Squeeze out some white paint. If the paint is thick, you will want to add some water to it. I did this on an old margarine container lid, so it wouldn’t run everywhere.
Pick up some white paint, then hold the bristle end of the brush over one of your hearts.
Use your other hand to gently tap the brush handle, to knock some of the paint off the bristles. If the paint doesn’t come off the brush easily, add a little more water.
Add as many or as few white dots as you prefer! Have fun with it!
Let the paint dry completely (and don’t forget to clean your paintbrush).
.
Six – Finishing Up
Use your hole punch to put a hole in the center of each heart, near the top.
Cut a piece of your twine or string, then push it through the hole and tie a knot to create a hanger.
.
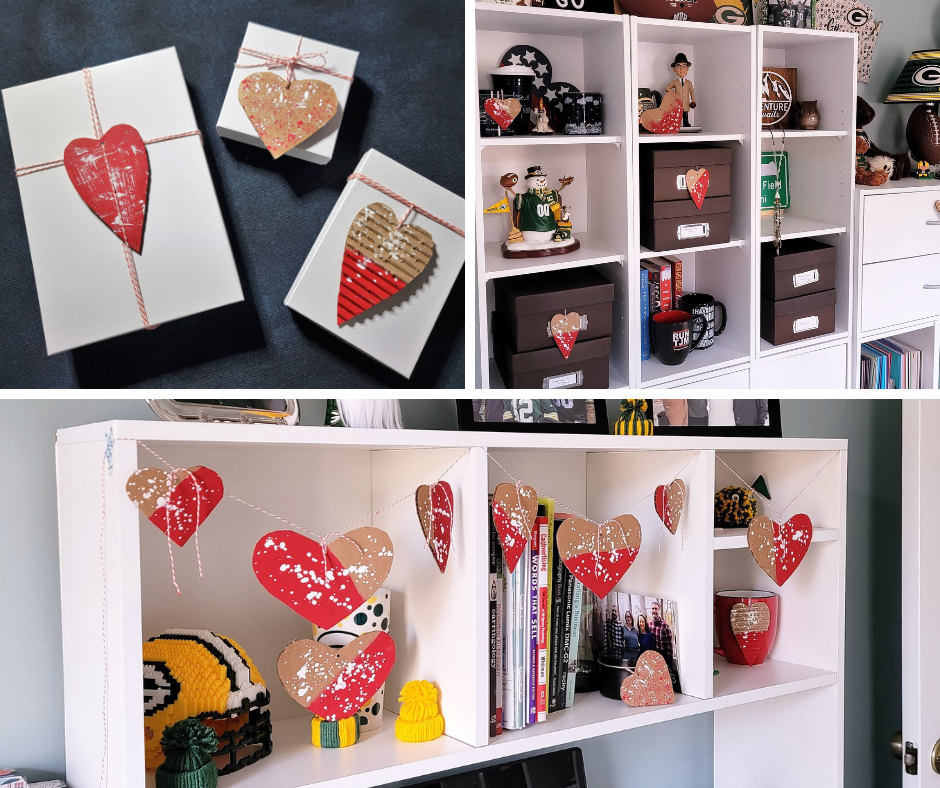
Seven – Time to Decorate!
How you use these cute little hearts is up to you!
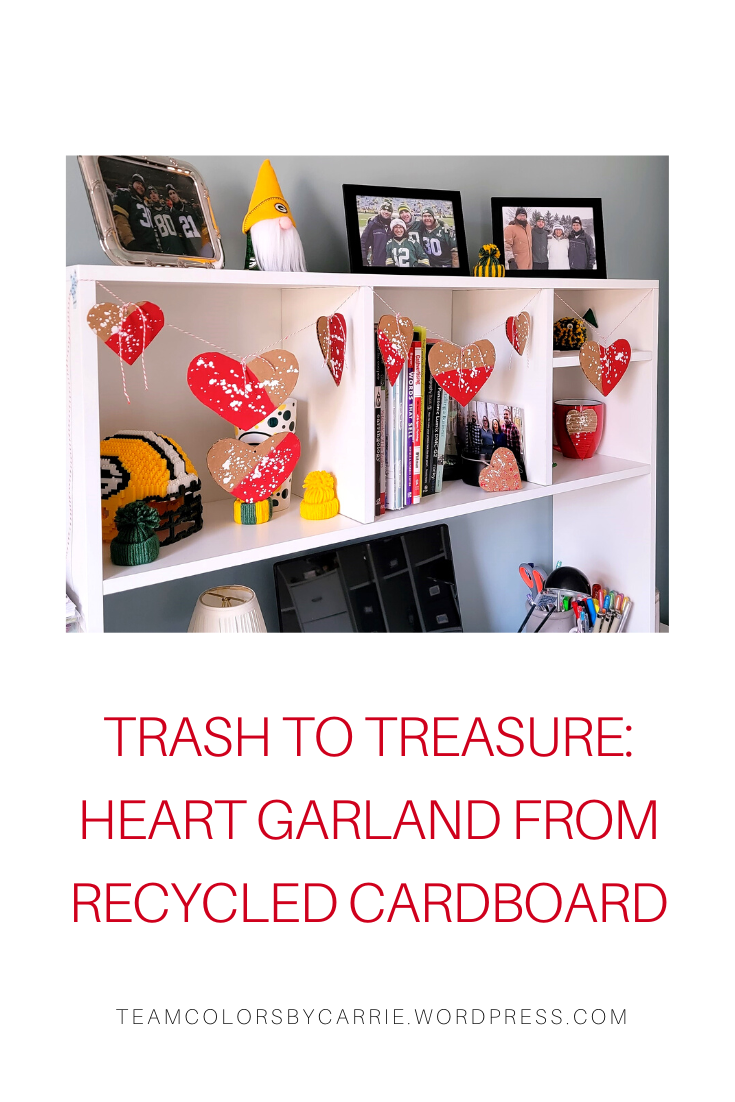
I used some as gift package tie-ons. I used others to hang from storage containers and knick-knacks sitting on the shelves in my office. And I used a bunch to hang from a string to create a garland above my desk!
Those are just some suggestions to get you started, and I’d love to hear about any creative uses you come up with (Valentines tree, anyone?)!
.
Enjoy your creative time, and let me know if you give this project a try!
See you next week,
Carrie
.