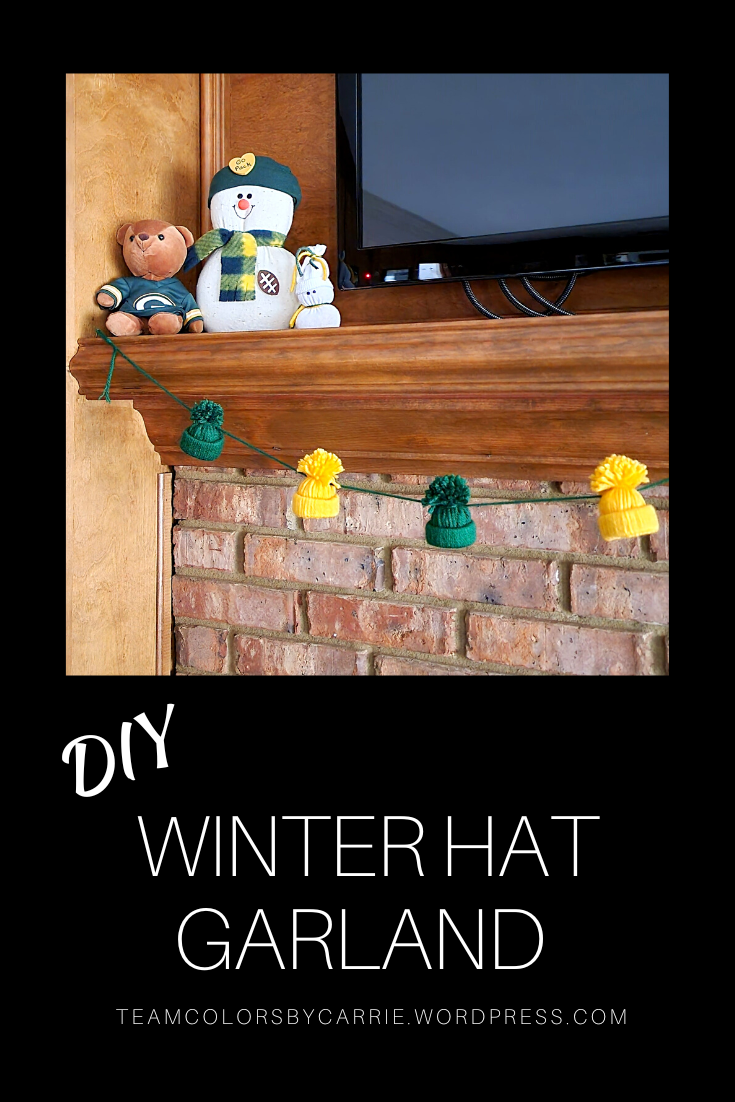
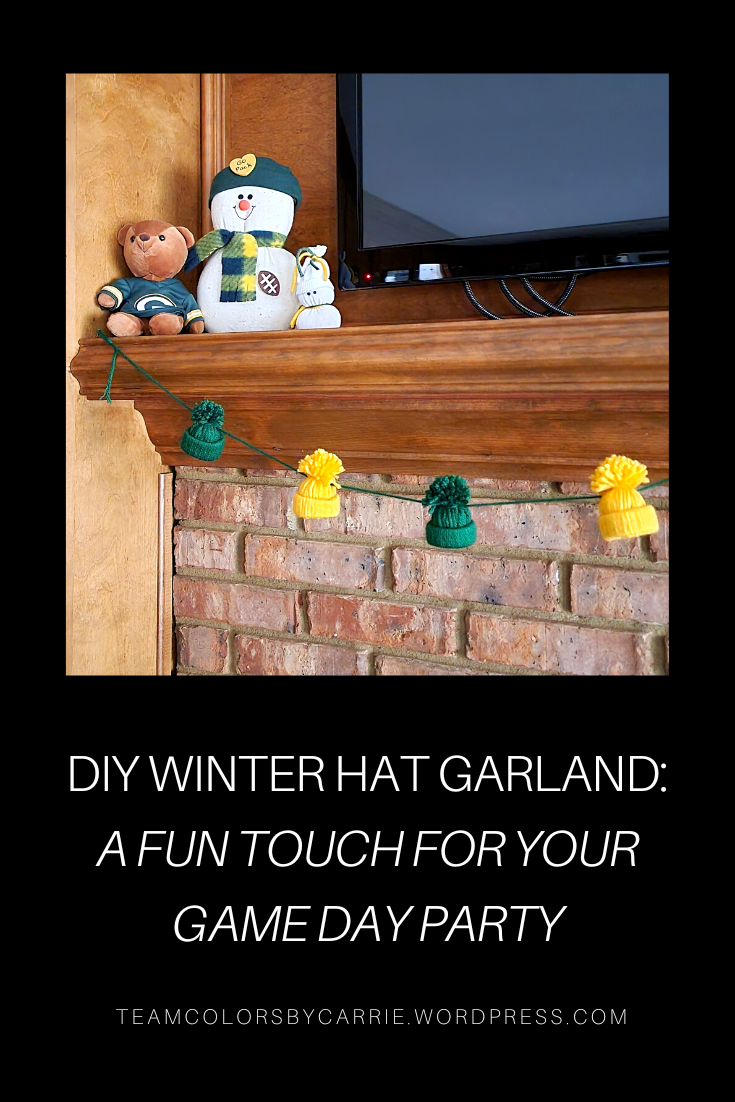
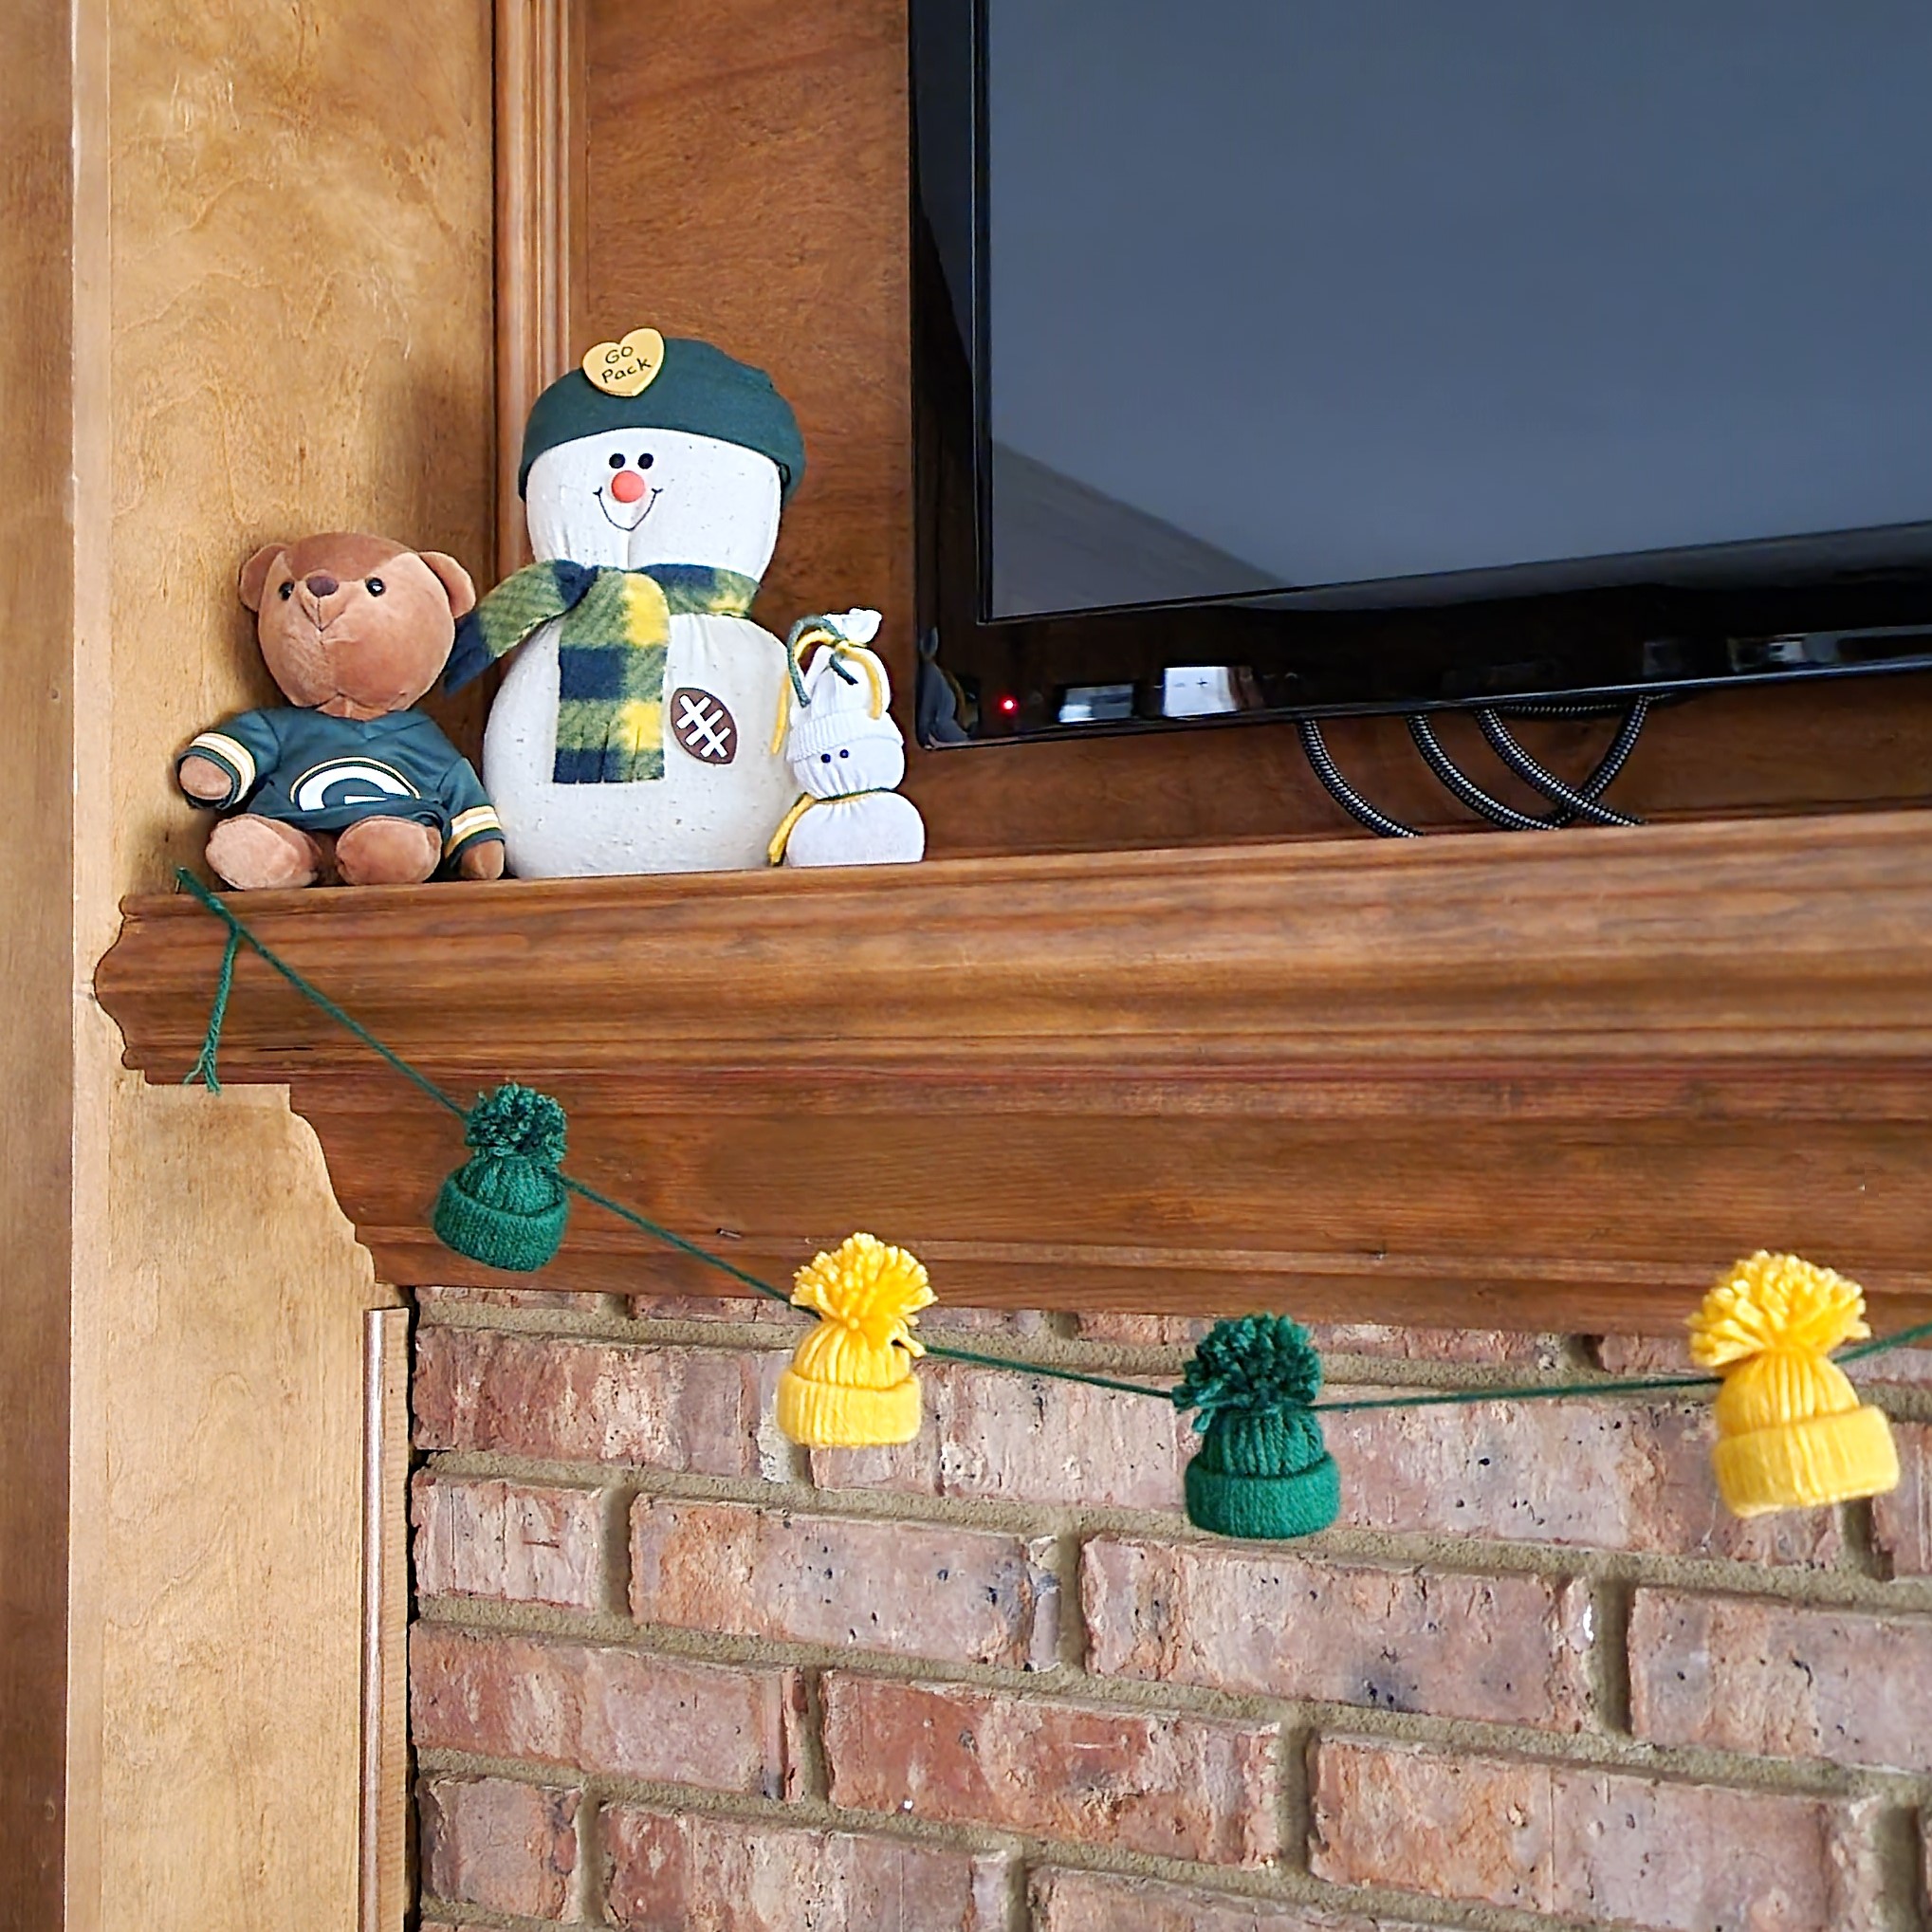
Hello sports fans! Are you ready for the NFL playoff games happening this weekend? Sadly, my team didn’t make the cut this year, but that won’t stop me from displaying my favorite team colors for another week of two. I’m a little down about the Green Bay Packers losing the “win and your in” game against the Lions, but given the way this season went, my expectations were pretty low, so I’ll get over it pretty quickly.
For those of you who have teams still playing, I put together a fun, DIY decoration that would be great for your game watching parties! These mini winter hats are made from yarn, and look adorable when strung up as a garland!
I made mine in green and gold (of course), but you can choose your favorite football team’s colors (or hockey or basketball team colors, or in any colors you choose for a winter themed birthday party)!
And a word of advice? Make extras, because they look cute just sitting on a shelf or table, or used as super cute gift toppers or Christmas tree ornaments!
Ready to get started?
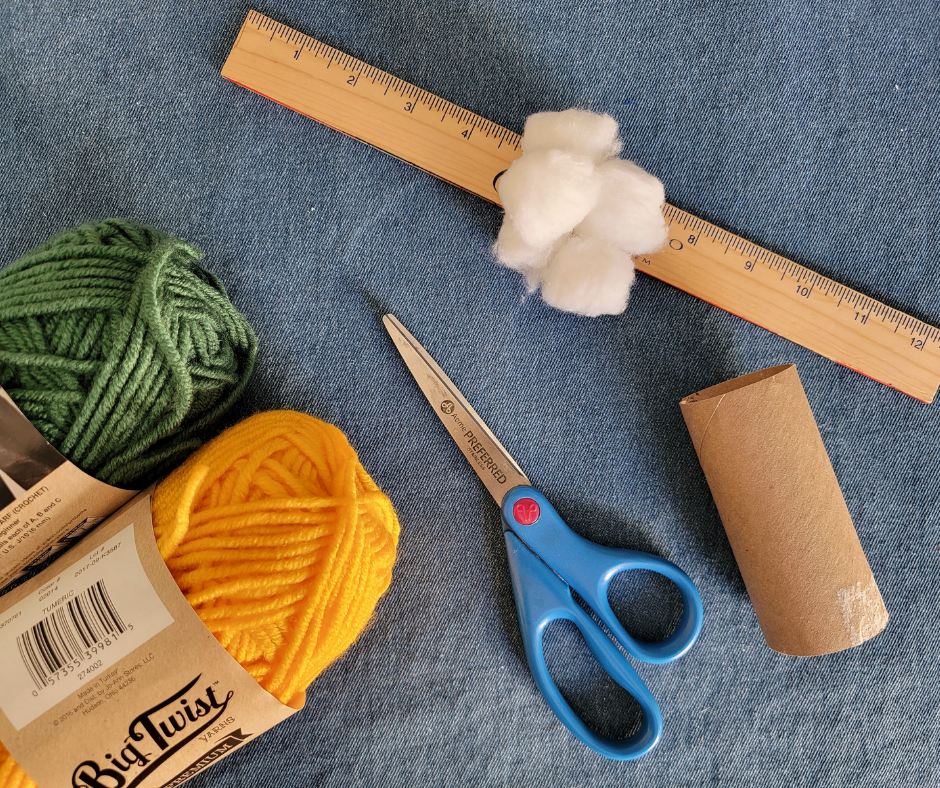
Let’s begin with gathering your supplies:
- cardboard rolls from toilet paper or kitchen paper towels
- yarn in your choice of colors
- sharp scissors
- ruler OR hardcover book
- cotton balls or tissue paper
- big hole needle (optional)
.
Step 1 – Cut the cardboard roll
Start by cutting the paper towel or toilet paper roll into pieces the size of the cuff you’d like on the hats, about 2/3″ in height (no need to measure – they don’t need to be perfect).
Fold the rolls just enough to cut with the scissors. Then bend each ring back into a round shape.

.
Step 2 – Cut yarn into pieces
You’ll need plenty of yarn pieces, all about 10” long.

You can use a ruler to measure, but I found that wrapping the yarn around a 10” tall hardcover book made this process a lot quicker, because you can cut a bunch all at the same time (if your book is a little taller, that’s okay, but don’t use one that’s shorter than 10”).
Wrap the yarn loosely around the book at least 20-25 times. Then carefully cut through the middle of the yarn at the top of the book. Repeat on the other side.
Cut more pieces later, if need them.

.
Step 3 – Attach Yarn to Cardboard Ring
Grab the middle of a piece of yarn and pull the loop through the ring, leaving the ends on the other side
Grab the ends, fold them over the ring, and pull them through the yarn loop. Pull until the knot is snug against the ring.

Repeat, making sure all your loops are in the same direction, until you’ve covered the entire cardboard ring with yarn (and it looks a little like an octopus with LOTS of legs)!

.
Step 4 – Finish the hat
Push the ends through the inside of the ring to the other side. Use your fingers to gently push all the knots into the inside of the ring as well.

Gather the yarn ends and tie them tight with a piece of yarn, about halfway between the hat cuff and the loose yarn ends.

Give the yarn ends a trim to shape them into a pompom. You can use your fingers to gently unravel the ends of the yarn to create a fluffier pompom (optional).

To give your hat more structure and get the nice puffy hat shape, stuff a cotton ball inside the hat (or roll a piece of tissue paper into a ball).

Repeat for as many hats as you want to make.

.
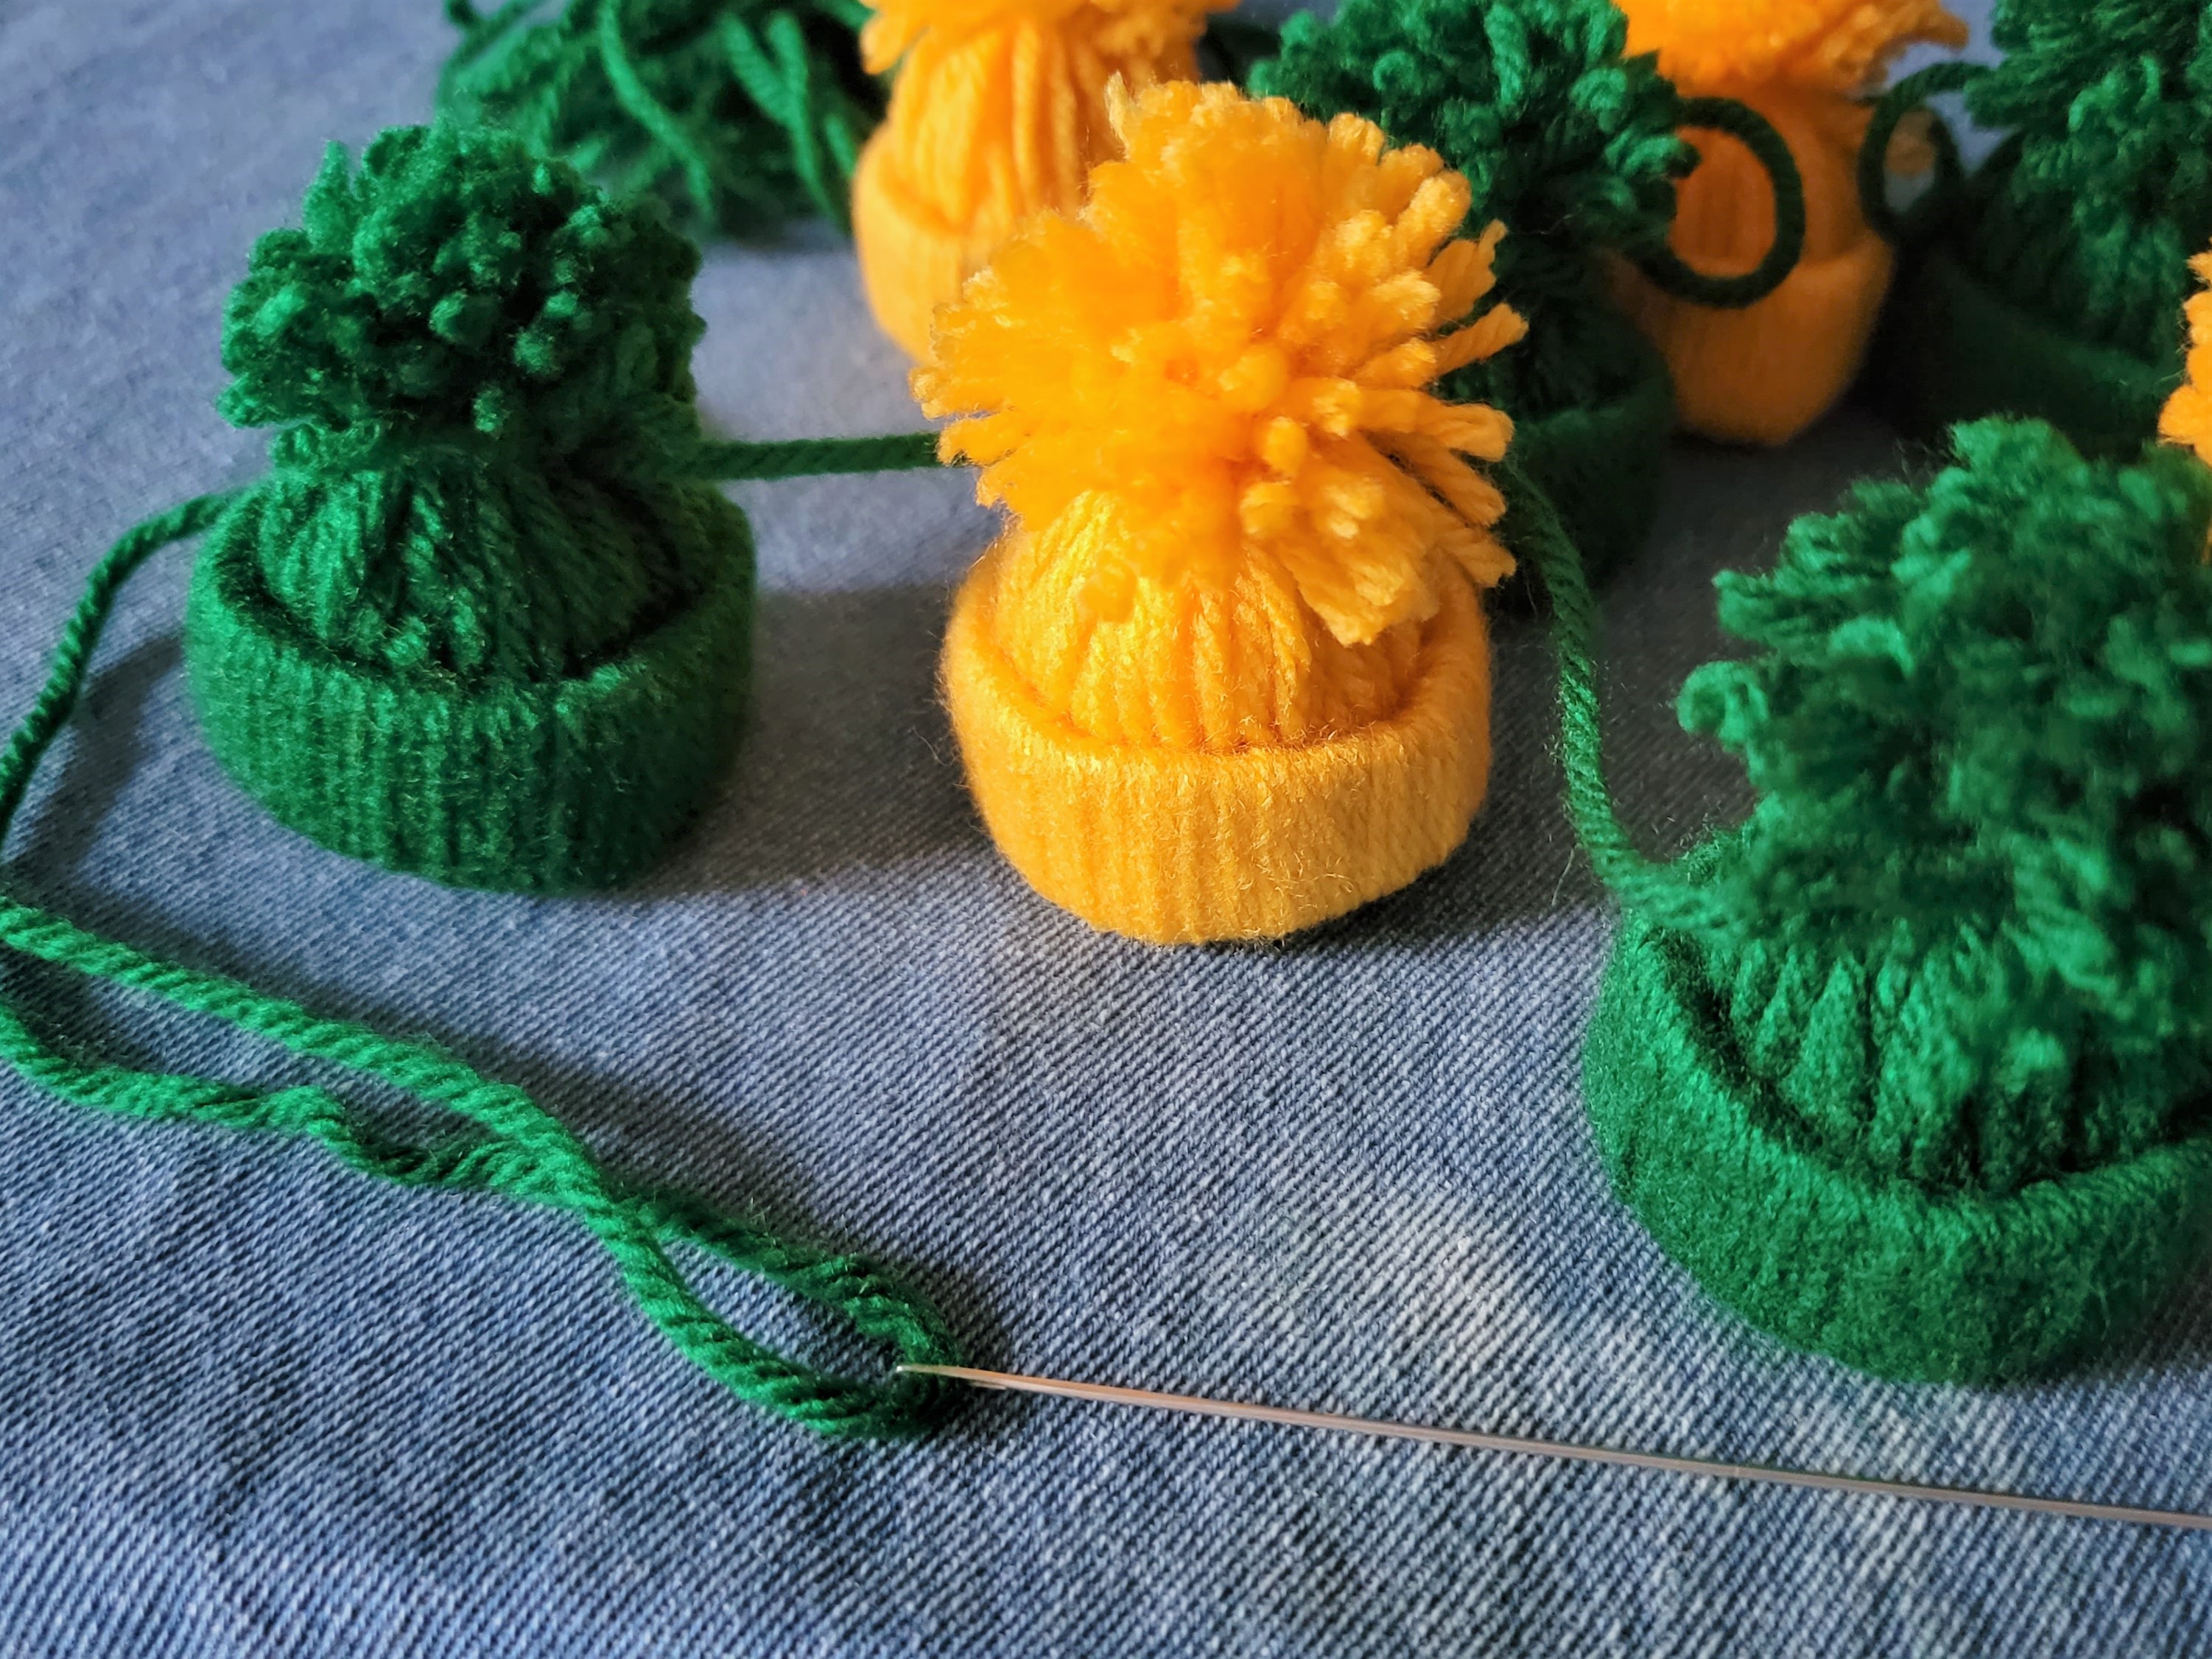
Step 5 – String the Garland
Cut a piece of yarn that is about twice as long as the area where you plan to hang your garland. This gives you plenty of extra for draping and tying loops for hanging.
String up your hats on this long piece of yarn. I used a needle that had an opening big enough for my yarn, but if you don’t have one, you could tie your yarn to a small safety pin, or just carefully use your fingers to push the yarn through each finished hat.

Slide the hats along the length of the yarn so they all fit, but don’t worry about spacing at this point, as you can adjust once you get the garland hung up.
.
Hang the garland, and adjust the spacing of your hats as desired!

I love how this looks, and adds to the winter theme I have going.
How about you? Are you ready to give it a try? I’d love to hear from you!
Enjoy the games this weekend, and I’ll see you next week.
Carrie
.