Welcome back!
If you’ve been following along for awhile, you know that in addition to being a bit of a sports fanatic and a jewelry maker, I also like to try my hand at all sorts of crafts. I’m especially fond of ones that use materials you might already have at home, are quick and easy to complete, and can be used for more than one purpose (and even better when one of those purposes is sports related)!
I’ve got one of those fun little projects for you today!
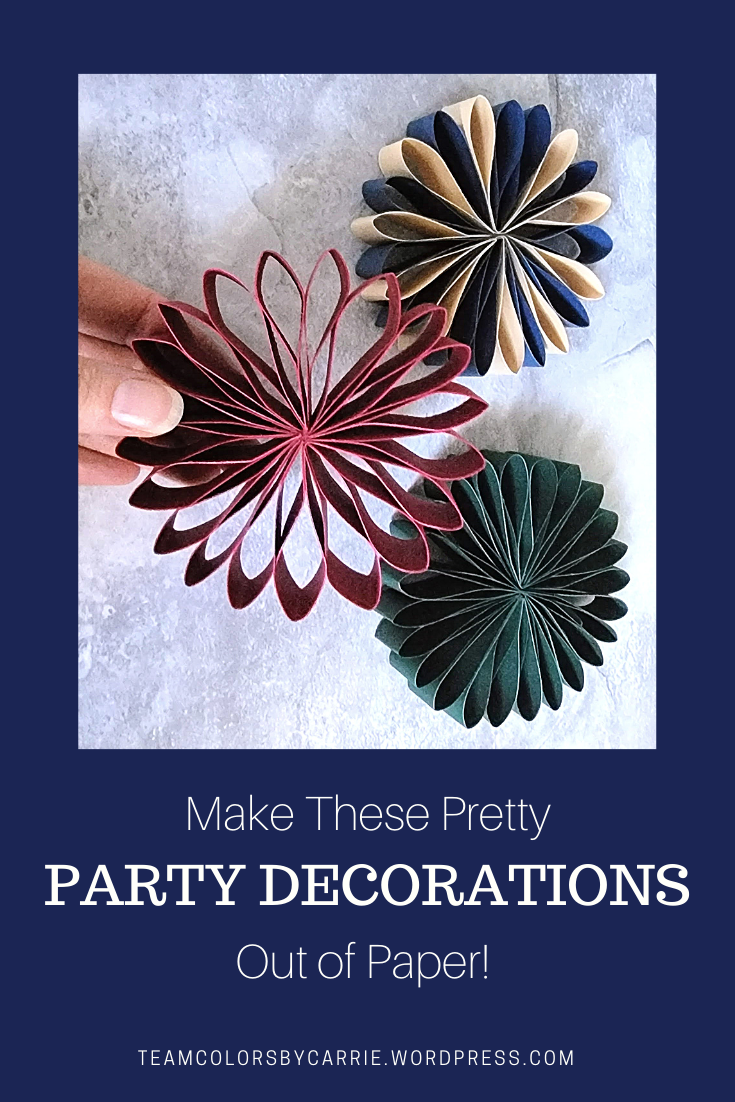
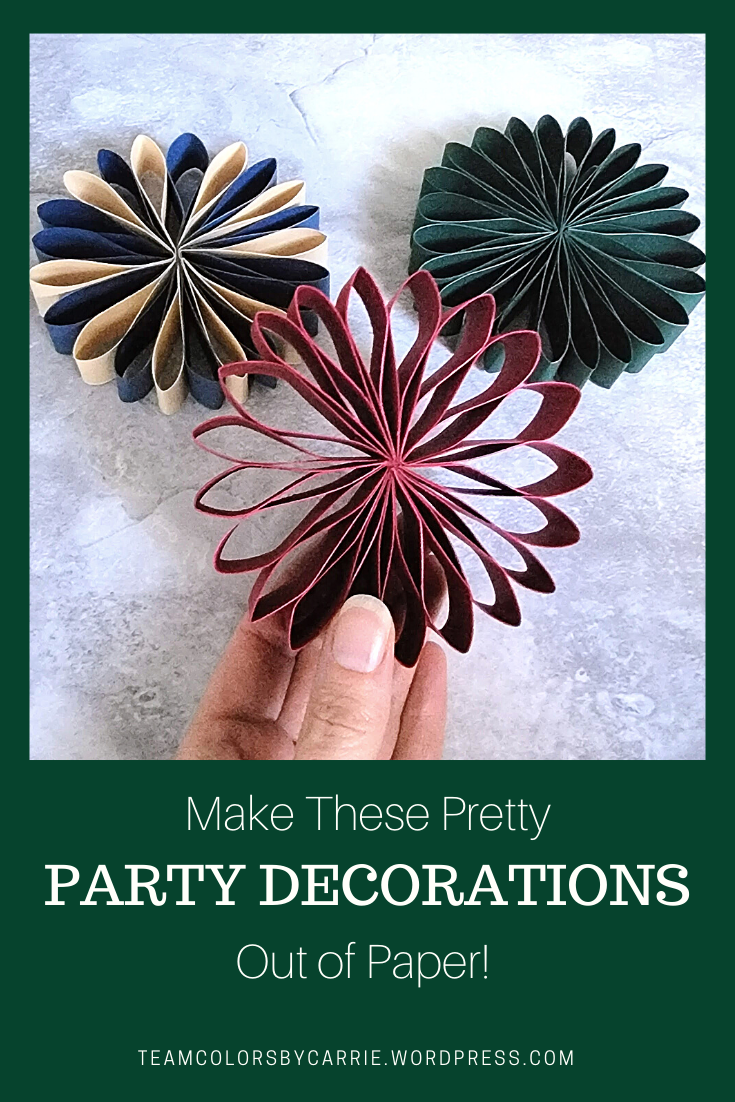
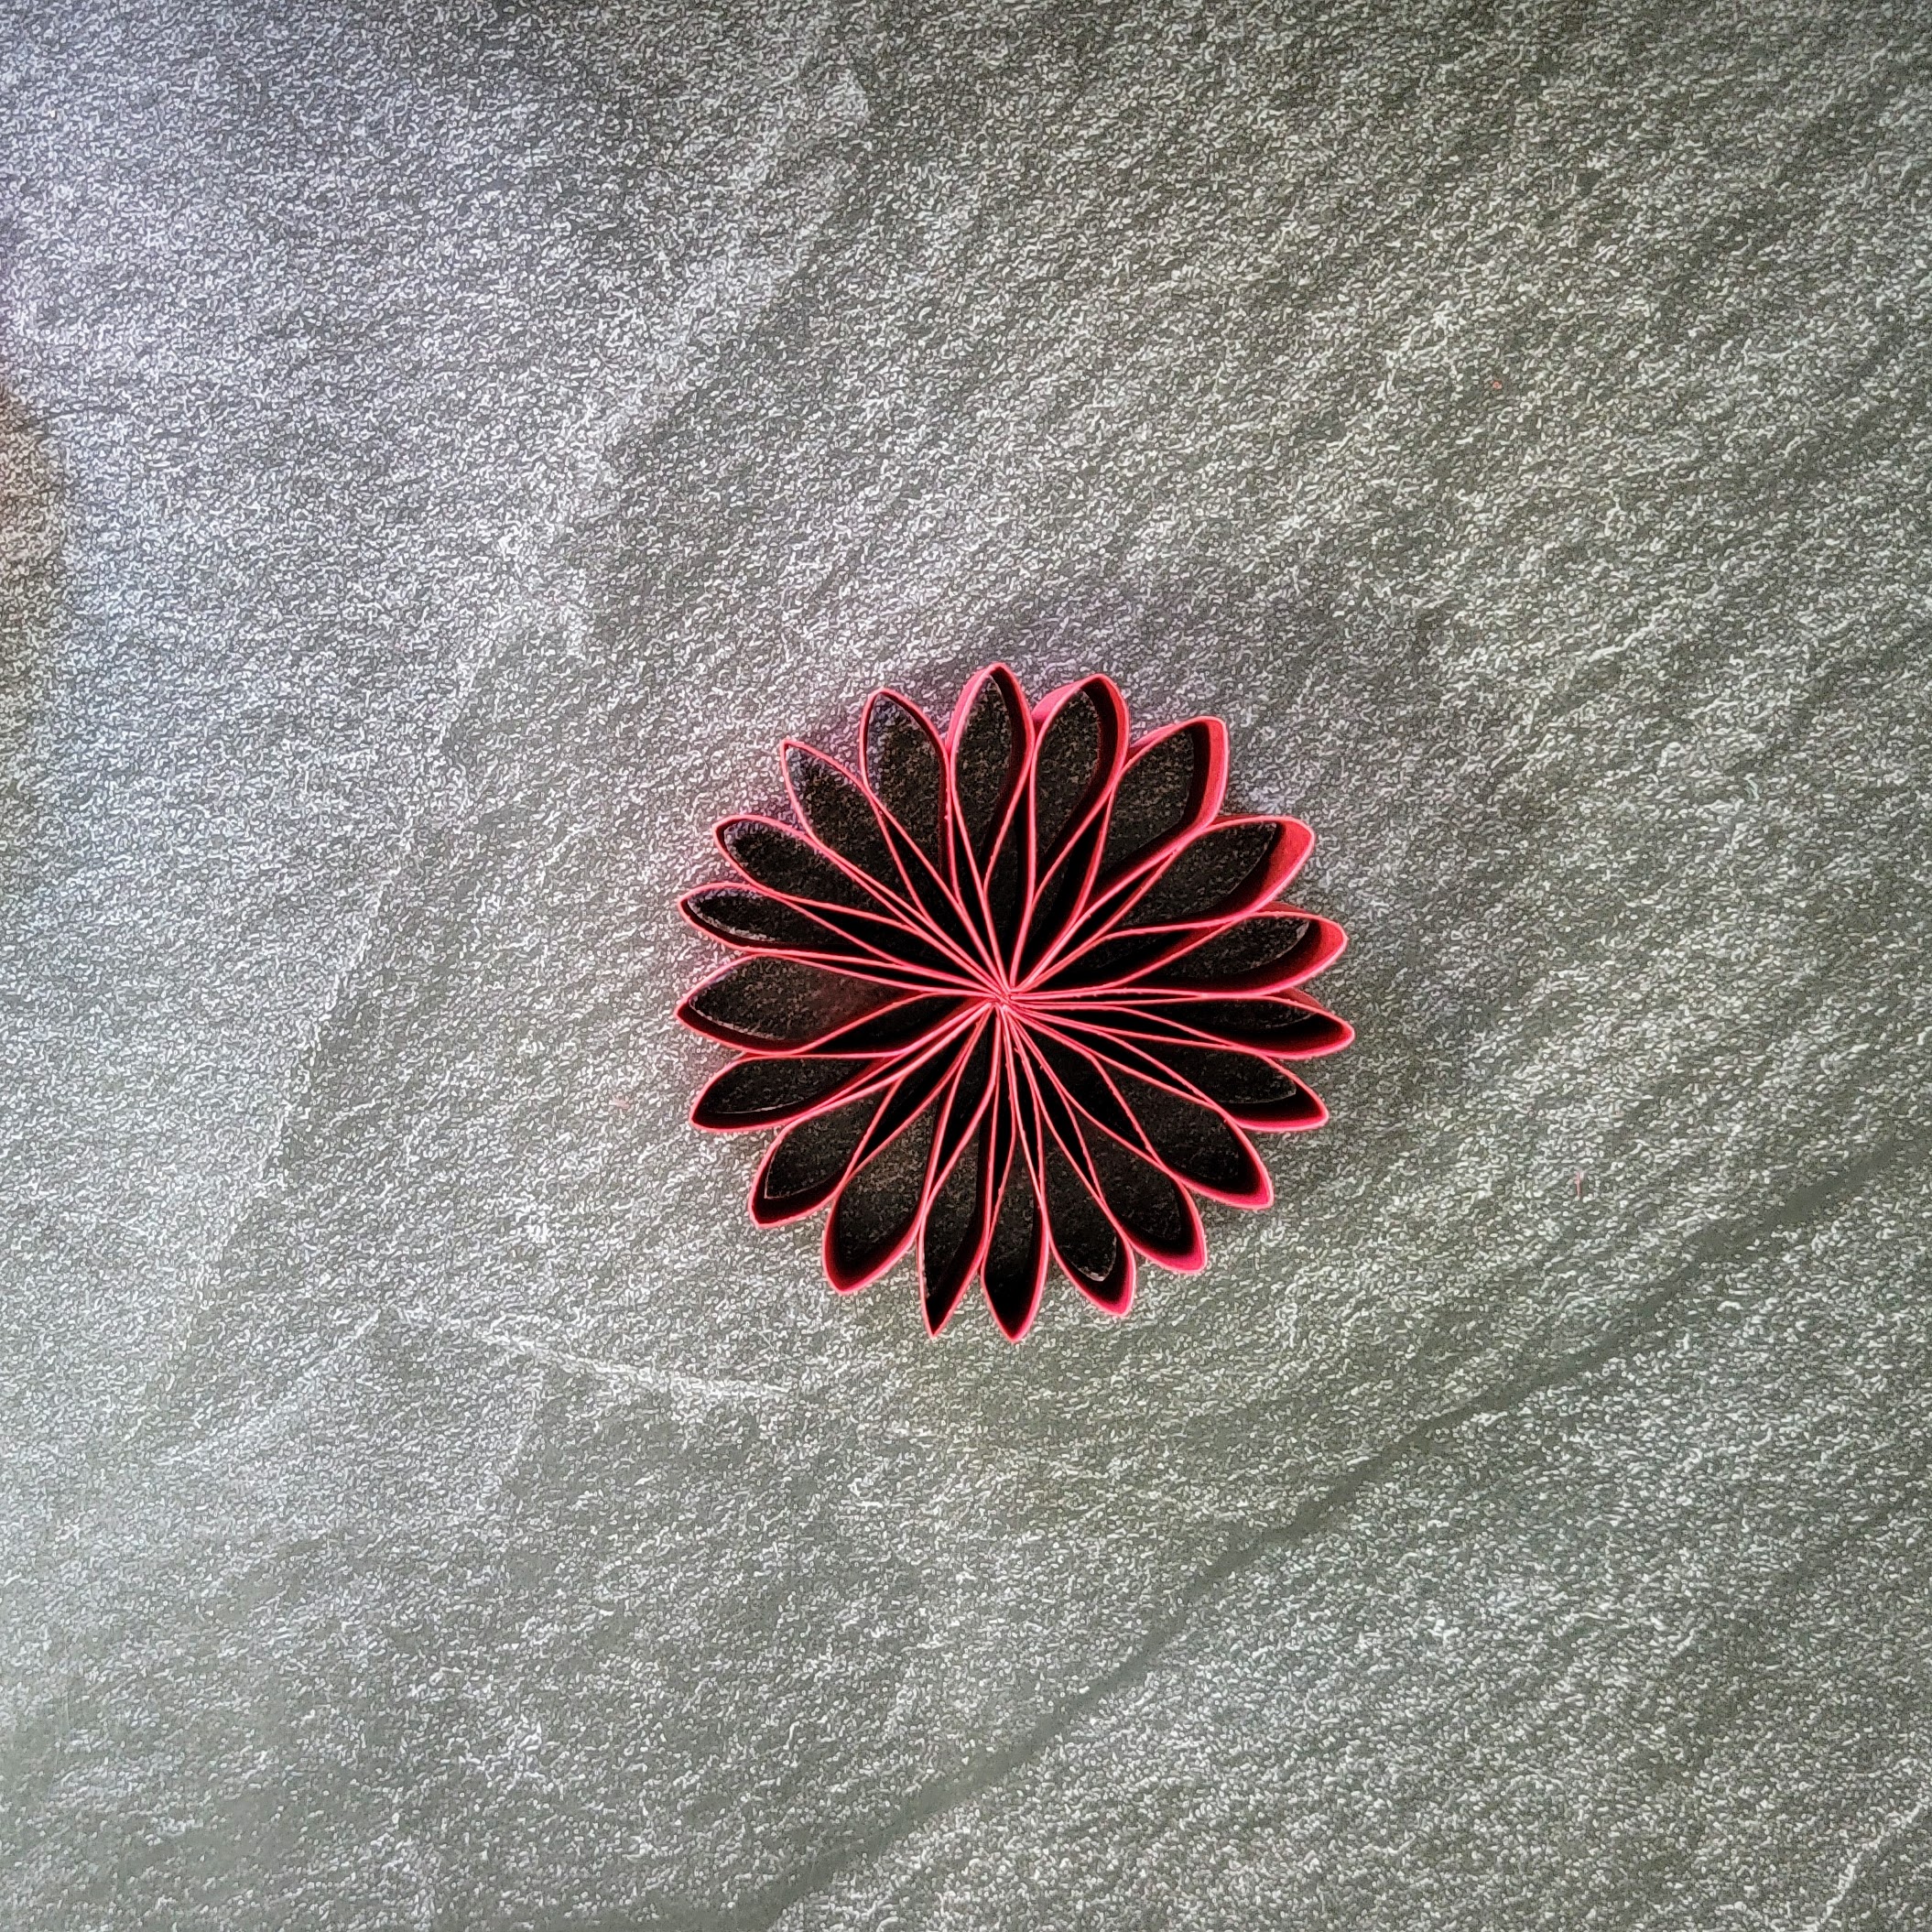
These pretty paper decorations remind me of flowers, and I can see them sitting on the food table at your next game day party, a bunch hanging on the wall as a back drop for a birthday or anniversary party, or hanging from the tree when you start your Christmas decorating. Just change out the colors to fit the occasion, and you’ll be all set!

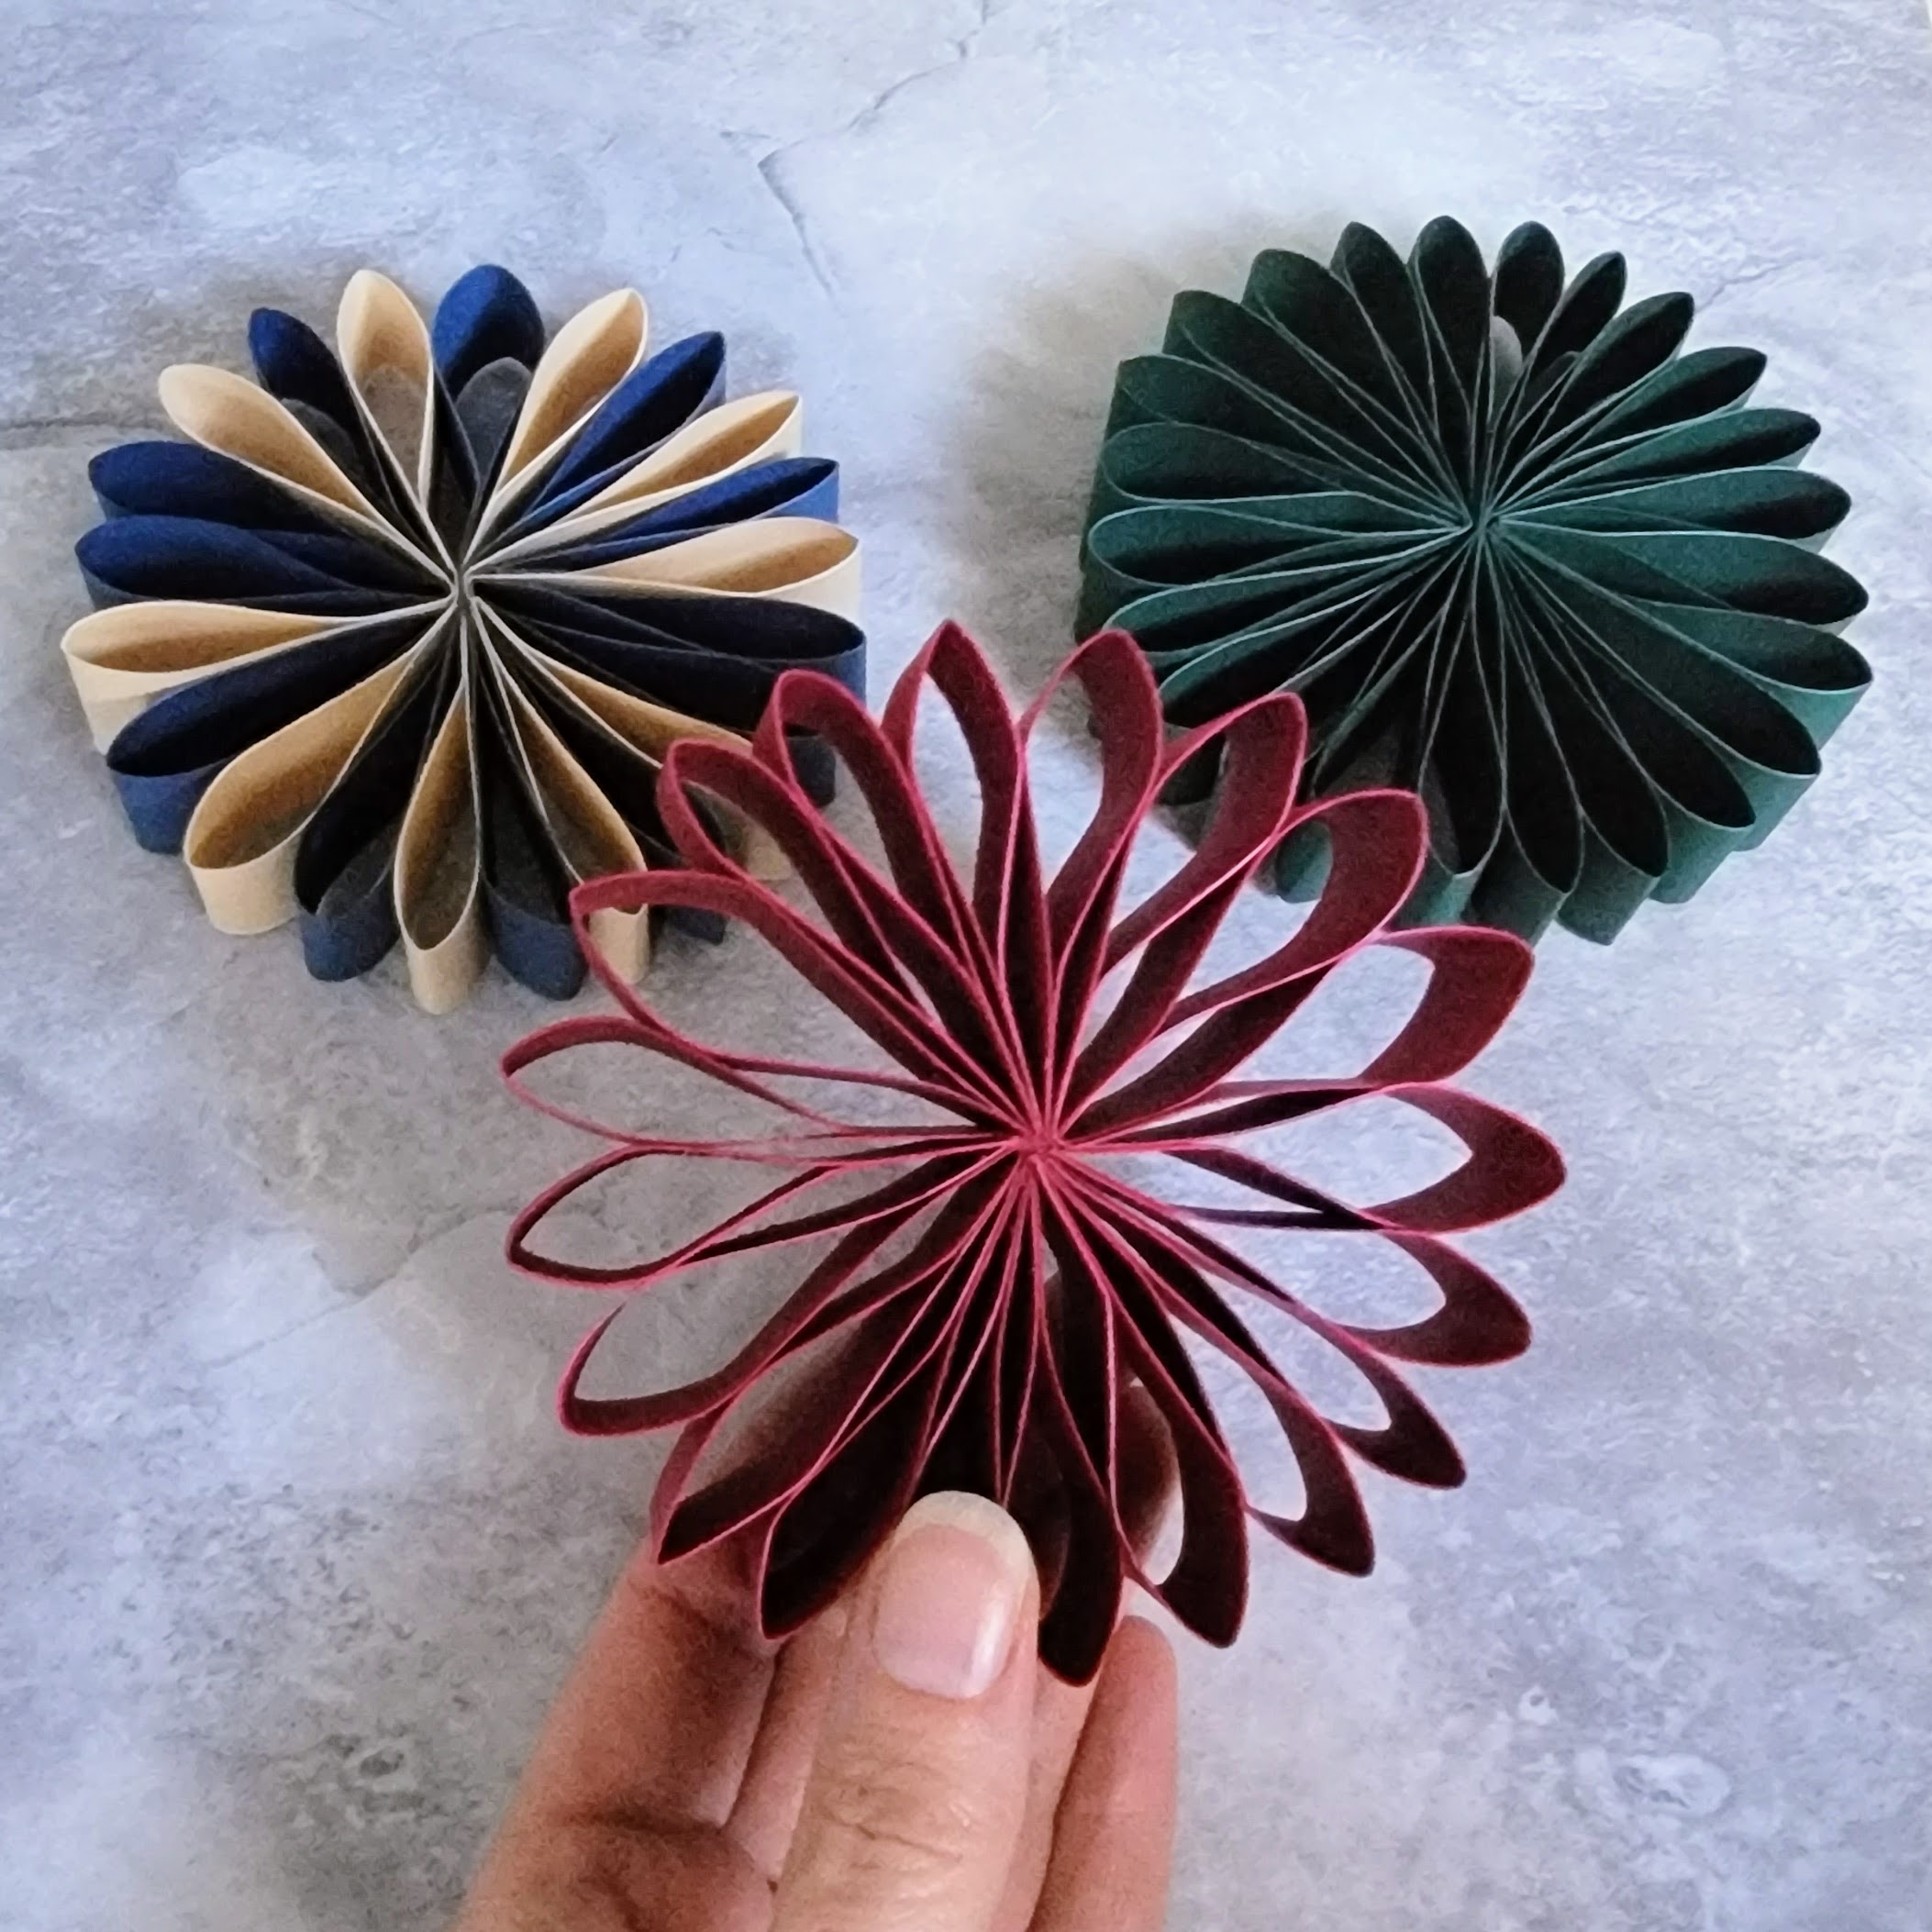
I started with a just a few, made from the first colored paper I found in my stash. But now I’m thinking about a batch in green and gold for my Green Bay Packers, or maybe in red and white for watching the Wisconsin Badgers, then transitioning right into a Christmas theme!
Sound good?
Let’s get started!
1 – Gather Materials
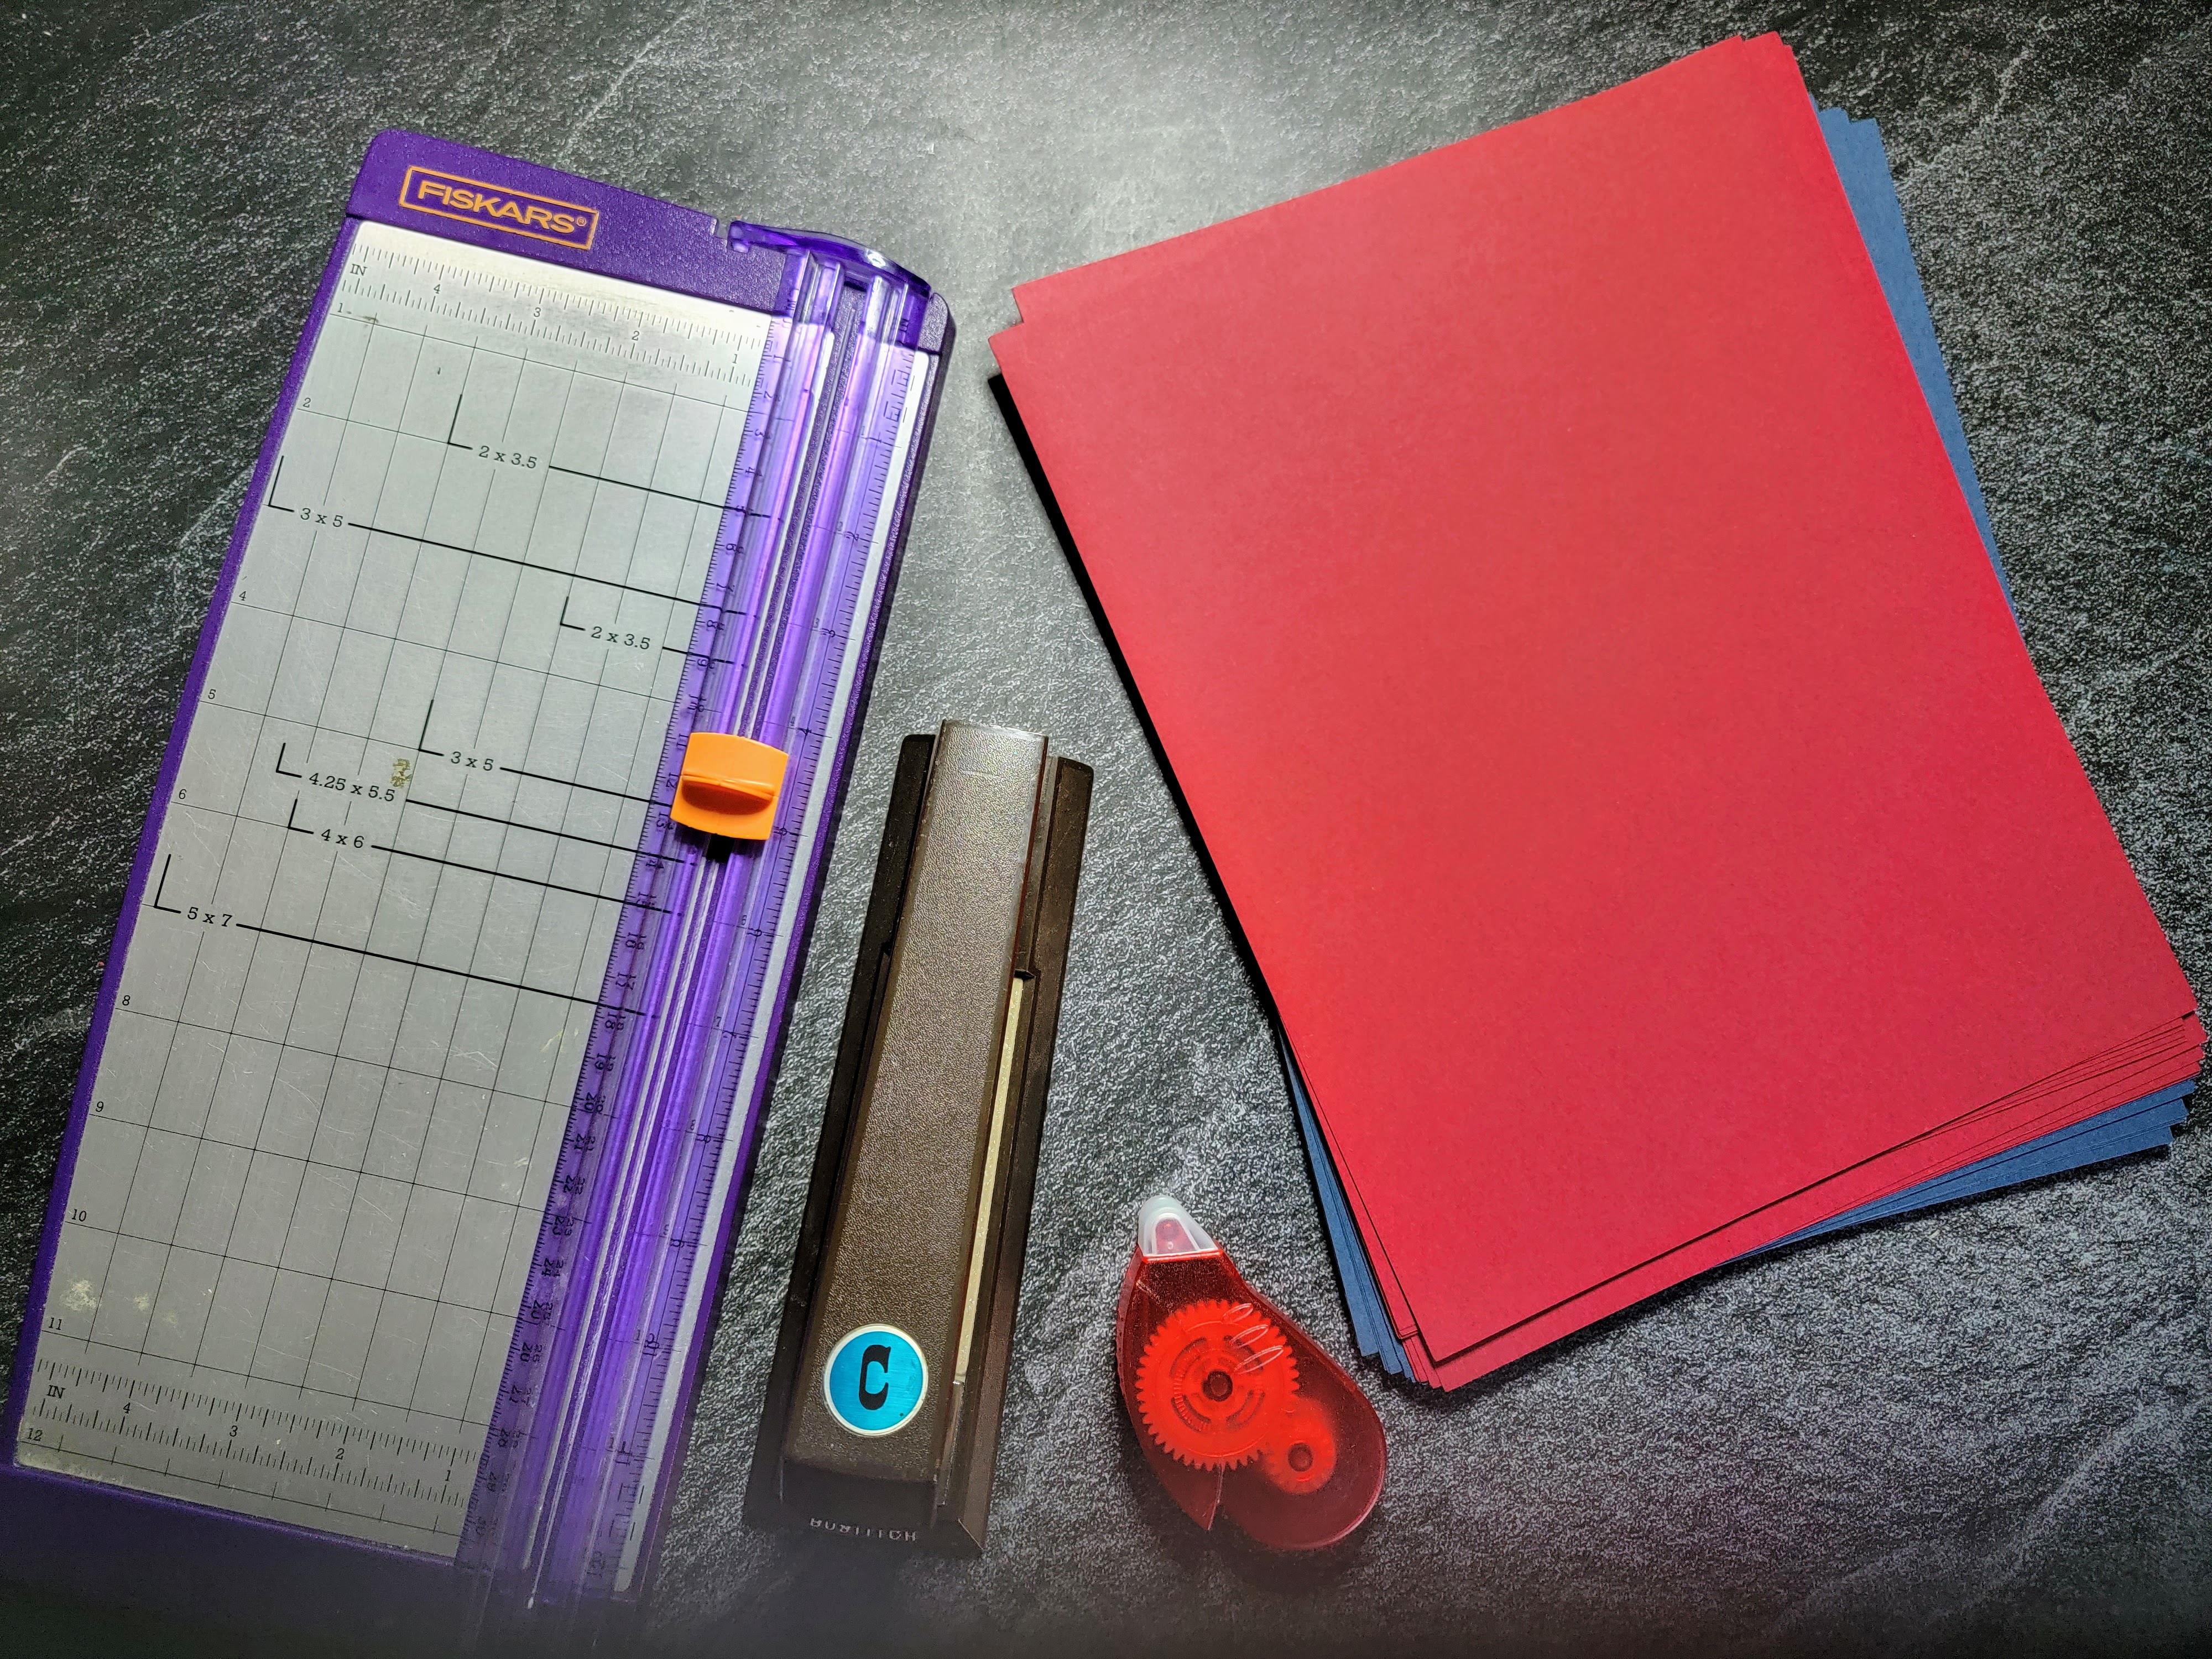
- Colored printer or scrapbook paper (try a bright color mix or a pastel mix you can find on Amazon)
- Paper cutter
- Stapler
- Two sided tape (this Duck tape comes in a dispenser and is really easy to use)
.
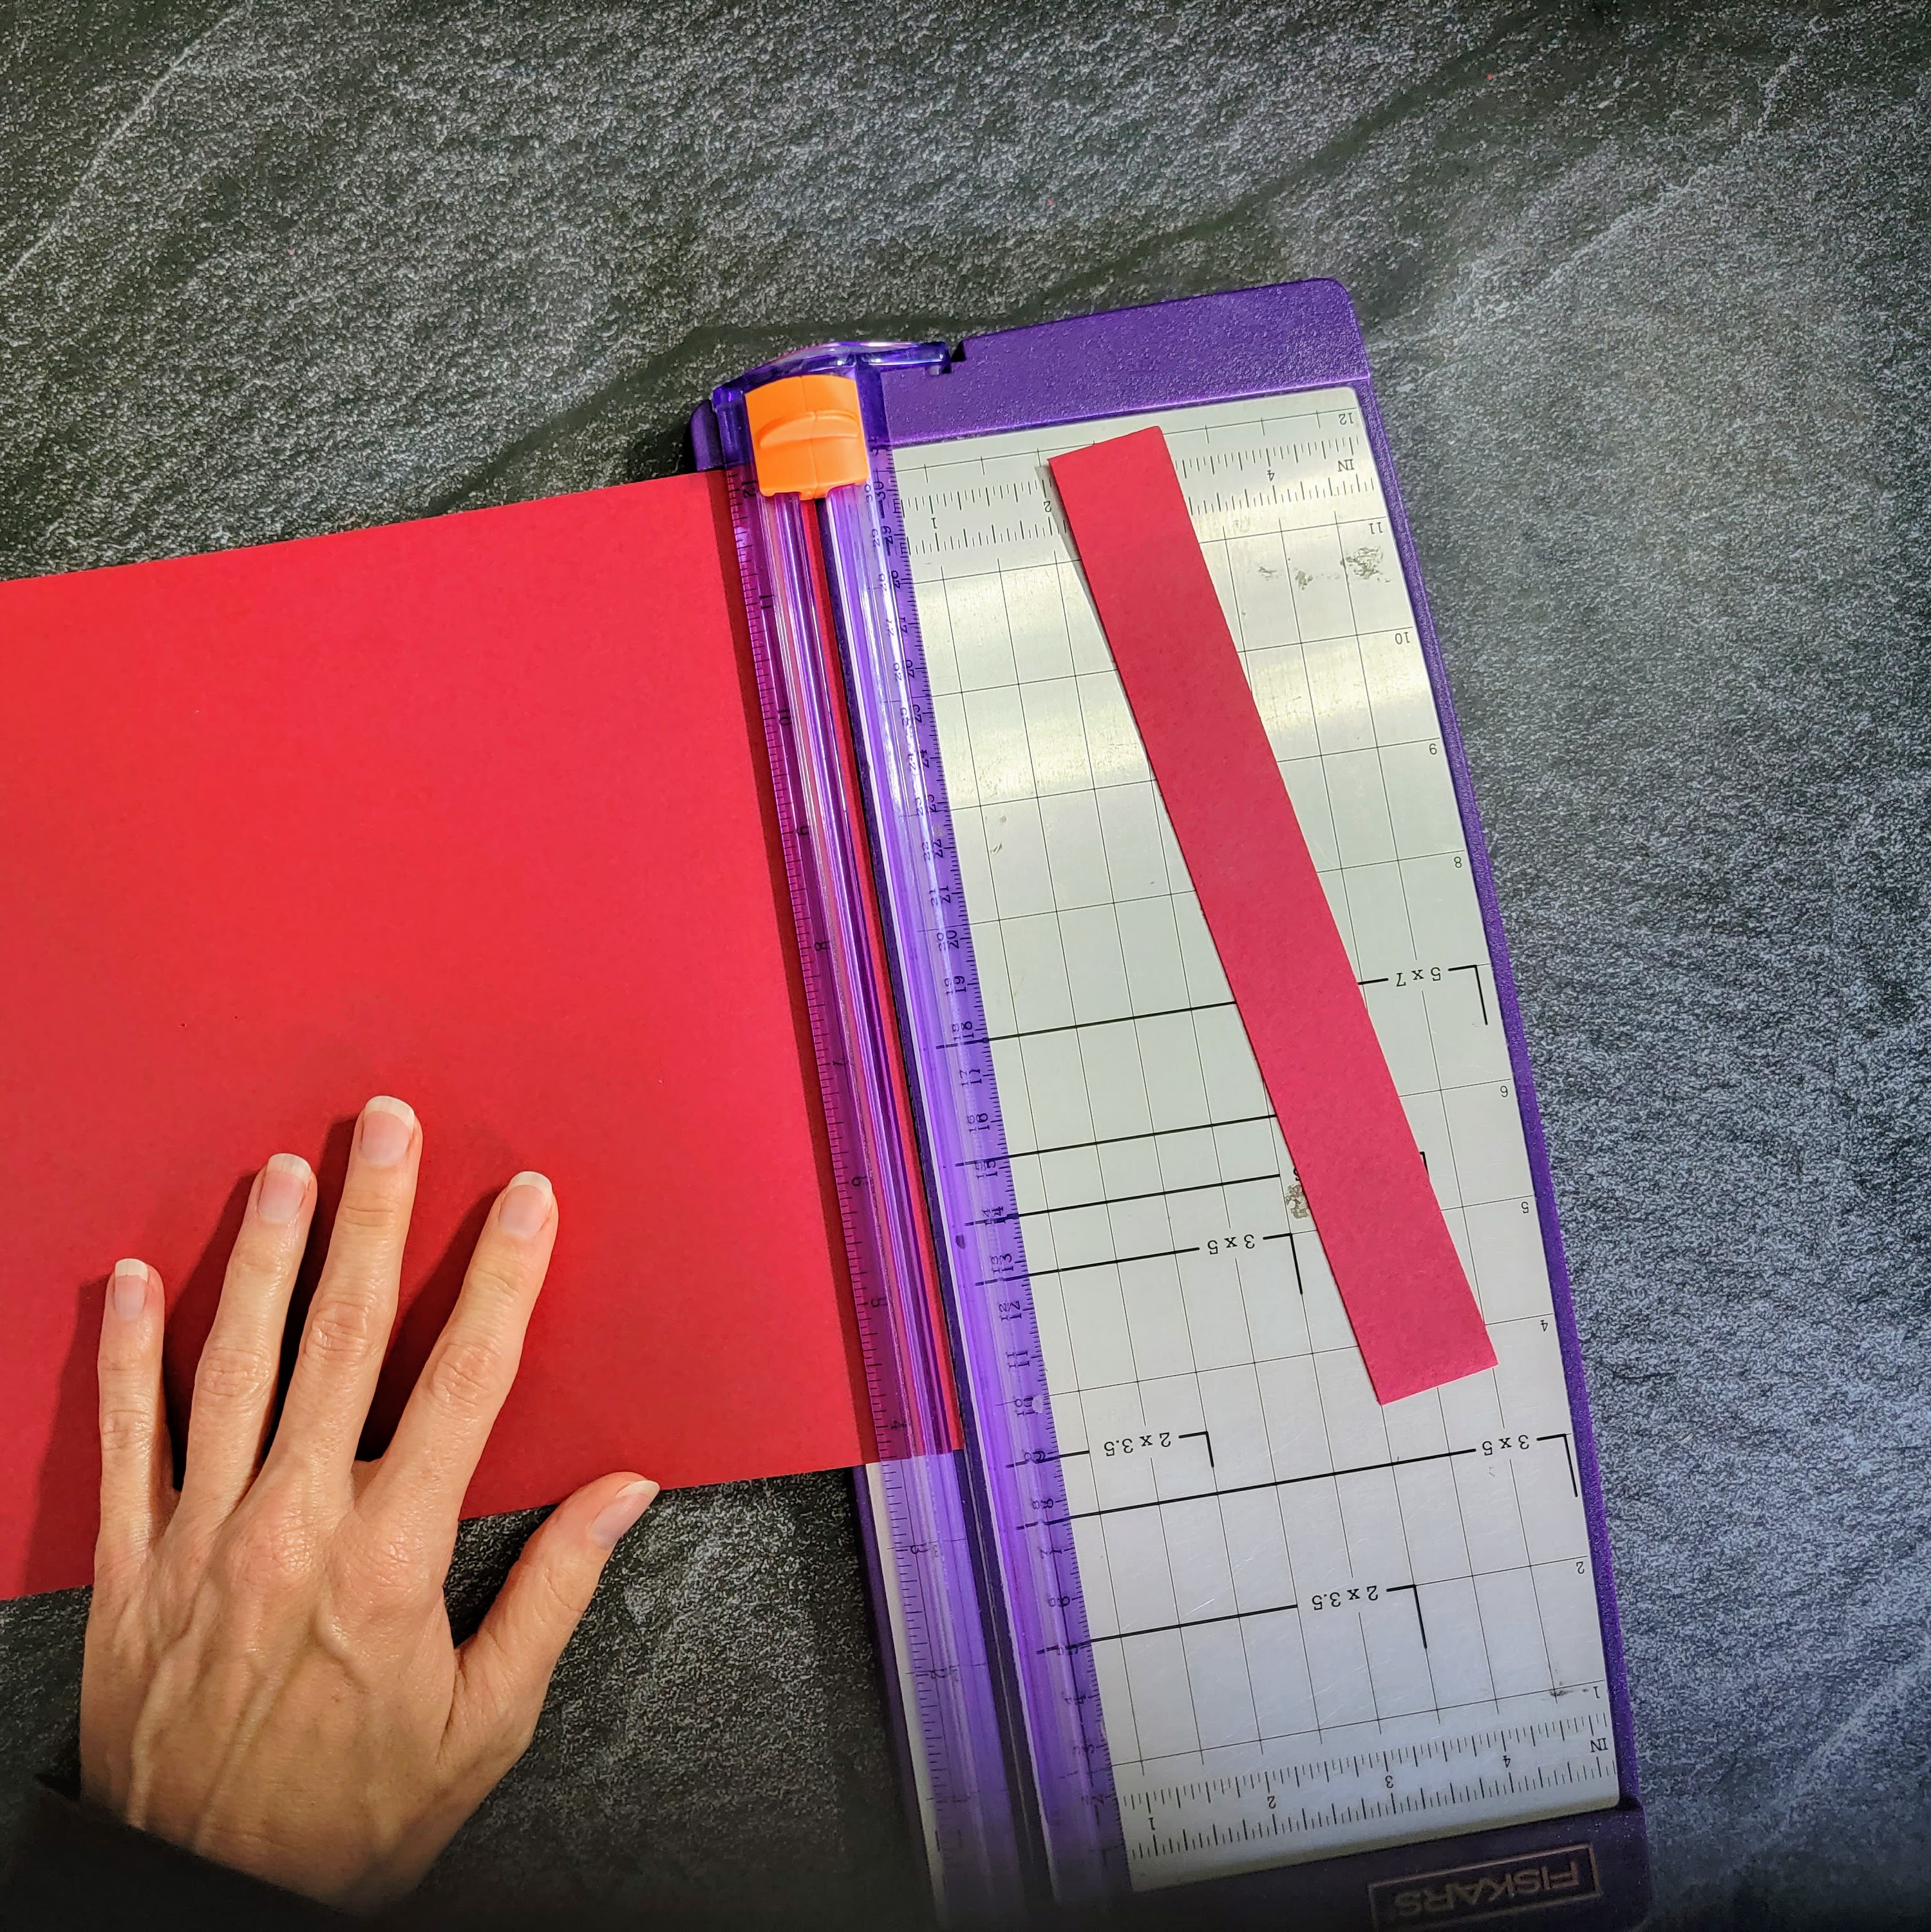
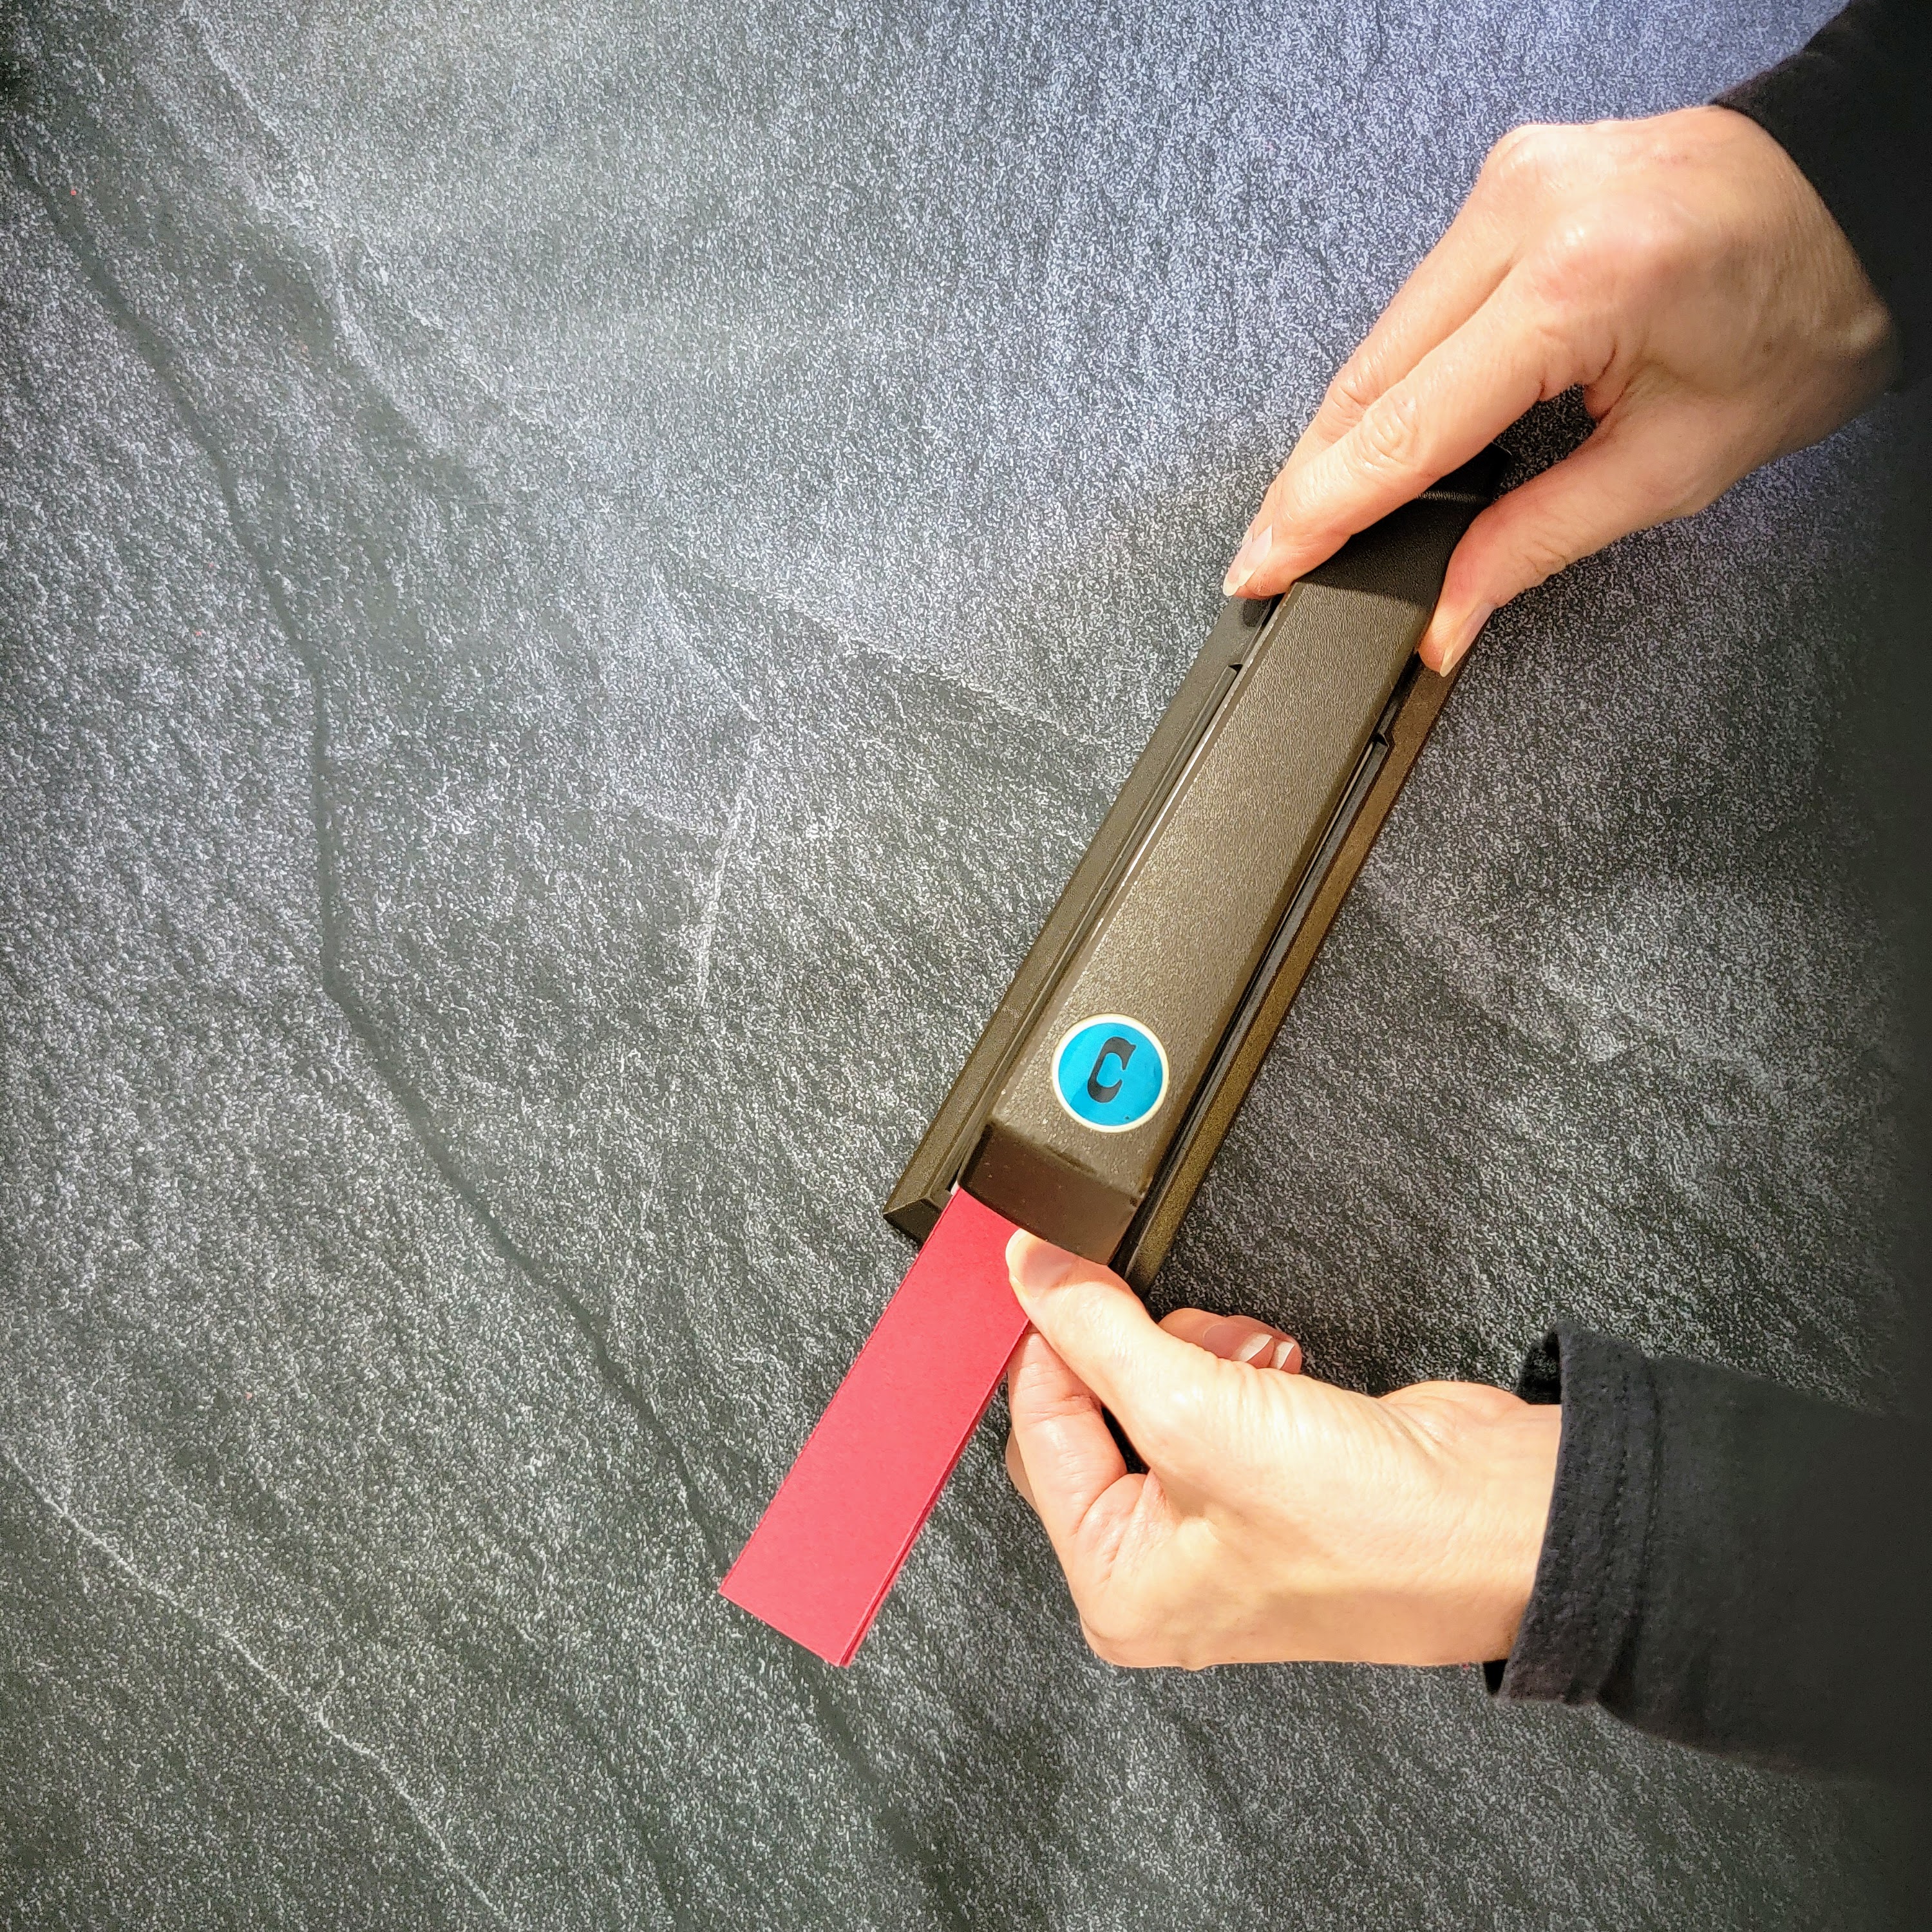
2 – Cut Paper Strips
Turn the paper in the landscape direction, and use your paper cutter to cut 1″ wide strips. My paper is 8.5″ x 11″ so I got 11 strips.

.
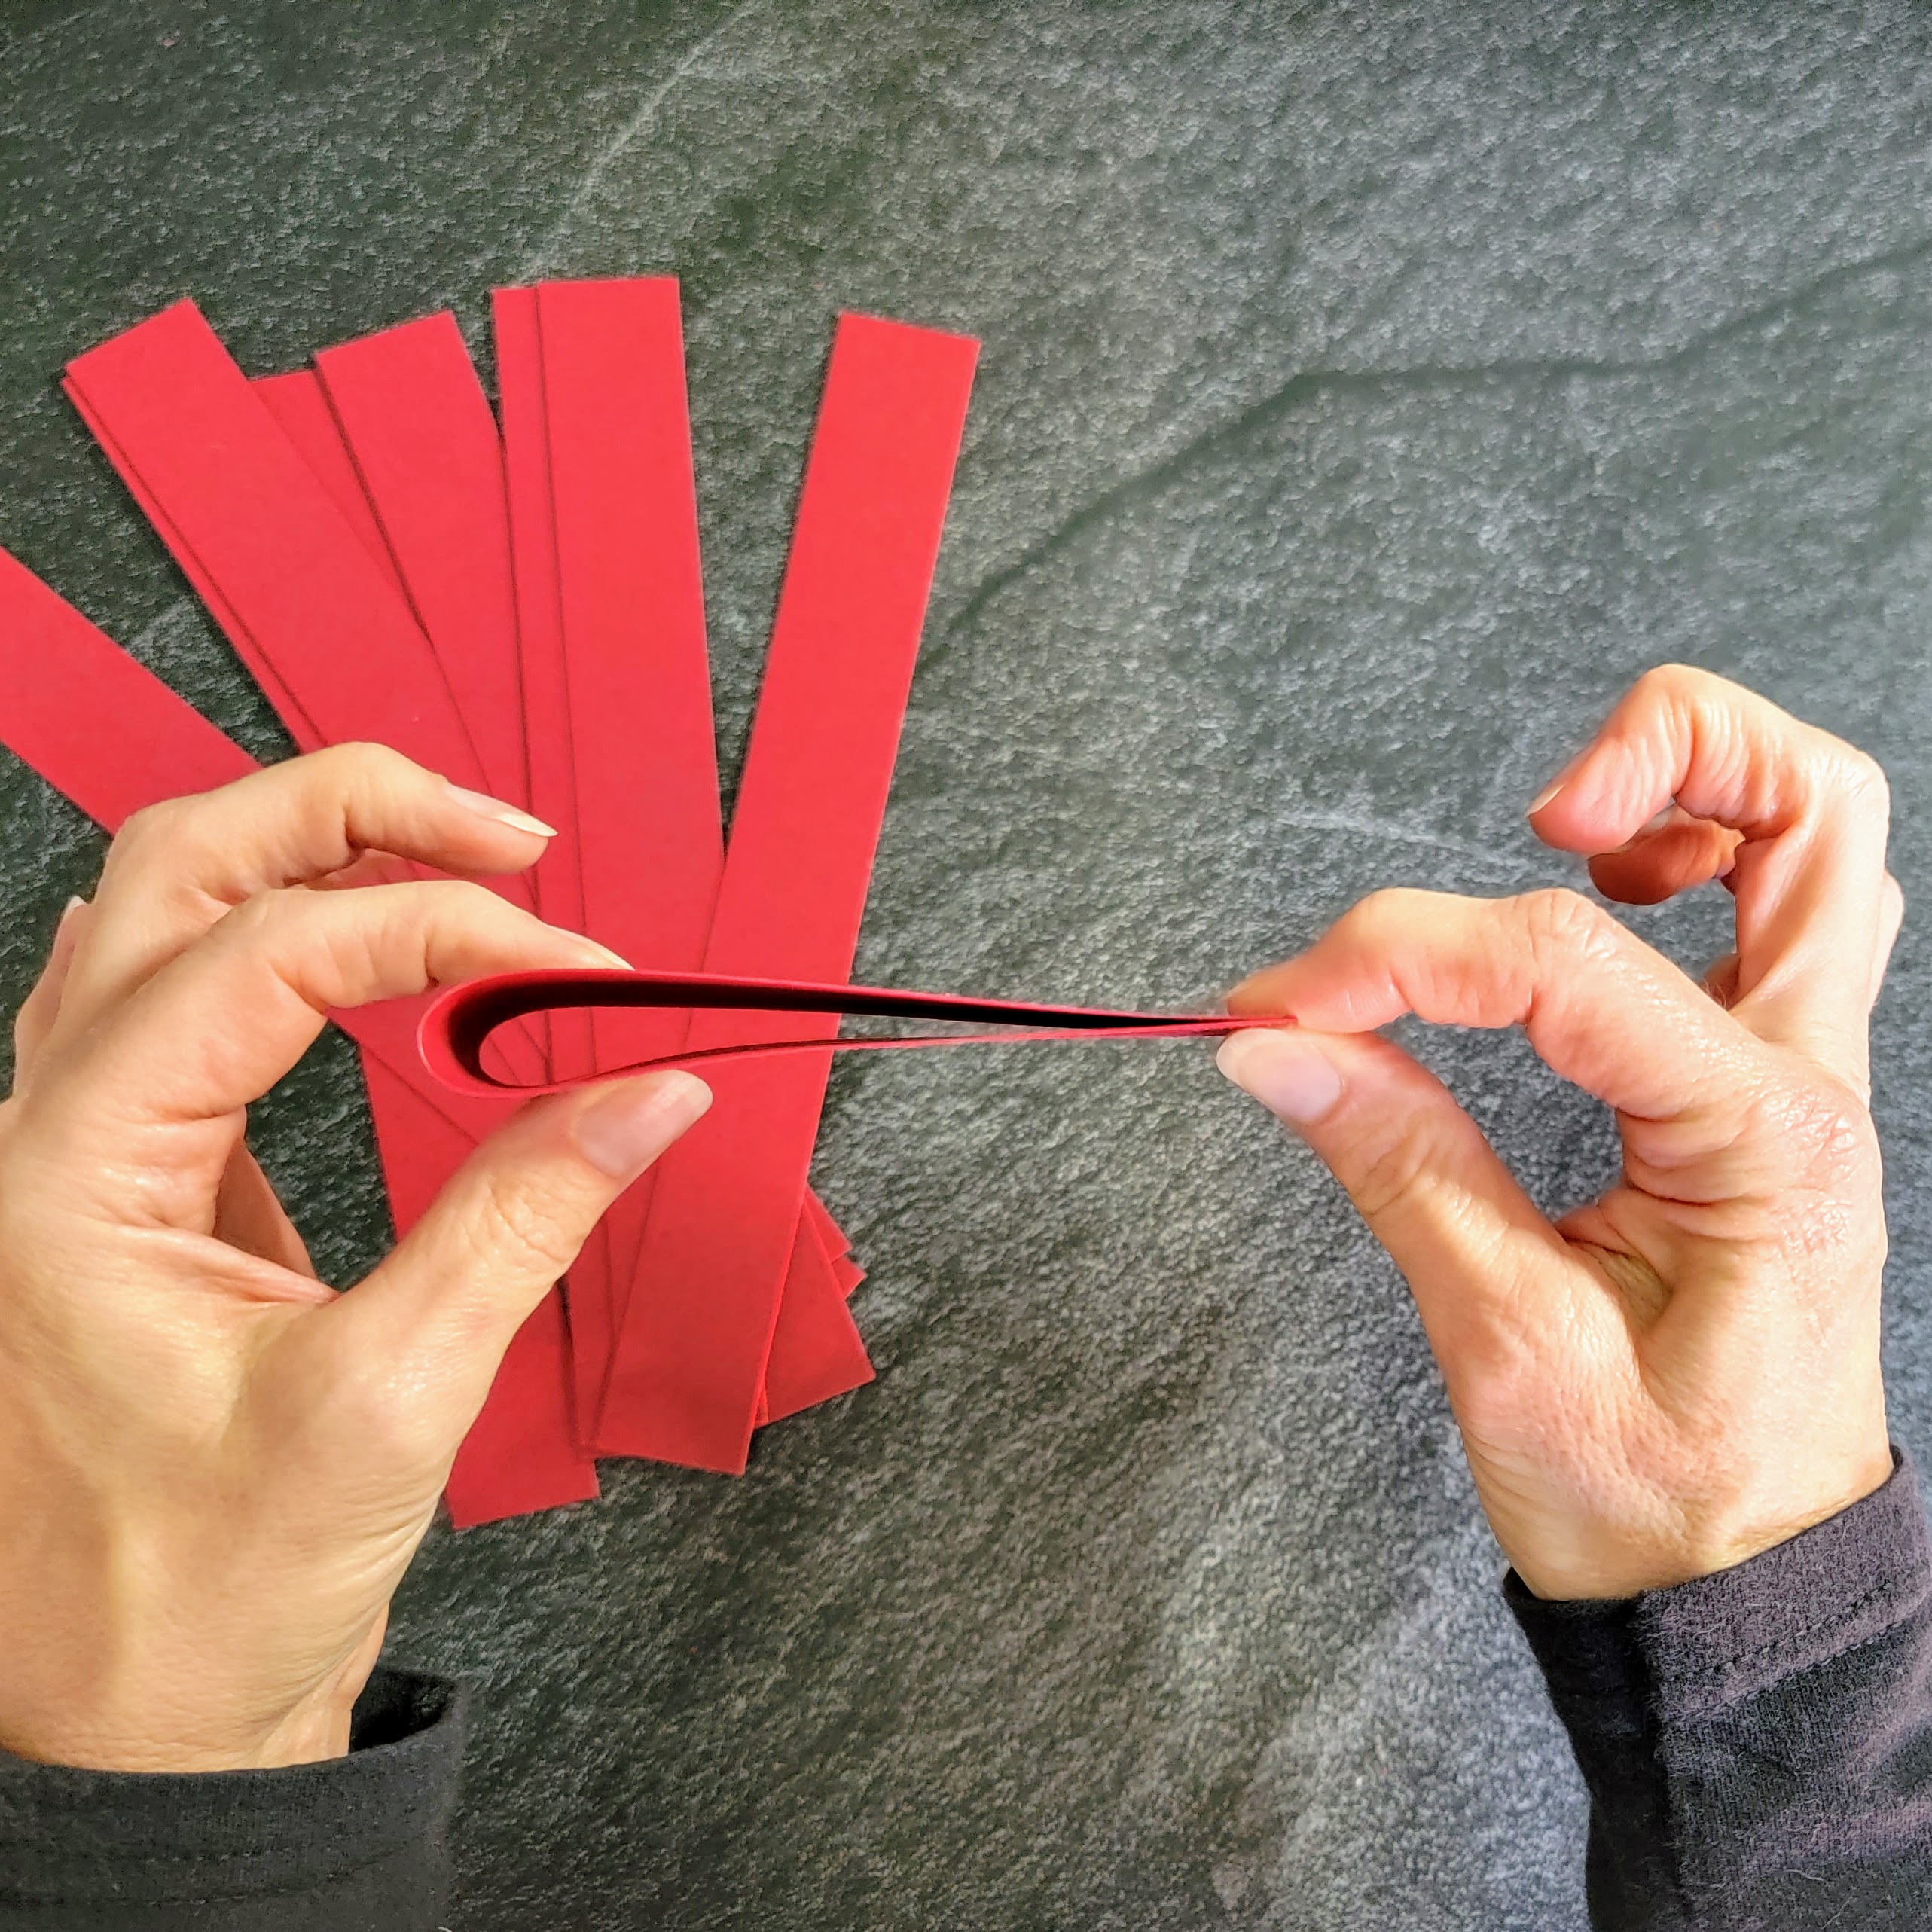
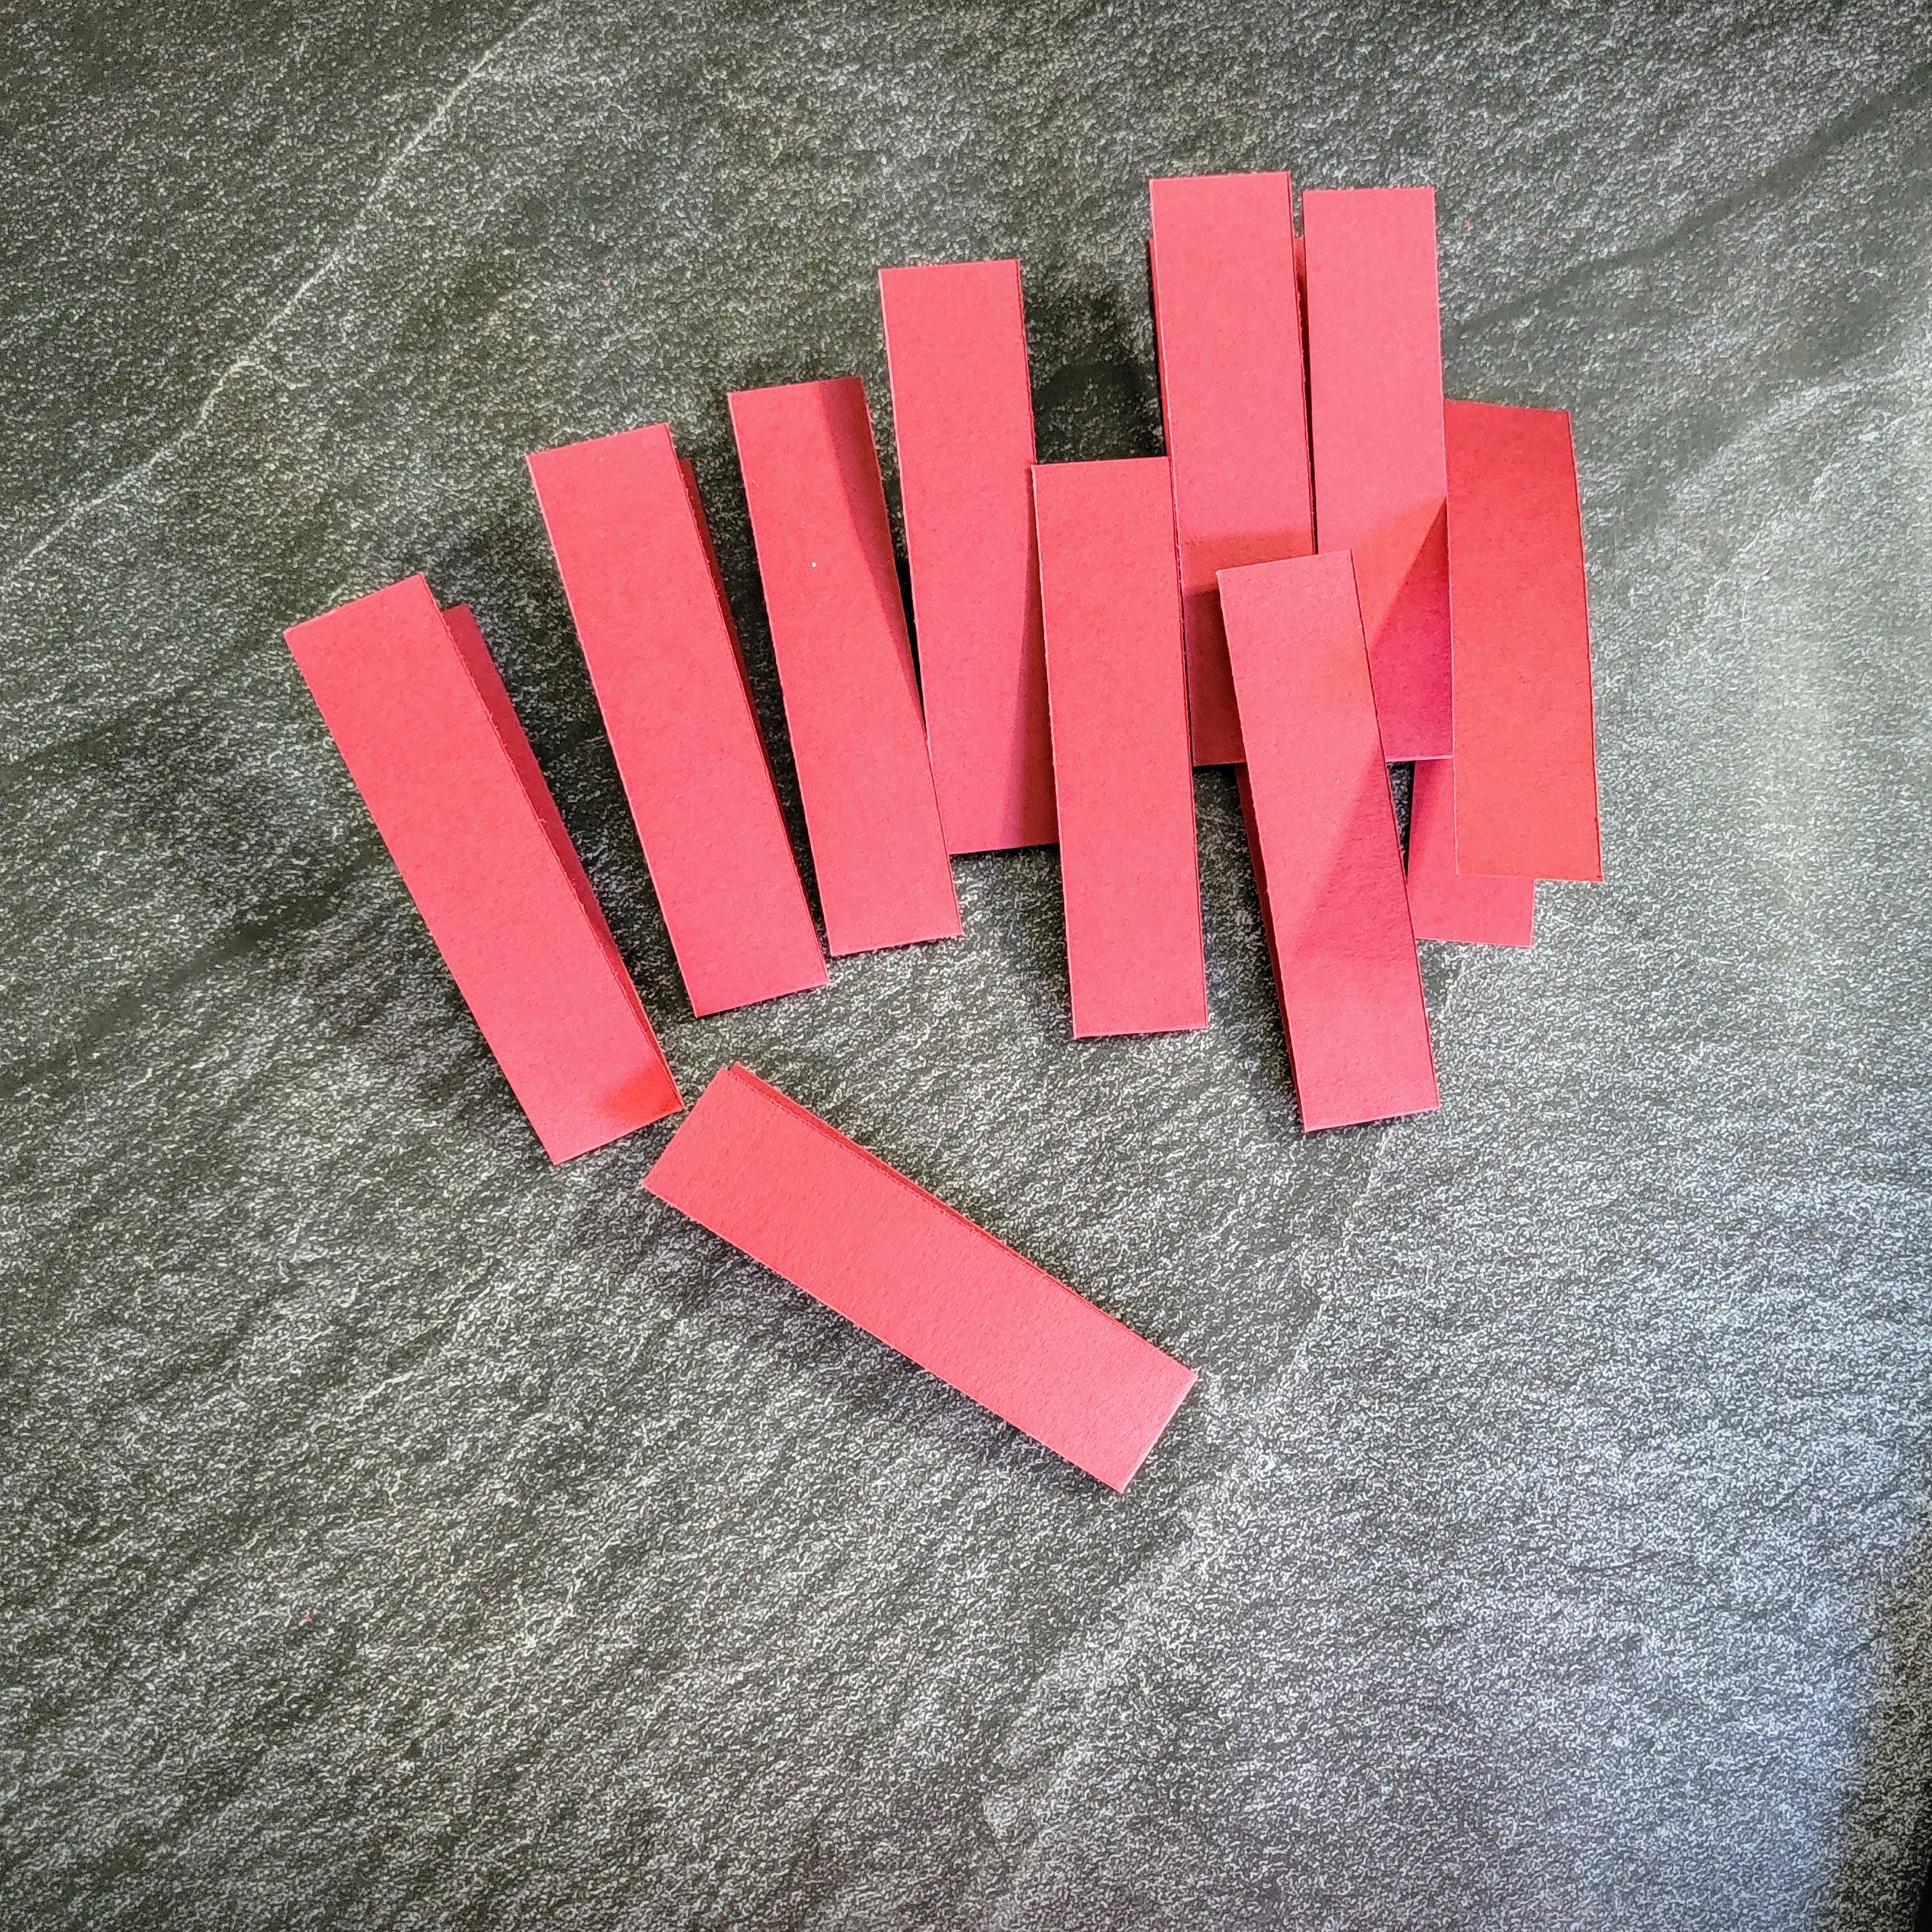
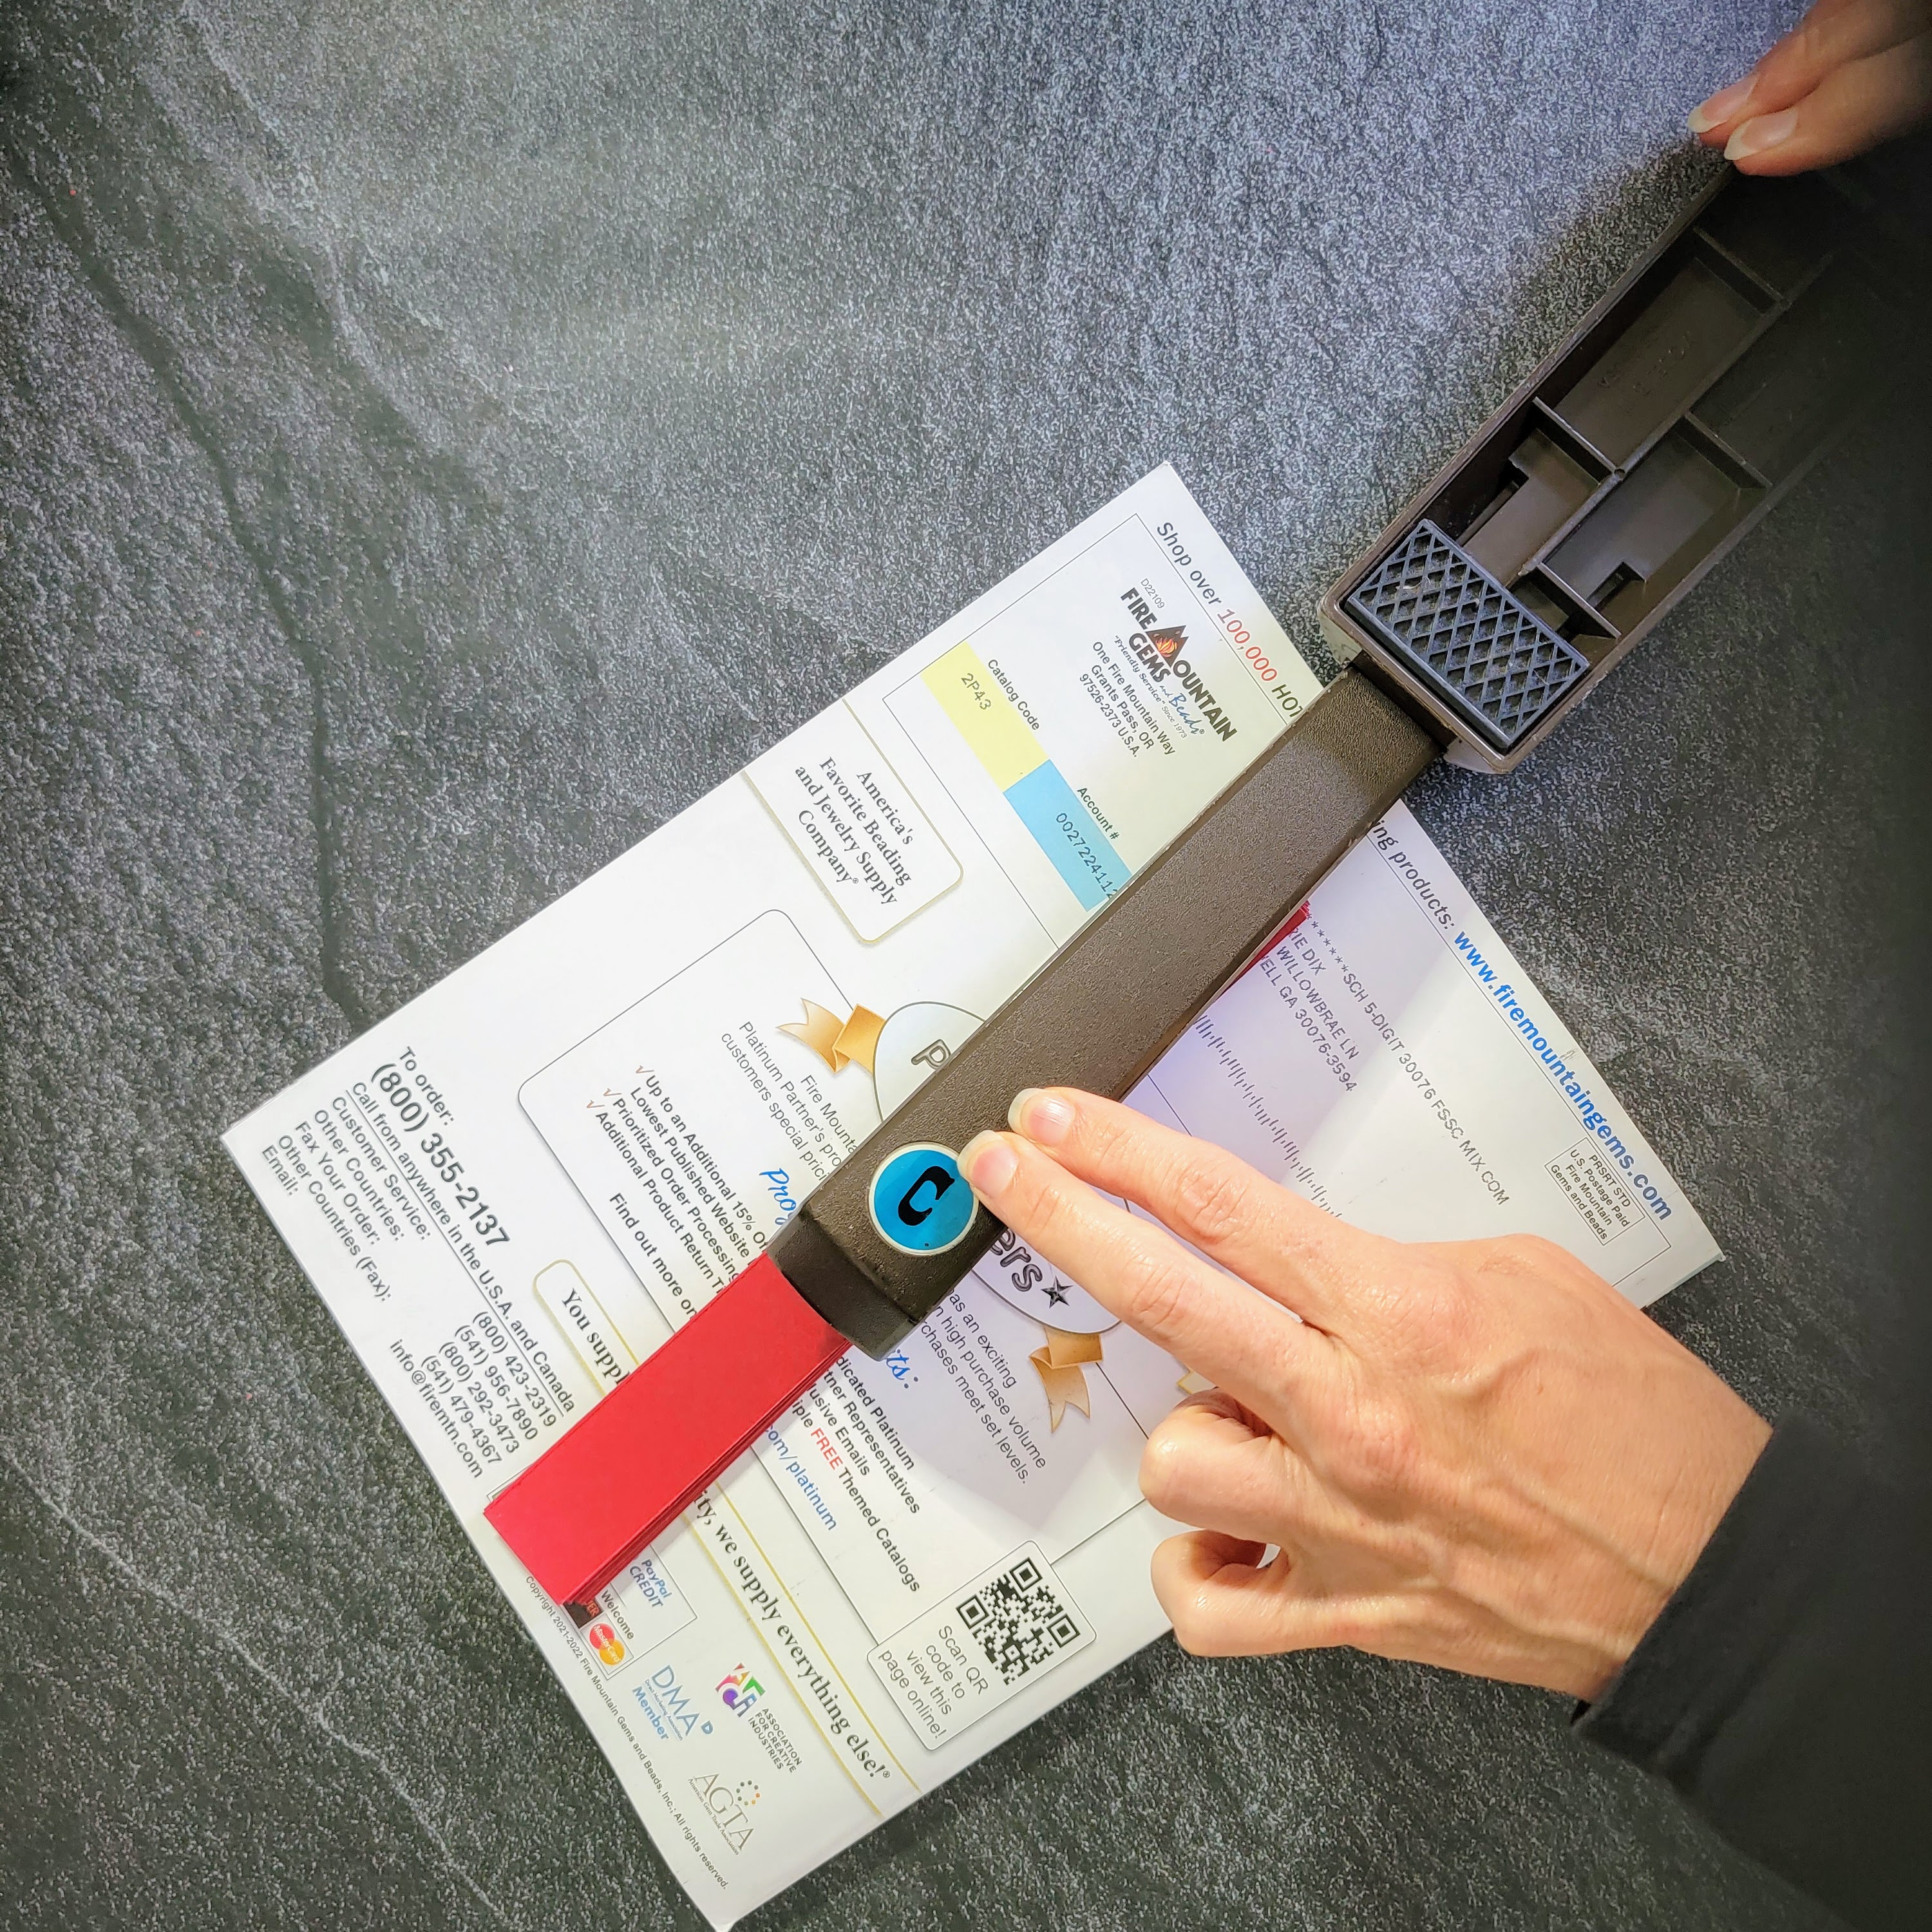
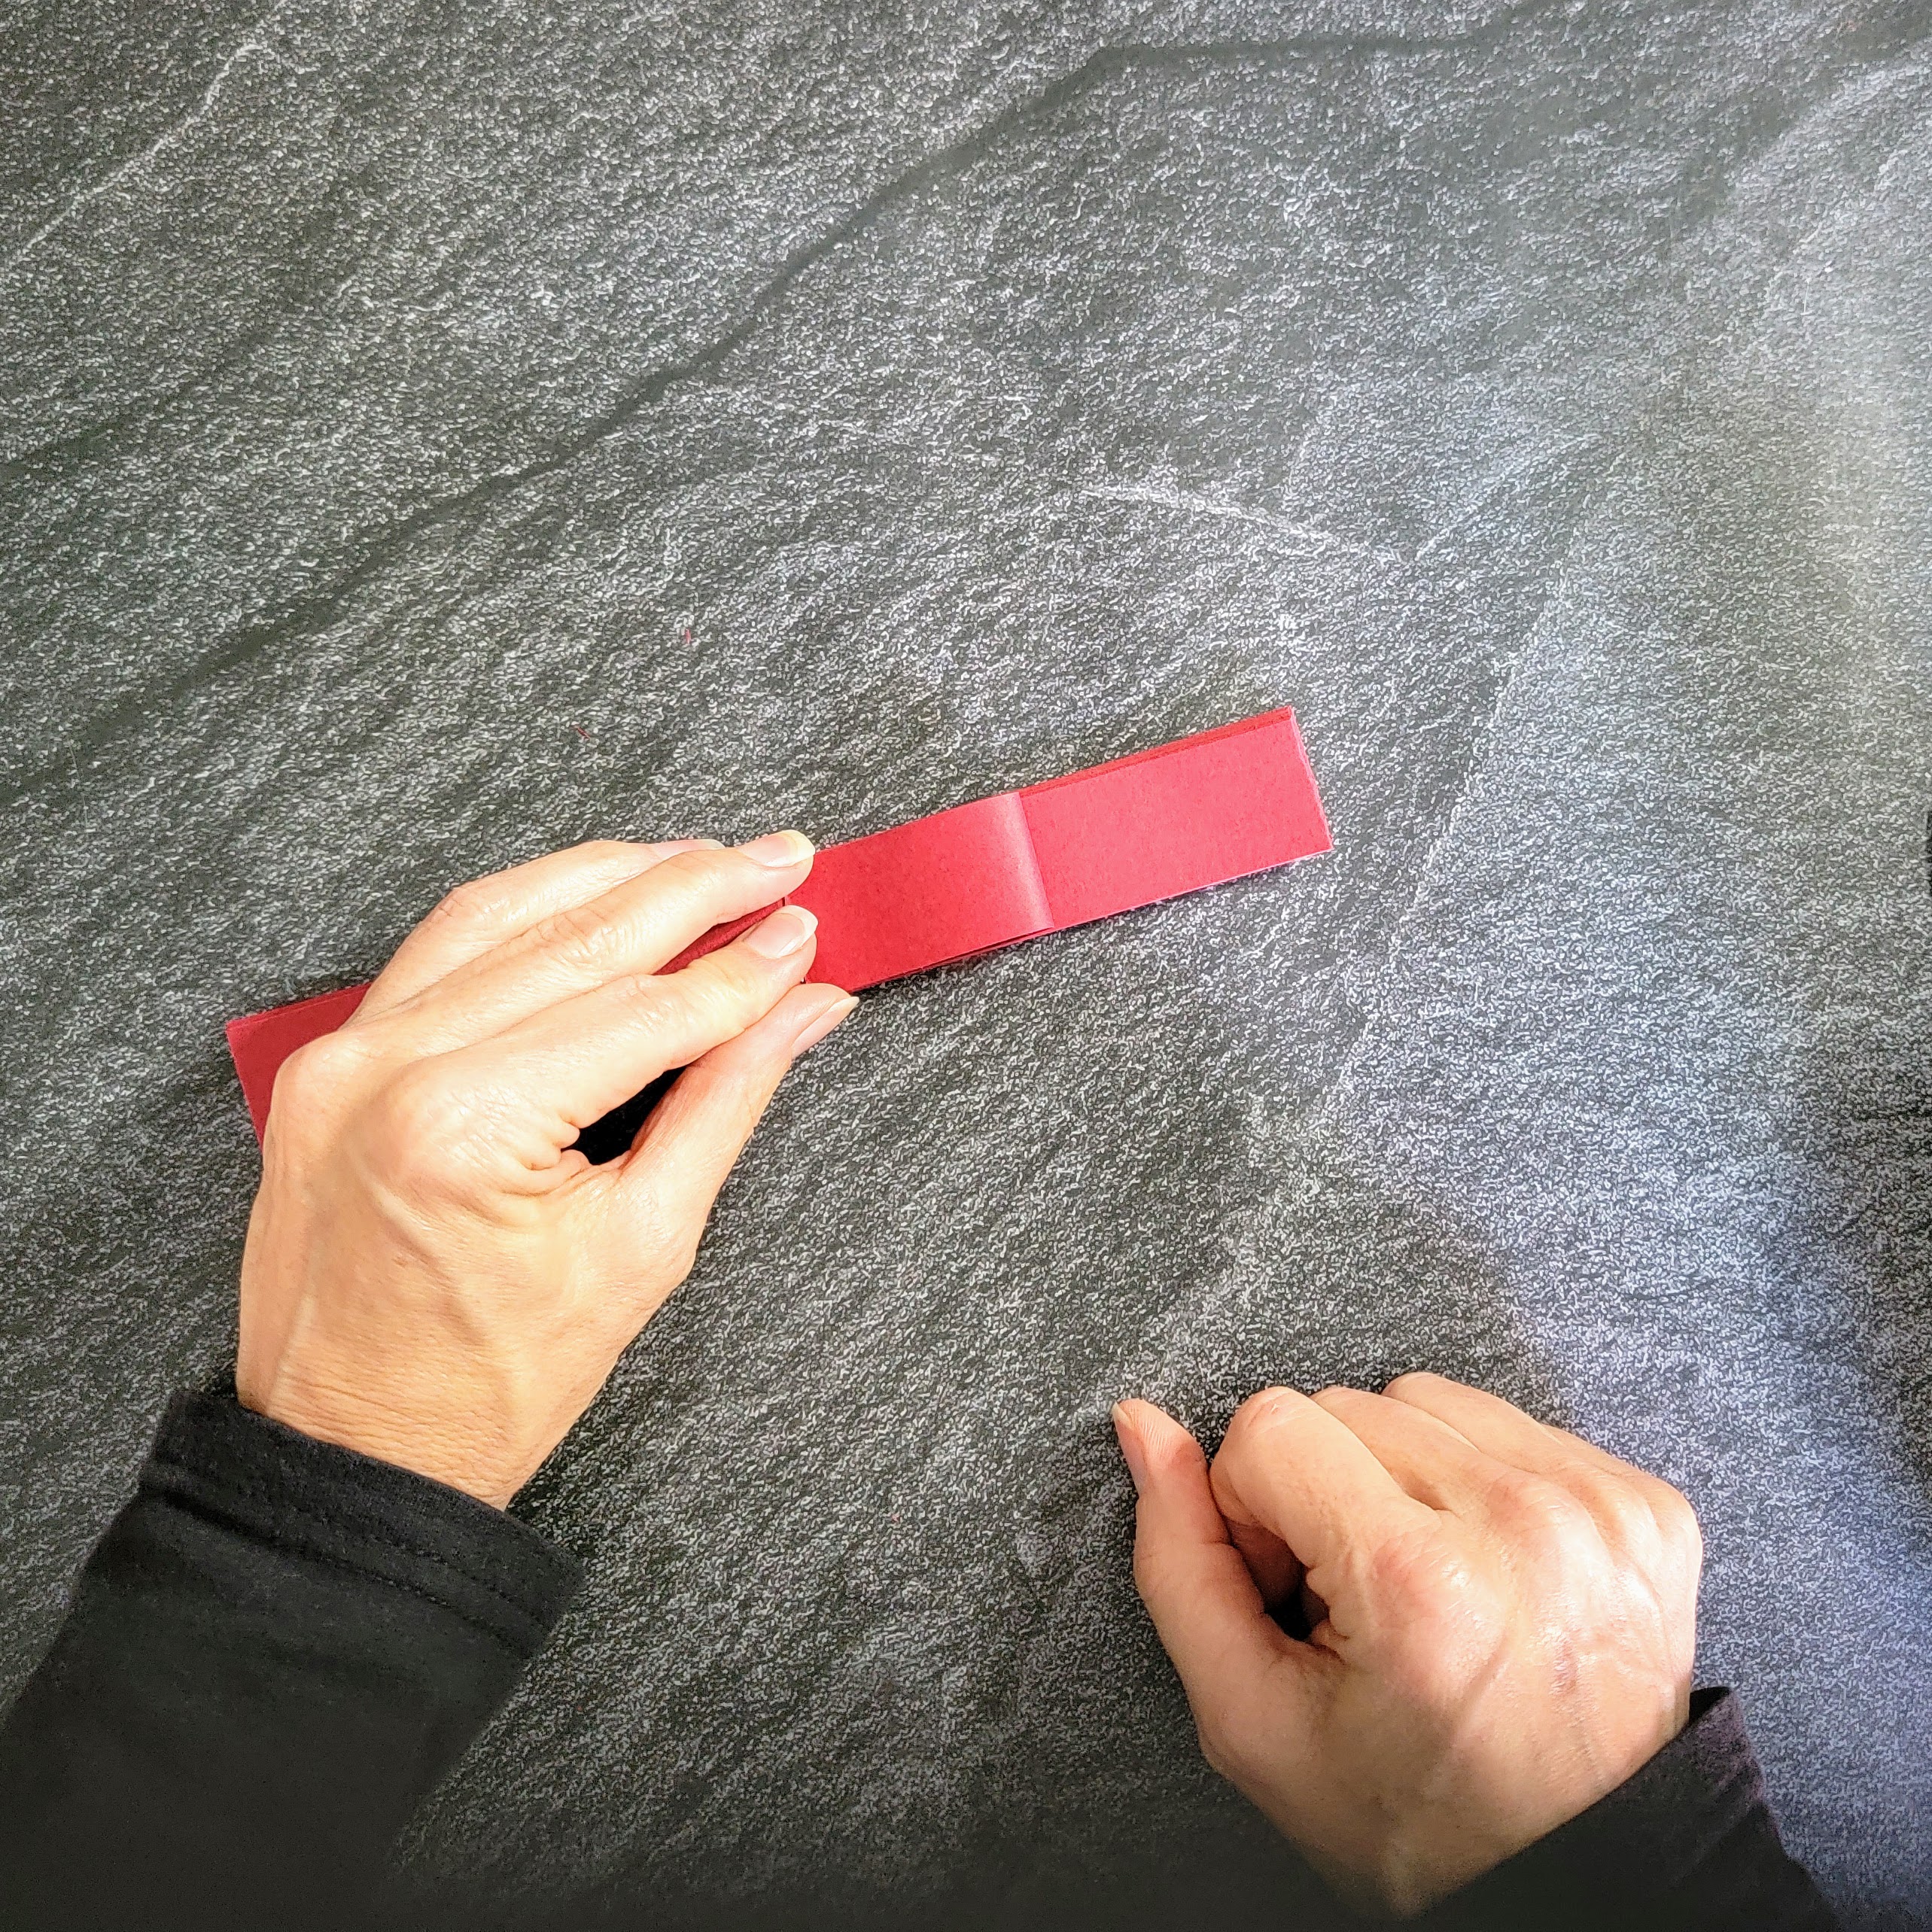
3 – Fold and Stack the Paper Strips
Fold each of the strips in half the long way. Unfold the strips, then stack them up, with the fold marks on top of each other.
.
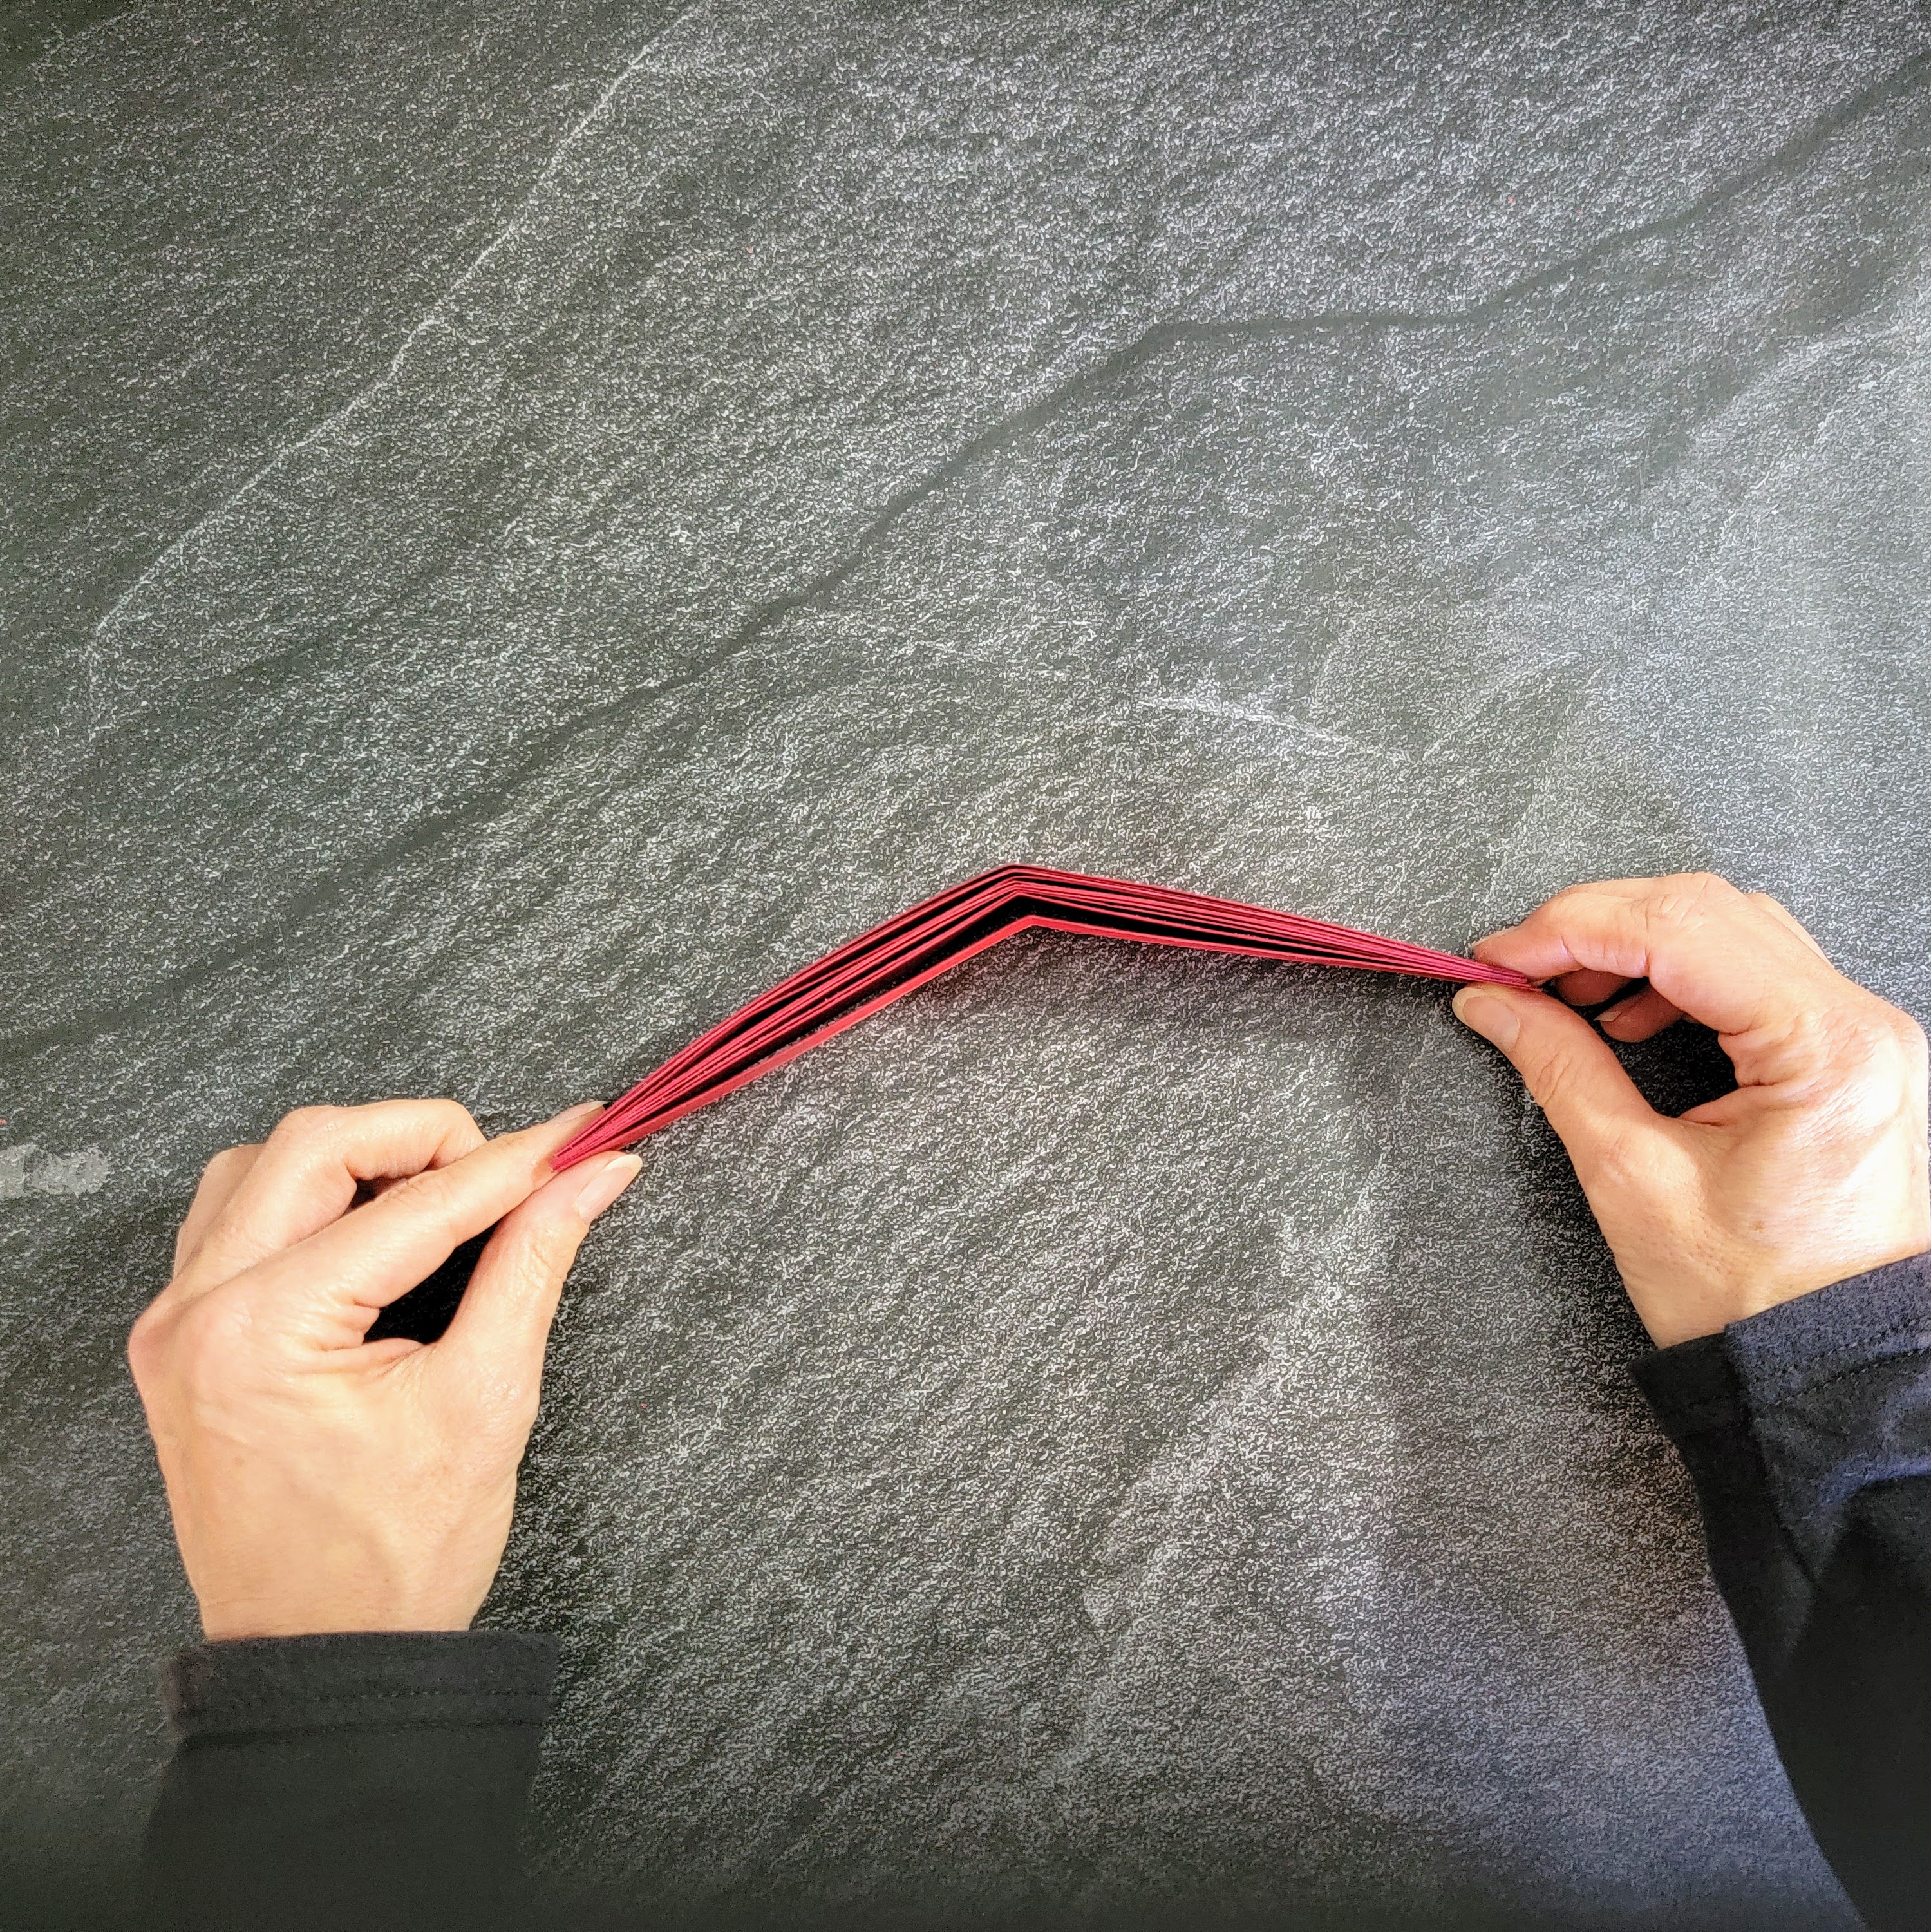
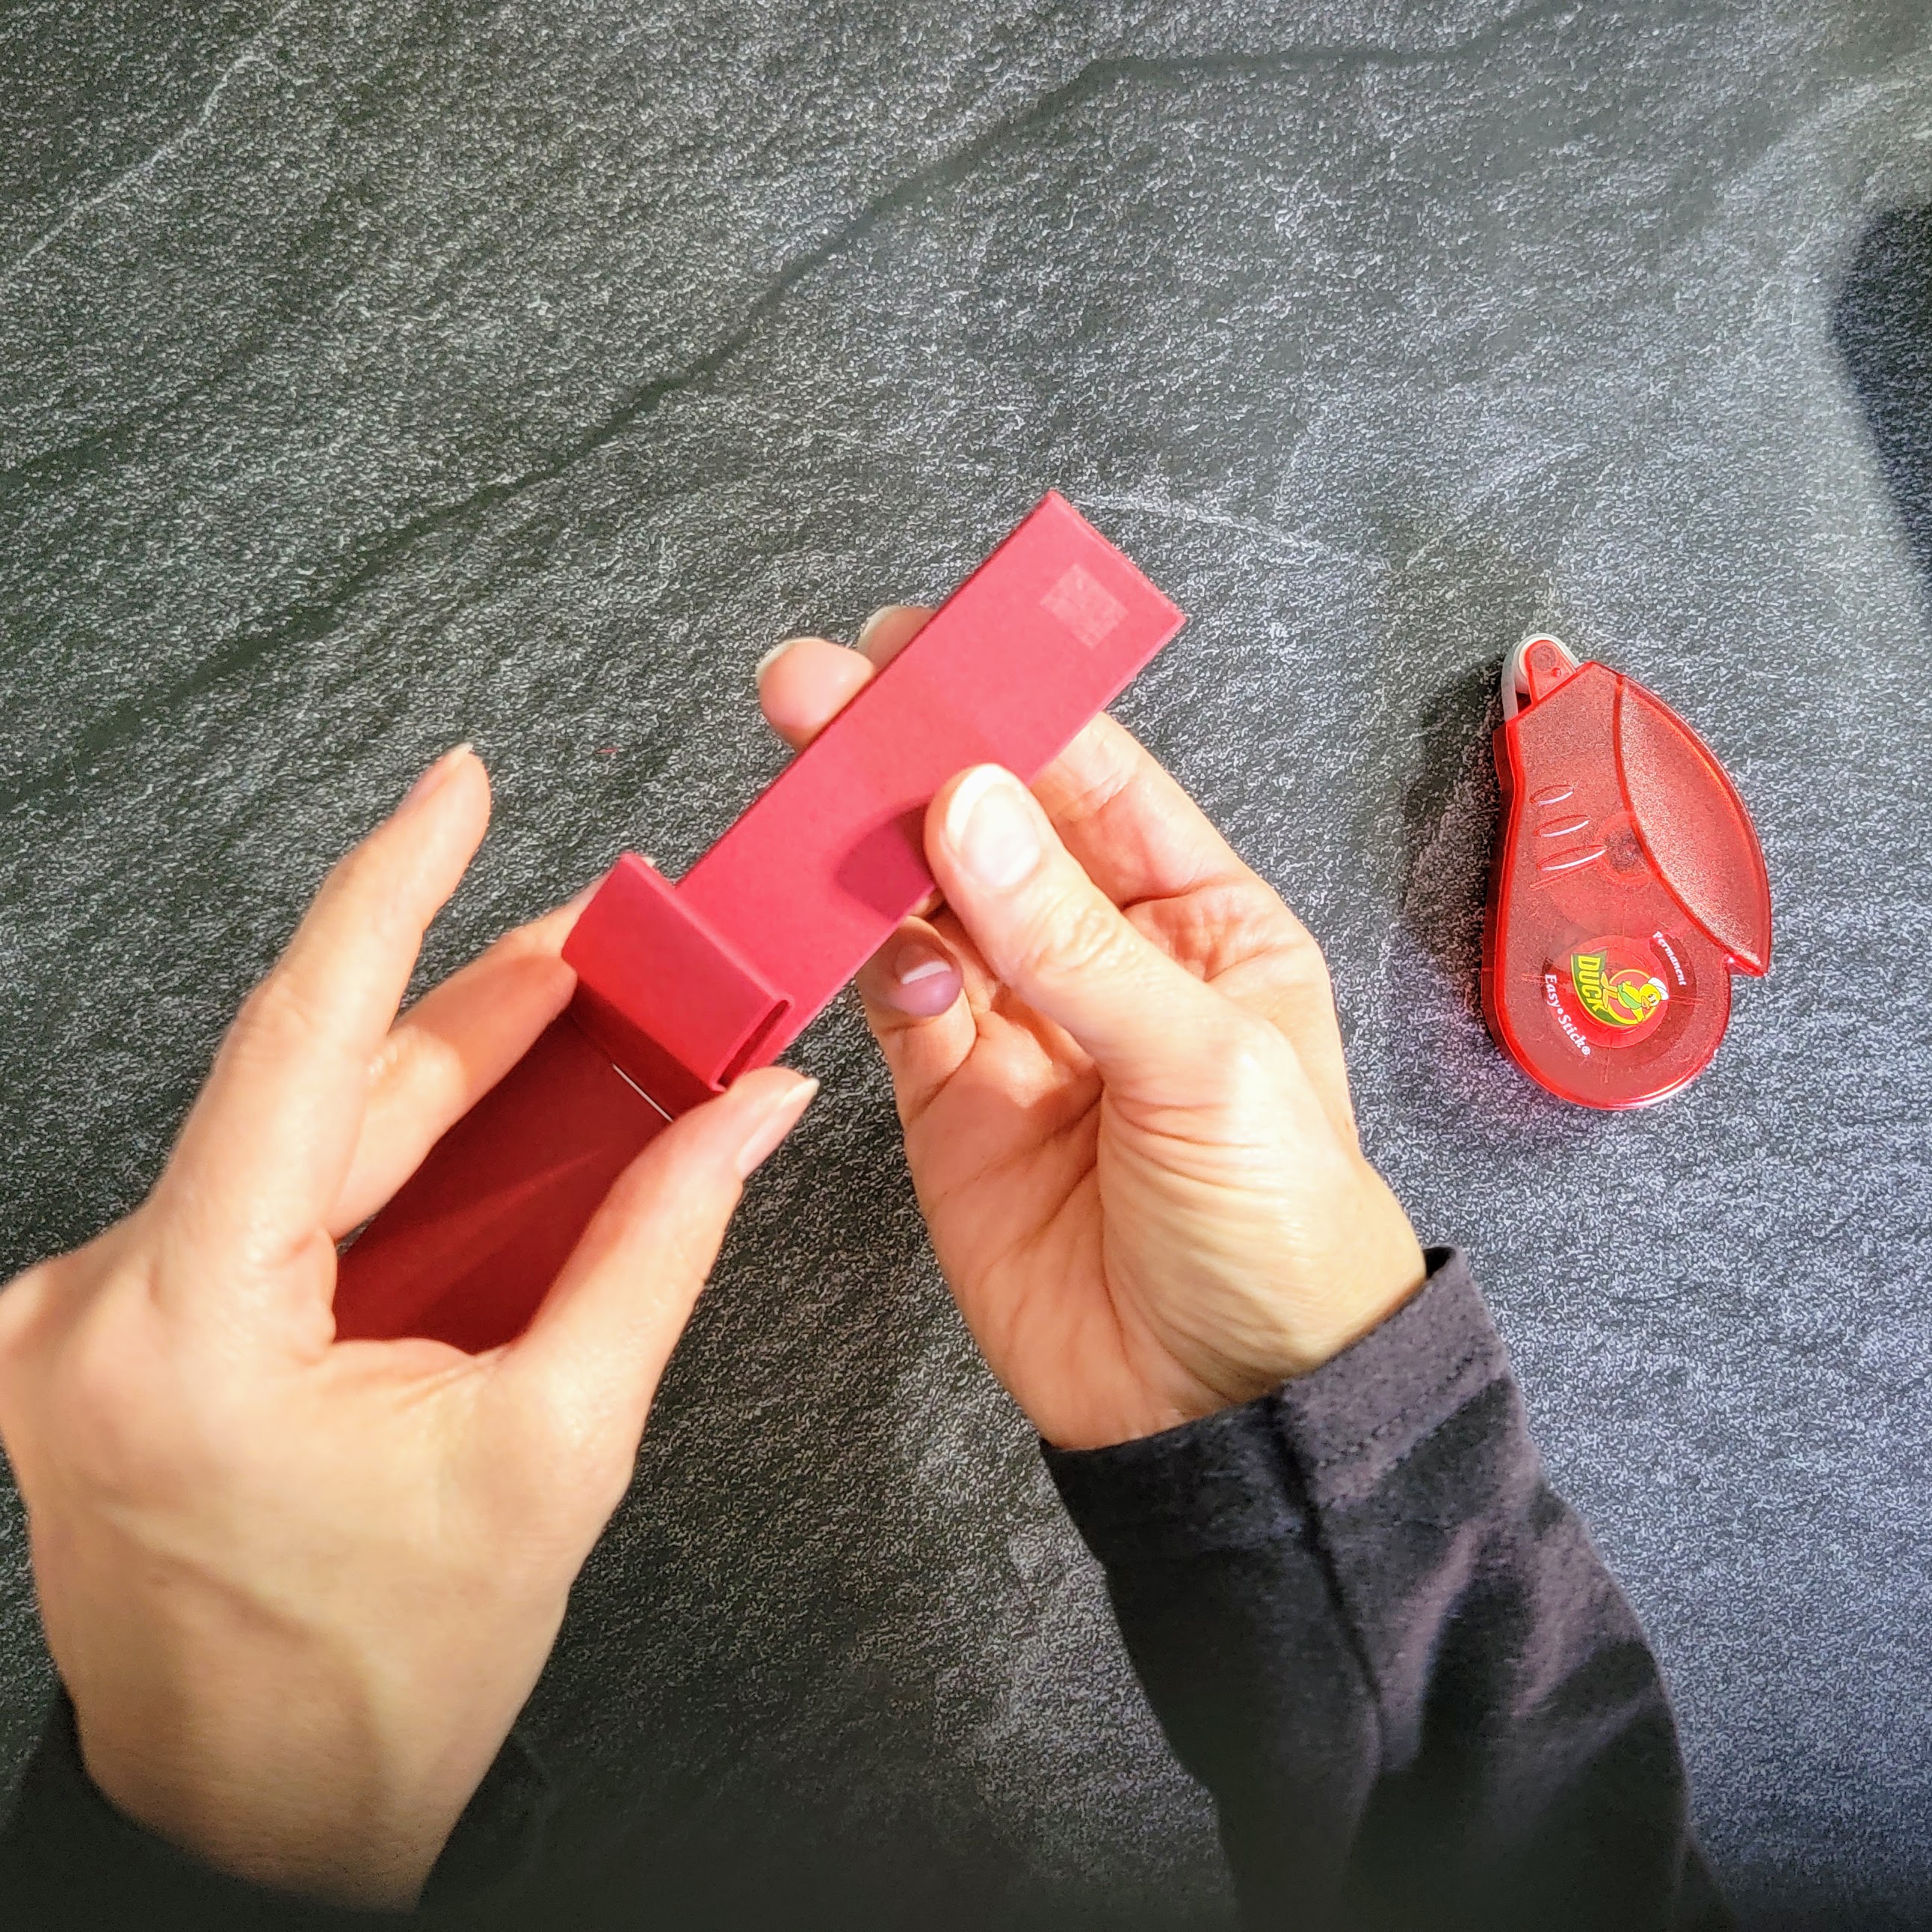
4 – Staple the Stack
Holding the stack so the fold marks stay lined up, put a staple through the stack right where the fold marks are.
If your stapler is not long enough to reach, open up the stapler, place the stack on a magazine or catalog, and push a staple through the stack. You’ll need to manually fold over the ends of the staple on the back side.

.
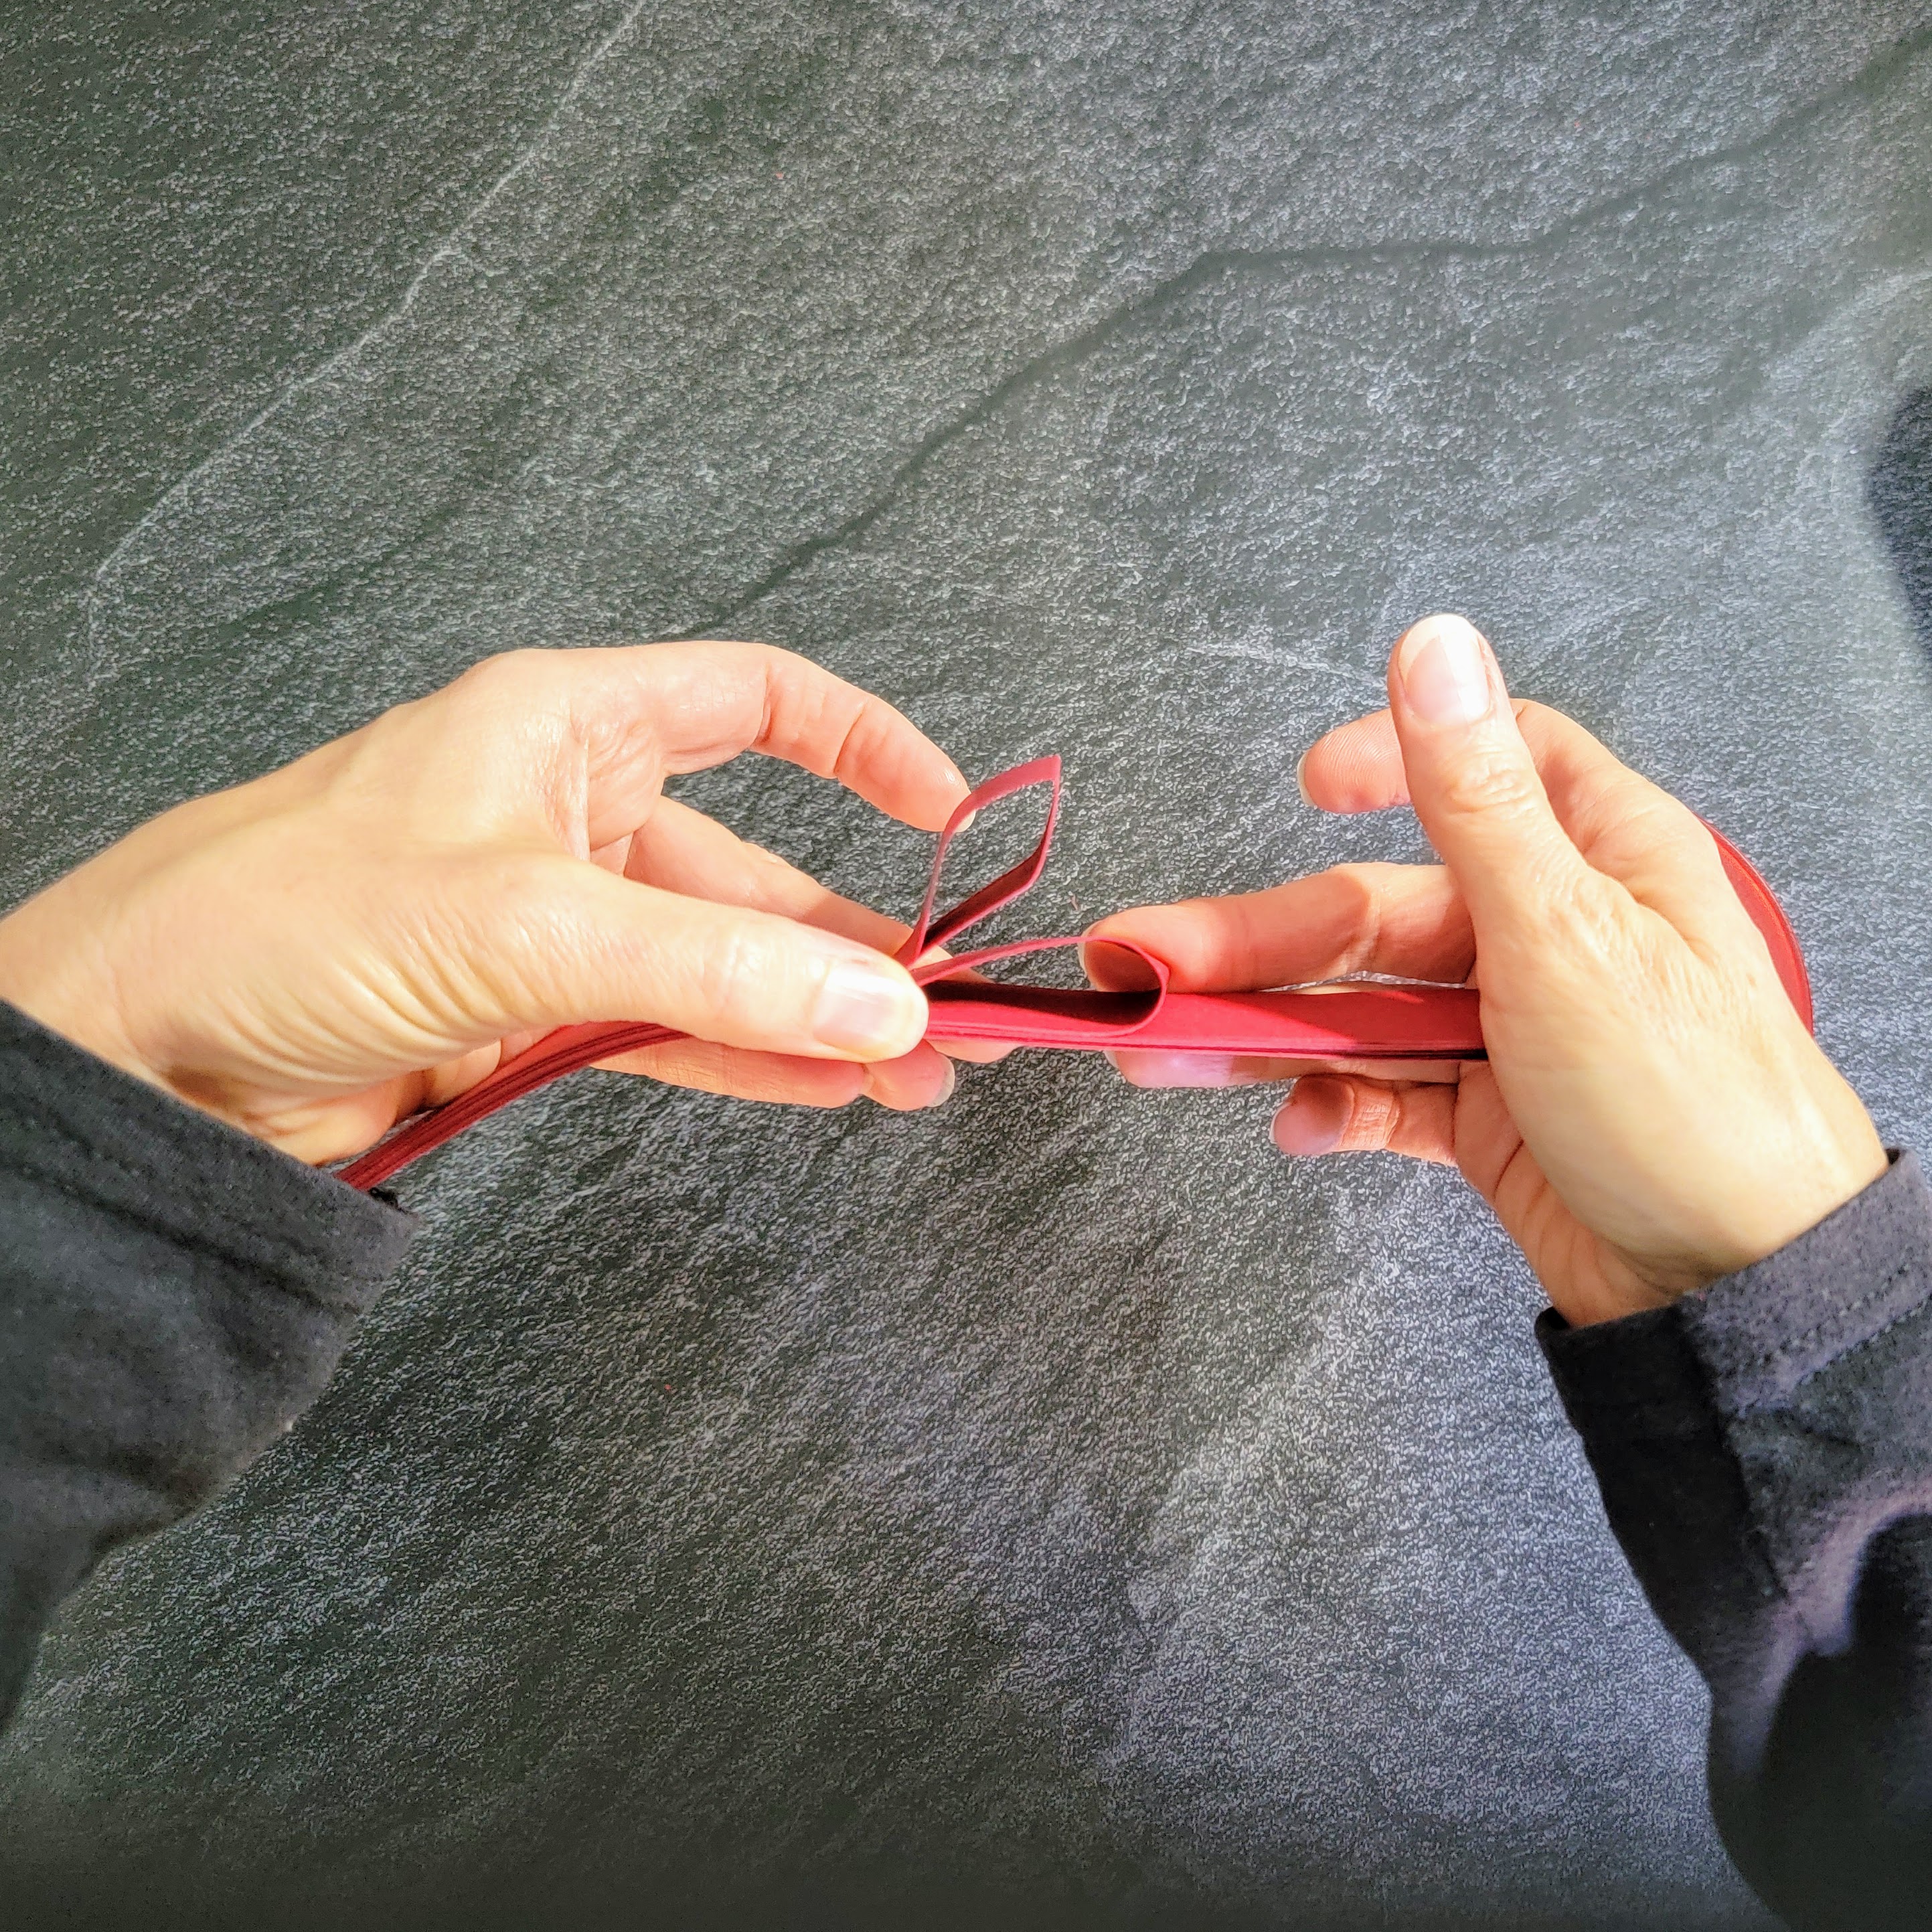
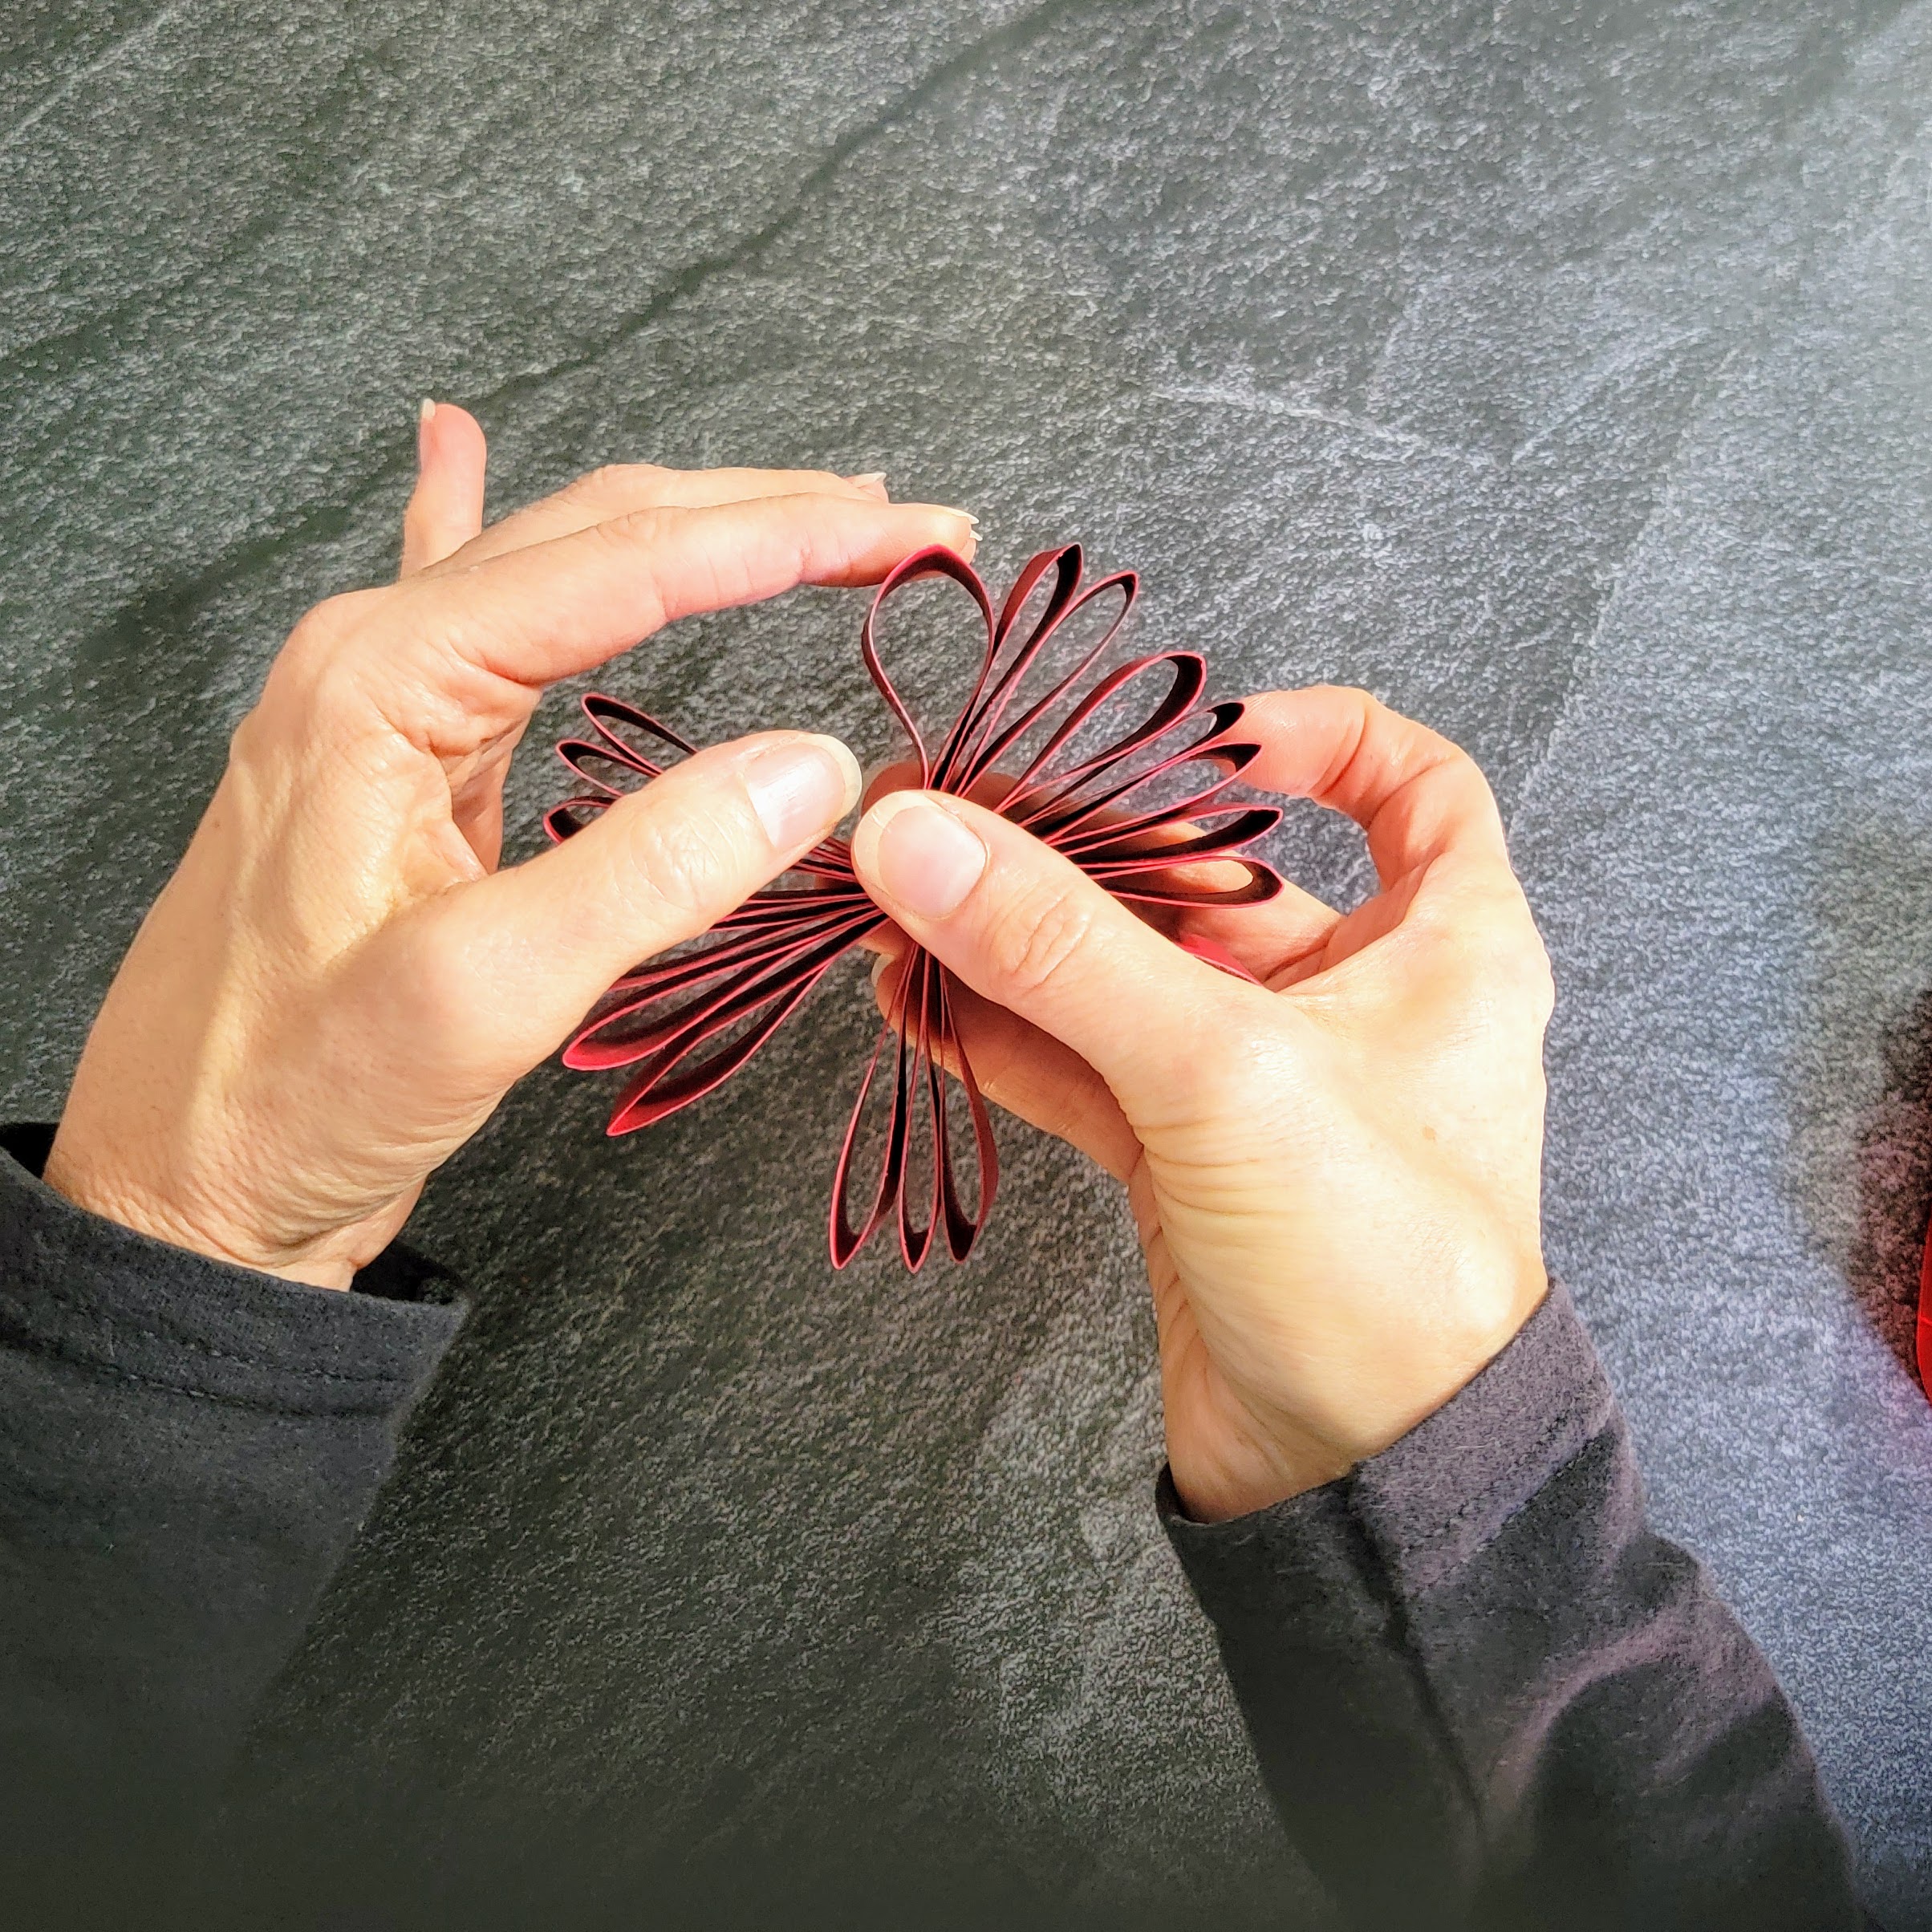
5 – Tape and Fold the Paper Strips
Put a small piece of tape on the edge of one of the paper strips. Bend the strip over itself, and place the taped edge snug up against the stapled center.
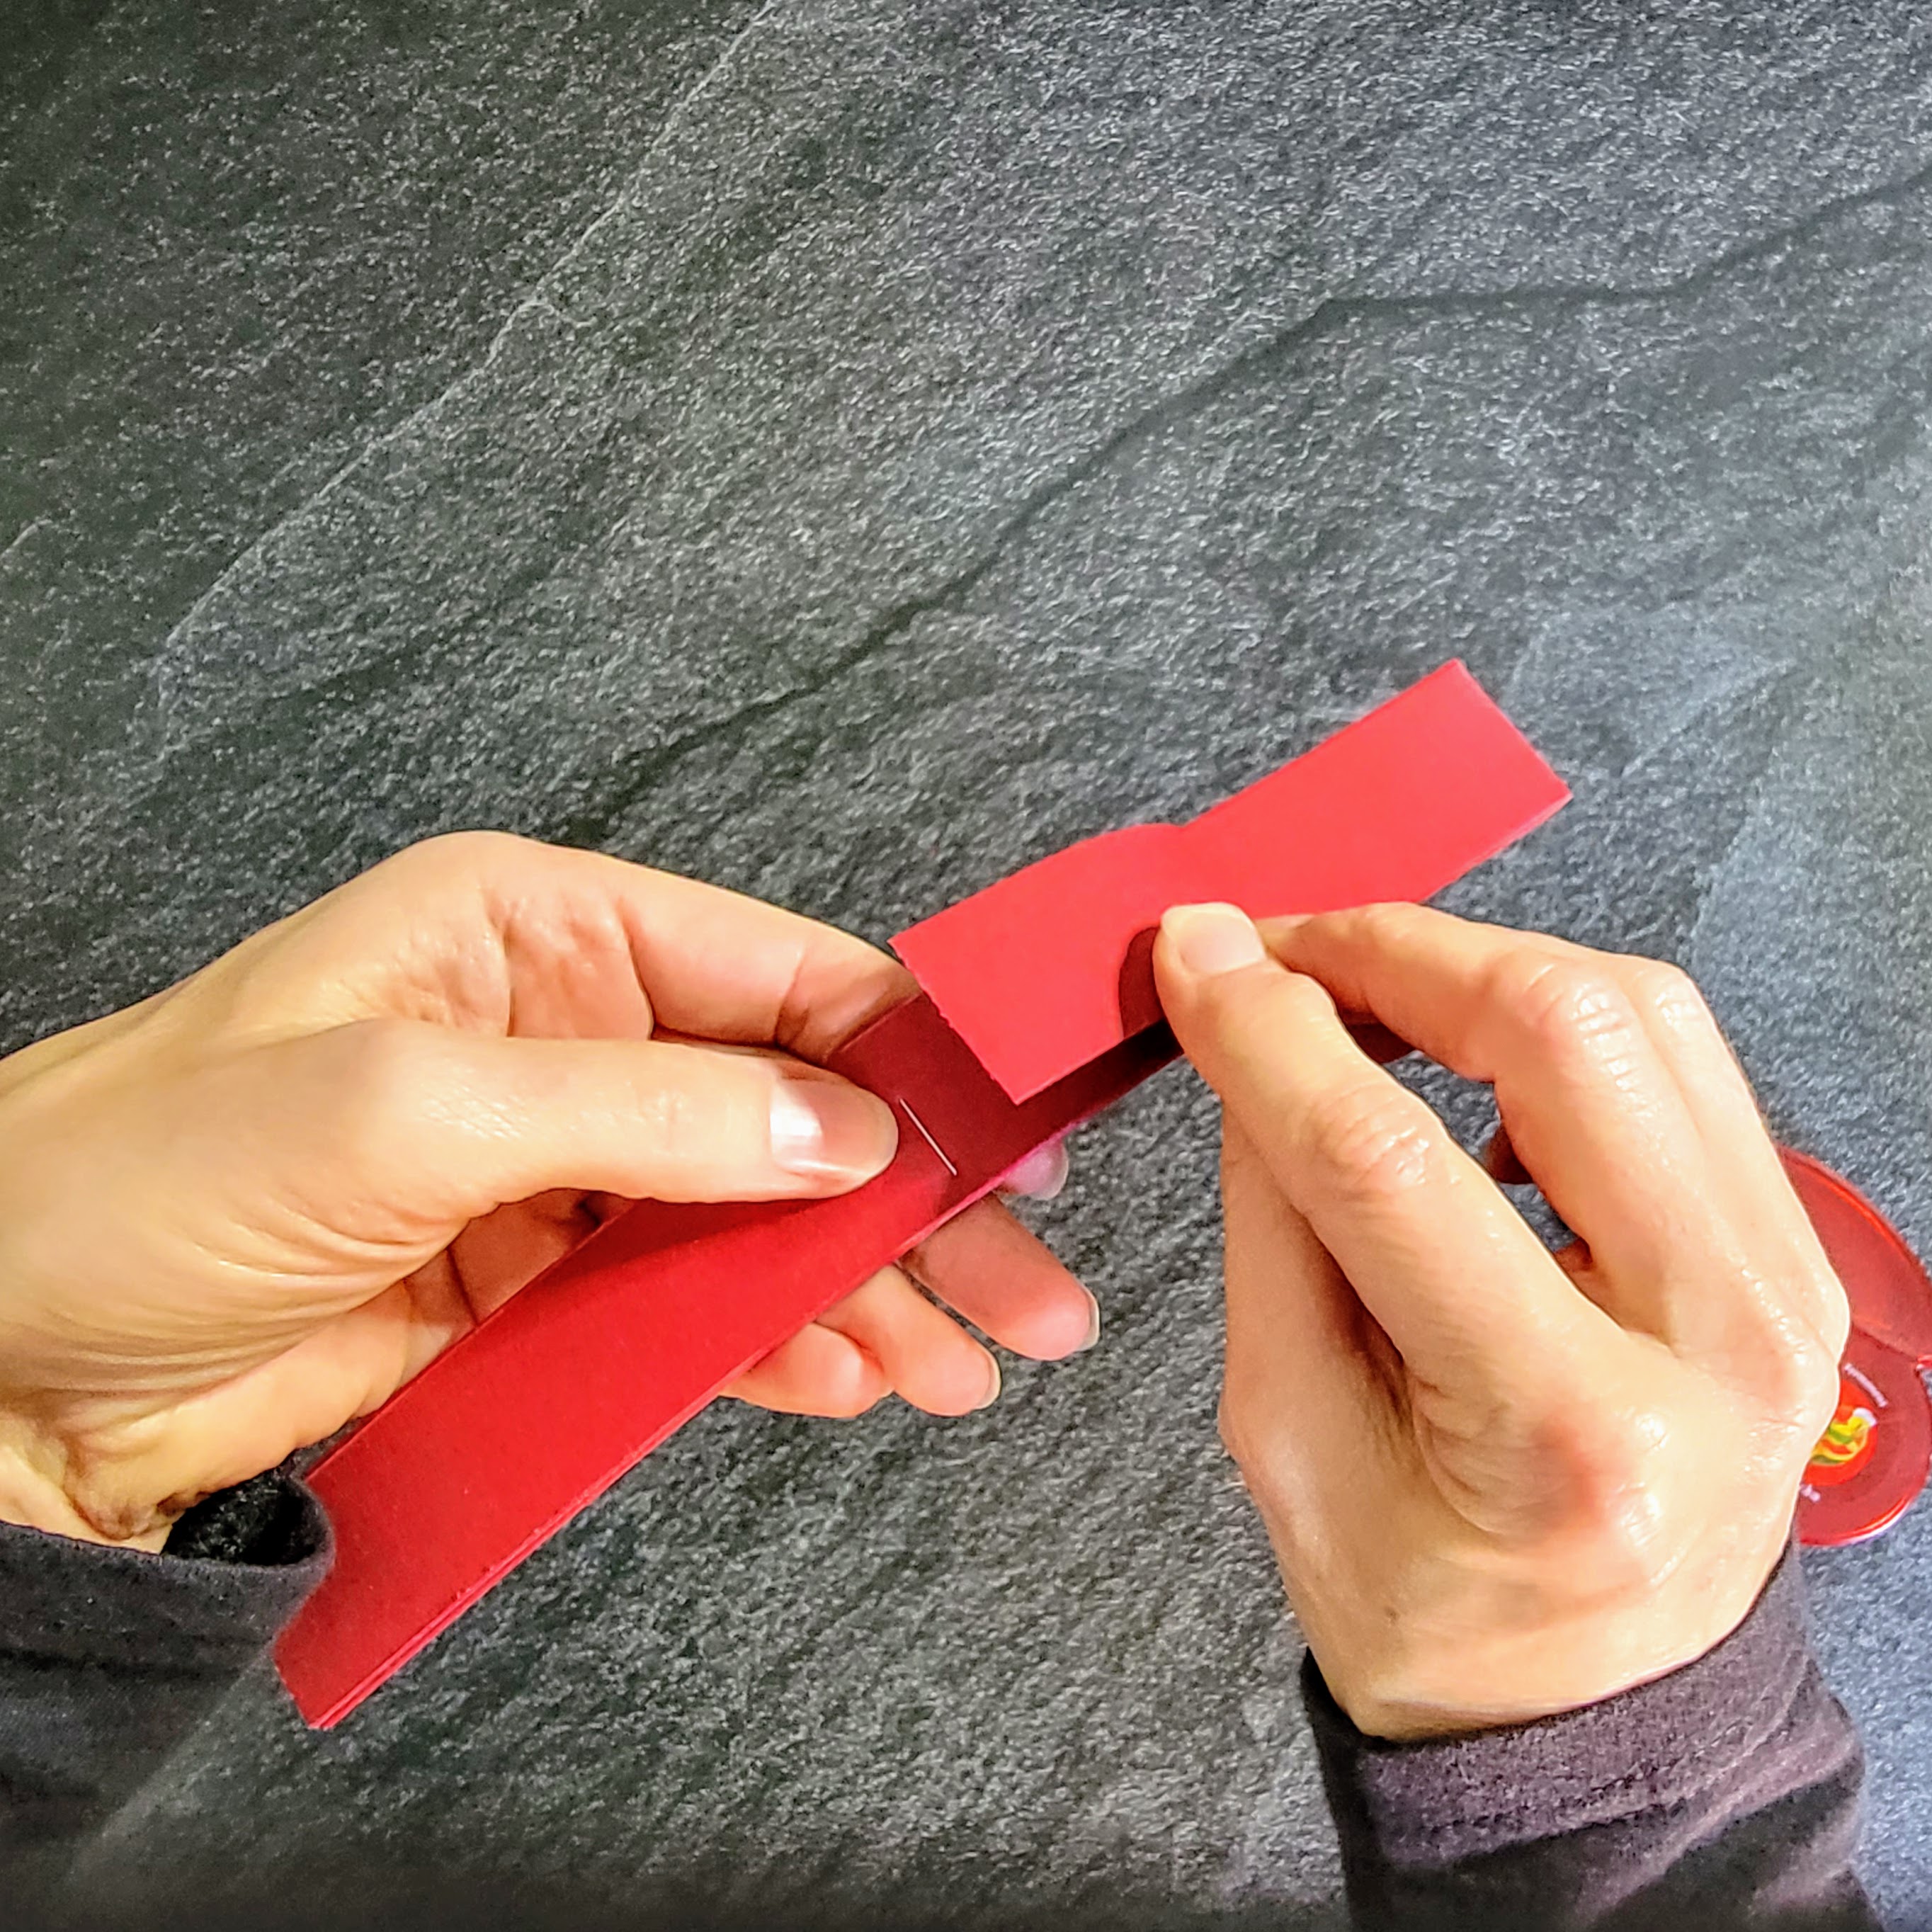
Repeat for all of the other paper strips, making sure you bend them all in the same direction.
.
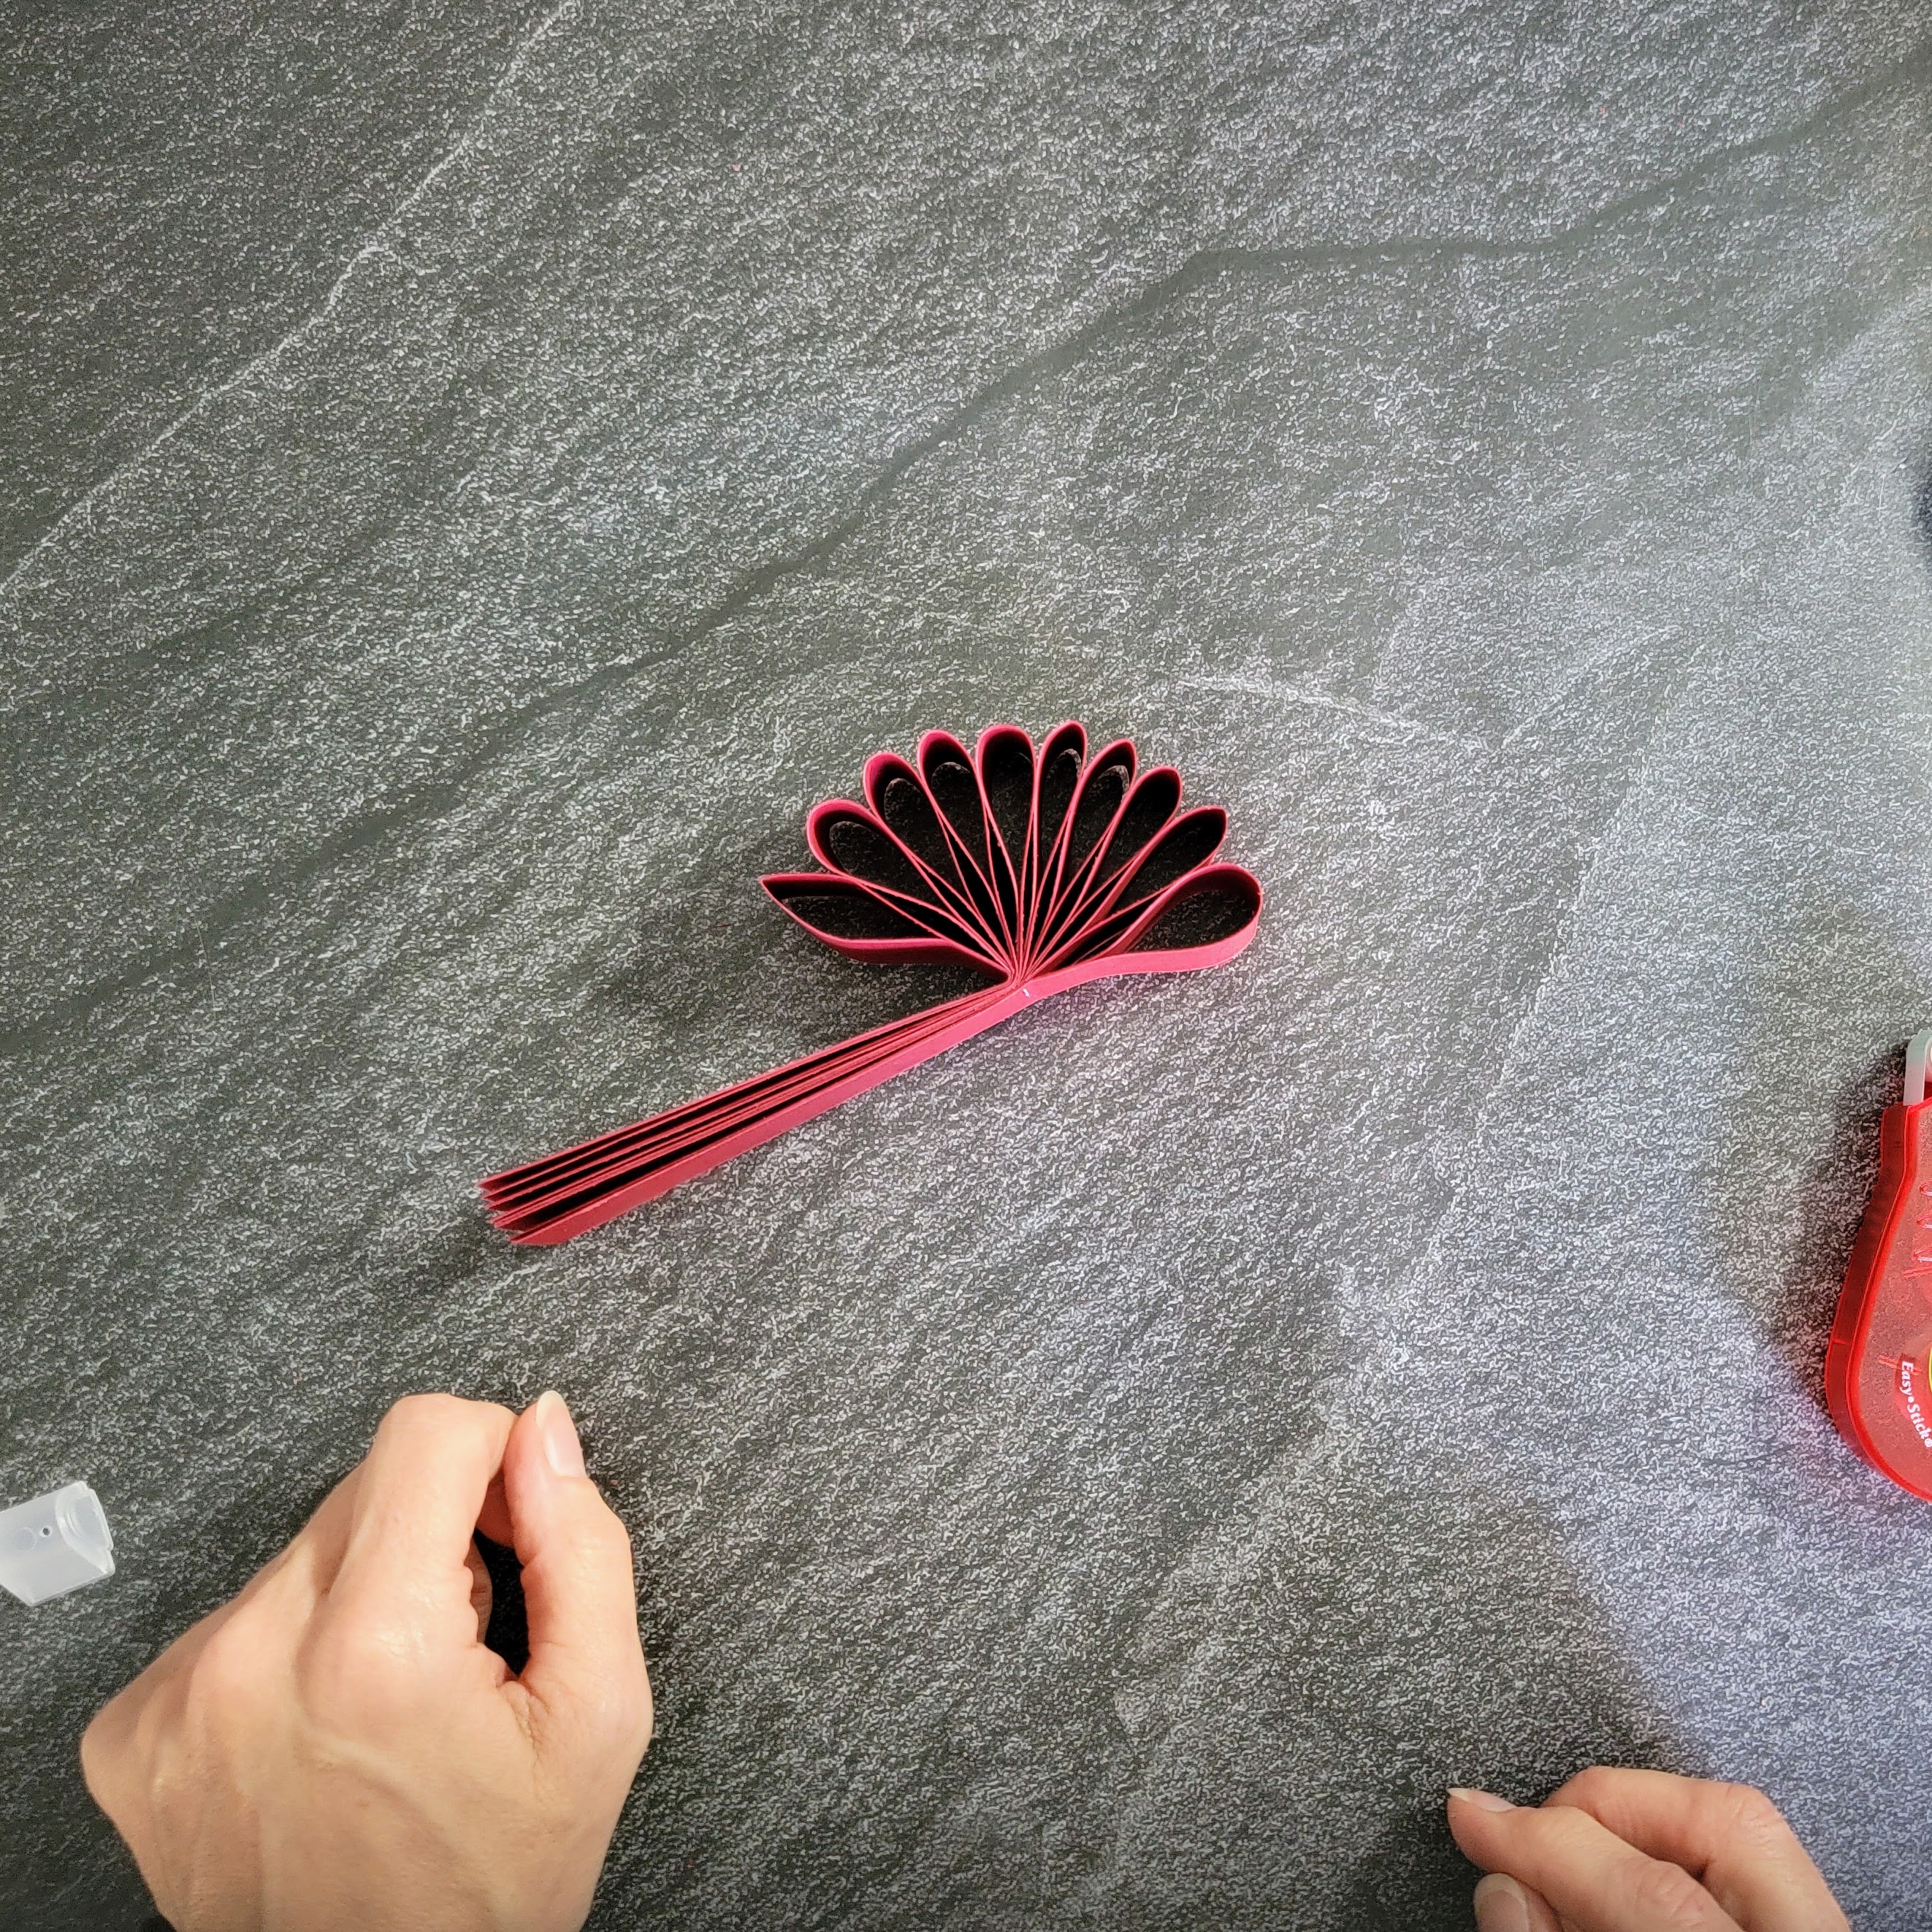
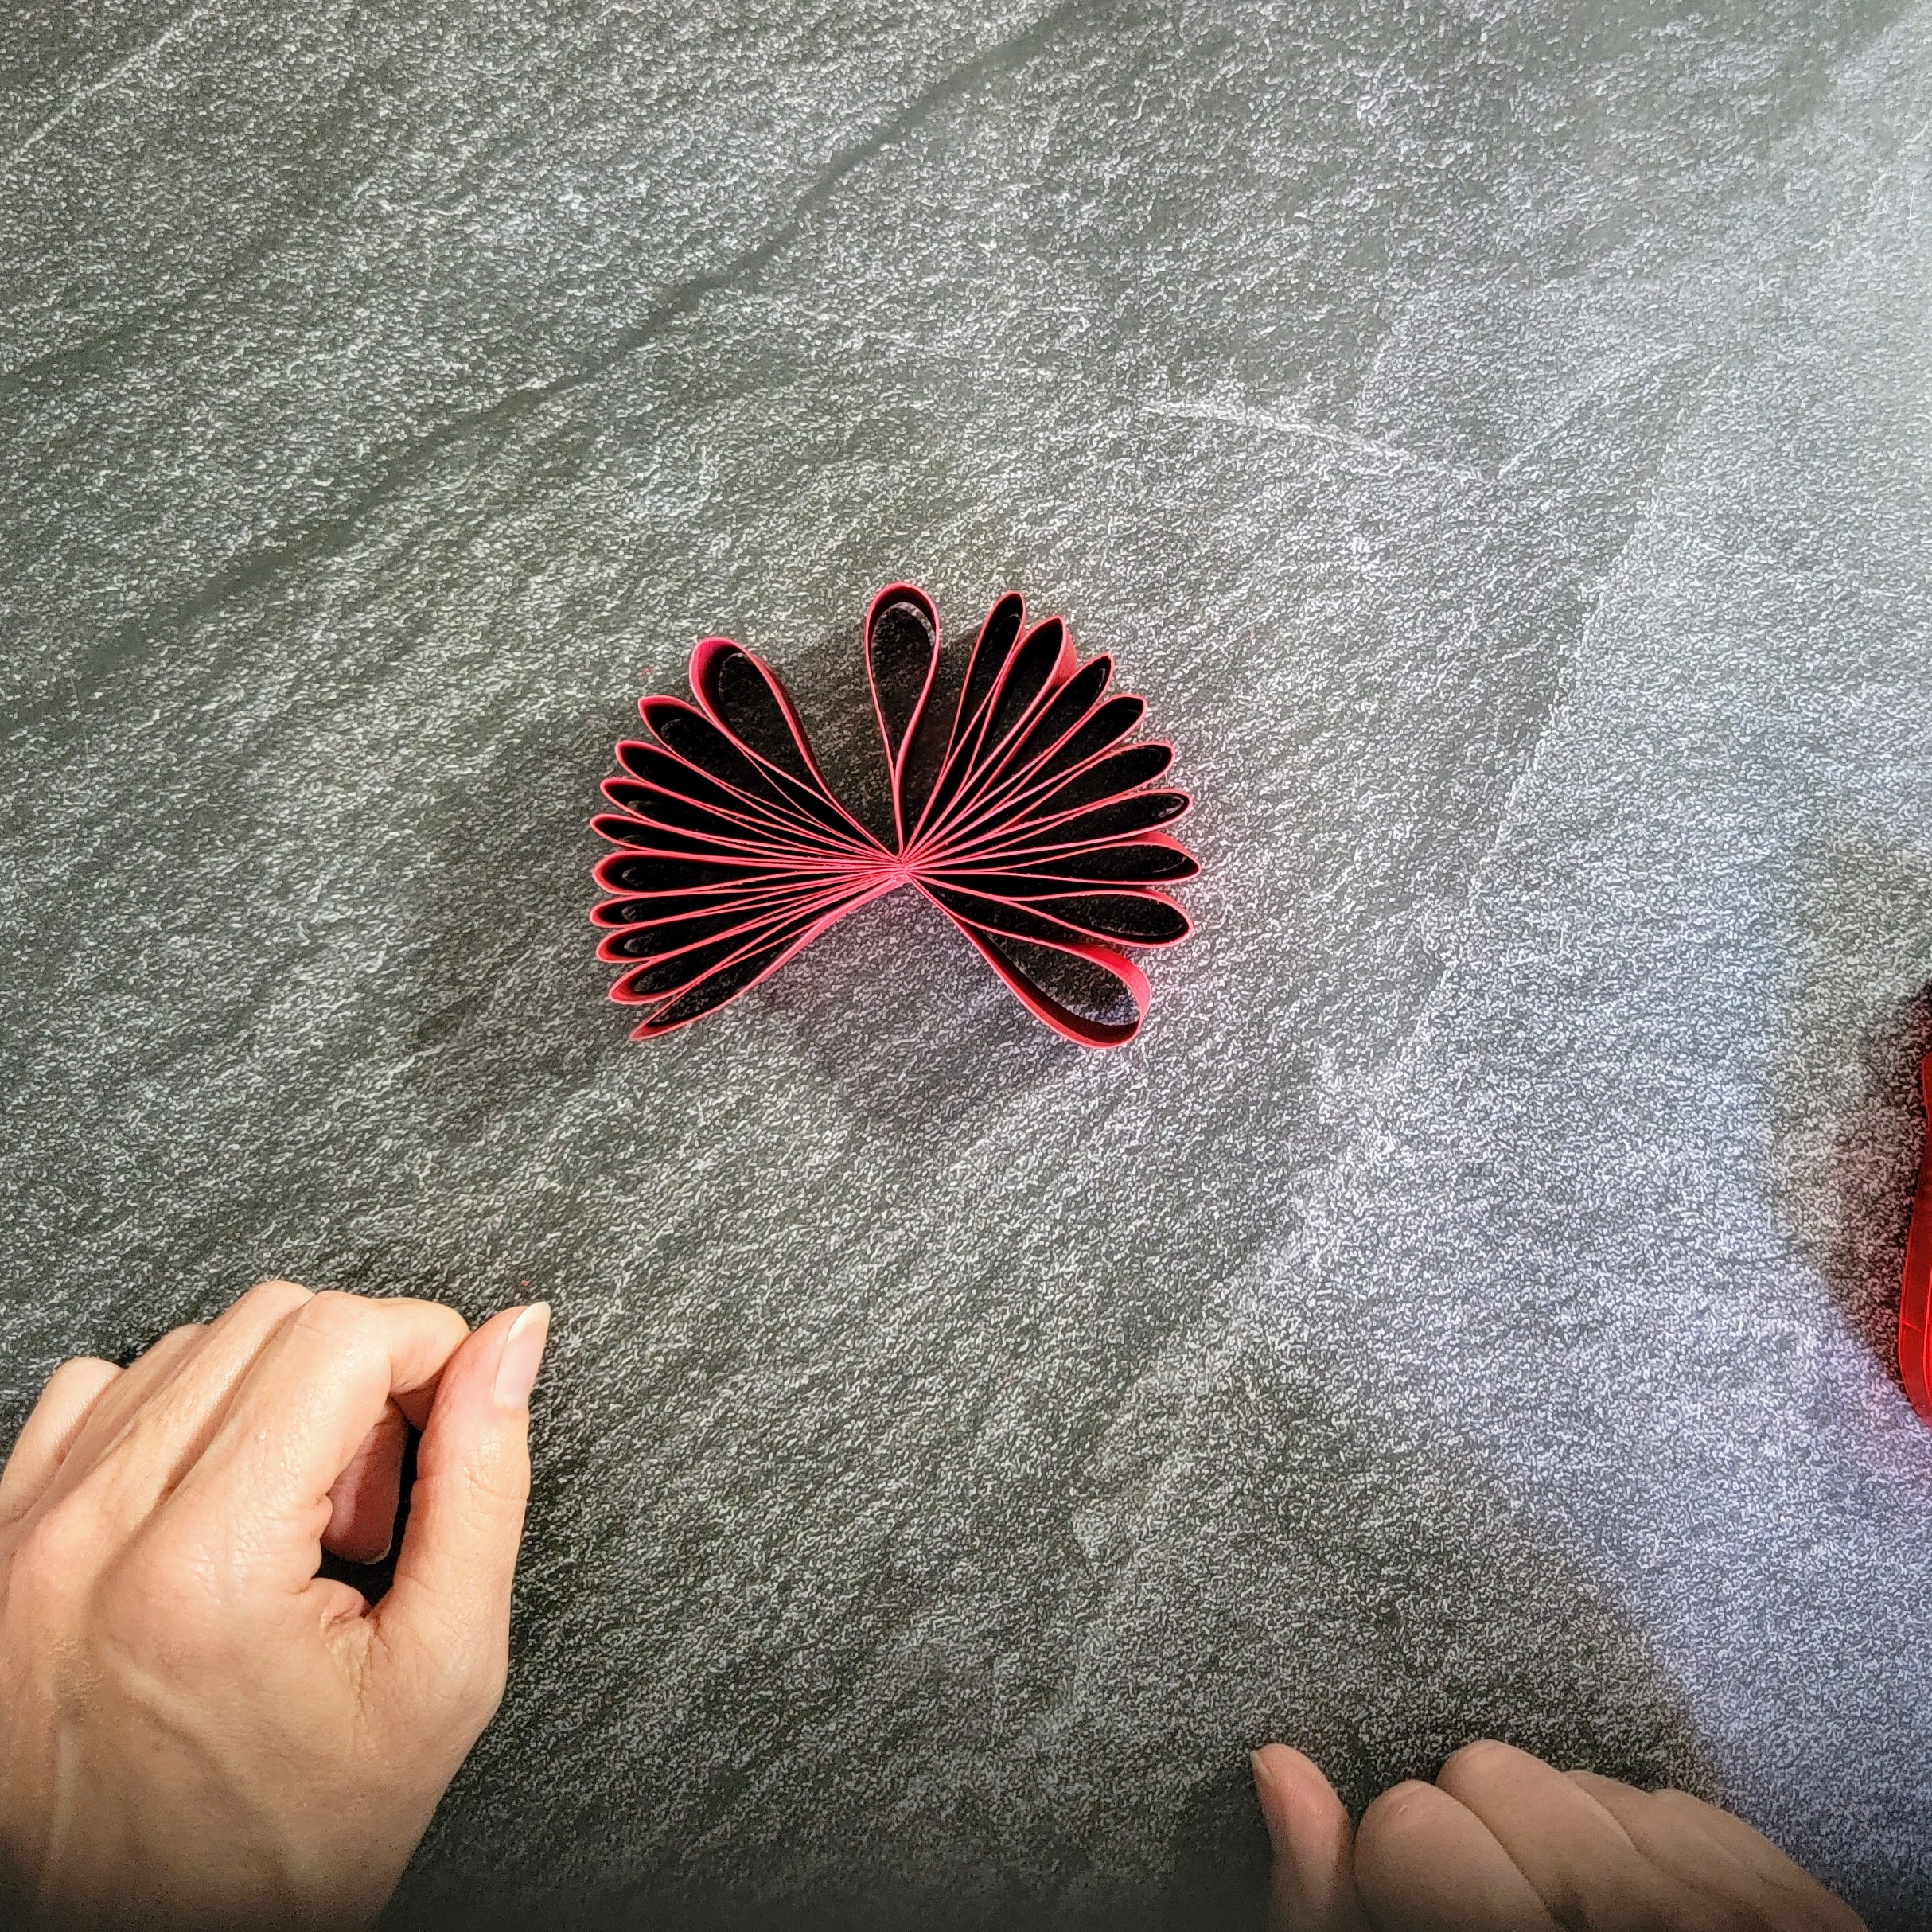
6 – Finishing
Use your fingers to push the ends of loops in, to spread them out and even them up. Then you are ready to sit your new decoration on a table or shelf, or run a string through one of the loops so you can hang it!
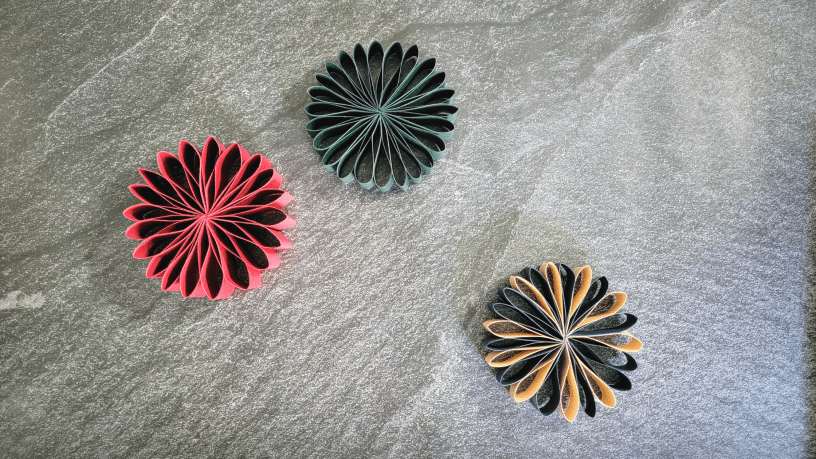
Just for fun, I experimented with narrower strips, and using 2 different paper colors. And I know I’ll be playing some more, because they are just so much fun to make!
.
I’d love to hear from you if you give this a try!
.
Until next week.
Carrie
.