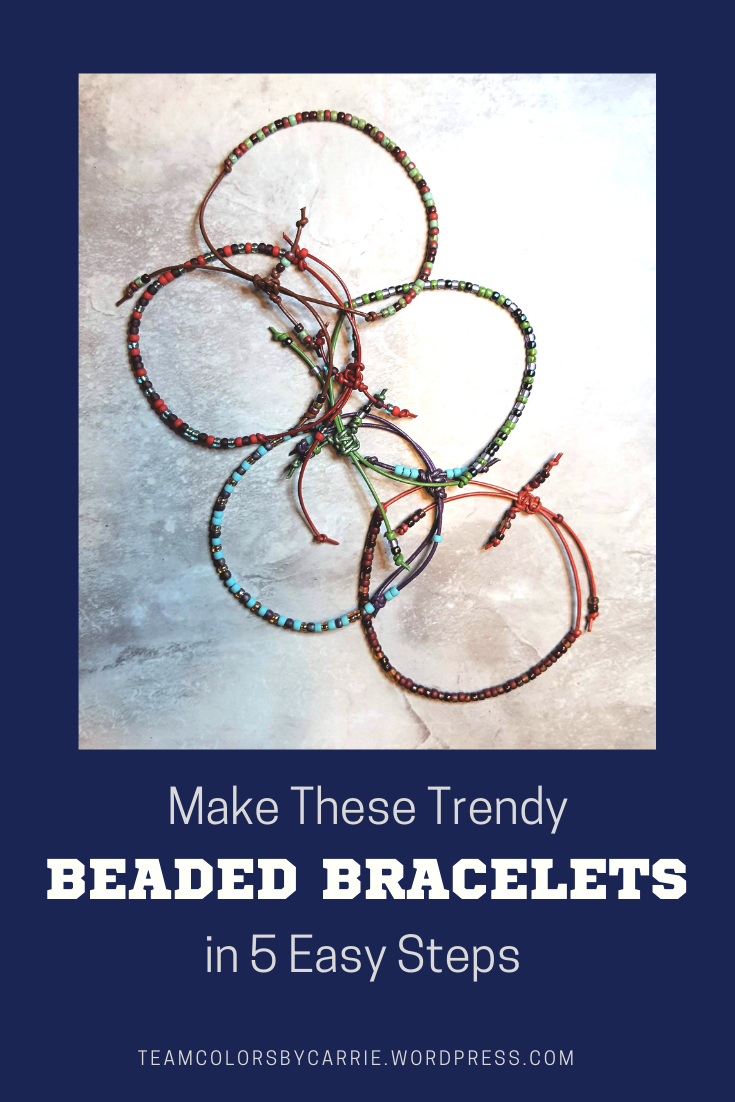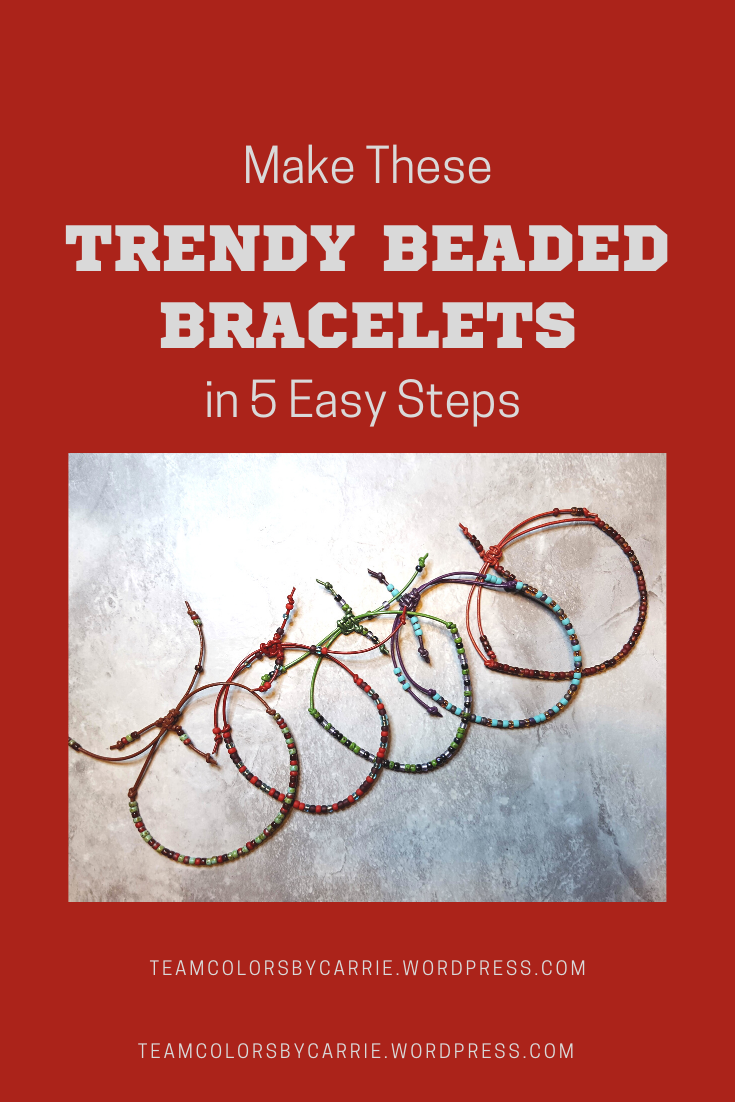
Welcome back, sports fans! You are probably wondering what a DIY bracelet post has to do with sports, but stick with me, because you could easily make a stack of these fun bracelets in your favorite sports team colors!
So let’s get right to it!
.
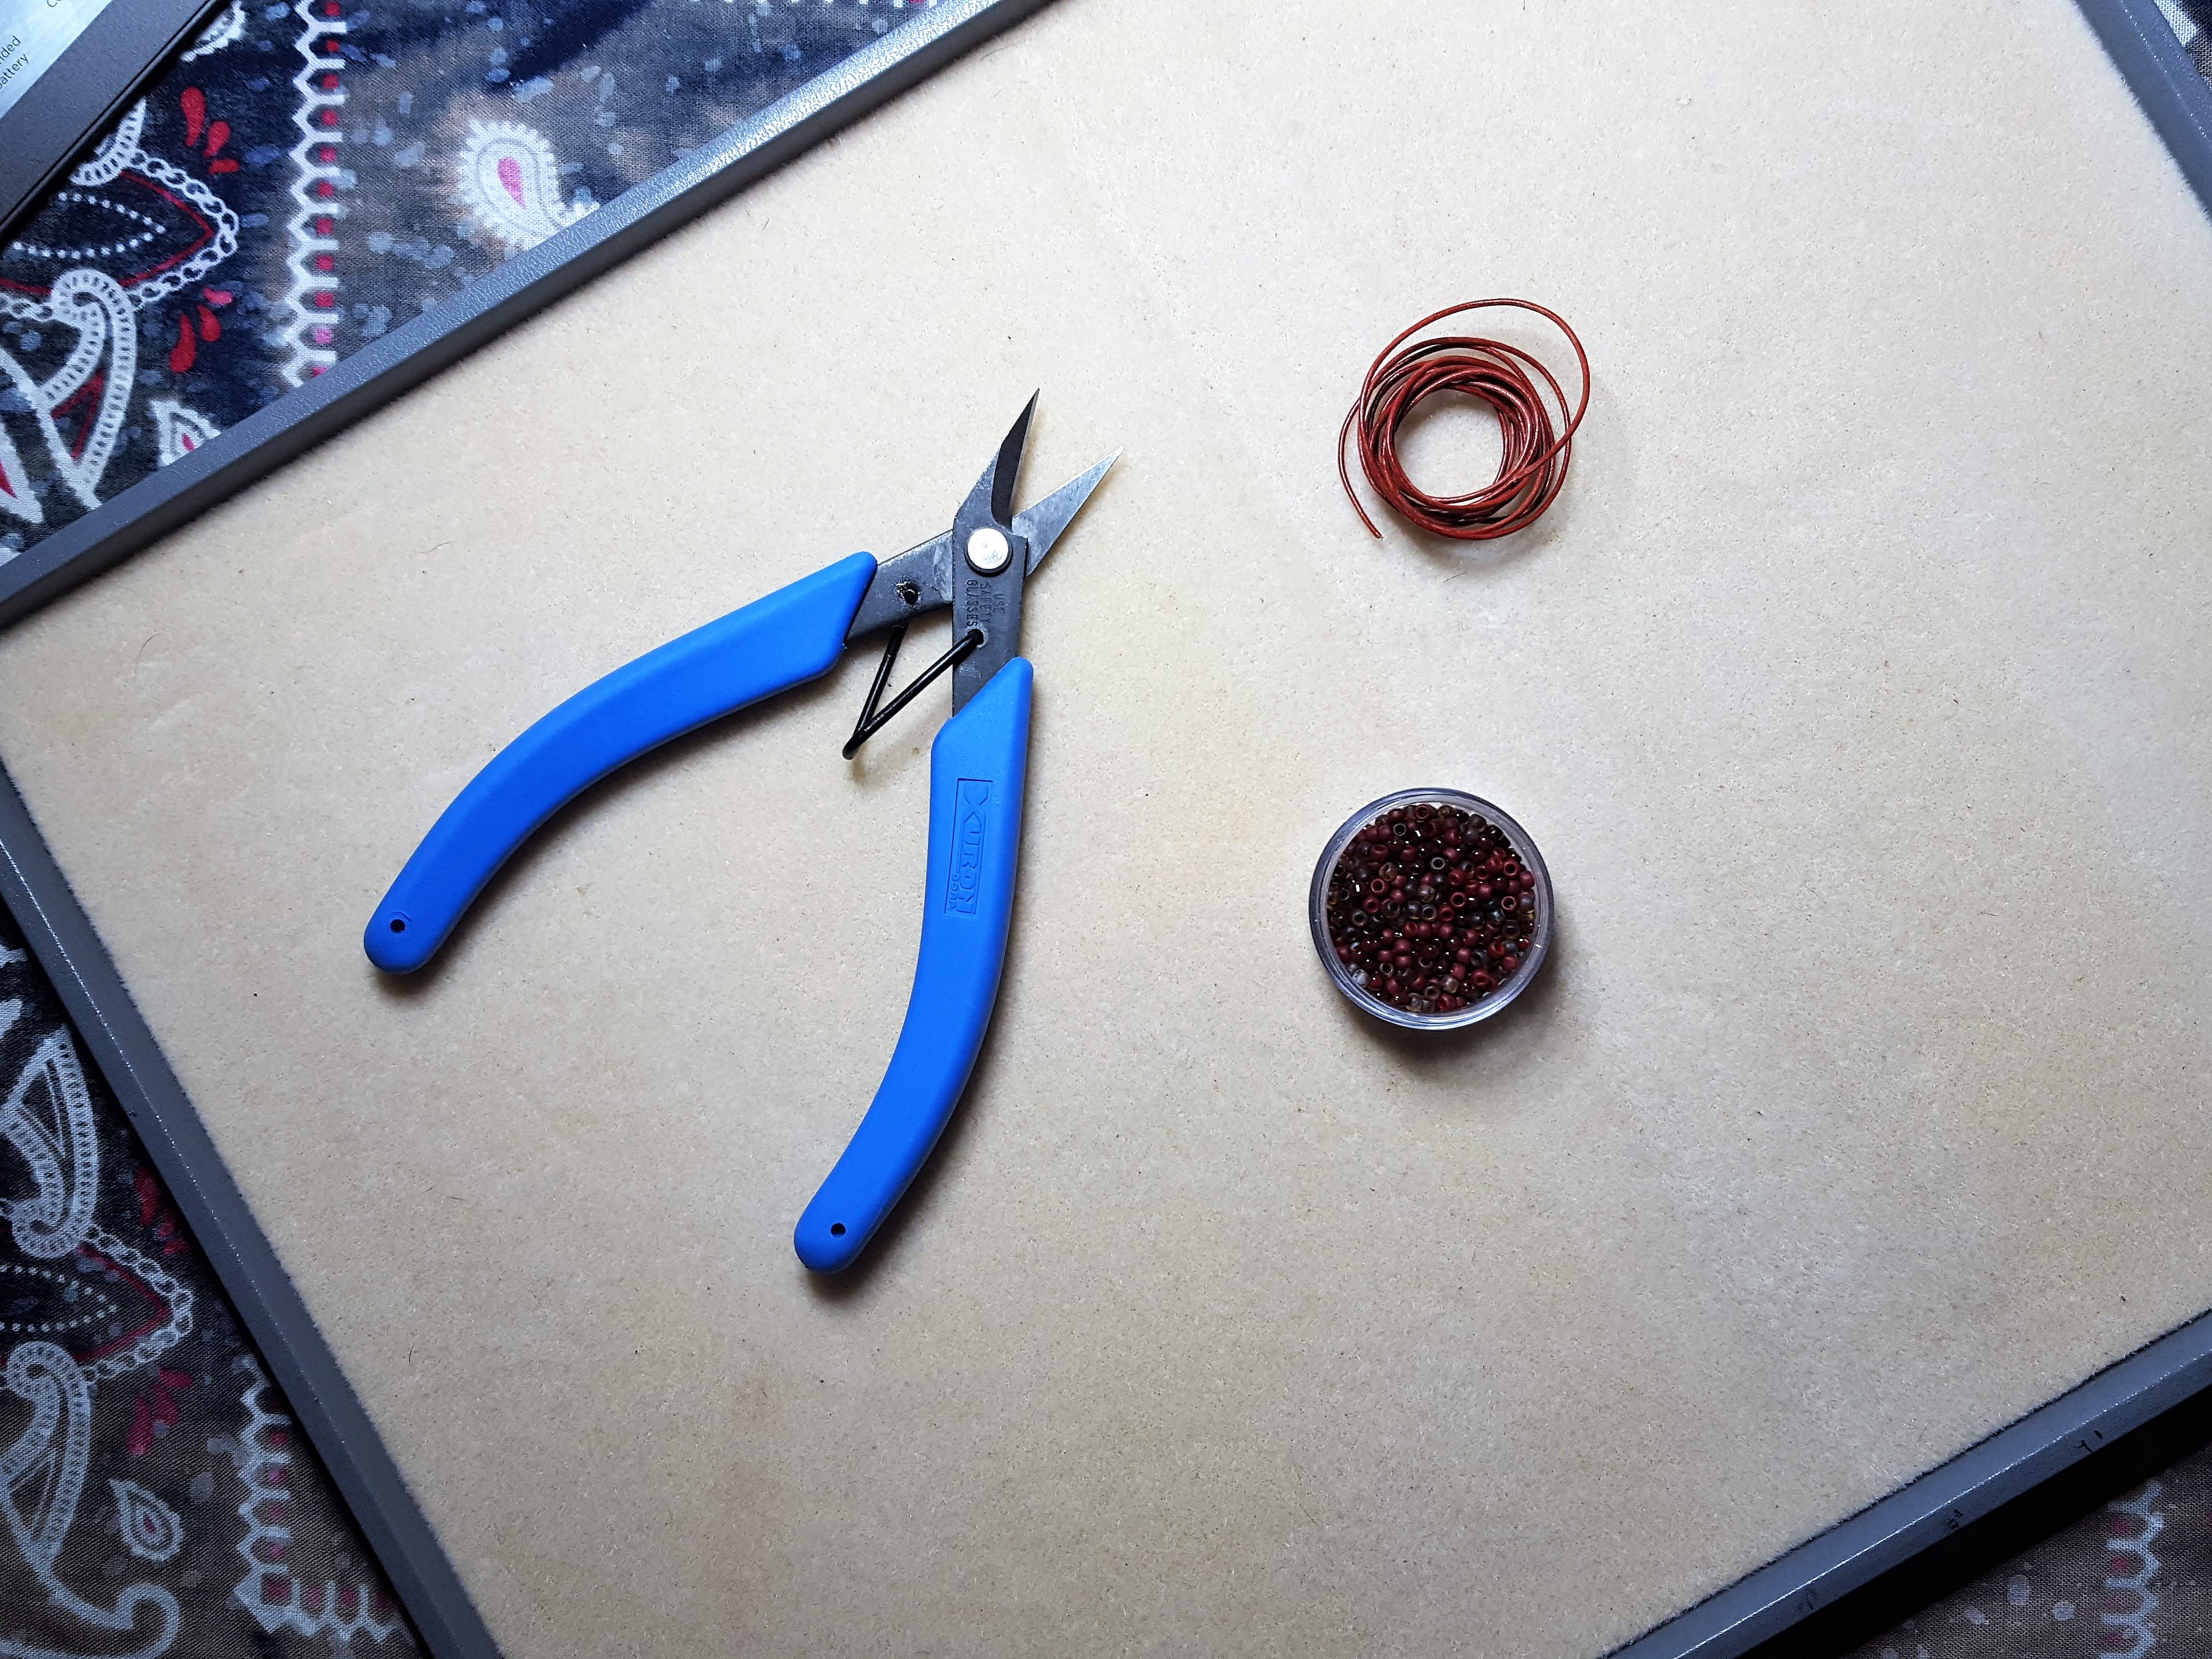
Step One – Gather Your Materials
- 1mm leather cord
- Size 8/0 seed beads in several colors (or a pre-made blend)
- Ruler
- Scissors
.
Step Two – Cut Your Leather
Cut an 18” piece of leather.
Cut a 10” piece of leather.

.
Step Three – String Beads
Start stringing beads on the 18” piece of leather. You can create a pattern, or string the beads totally randomly like I did.
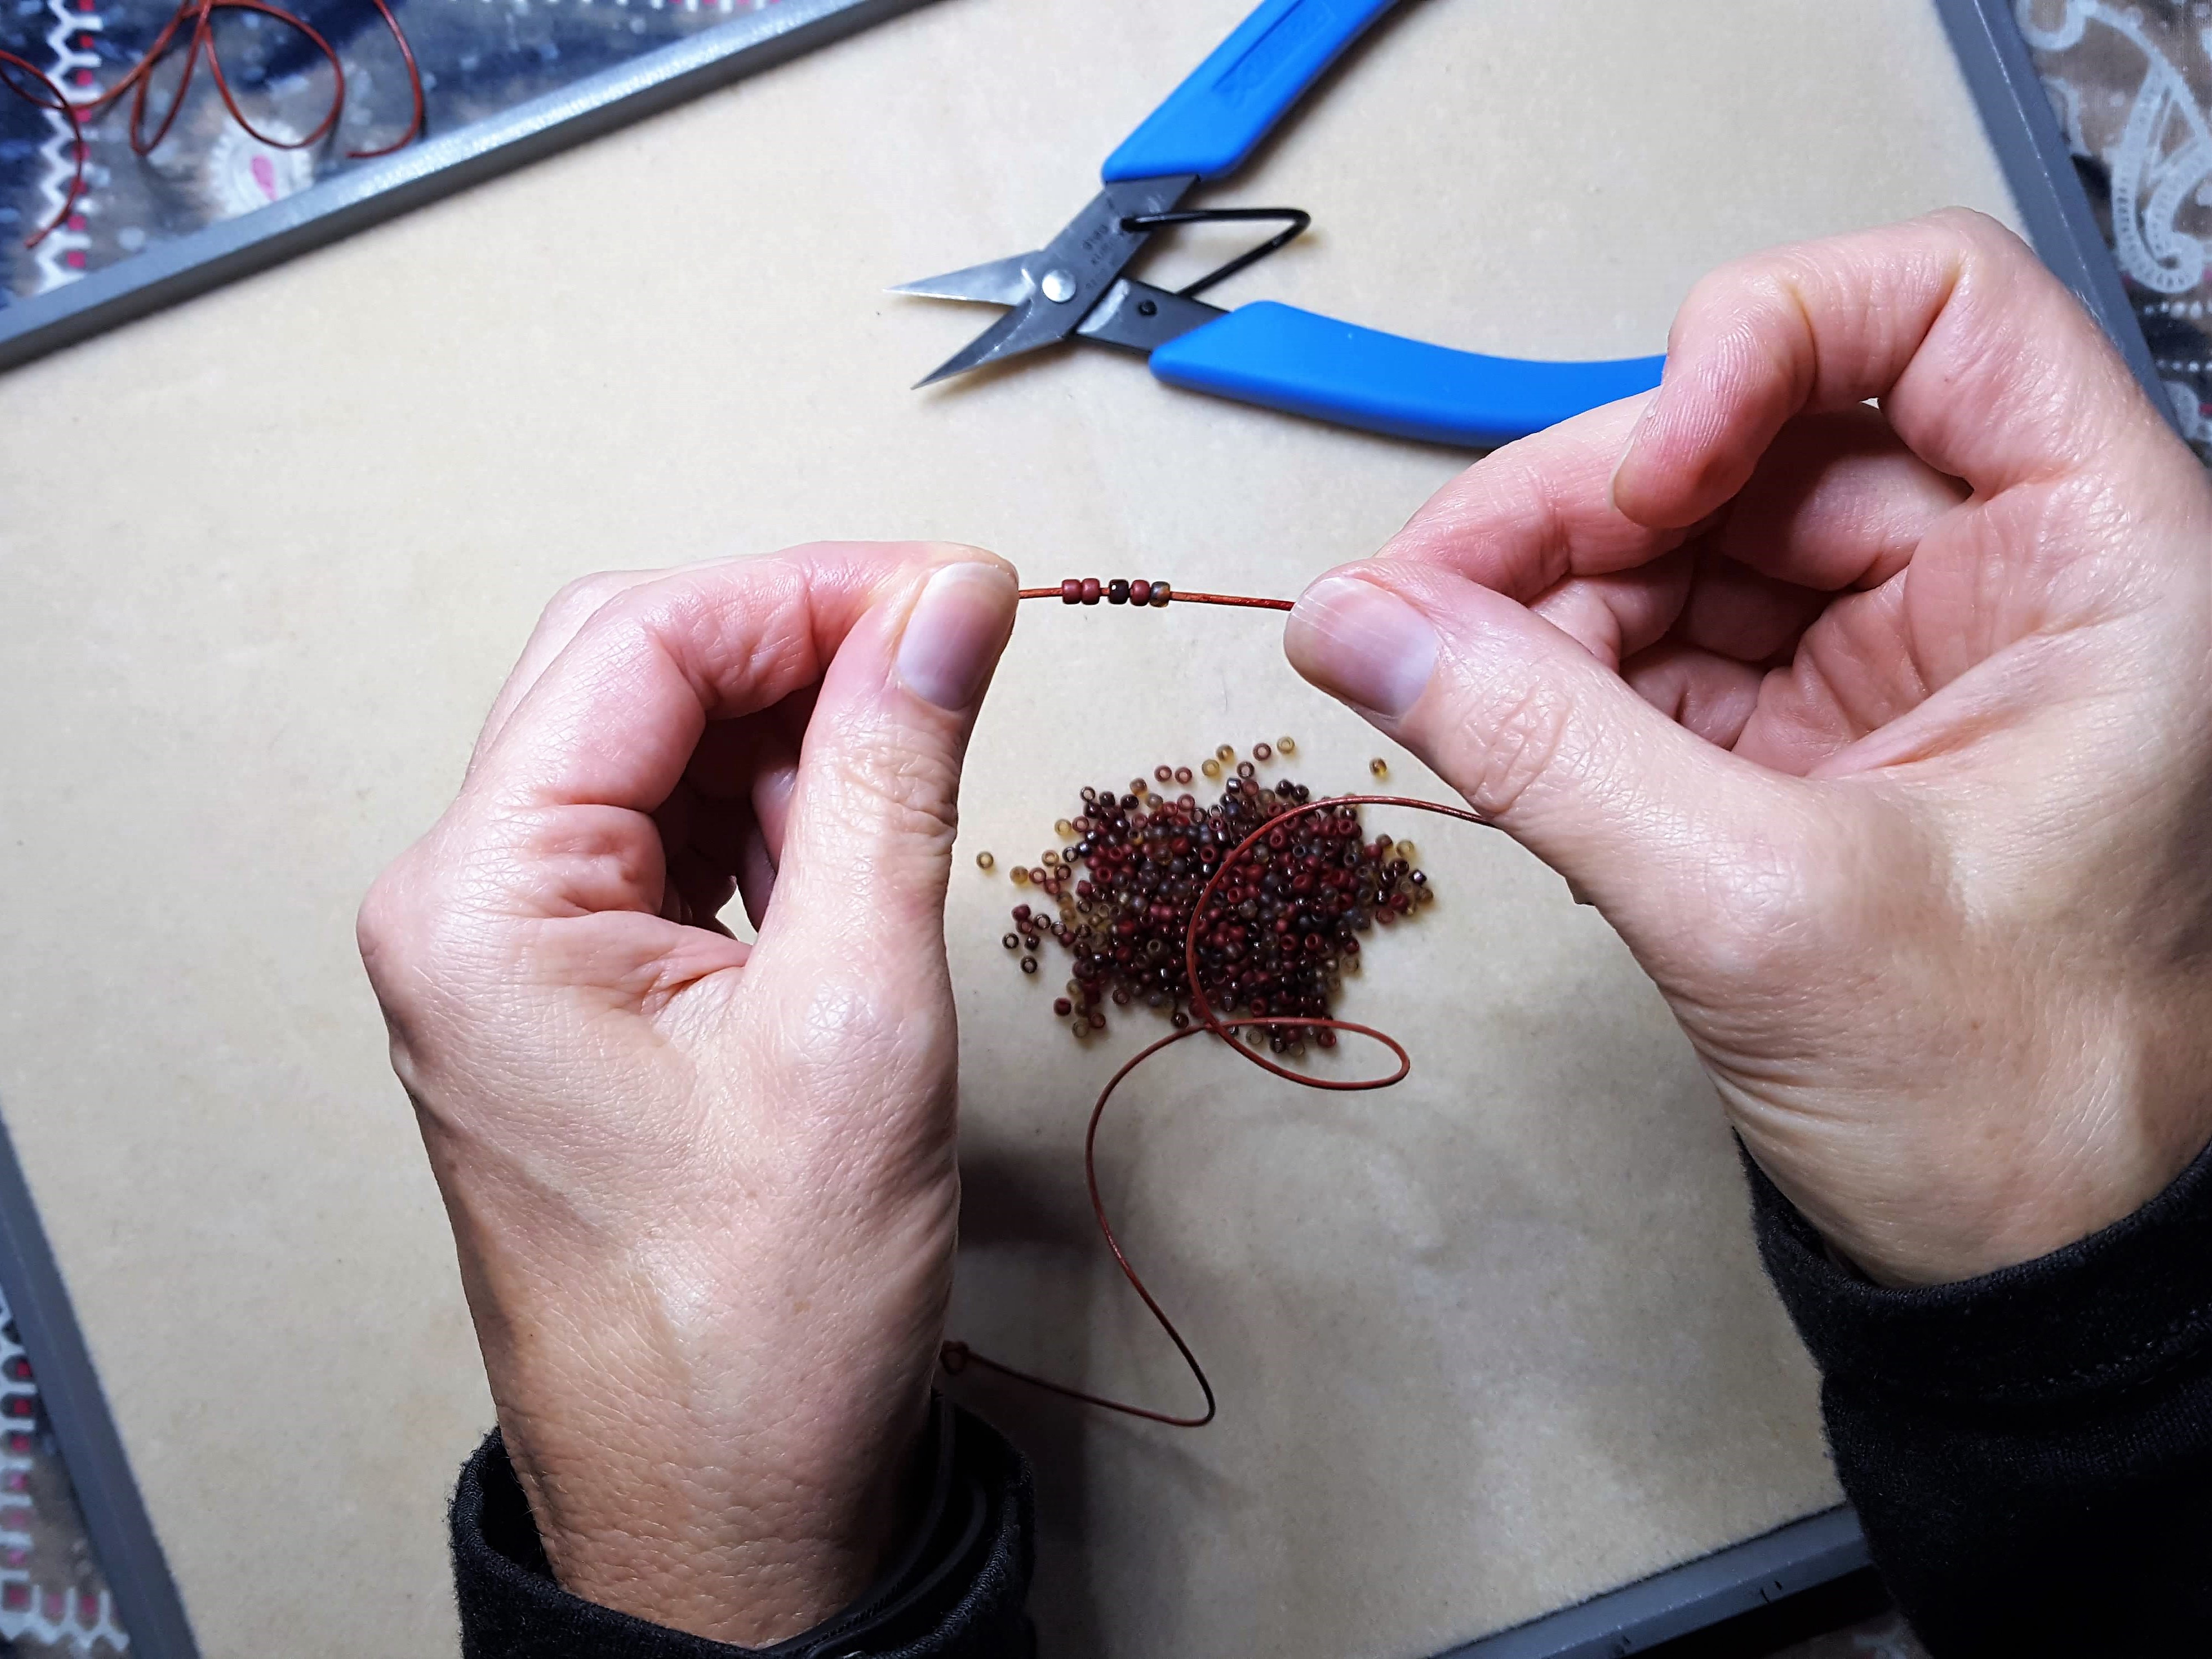
Continue until you have about 4 or 5 inches of beads. Wrap the cord around your wrist to test length. You want to have at least an inch gap between the beads. Add or remove beads as needed.
Center the beads on the leather, then tie simple overhand knots on each end of the beads to lock them in place.
NOTE: If you don’t plan to ever take off your bracelet, you can just wrap it around your wrist, tie a knot with the long ends, and trim the leather! And done!
But if you want to be able to take the bracelet off, you need to create this sliding knot. The sliding knot lets you open the bracelet wide enough to fit over your hand, then pull it tight enough to fit your wrist.
.
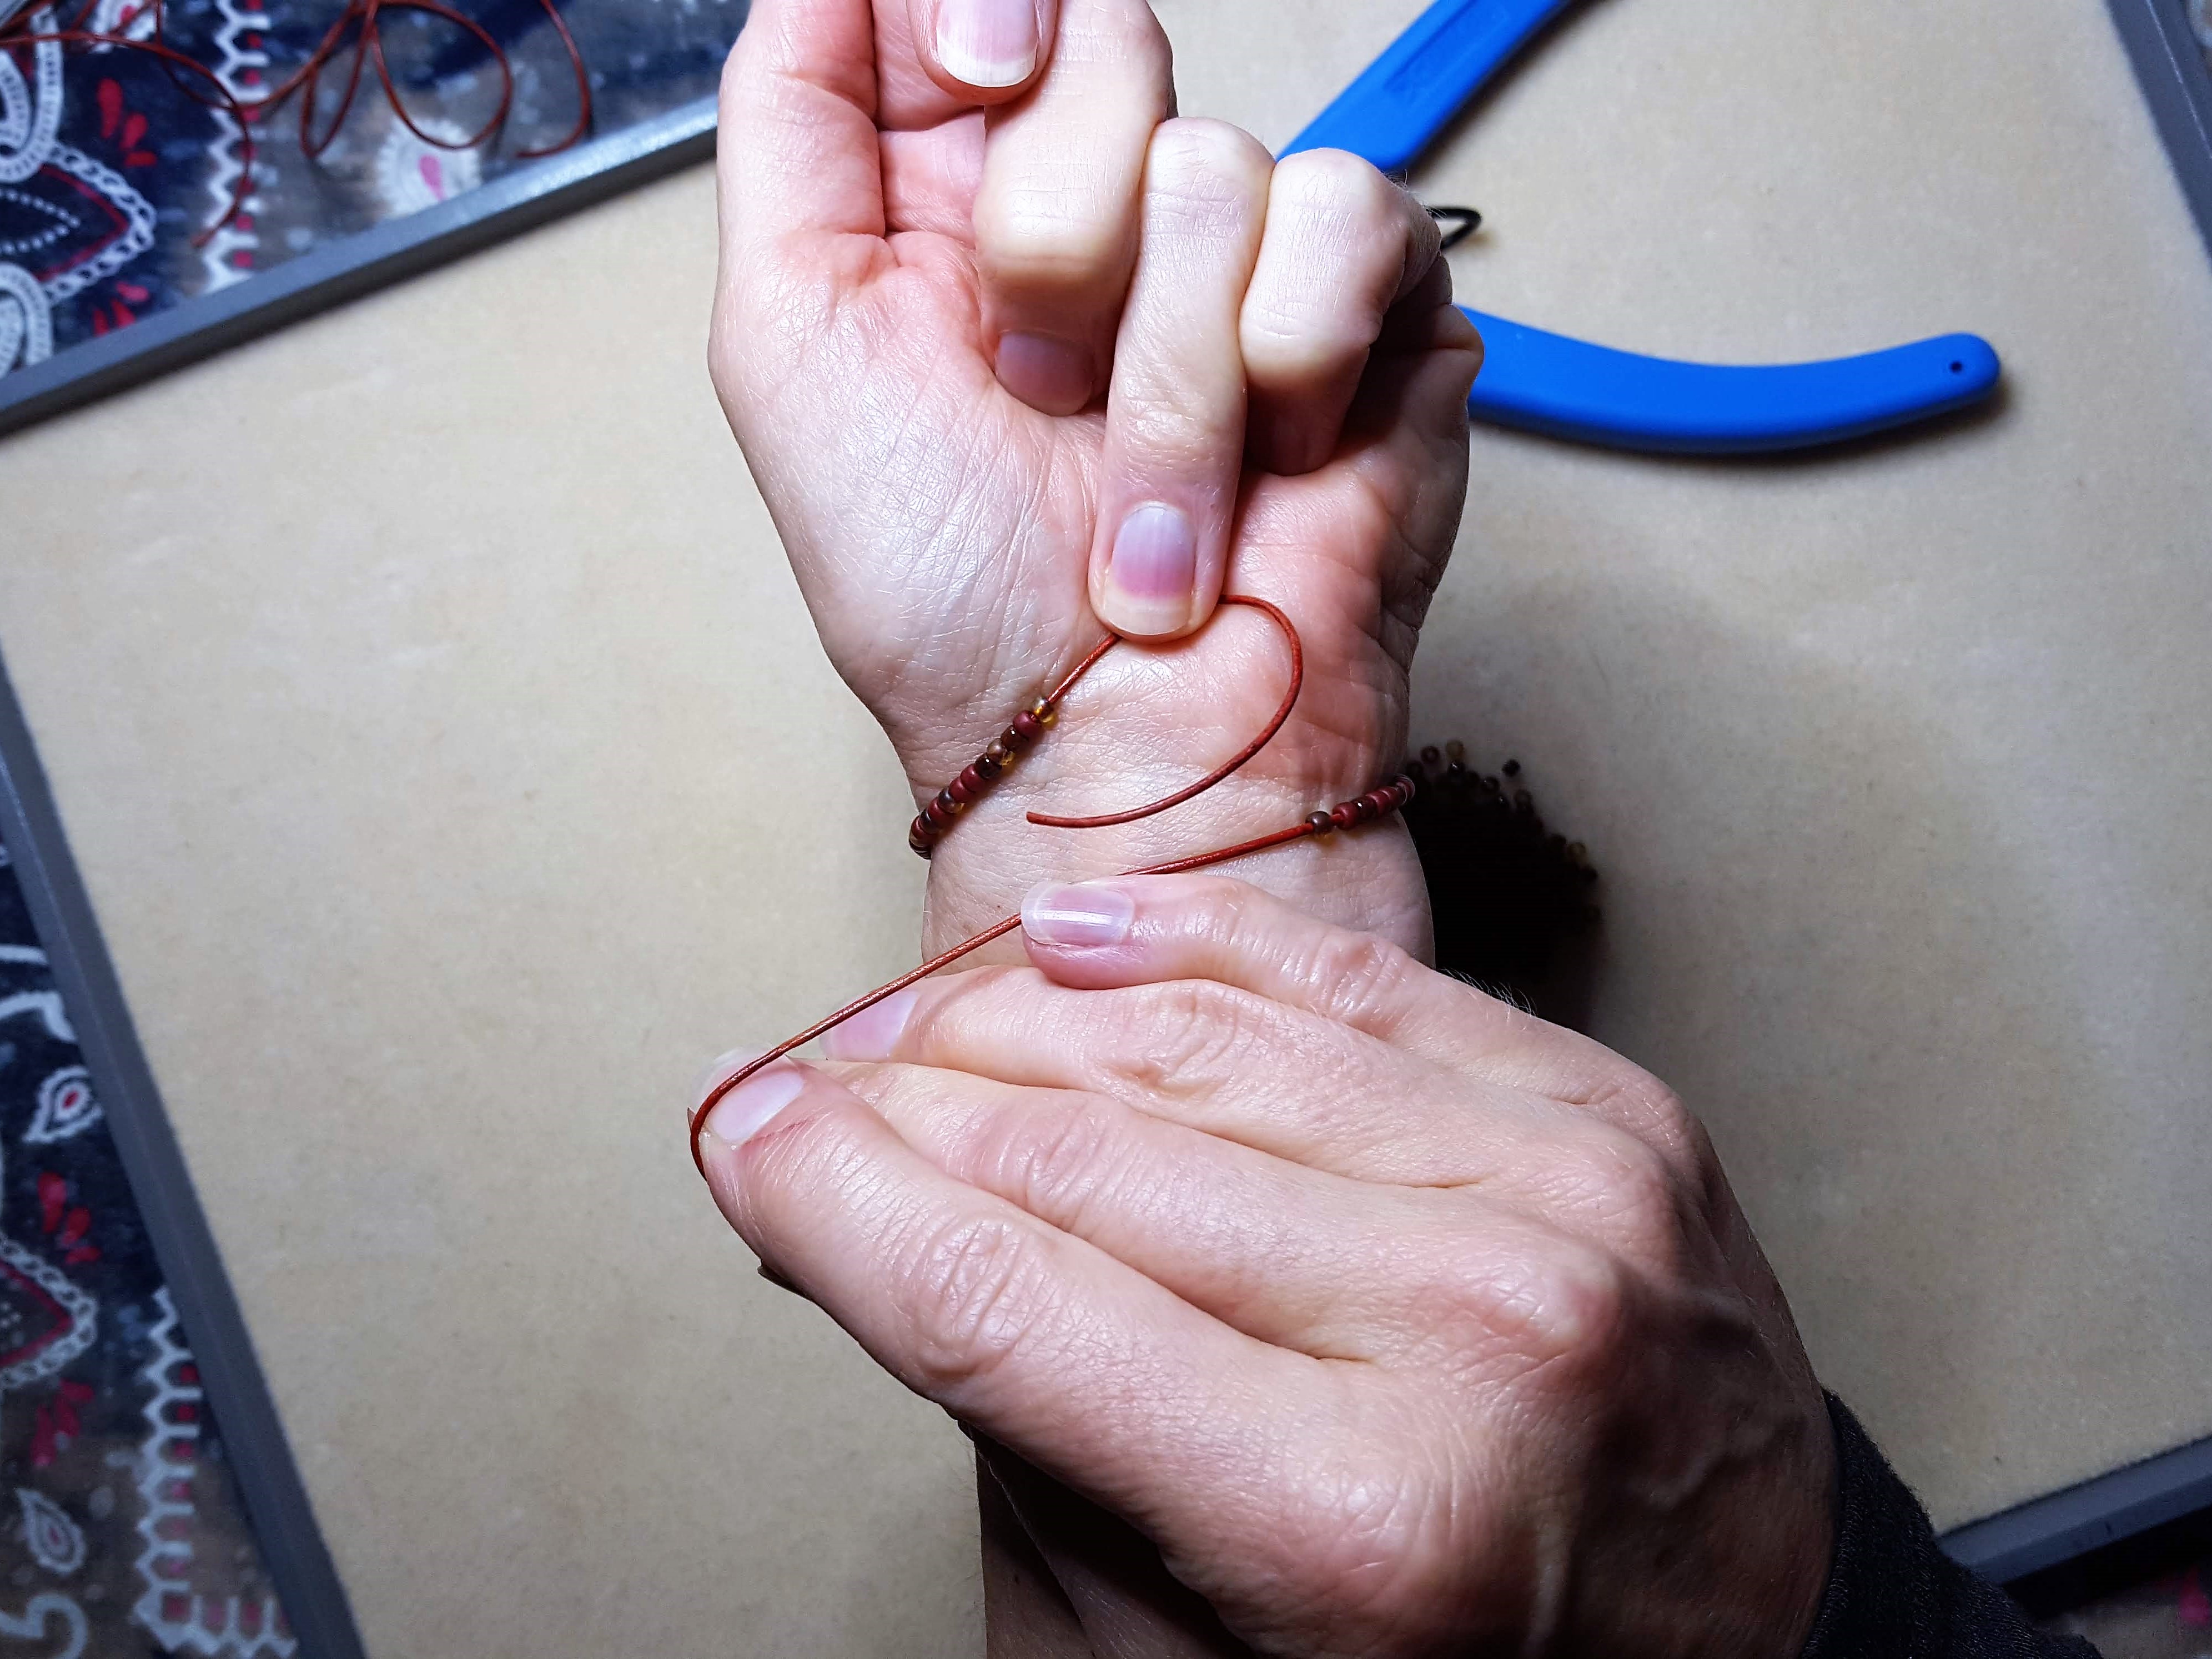
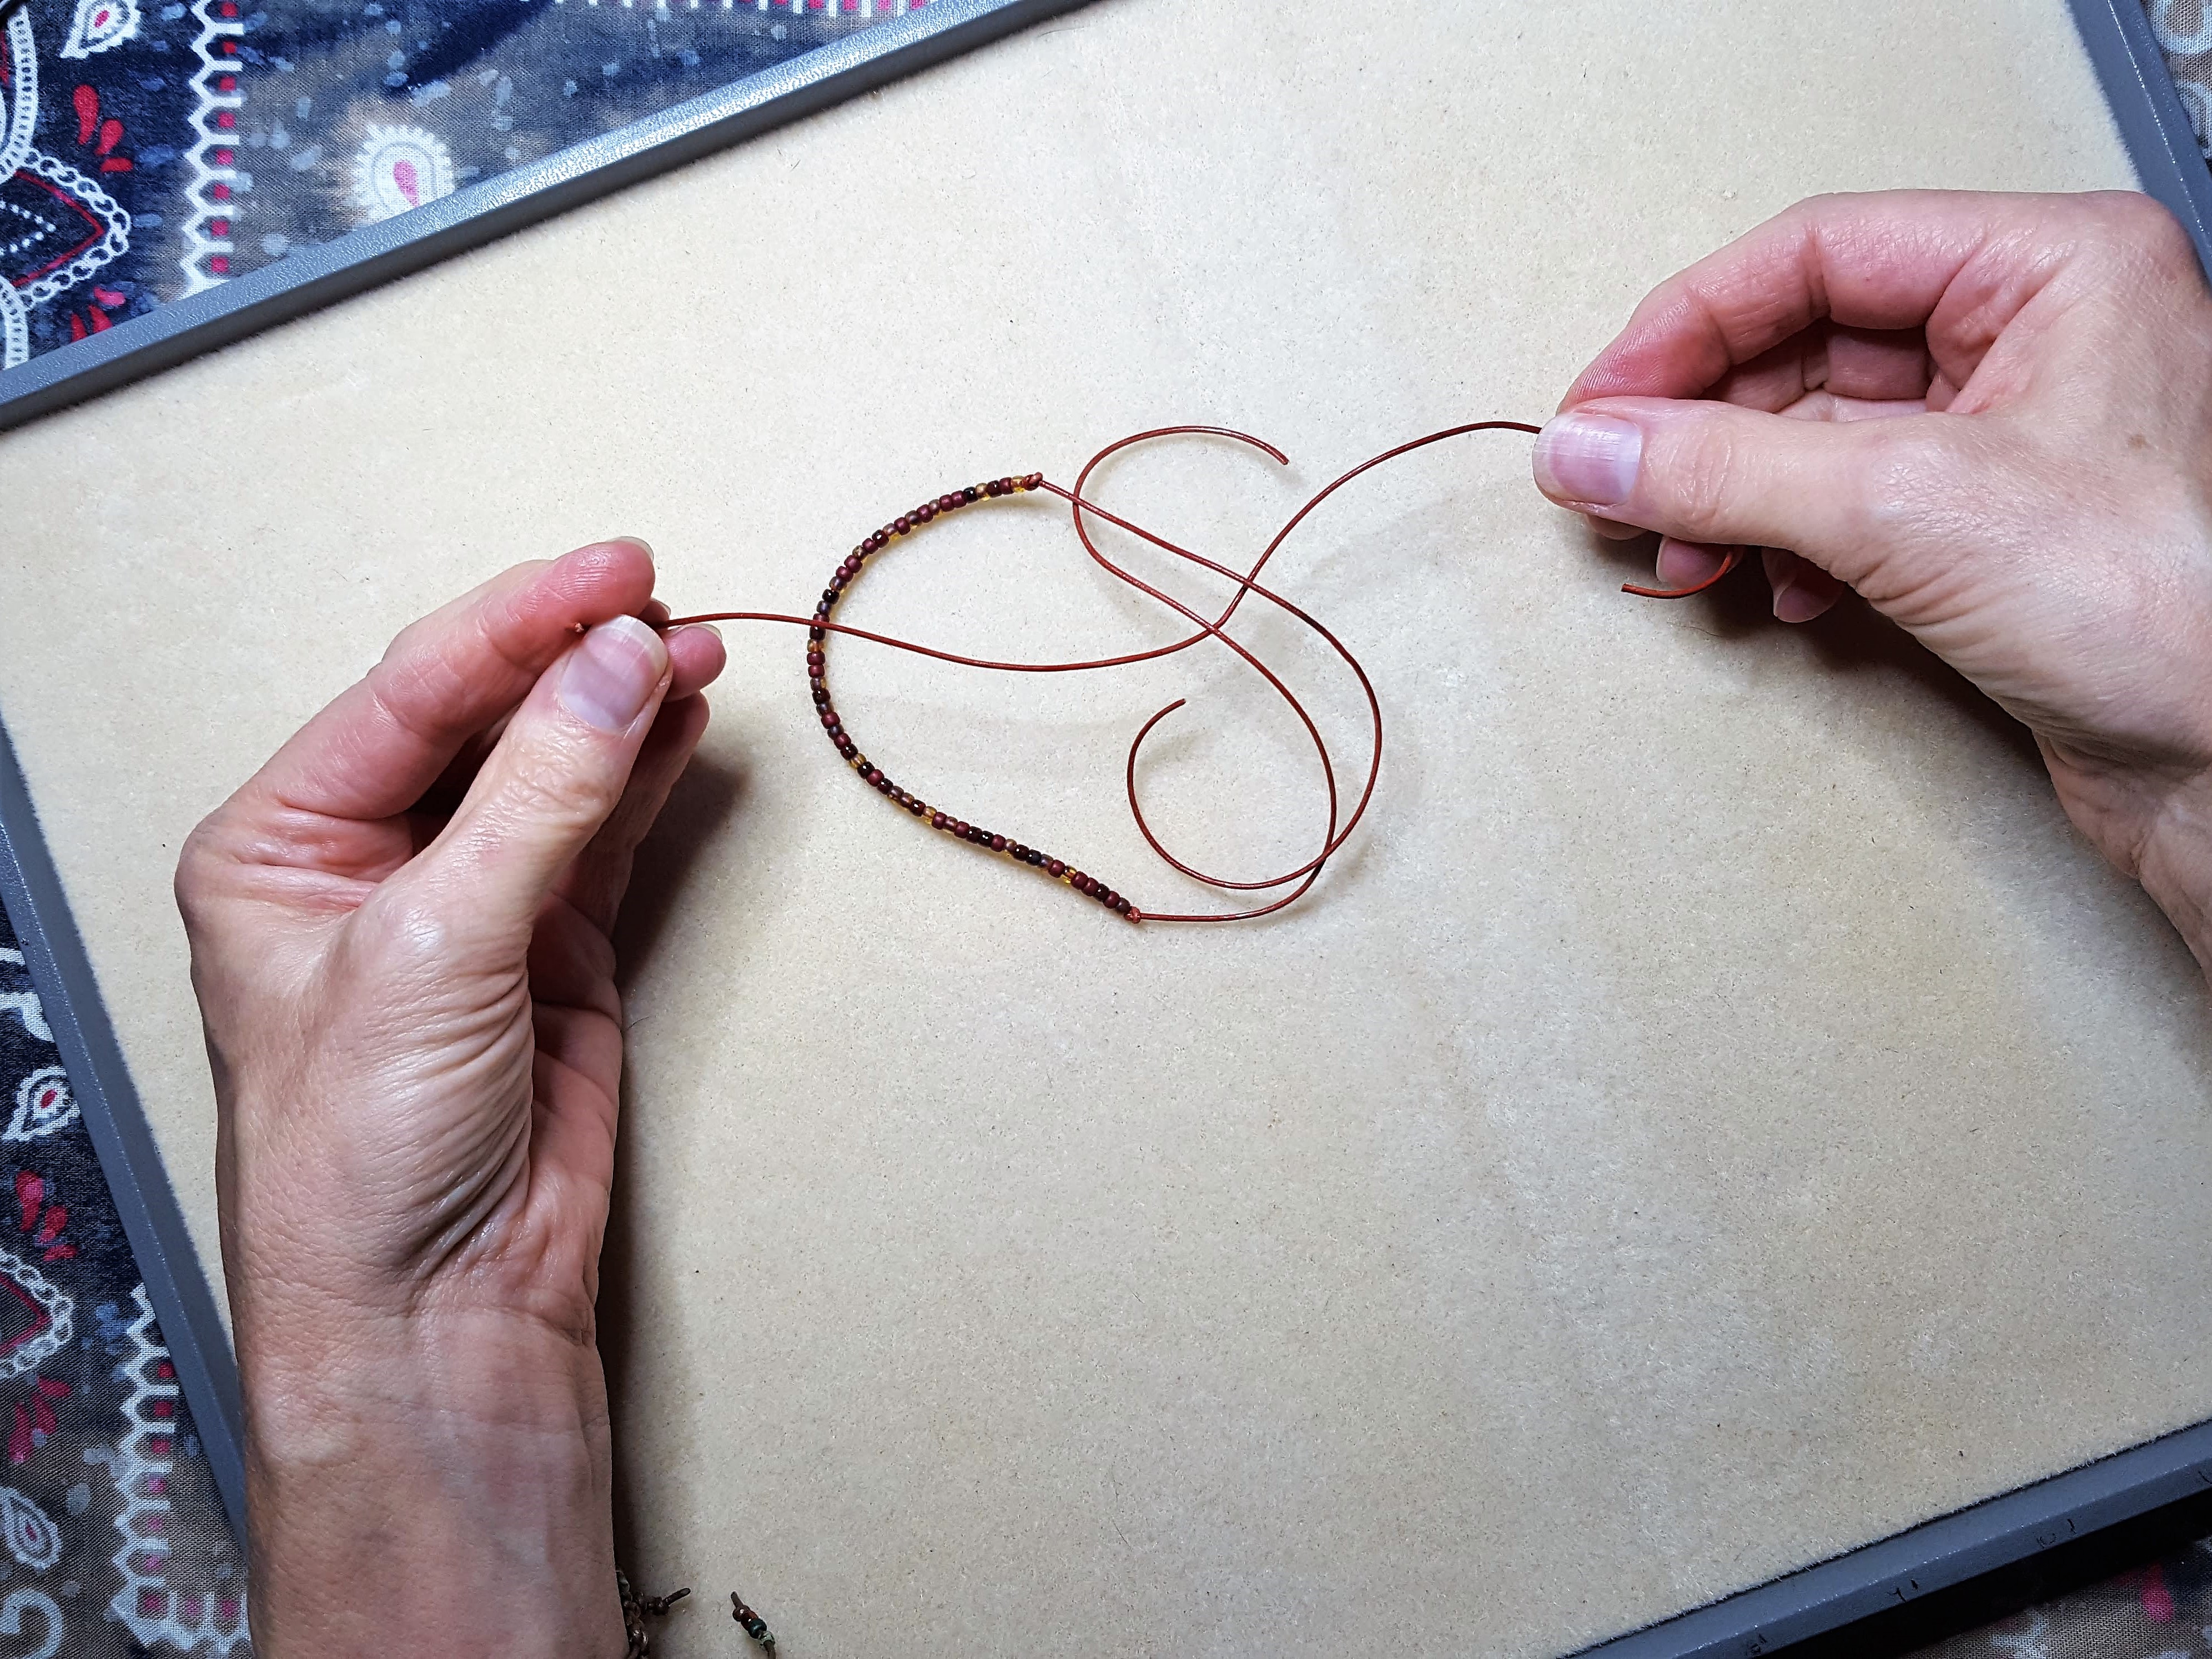
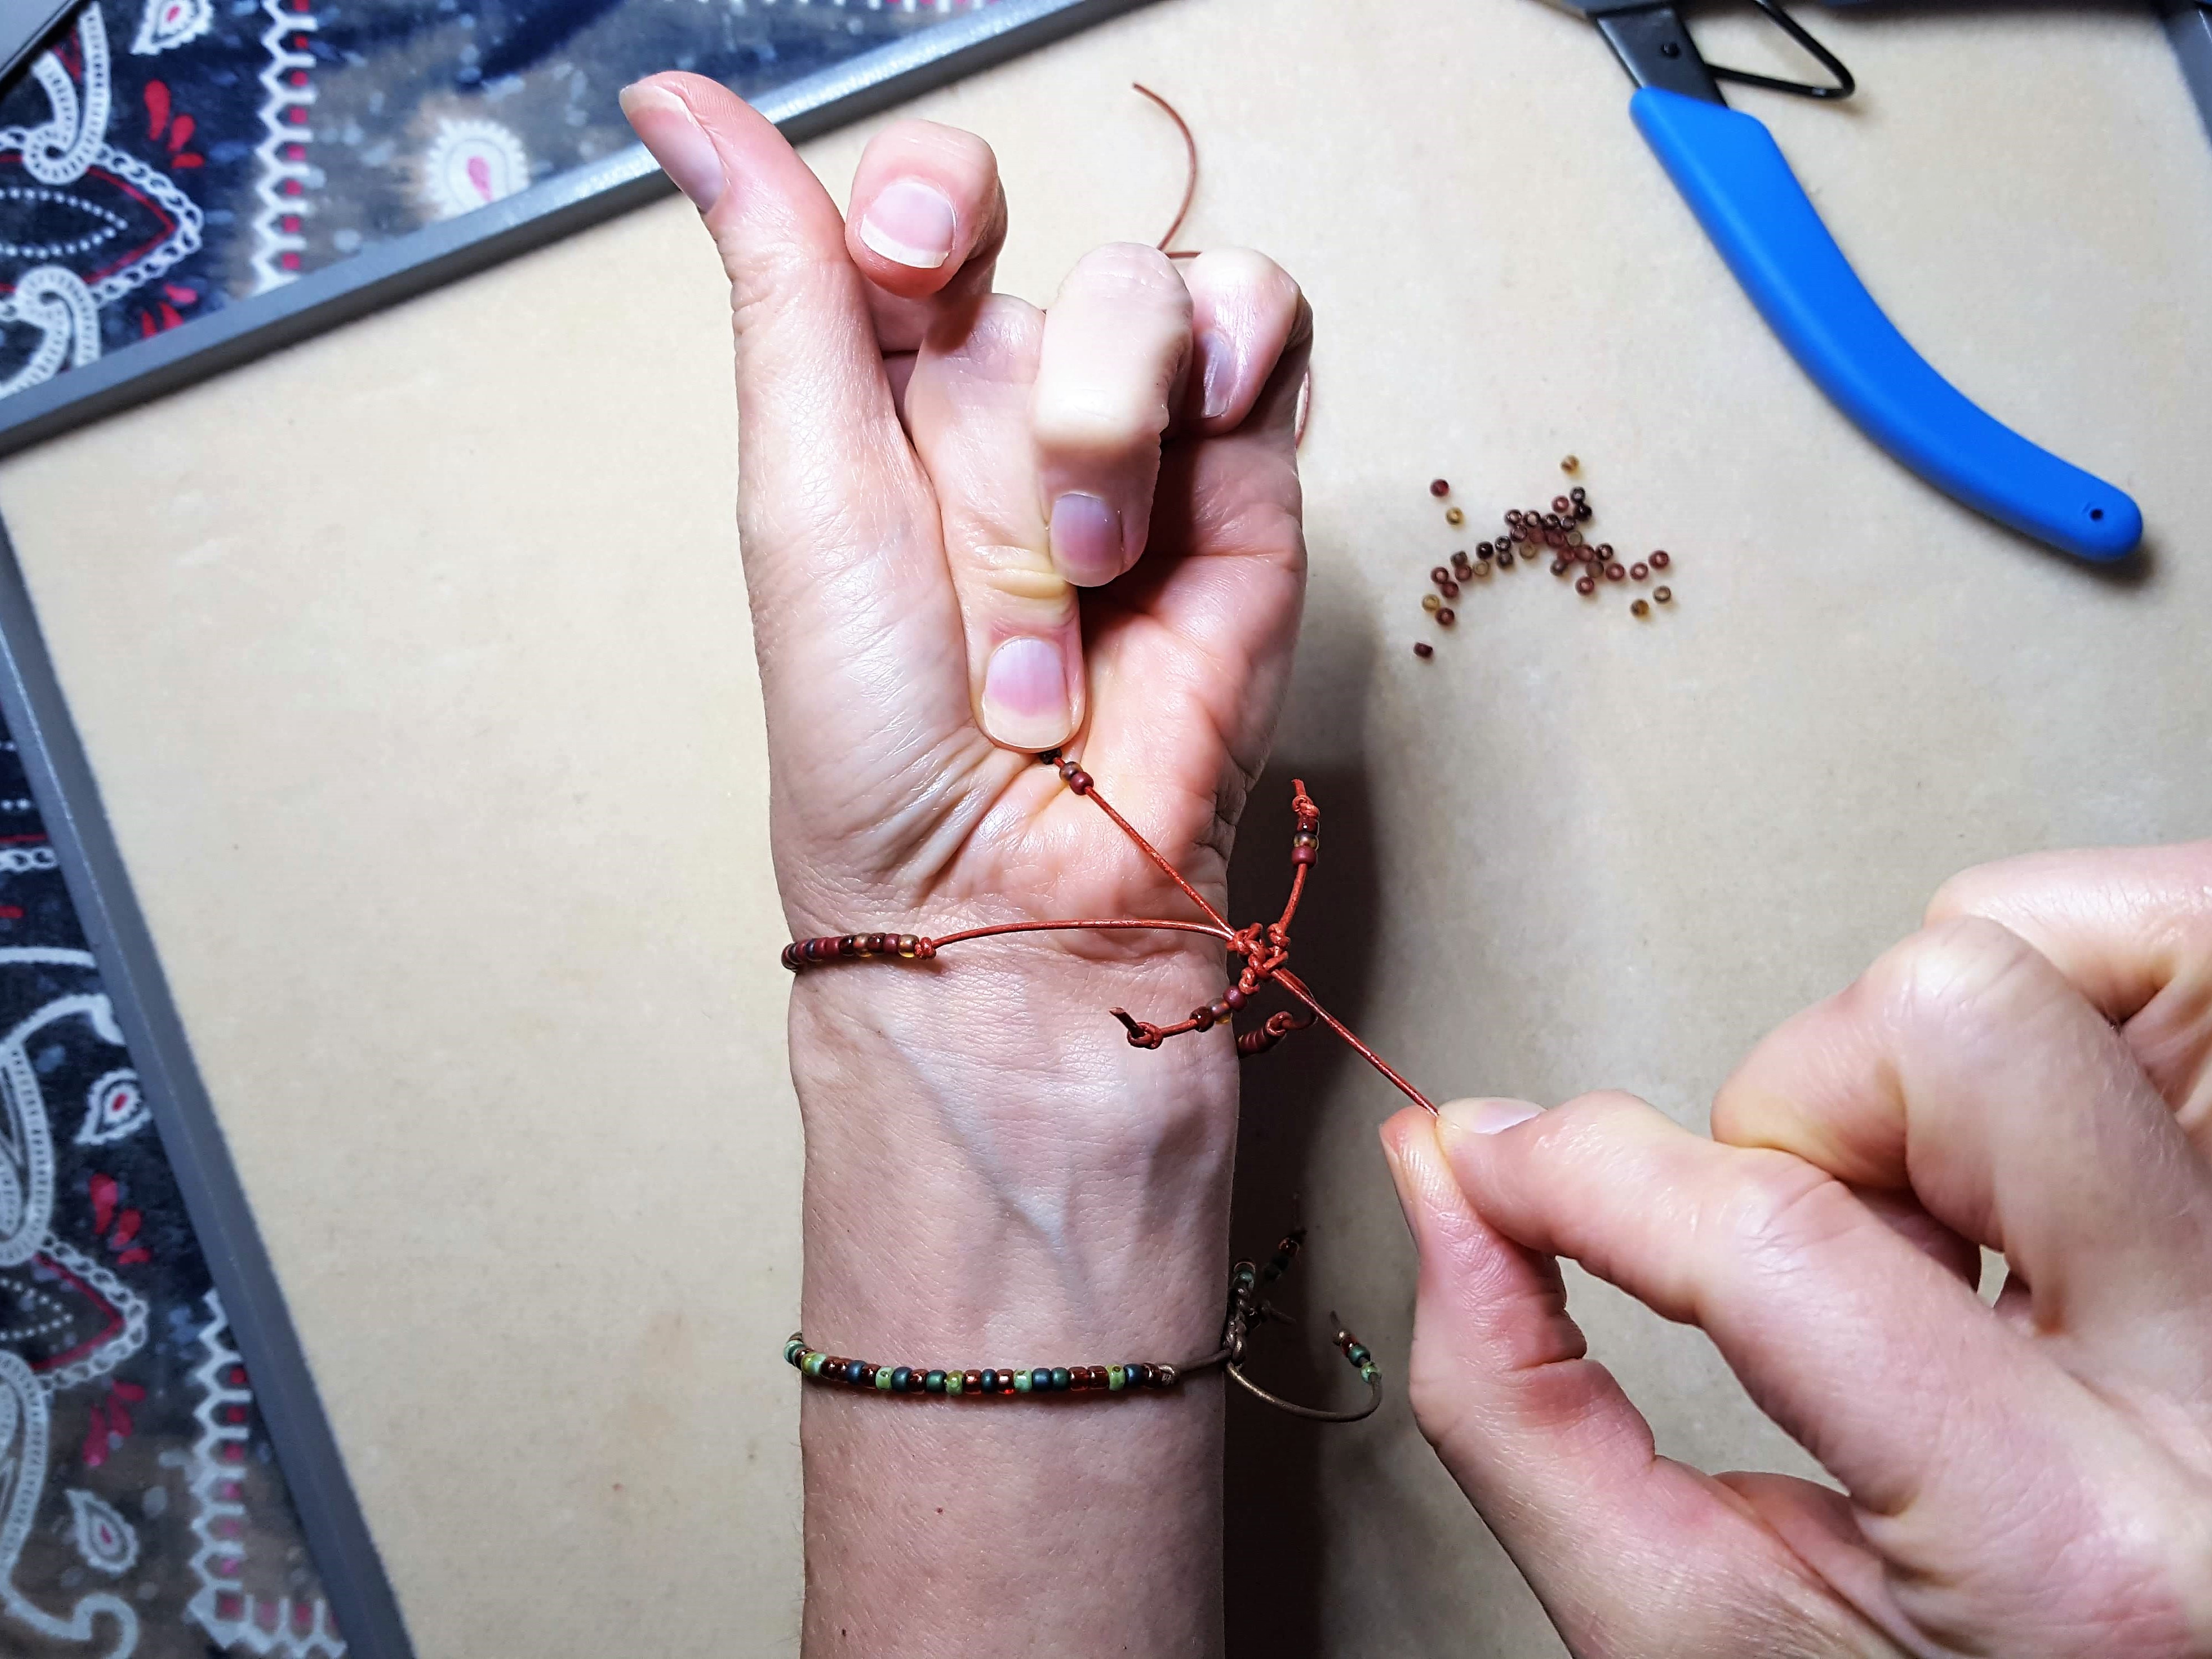
Step Four – Create the sliding macramé knot
Overlap the long, unbeaded ends of the bracelet, and lay it flat on your work surface.
Then center the 10” piece of leather under these overlapped ends.
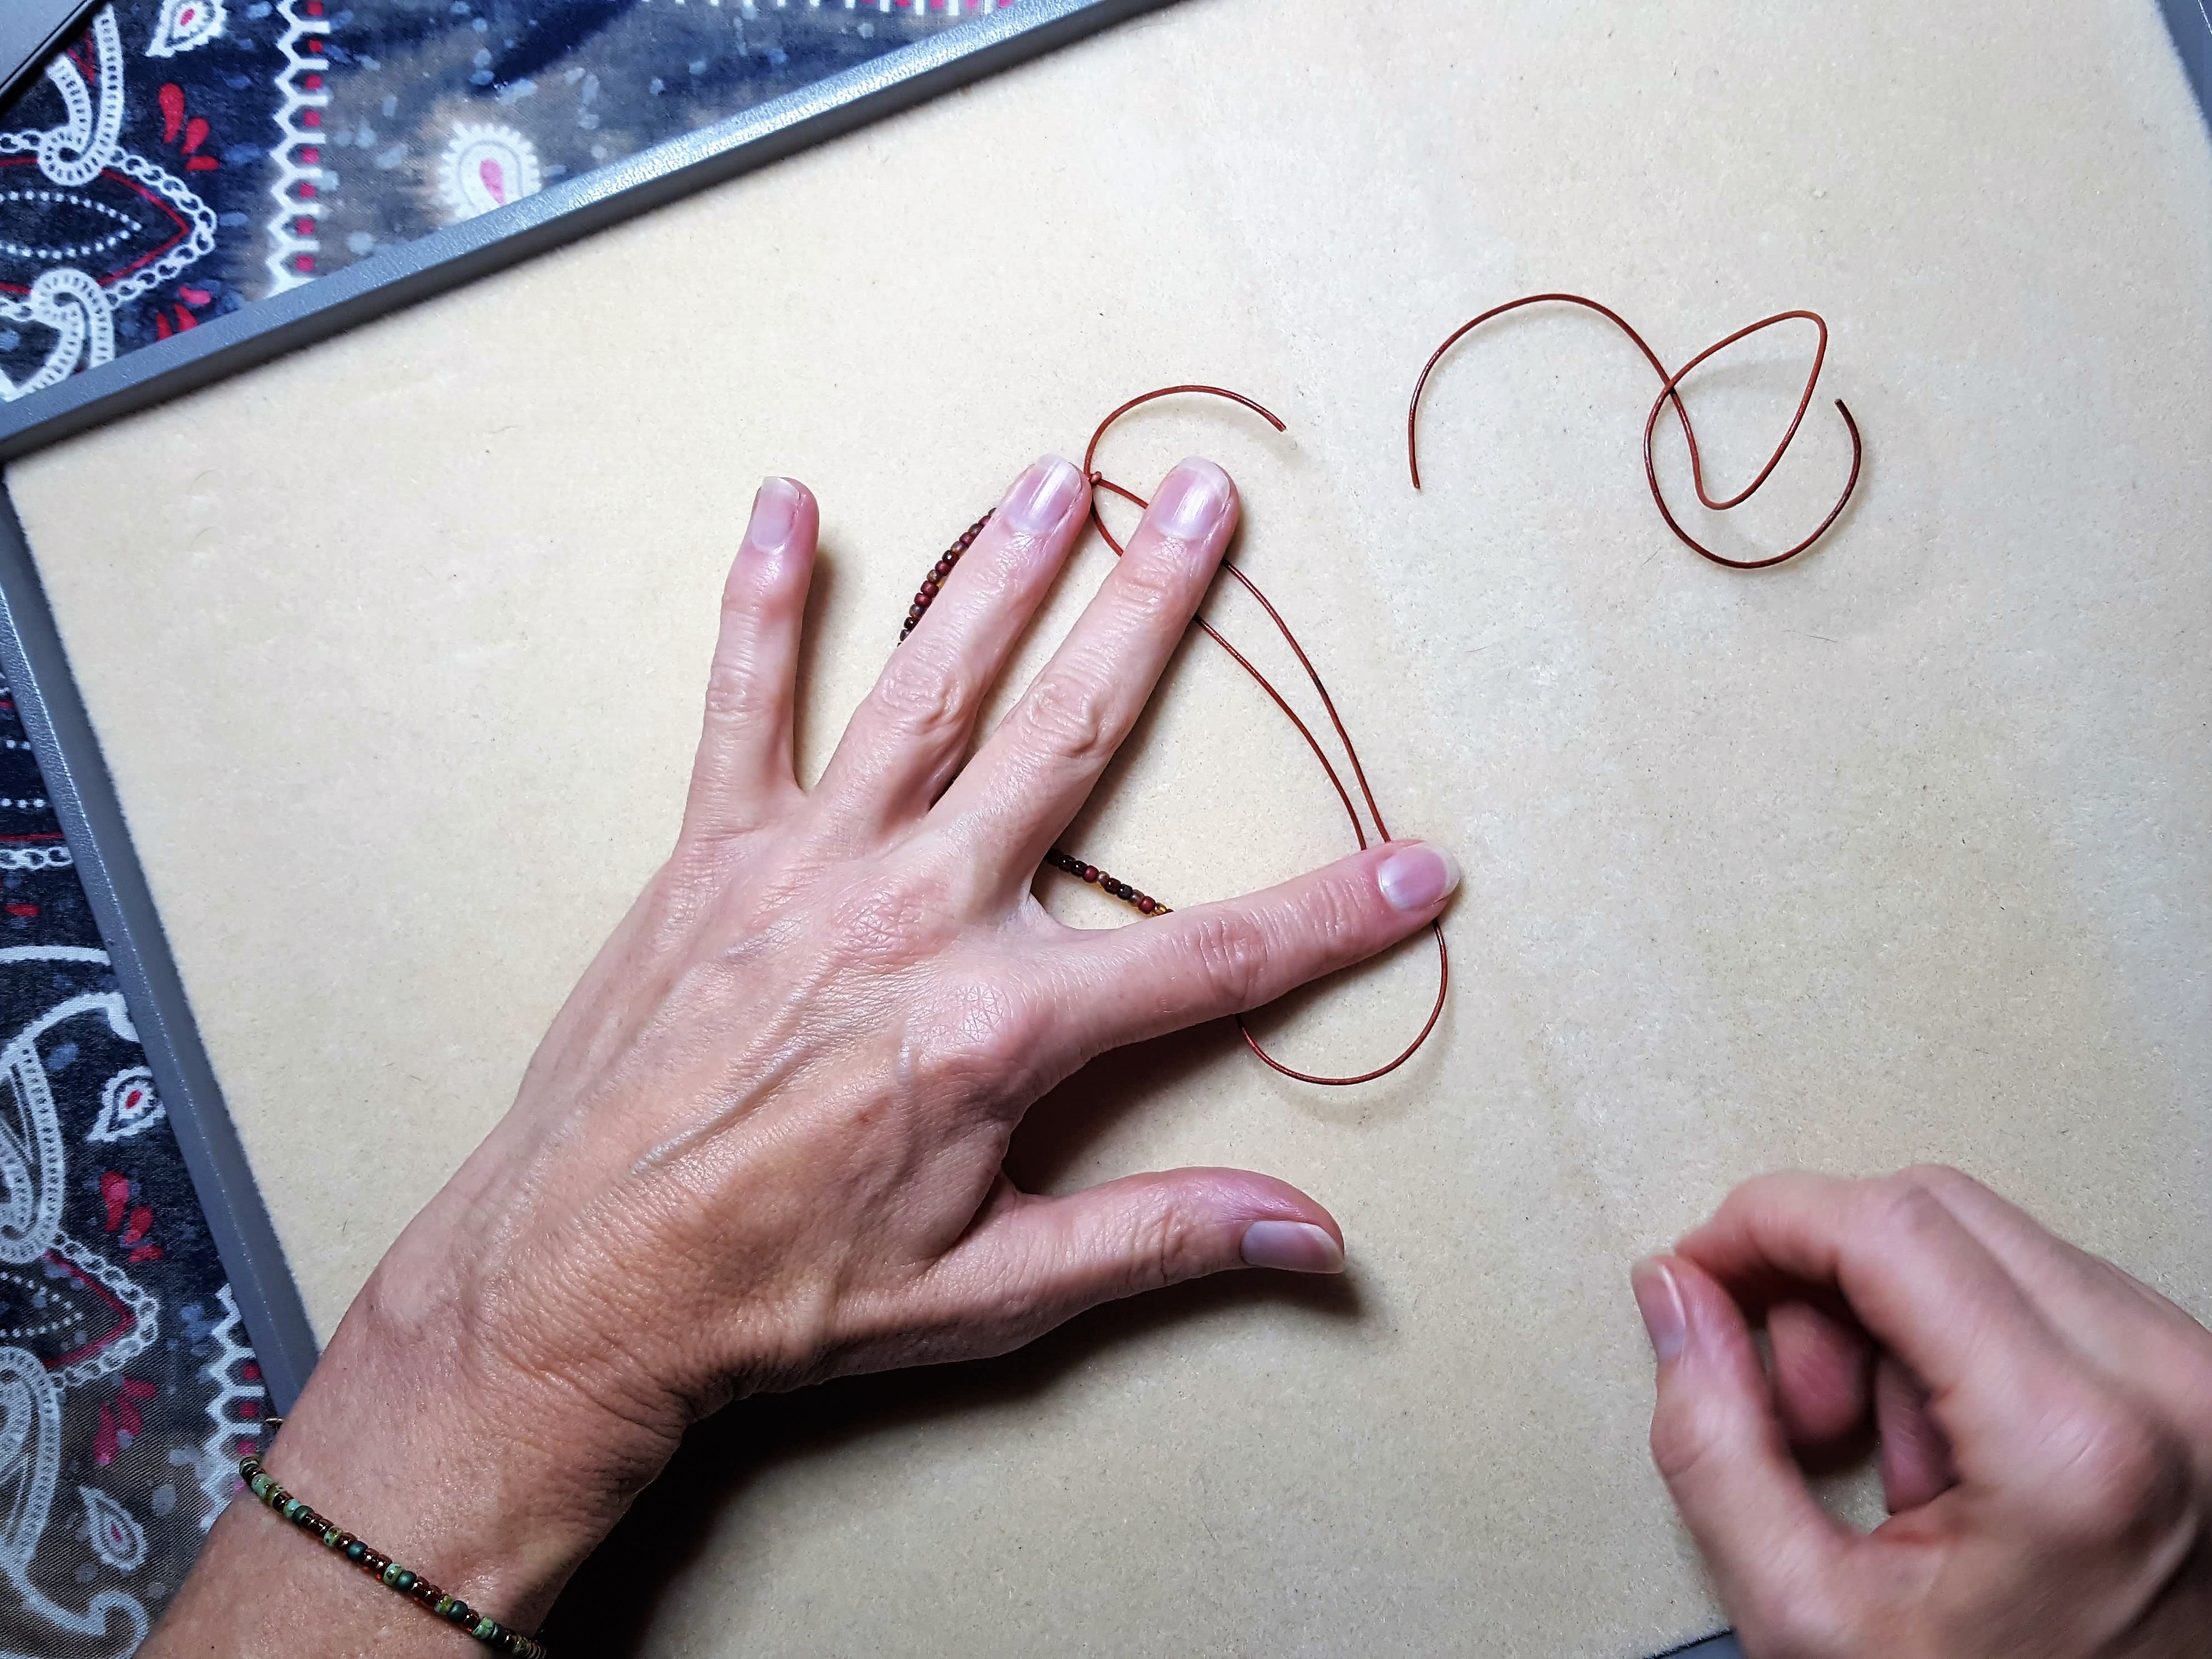
Before we start the macramé, here is a visual of the 2 knots we’ll use. Note that knot 2 is just the reverse of knot 1:
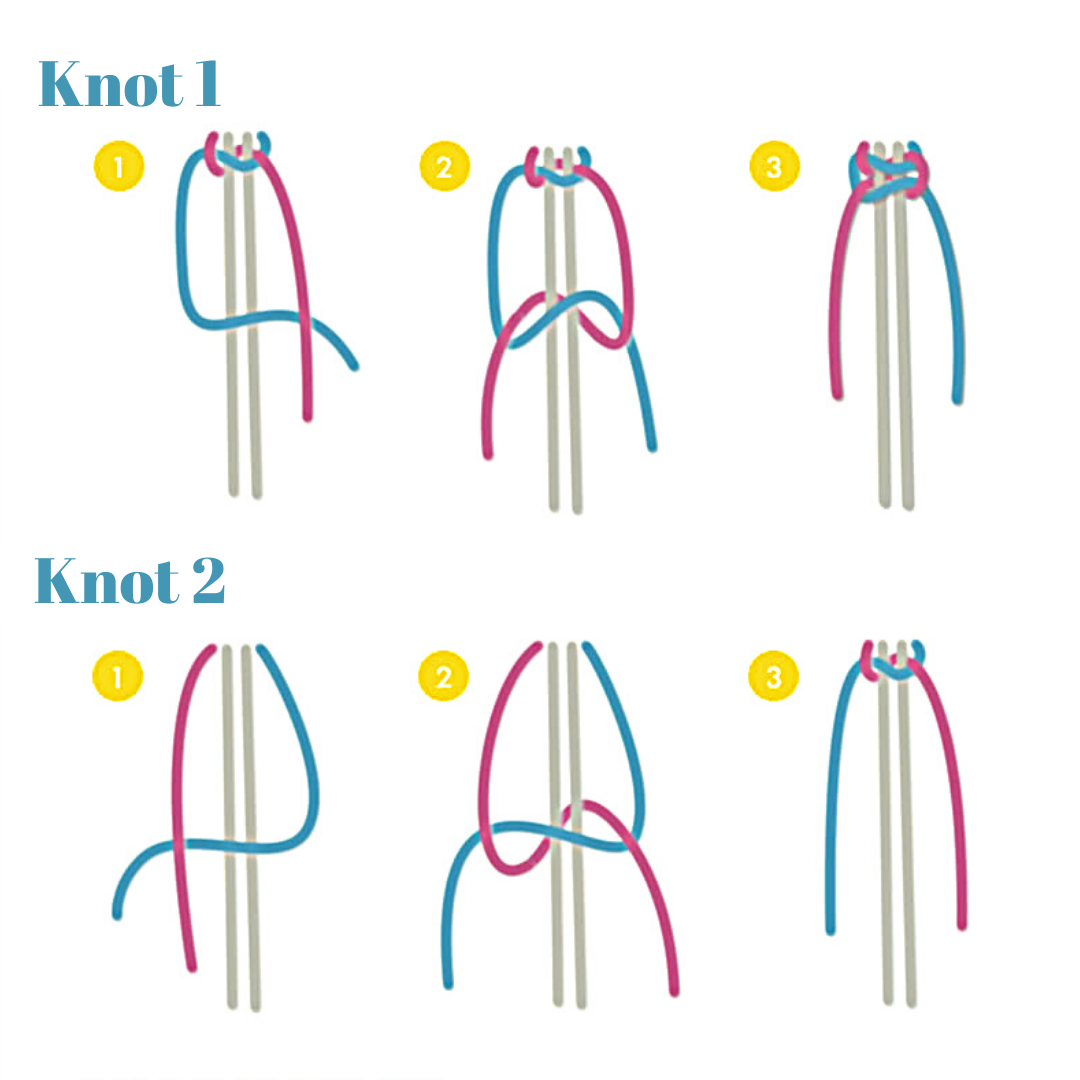
Knot 1:
- Create a “4” shape with the left side cord, laying the long end over and perpendicular to the overlapped ends of the bracelet.
- Lay the right side cord over the left cord, then bring it under the bracelet ends, and up through the top part of the “4” shape.
- With one cord in each hand, start to pull the cords out to the side, trying not to disturb the overlapped bracelet cords.
- Continue pulling and pulling, until they are snug against the bracelet cords.
- NOTE: pull snug but not too tight, or your sliding knot won’t slide!
Knot 2:
- Create a backwards “4” with the right cord, laying the long end over and perpendicular to the ends of the bracelet.
- Lay the left side code over the right cord, then bring it under the bracelet ends, and up through the top part of the “4” shape.
- With one cord in each hand, pull out until they create a knot.
Repeat knots 1 and 2
.
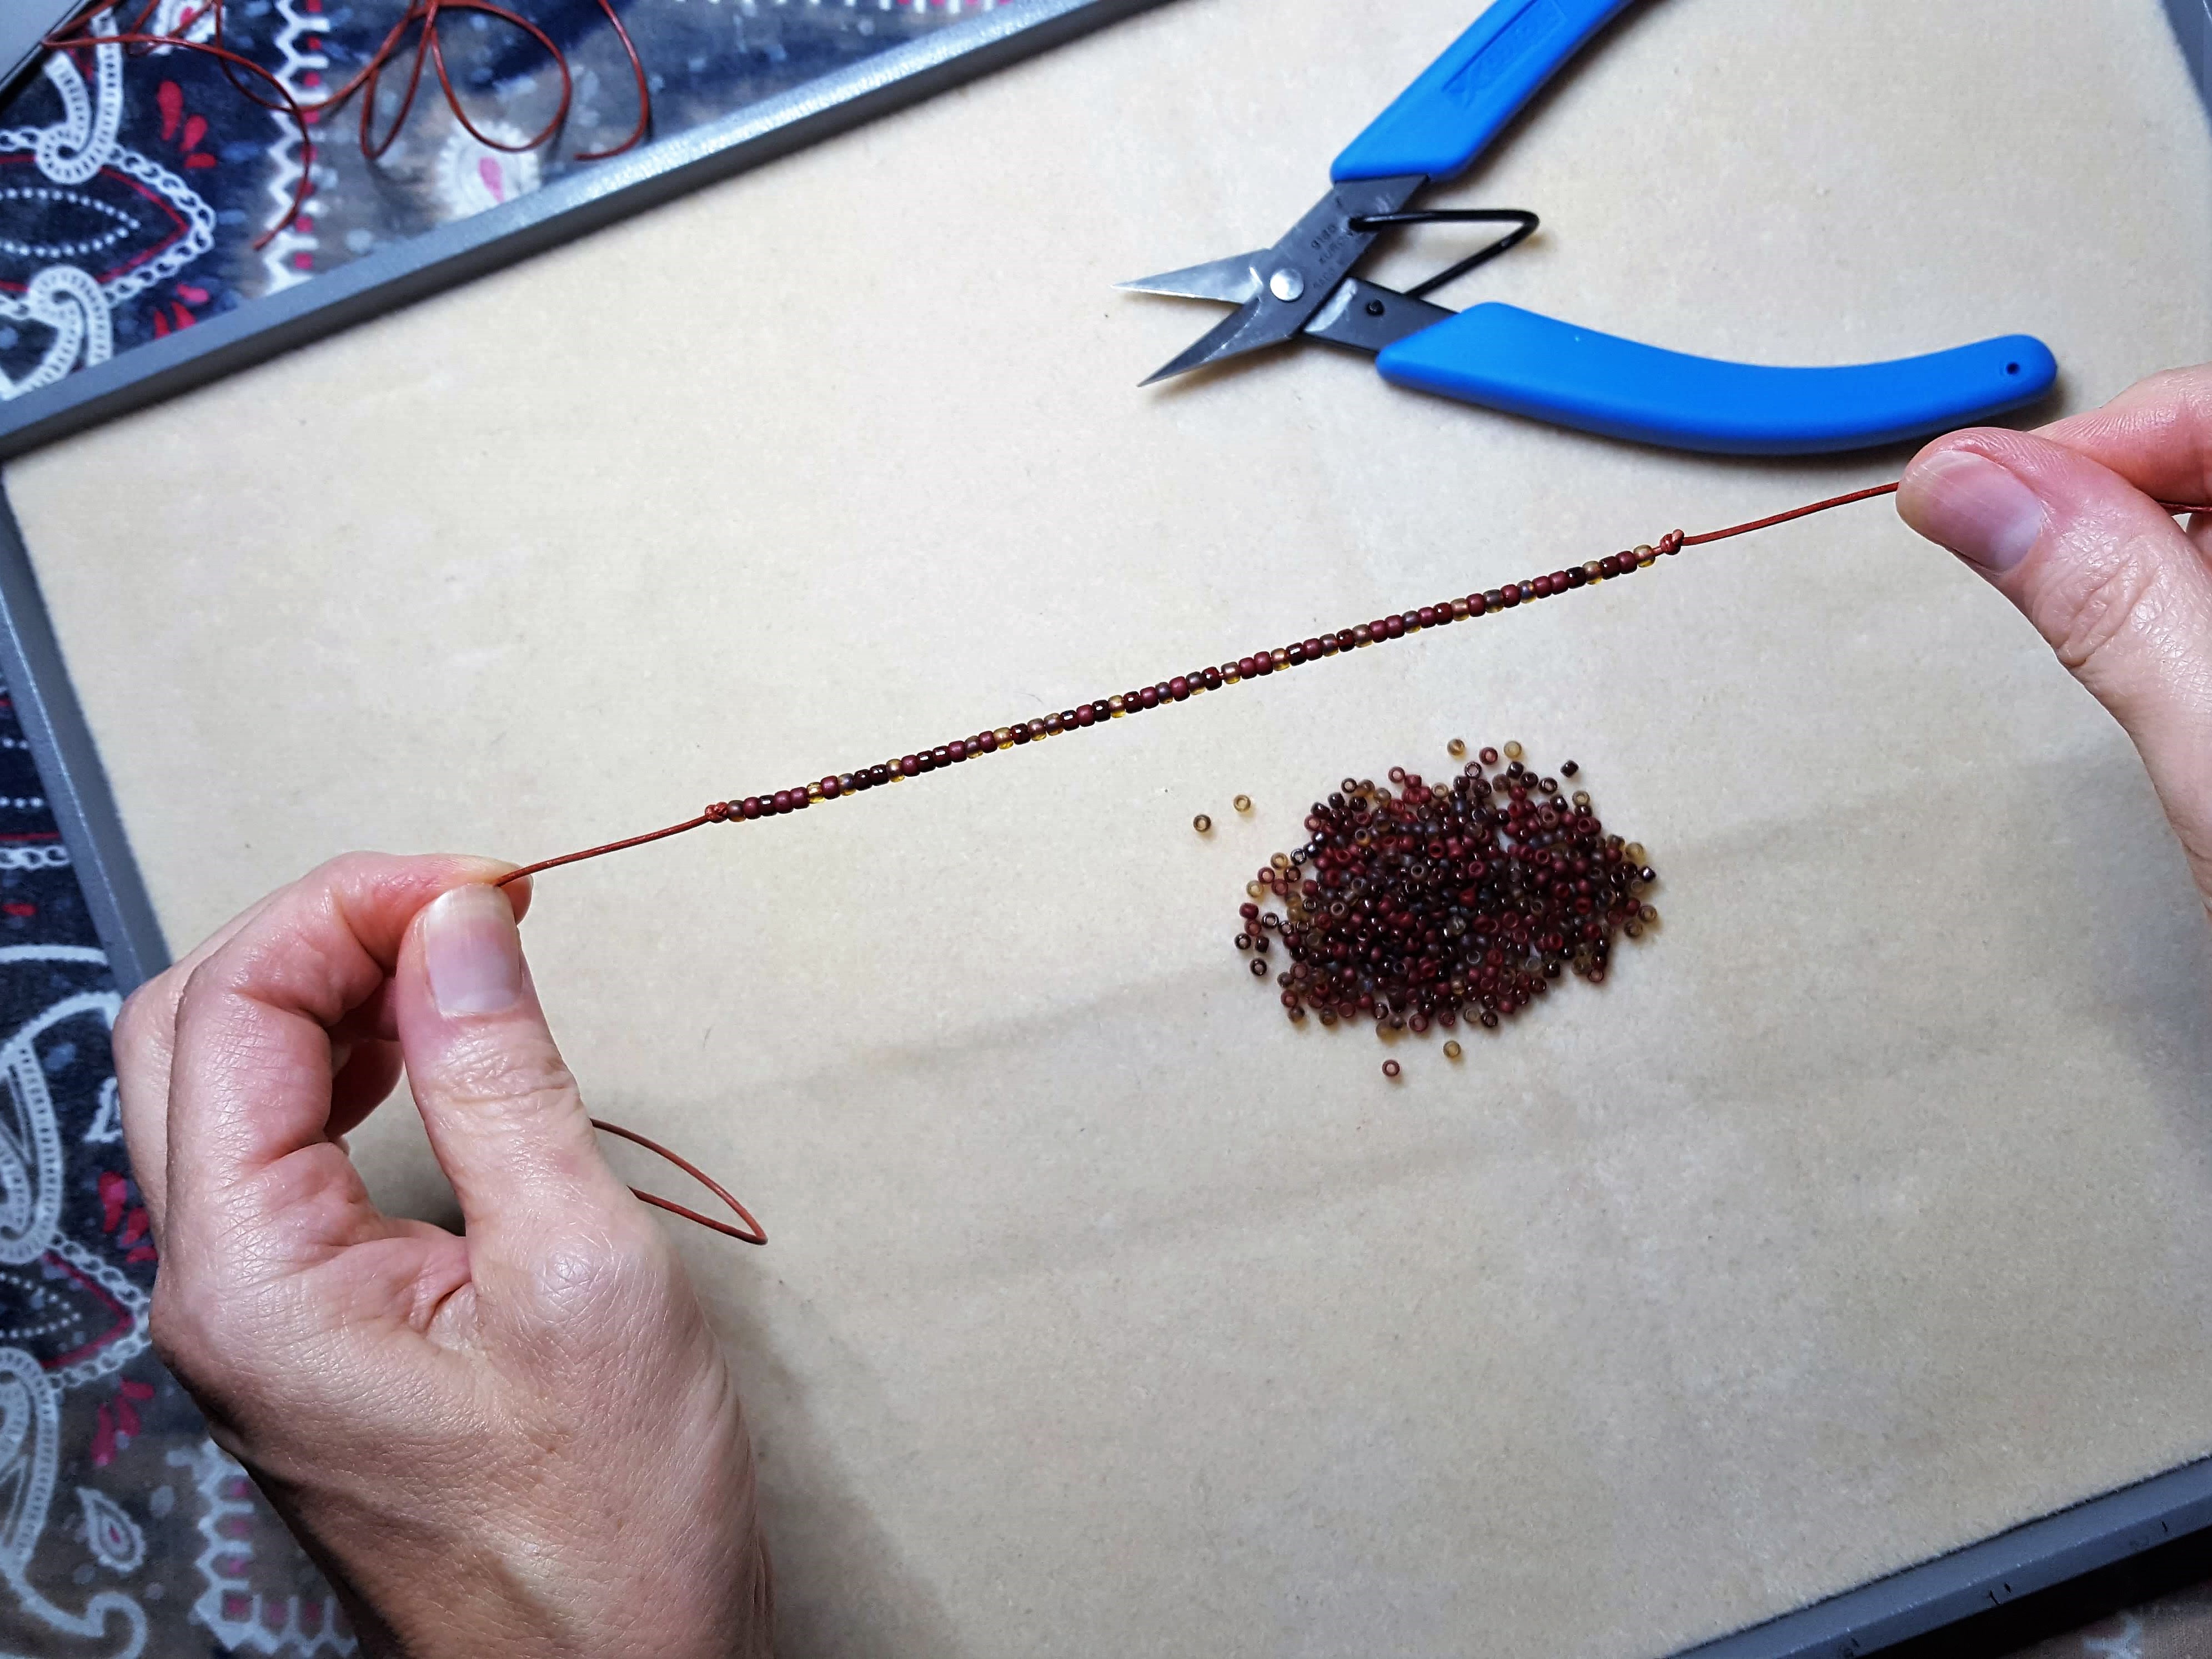
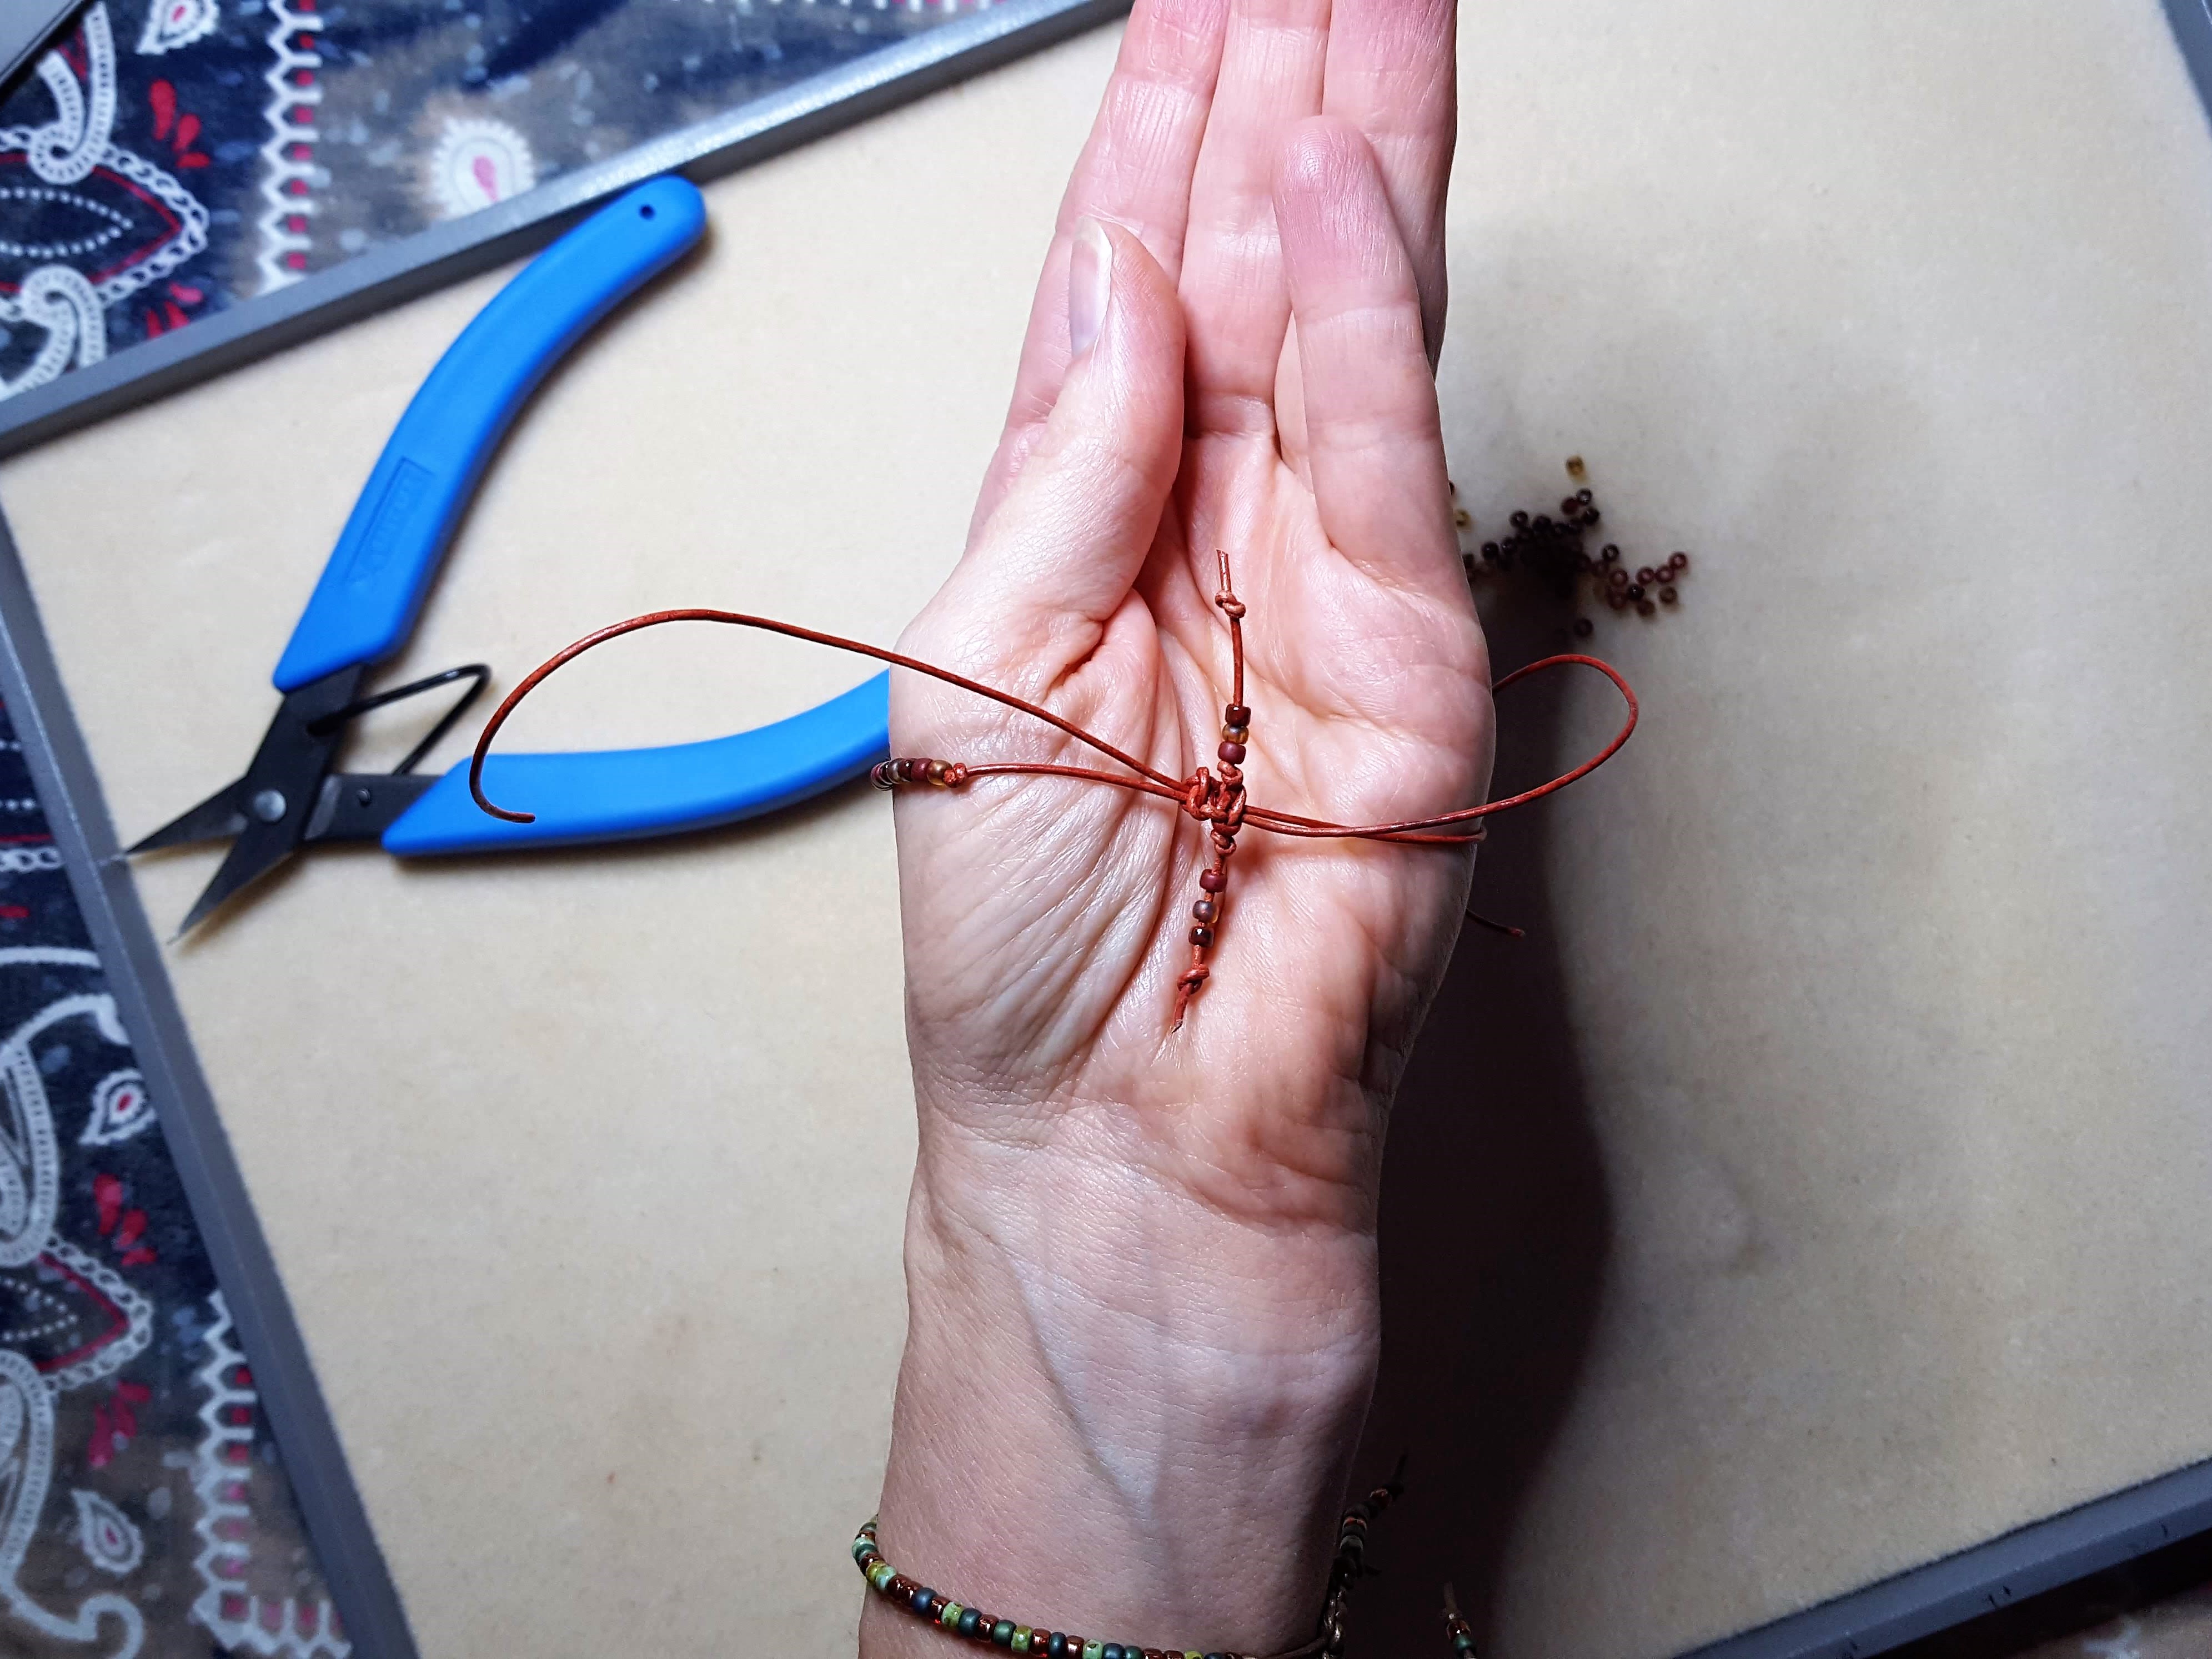
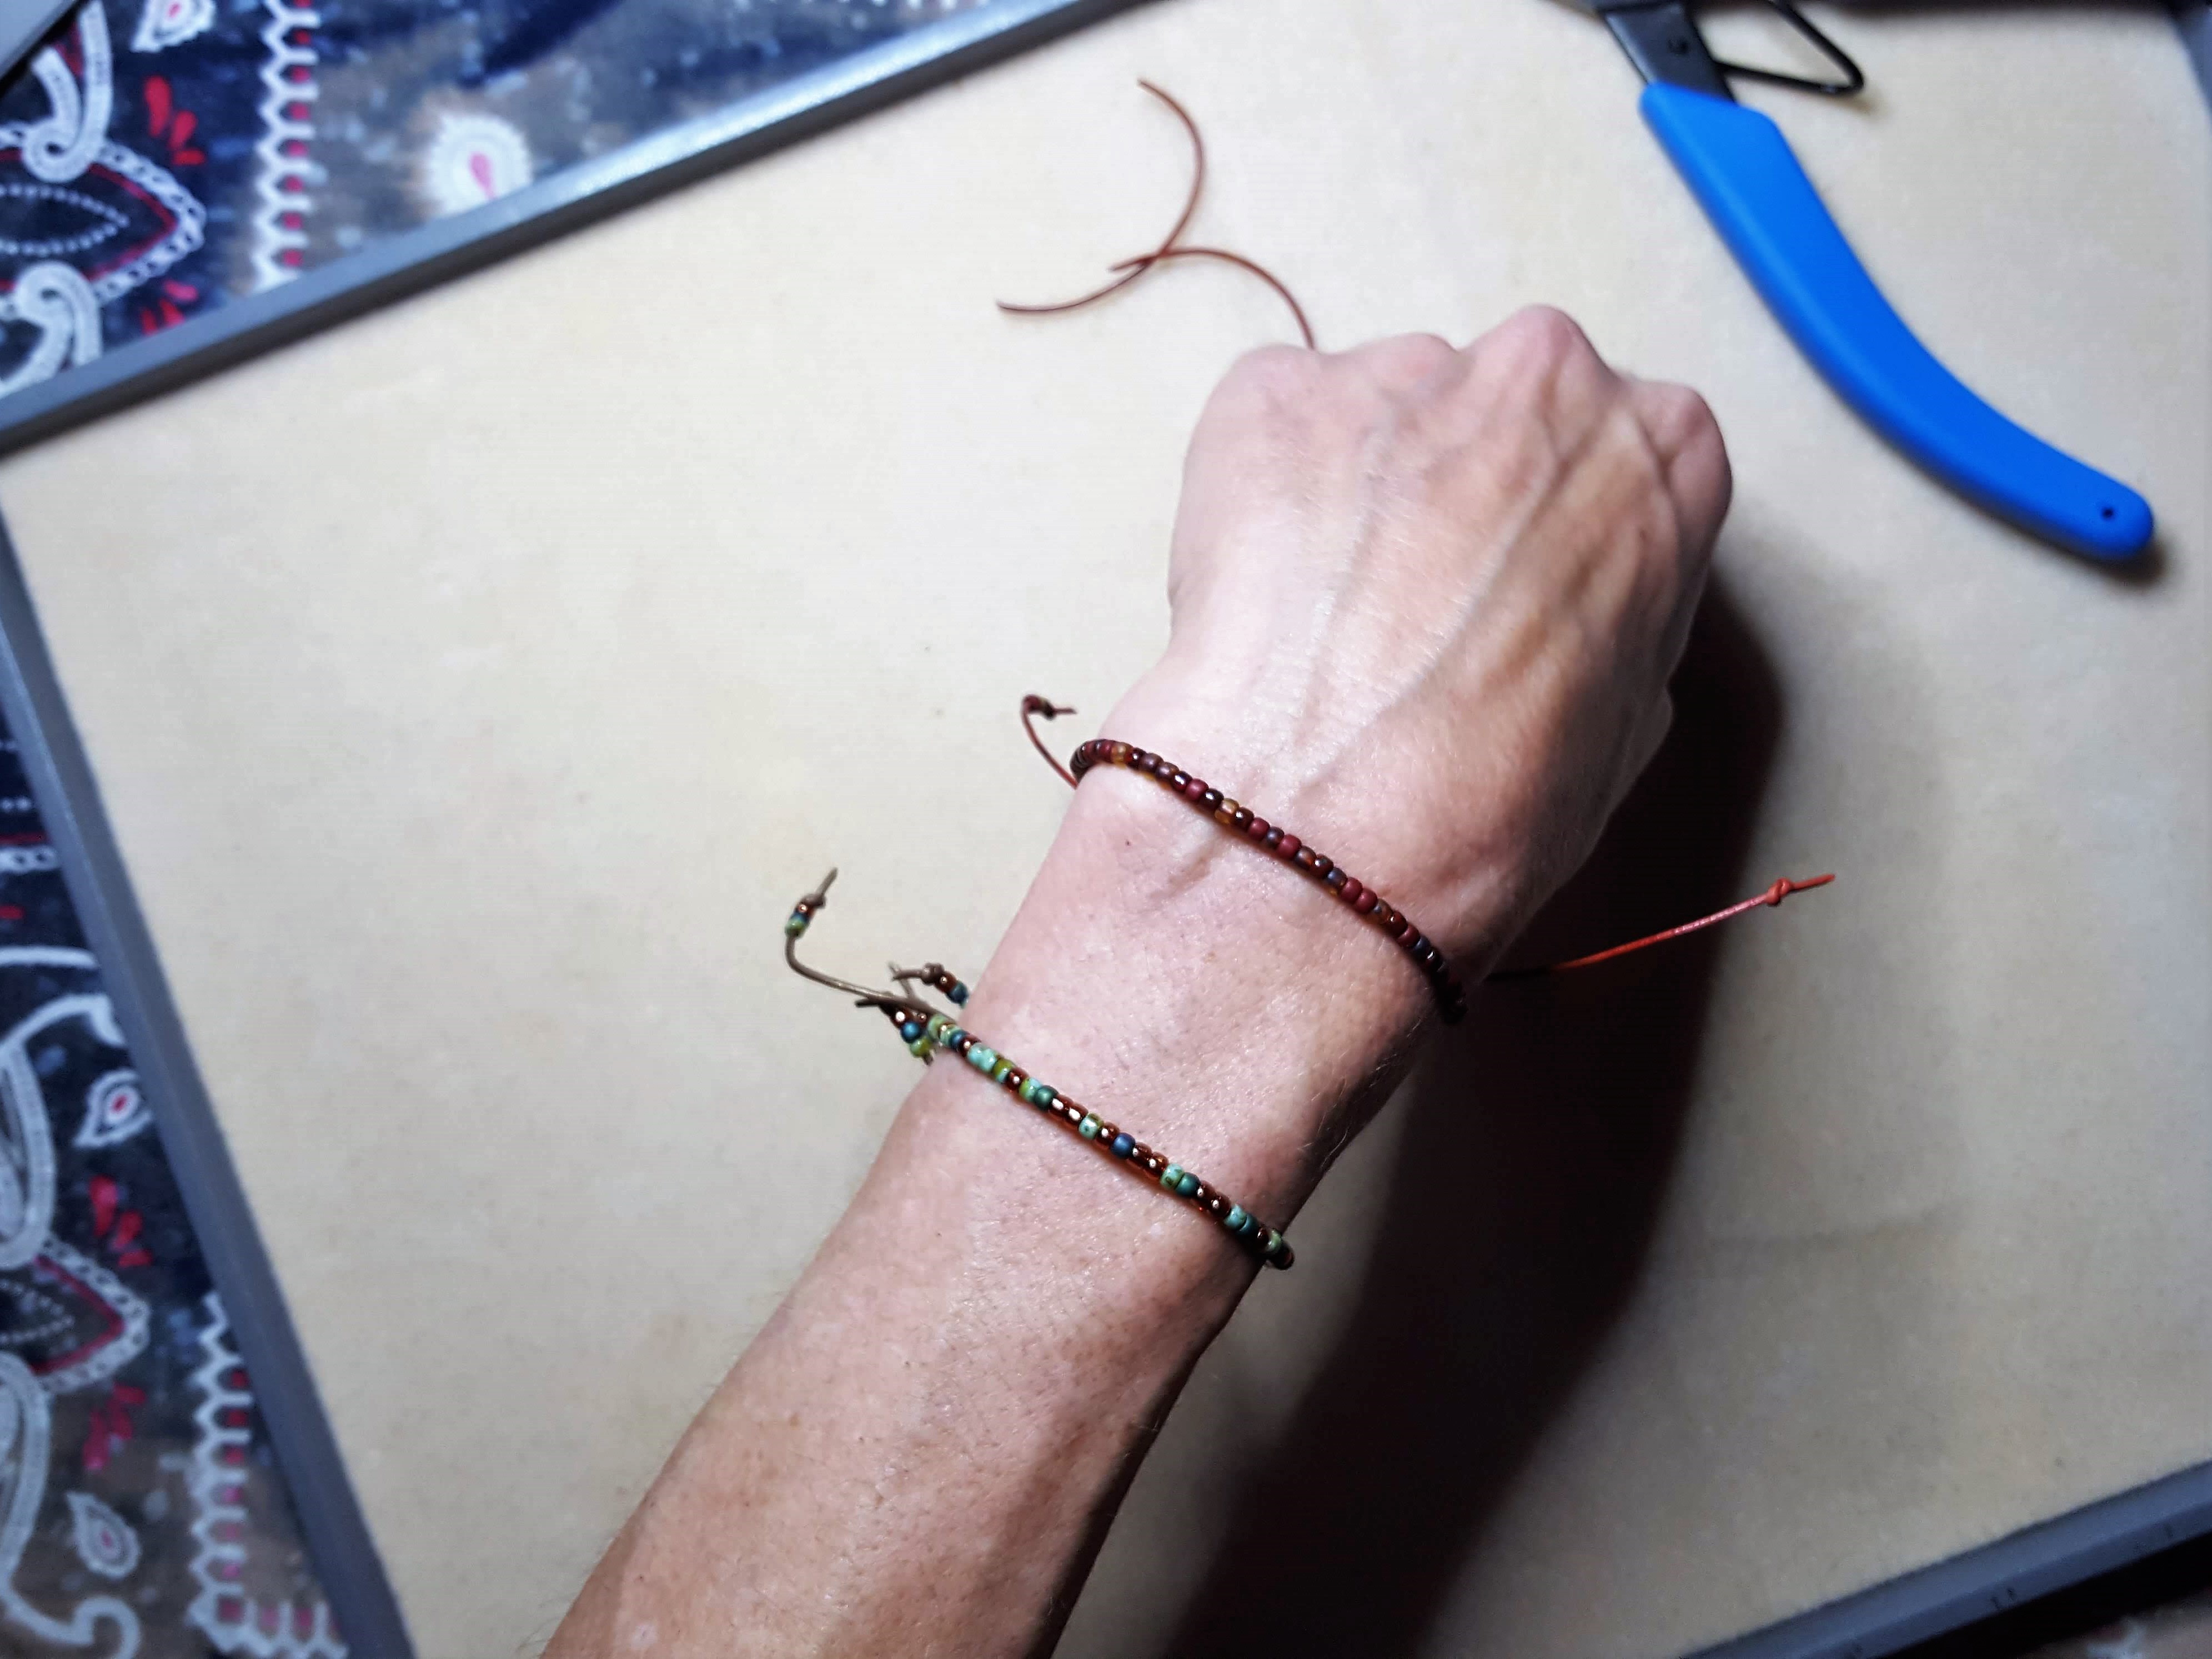
Step Five – Finishing
Create simple overhand knots up close to each side of the macramé sliding knot, using the cords you used to create the macramé. Add a few beads, if desired, tie another overhand knot, and trim the cords about ¼” from the knot.
Slide the bracelet over your hand, and adjust as needed (using the sliding knot), to be sure the bracelet is long enough to put on.
Remove the bracelet.
String some beads onto the long bracelet cords, and add an overhand knot to create a tail (this can be as long as you want it to be). I made mine at least an inch long.
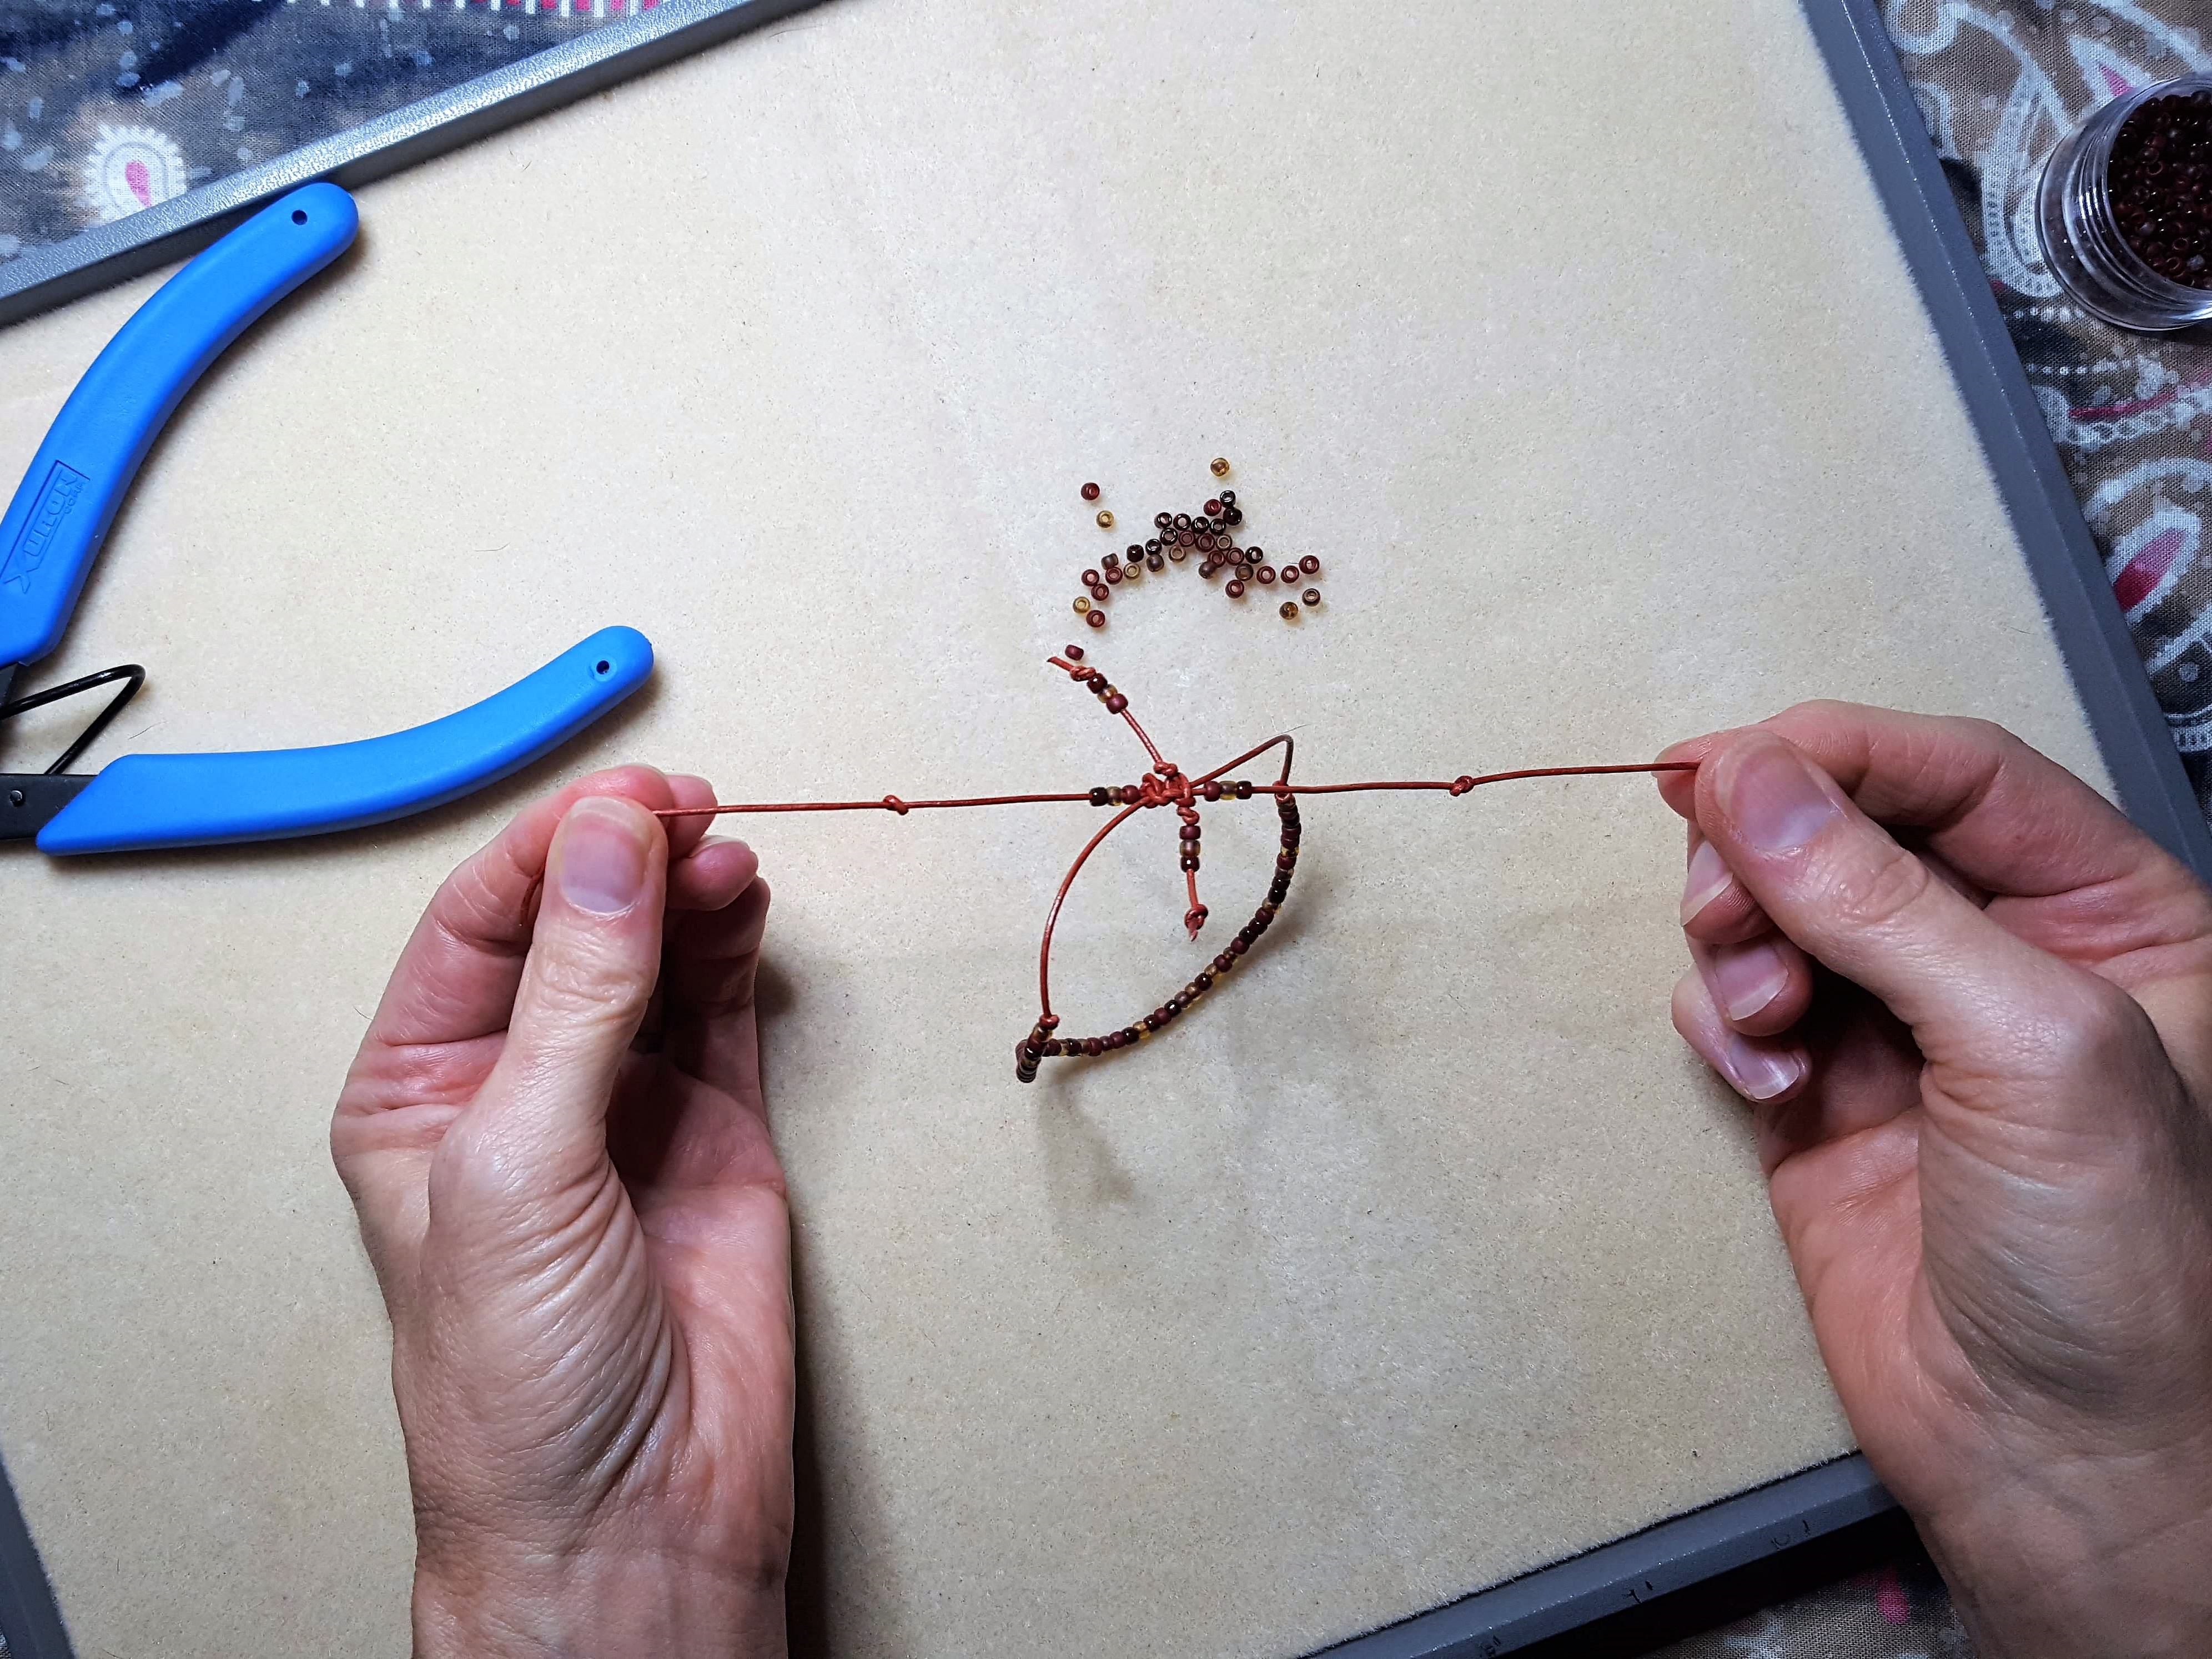
Trim the cords about ¼” from the knots.
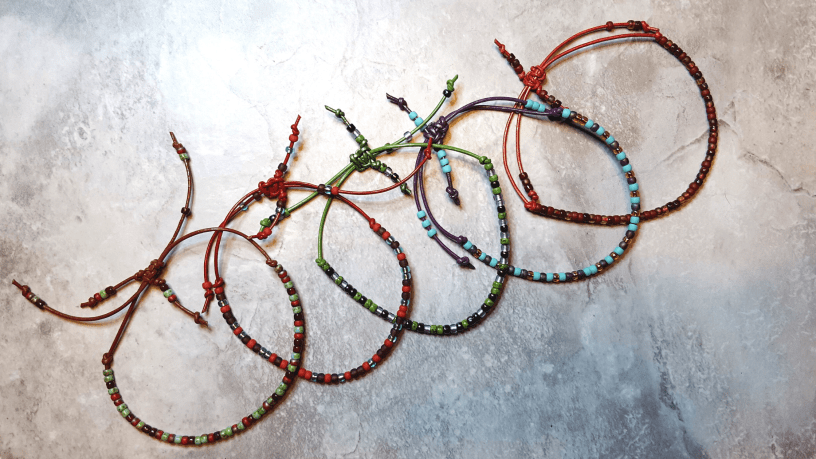
And your finished bracelet is ready to wear! I found it easiest to tighten the sliding knot when I used a finger to hold down one end while I pulled on the other!
Time to make some more! I like wearing them in stacks, and giving as gifts, so I’ll be making a bunch more.
.
If you are having trouble with the macramé knot, or want to see an entire bracelet made using this knot, check out the post I did a few weeks ago showing you an easy Macramé Bracelet!
I hope you found these instructions helpful, and are ready to try making a bracelet of your own.
See you next week!
Carrie
.
P.S. Prefer to buy your bracelet instead?
You can find the multi-color Beaded Friendship Bracelets HERE
and the custom Sports Team Colors Beaded Bracelets HERE