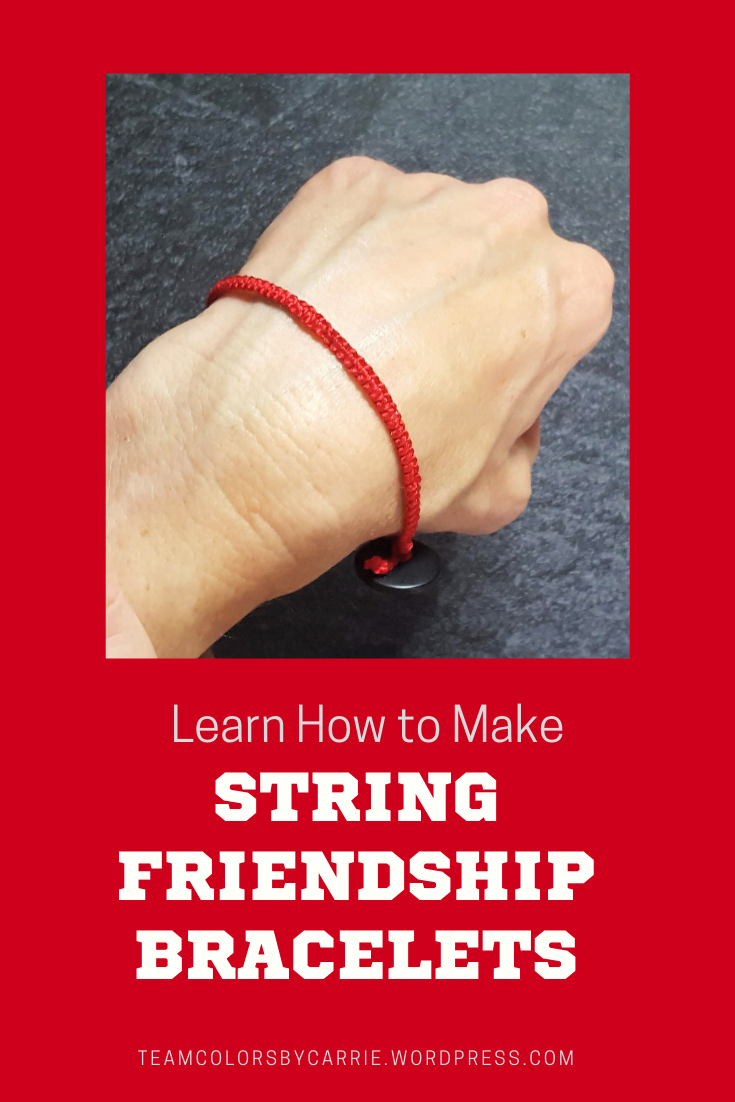
In last week’s blog, I promised you that more DIY team spirit wear projects were coming your way. And today I’m sharing a fun bracelet project that I know you are going to love!
This kind of bracelet is commonly referred to as a “friendship” bracelet, and it always seems to stay in style. There are quite a few different ways to make them, and I think this is the 3rd or 4th technique I’ve shared (you can find the others in the DIY Crafts section of the blog).
Ready?
Let’s get started!
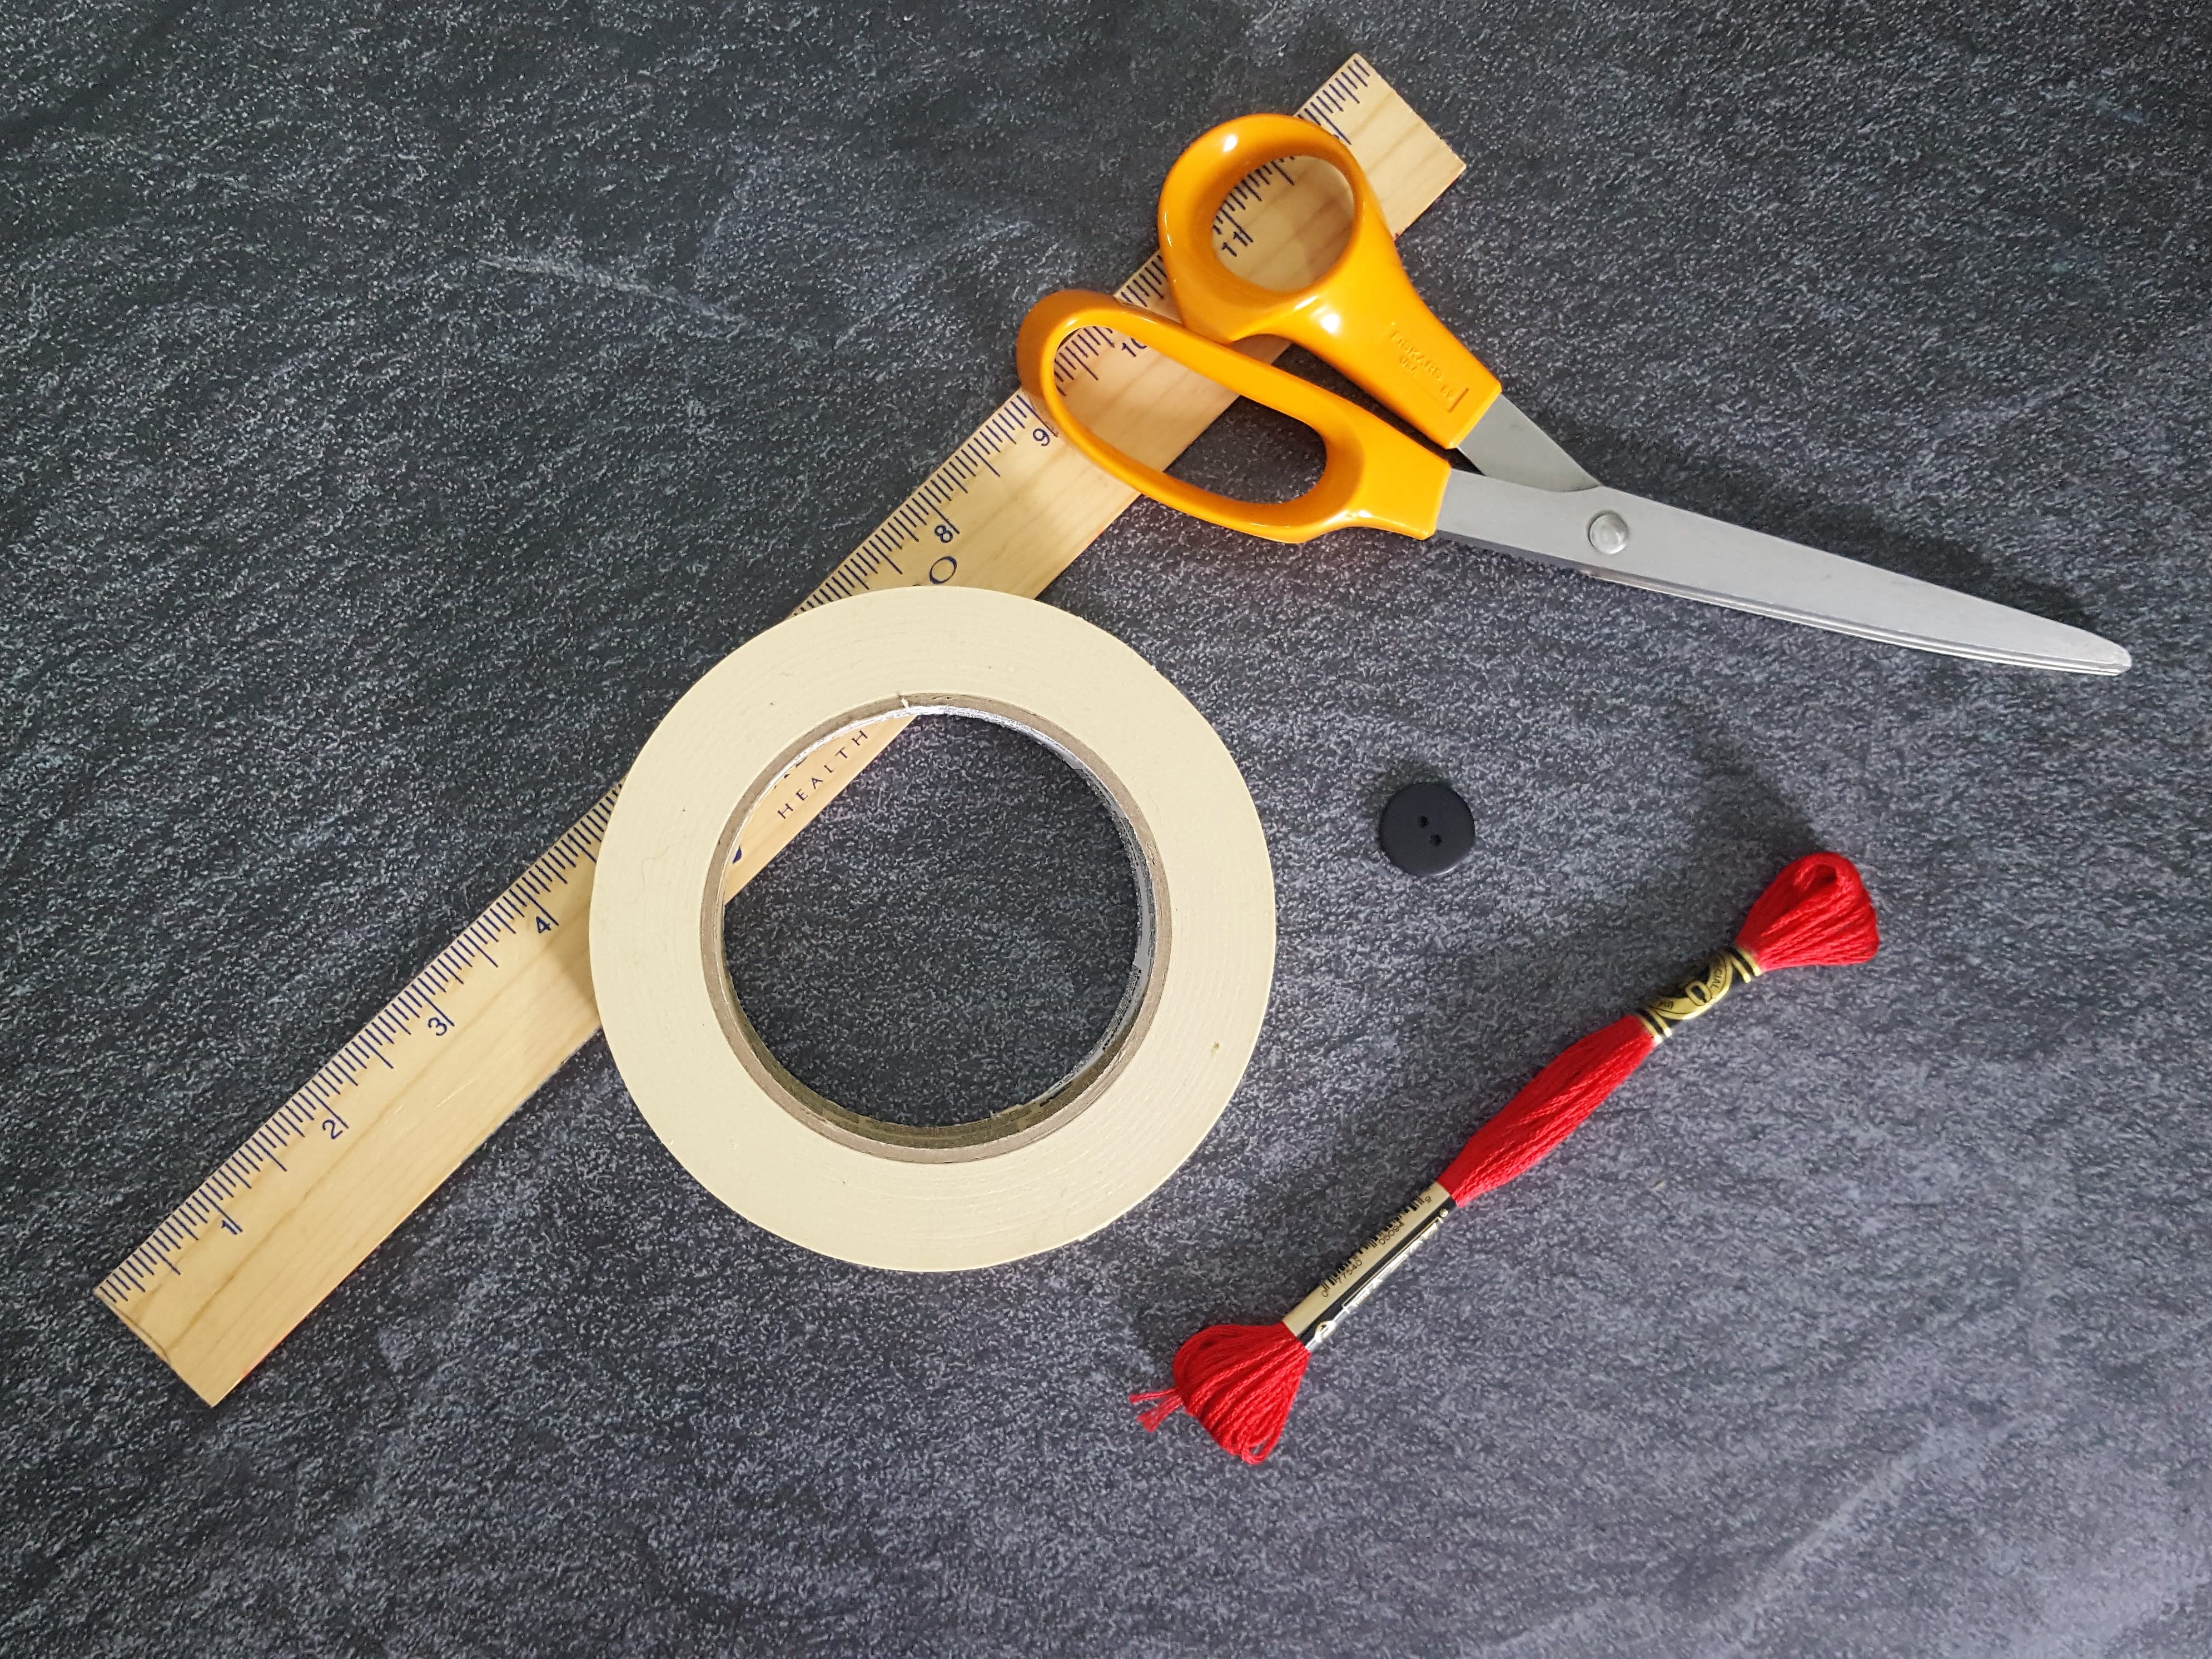
Step One – Gather Your Materials
- Cord: embroidery floss, 1mm knotting cord or hemp
- Button
- Ruler
- Scissors
- Tape
.
Step Two –Start with the Button
Cut two 5-foot long pieces of your cord, for a 6″ to 7″ bracelet. Cut 6 feet for a larger bracelet.
Match up the ends, and run both through the holes in your button:

Pull the ends until you have 12” of those 2 cords:

With all 4 cords, create a simple overhand knot close to the button:


.
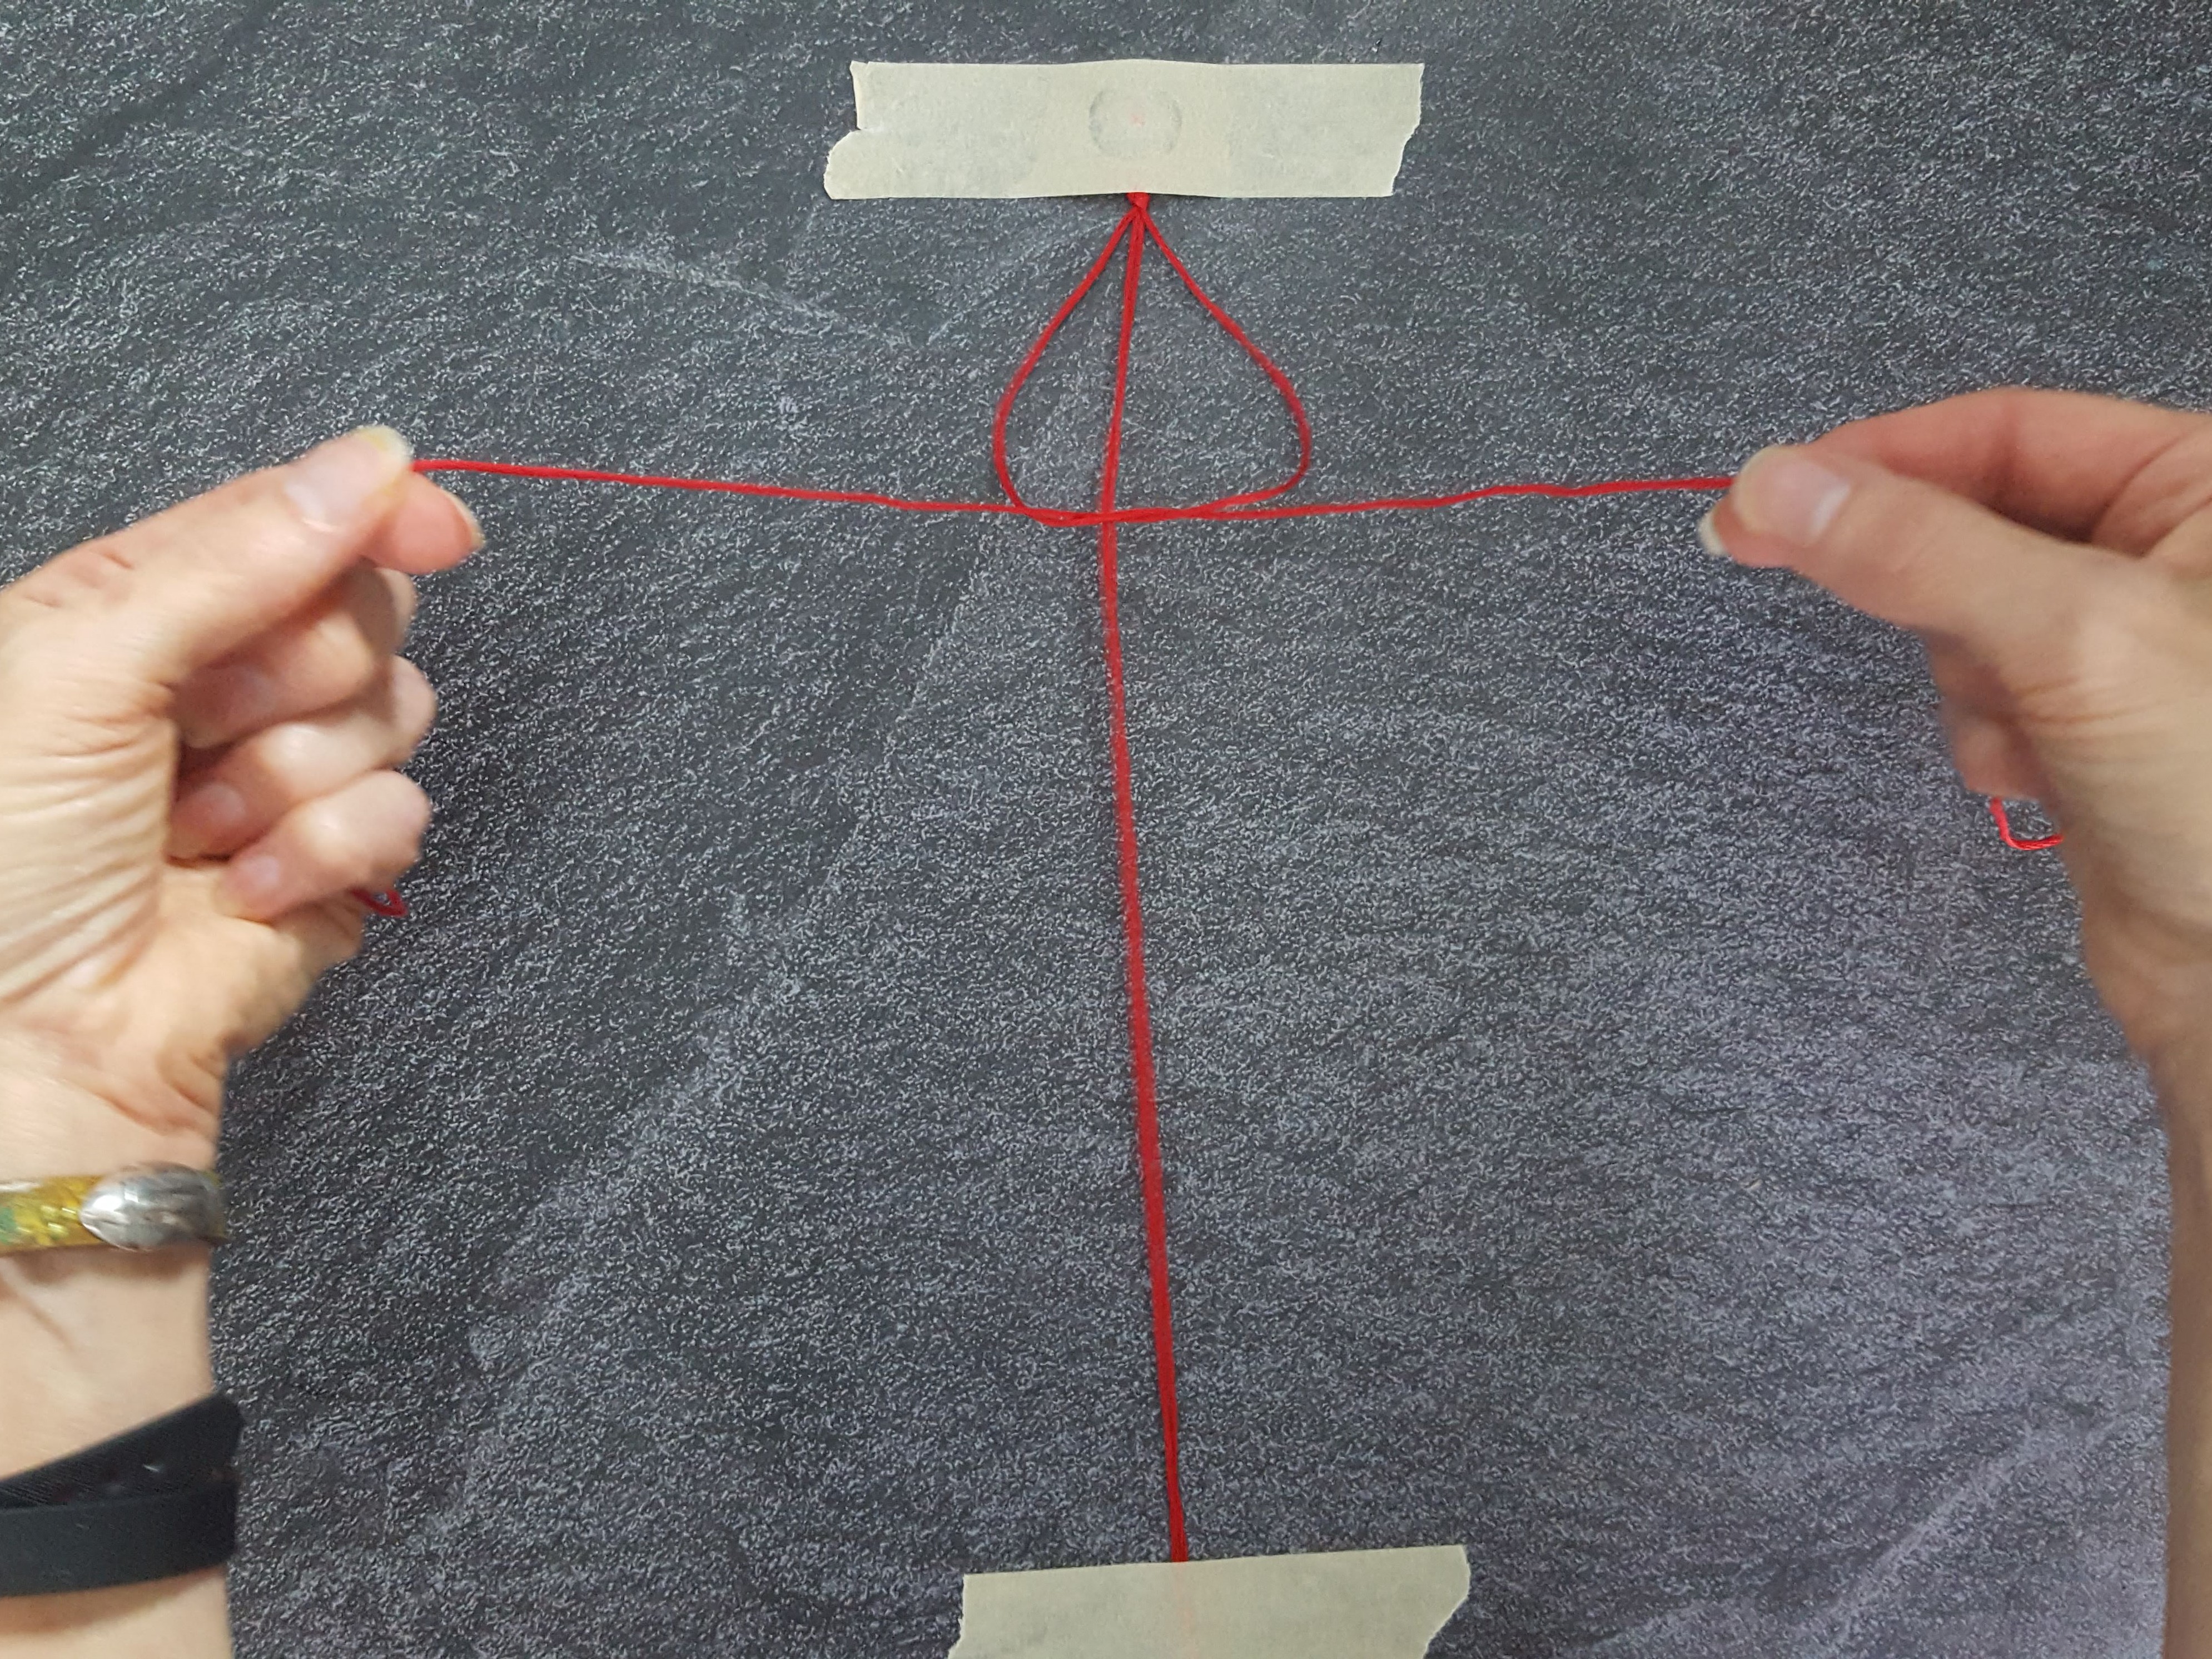
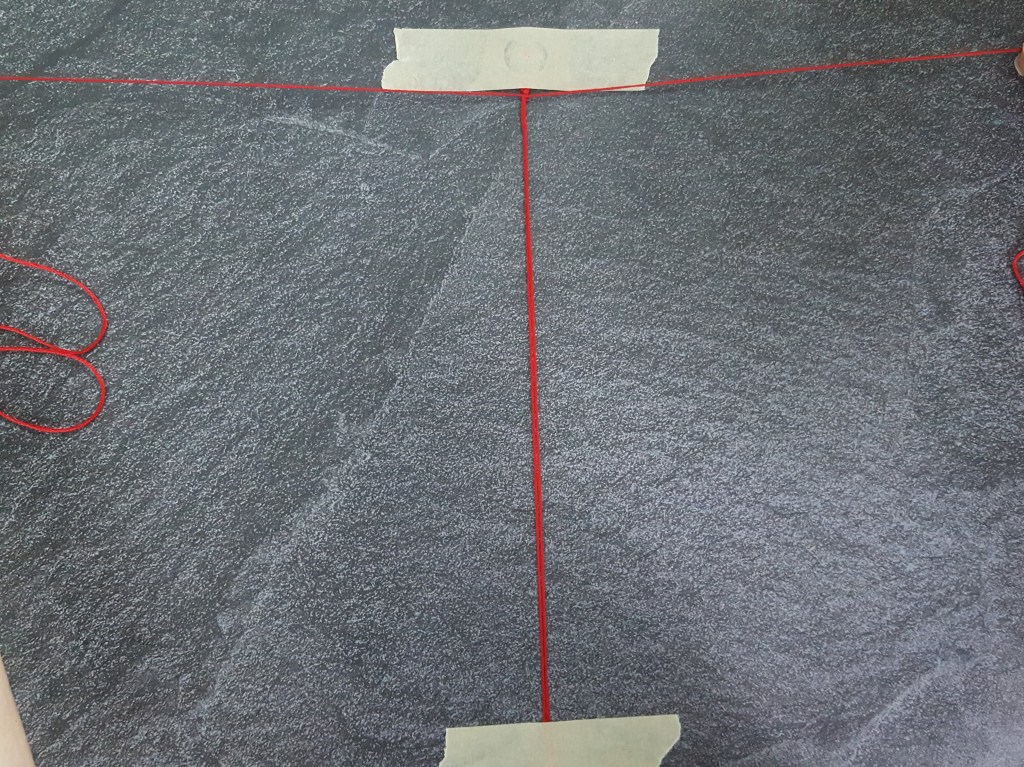
Step Three– Anchor the Cord
Lay out the cords so that the 12” pieces are straight ahead of you, and the 2 longer pieces are off to either side:

Use a piece of tape to anchor the button to your work surface, and a second piece of tape to anchor the ends of the 12” cord to the work surface:

.
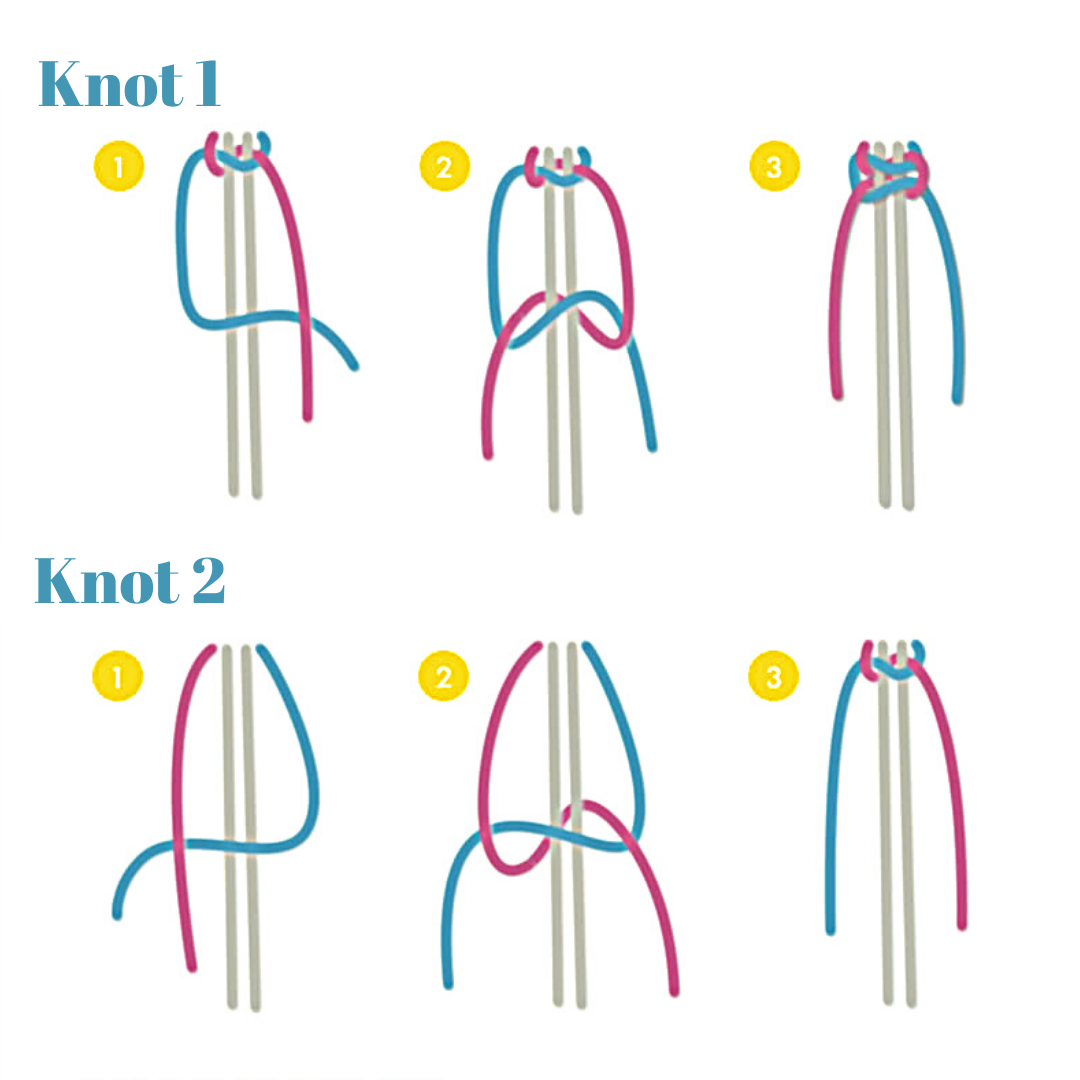
Before we start the macramé, here is a visual of the 2 knots we’ll use to make this bracelet. Note that knot 2 is just the reverse of knot 1:
.
Step Four – Knot 1
Create a figure “4” with the left side cord, laying the long end over and perpendicular to the 12” cords:

Lay the right side cord over that long end of the left cord:

Bring the right cord under the 12” cords, and up through the top part of the “4” shape:


With one long cord in each hand, start to pull the cords out to the side:
Continue pulling, until they are snug against the knot near the button, to complete Knot 1:

.
Step Five – Knot 2
Create a backwards 4 with the right side cord, laying the long end over and perpendicular to the 12” cords:

Lay the left side cord over that long end of the right cord:

Bring the left cord under the 12” cords, and up through the top part of the “4” shape:


With one long cord in each hand, start to pull the cords out to the side:

Continue pulling, until they are snug against the knot near the button, to complete Knot 2:


.
Step Six – Continue Knotting
Alternate knots 1 and 2, by repeating steps 4 and 5:


Periodically pause to measure the length of your bracelet, from the middle of the button, to the end of your knots:

NOTE: I find it helpful to always complete a cycle of knot 1 and knot 2 before stopping, so I know which side to start back up on.
Stop knotting when the length of your bracelet is ½’ shorter than the finished length you want.
.
Step Seven – Finishing
Remove the tape.
Using all 4 cords, create a simple overhand knot, and pull it tight over the last of the knotted portion of your bracelet:

Trim the short cords close to the overhand knot, leaving about ¼’, and taking care not to cut the longer cords.
Hold the button up next to that knot, to get an idea of how big you need your button hole:

Create a second overhand knot in the longer cords, testing that the button will fit, before pulling it tight.
Trim the cords close to knot, leaving about ¼”
.
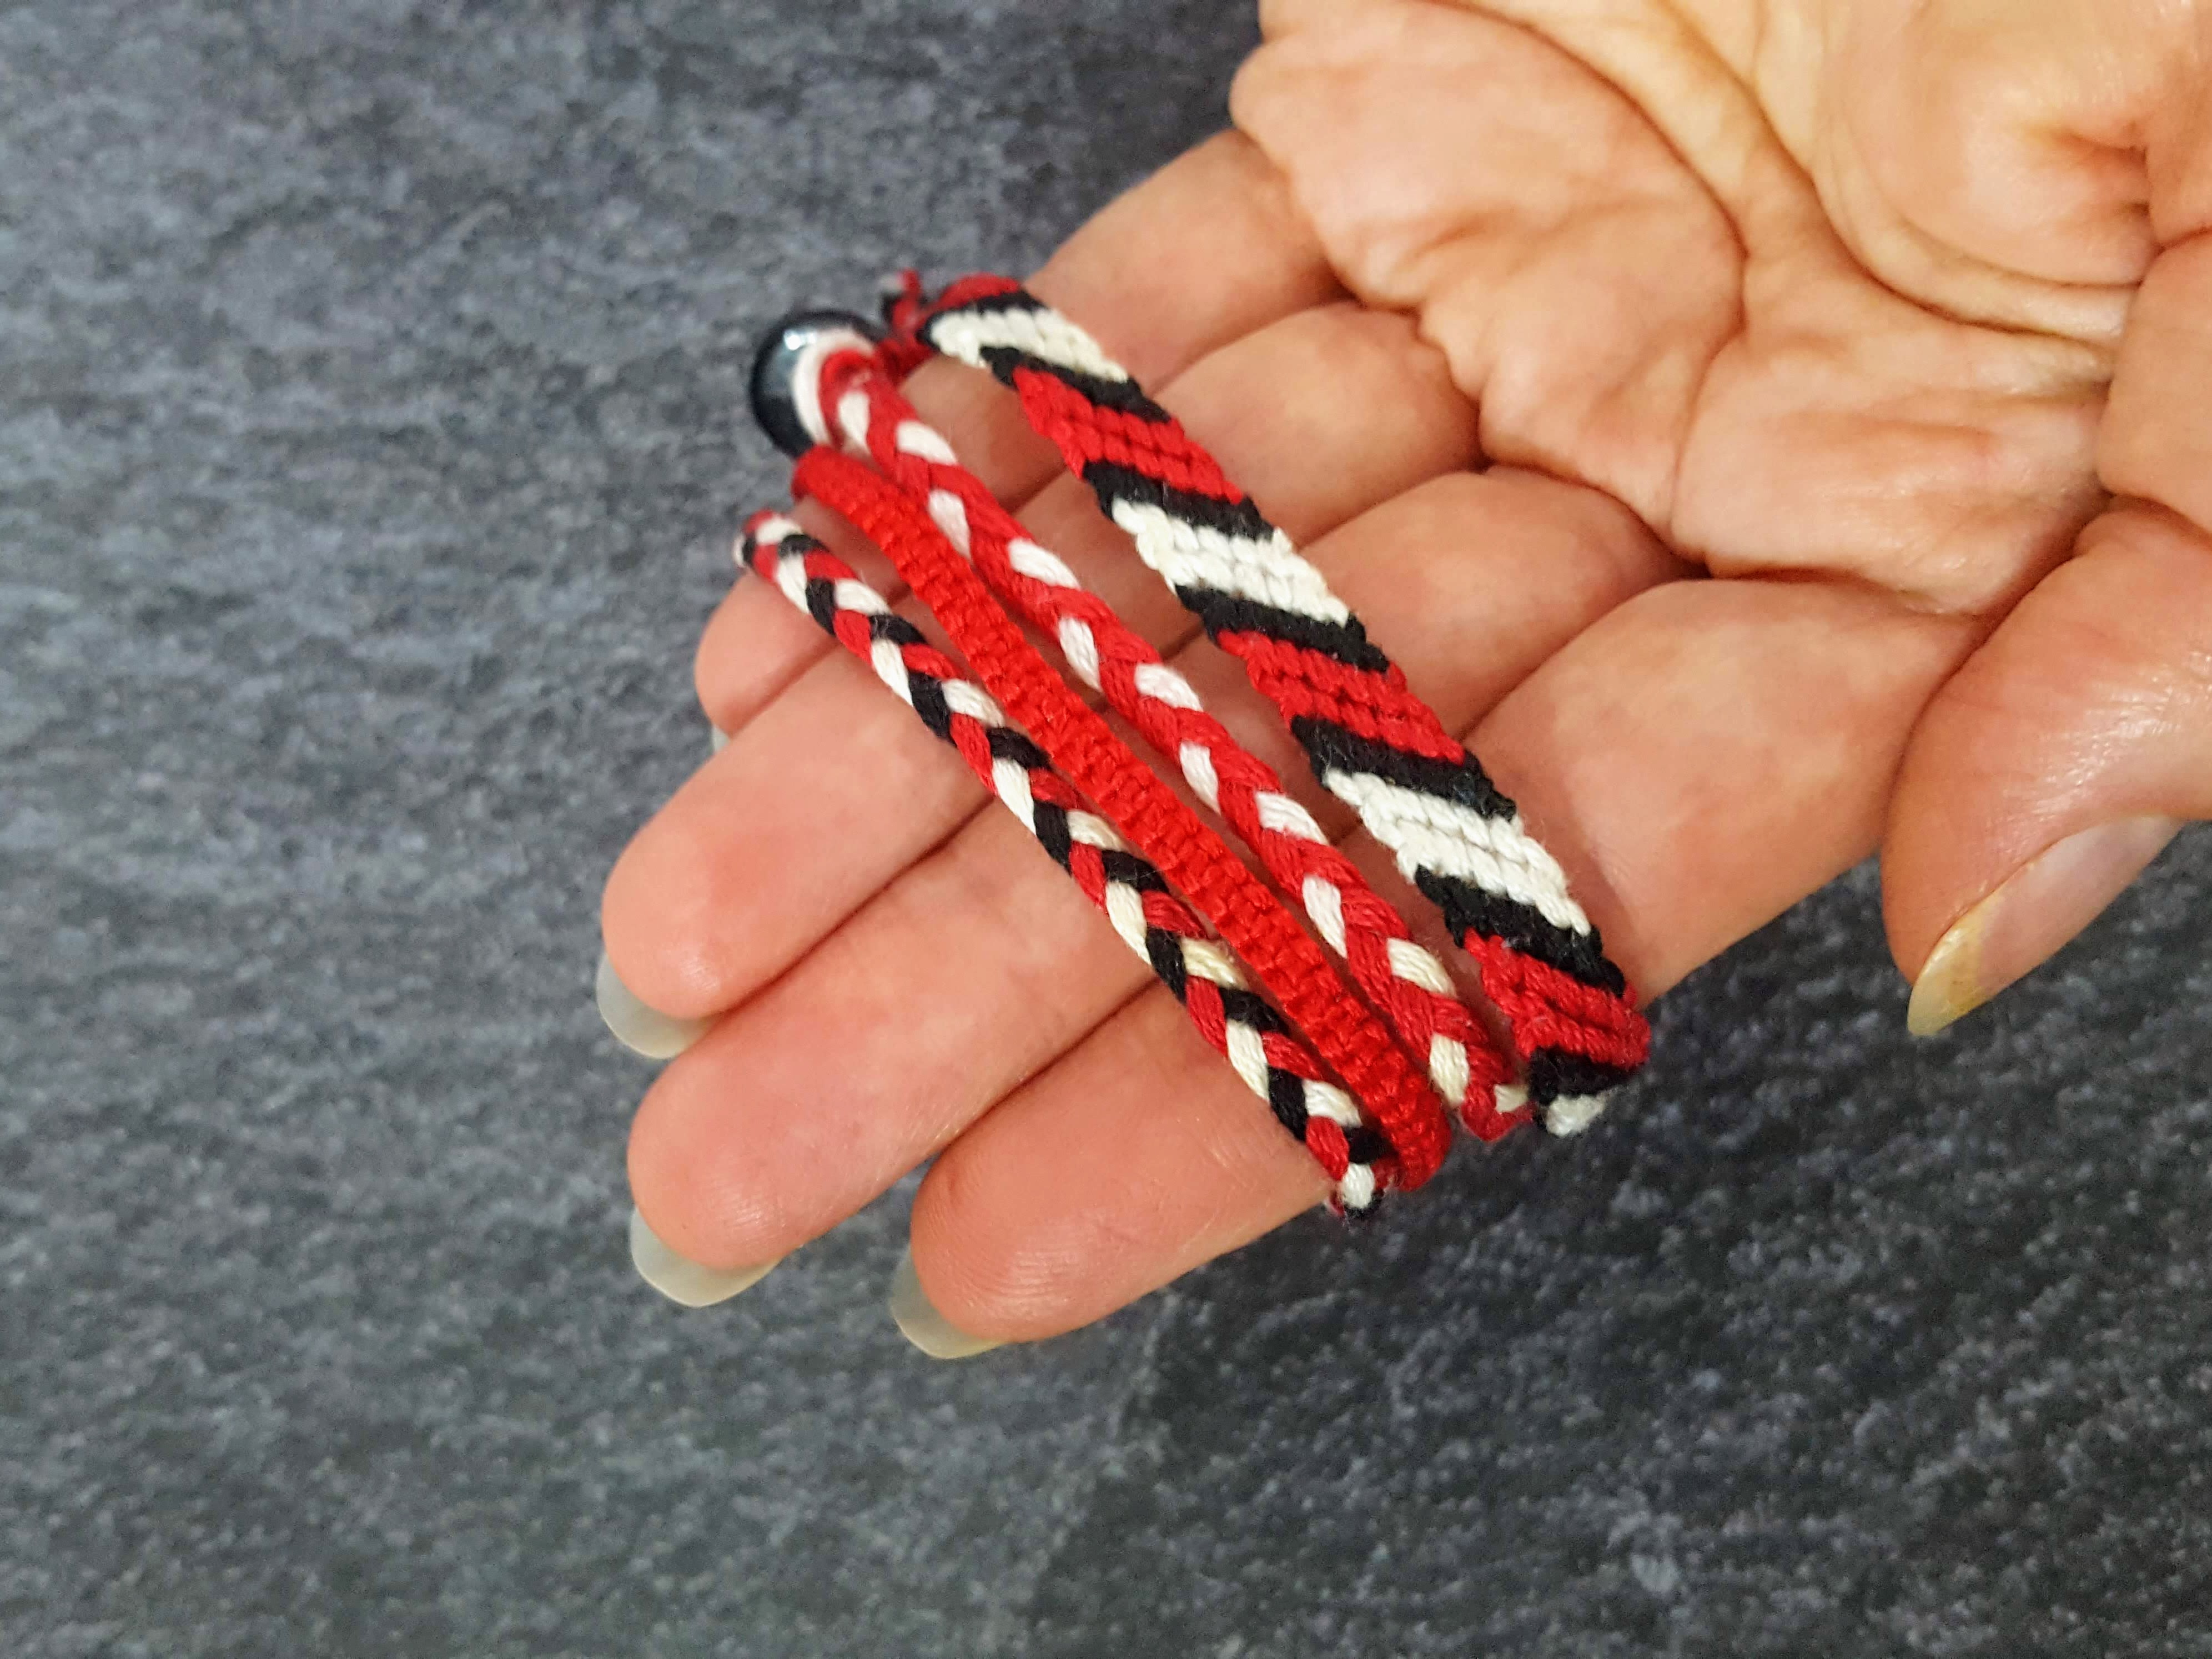
Step Eight – Wear It!
Your finished bracelet is ready to wear!

.
Time to make some more! I like making them in my favorite sports team colors, to stack with other bracelets I own!
If you’d like to make more bracelets, check out the previous blog posts listed below:
.
I’ll see you back here next week!
Carrie
.
P.S. If you love the look, but don’t want to make your own bracelet, you can order one here: