Hello fellow sports fans!
I know it’s hard to believe that with so much going on the in the sports world right now (baseball, soccer, football, hockey and basketball) that I would take a week off and share something that is NOT sports related!
But Halloween will be here before you know it, and those that know me know that I love celebrating holidays ALMOST as much as I love sports!
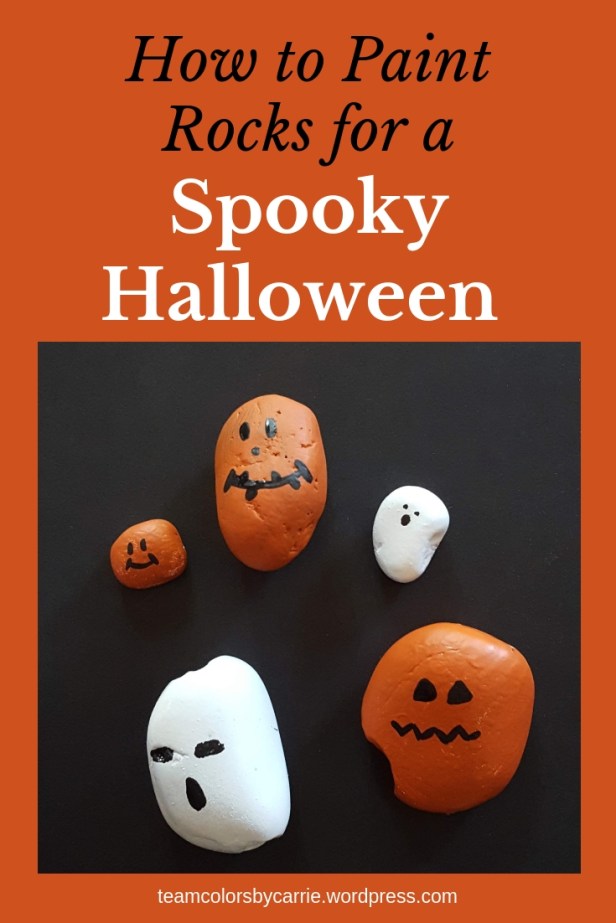
So I’m back with another painted rock project, this time featuring some spooky things for Halloween!
Let’s get started!
Step 1 – Collect the Supplies
Here’s what you need:
- Smooth Rocks
- Hunt for smooth rocks near water (oceans, rivers, lakes & streams)
- Or purchase from craft or home improvement stores in the garden department
- Liquid acrylic paints in Orange, Black and White (acrylic washes up with just water)
- Paintbrushes in various shapes and sizes
- Clear sealer (optional, but get something non-yellowing and marked specifically for exterior use if you plan to use your rocks outside
- Newspaper (to protect your work surface)

Step 2 – Clean Your Rocks (especially if you found your rocks outdoors)
- Soak rocks in hot water for a few minutes
- Scrub away any dirt with a toothbrush or a sponge
- Pat with a towel and let air dry completely before painting
Step 3 – Paint the Base Coat
- Choose which side of the rock will be the front (use the smoother, flatter side)
- Turn the front side down on the work surface
- Shake the paint well (orange for the pumpkin, white for the ghost)
- Put a small puddle of paint on the back of the rock
- Use a large brush to paint the back and sides of the rock
- Wash out your brush
- Allow paint to dry
- Turn the rock over, and repeat the steps to paint the front
- NOTE: You may need a second coat of paint to completely cover the color of the rock


Step 4 – Paint the Face
- Shake the black paint well
- Squeeze out a small puddle of paint on the newspaper
- Use a small brush to paint the eyes and mouth
- Wash out your brush
- Allow paint to dry
- Touch up as needed


Step 5 – Clear Coat (optional, but recommended for outside use)
- Spray your rock with the clear coat
- Allow to dry
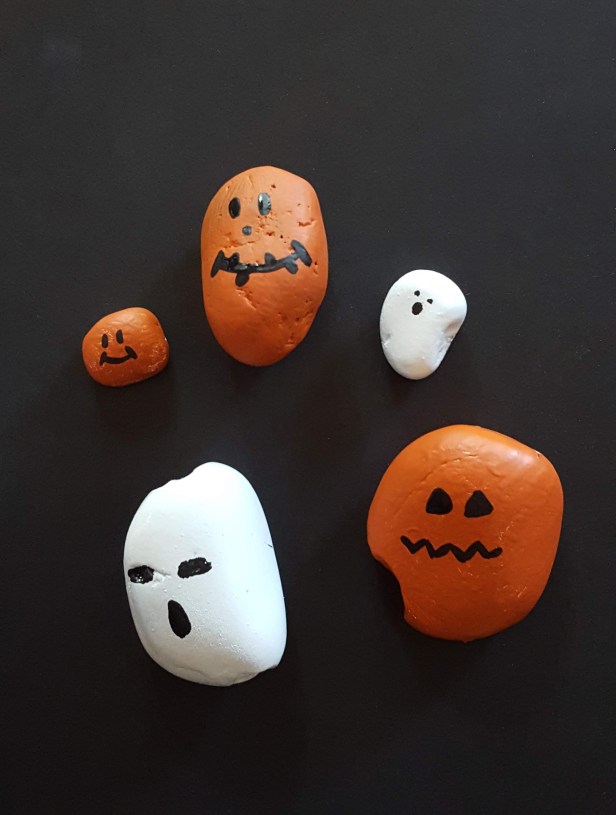
There you go! Painted jack-o-lantern and ghost rocks! I’ll be adding mine to the flower pots on my front step. Where will you put yours?
Until next week,
Carrie
P.S. If you missed my previous painted rock projects, you can see them here: