Hello fellow sports fans!
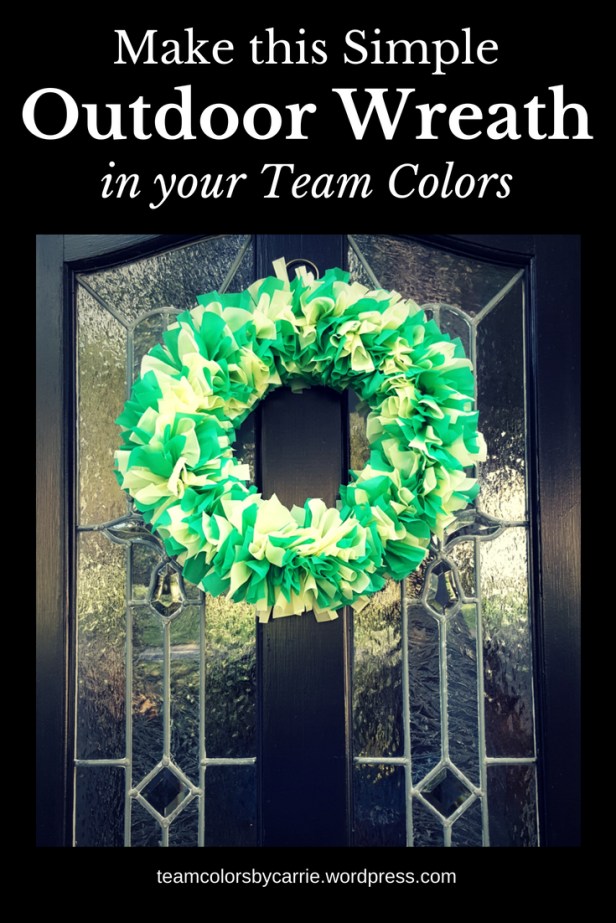
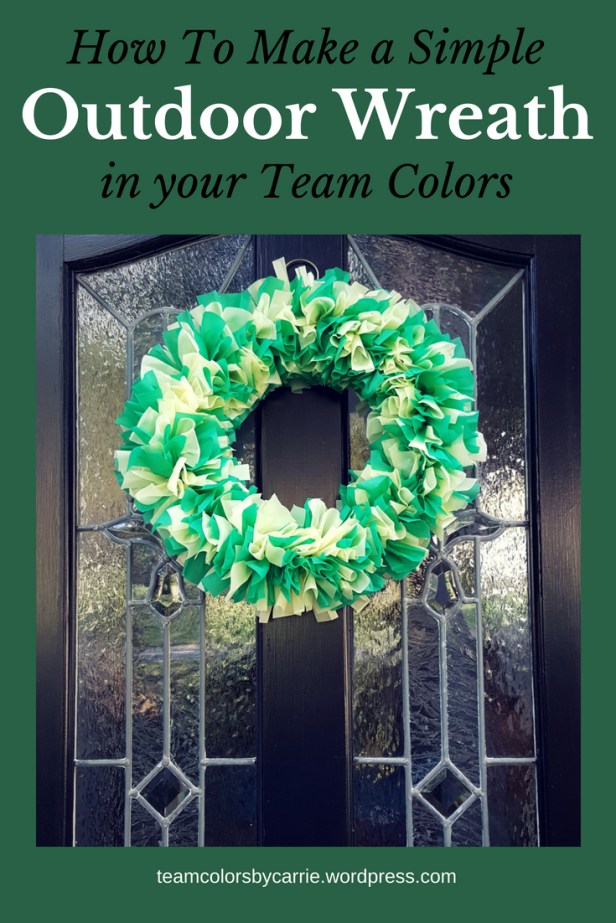
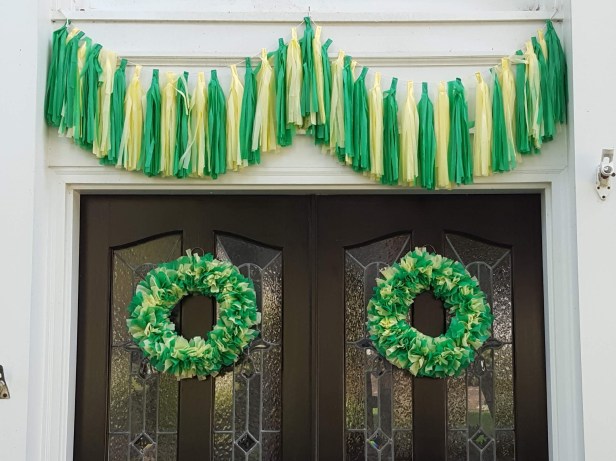
The season for game day and tailgate parties has started! And I’m here to remind you not to forget the decorations!
If you have been following the blog, you already know that I love turning basic items into something amazing. Plastic tablecloths are easy to find and very inexpensive, and come in all the colors you need to represent your favorite sports team, or to decorate for the season. And the tassel garland I made a few weeks ago is looking lovely hanging above my front door (check it out HERE if you missed it).
Today, I’m going to show you how you to turn some of those tablecloths into a wreath you can hang from the front door or from the tent at your next tailgate party. And you can make your wreath with just $2 worth of supplies from the local dollar store!
Let’s get started!
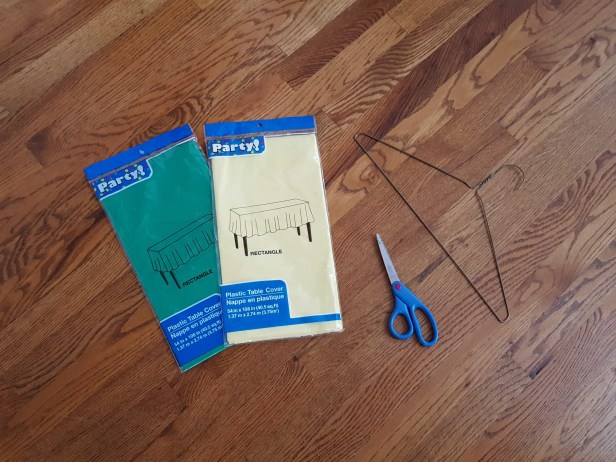
Step 1 – Collect the Supplies
Here’s what you need:
- 2 Plastic tablecloths in your team colors
- Get the long rectangular ones (54” x 108” is a common size)
- A wire hangar
- Sharp scissors
Step 2 – Create the Base for the Wreath
- Use your hands to bend your wire hangar into a circle shape
- It doesn’t have to be perfect, just a general circular shape
- If the wire is really stiff, you may need a pliers to help bend it


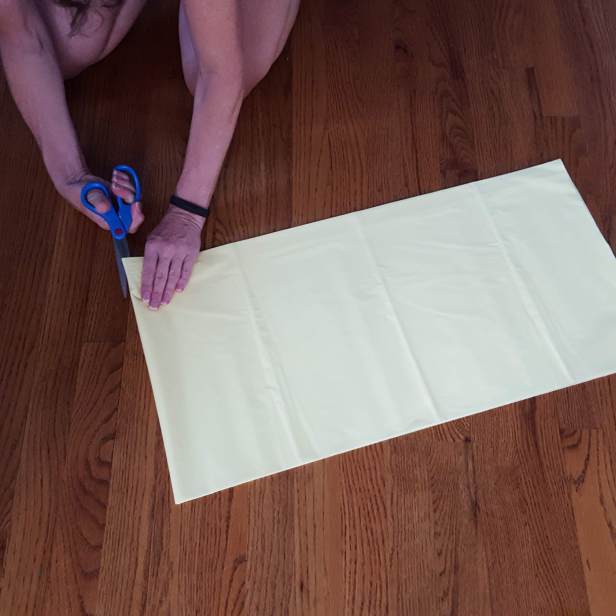
Step 3 – Cut the Tablecloths into strips
- Remove a tablecloth from its wrapper
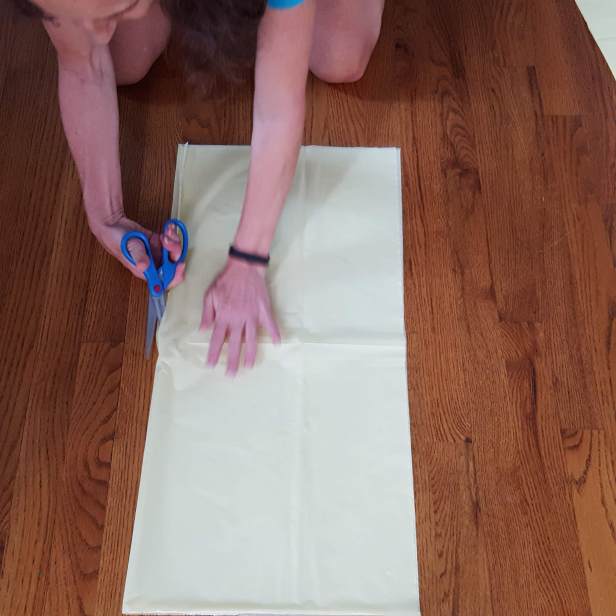
- Unroll the tablecloth. I will be a very long rectangular (it’s only partially unrolled in this picture):

- Check that the long edges are aligned, and adjust if needed
- Lay the tablecloth on a work surface, and refold in half, and in half again, aligning the edges
- Cut through all of the folds on both ends
- Pick up the top section
- Fold it in half, and fold it in half again, and cut the folds on both sides
- Fold those pieces in half in the opposite direction, and cut through the fold
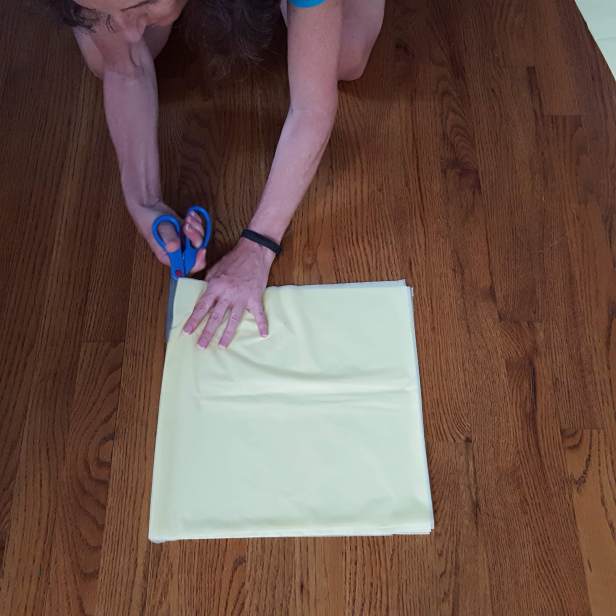
- Fold again and cut through the fold

- Fold again in the opposite direction and cut through the fold


- You will now have a pile of pieces about 7” square
- The stack is now too thick to cut all at once, so take half of that stack, fold in half and cut on the fold

- Fold in half one more time, and cut
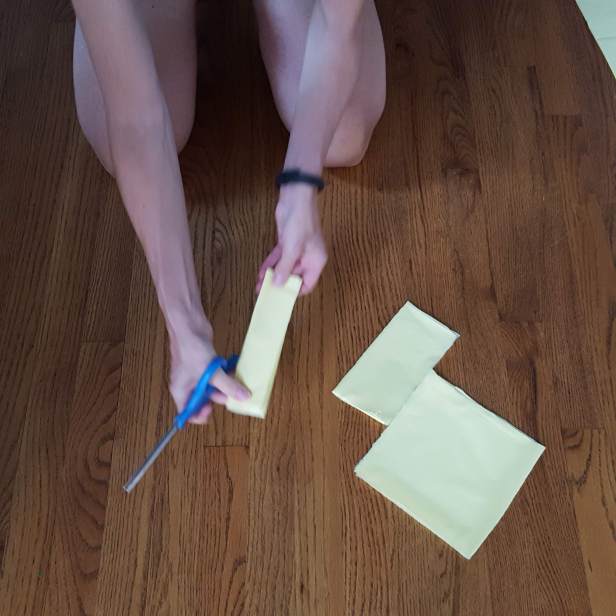
- You will end up with strips about 1-1/2 to 2”wide

- Repeat with the other stack of square pieces
- Repeat the entire process for the remaining sections of the tablecloth
- Take the second tablecloth, and repeat!

Step 4 – Tie the Strips onto the Wreath form
- Take a strip and gently tie it onto the wreath frame


- Don’t pull too hard, as the plastic stretches and tears easily
- Repeat with a second strip of the same color
- As you tie each strip, slide it up to the top of the wreath

- Next tie on 2 strips of the second color
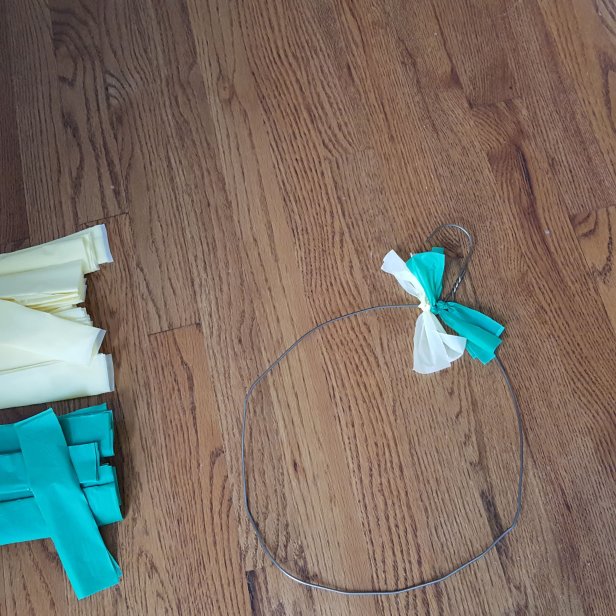
- Continue adding more strips, alternating colors.
- Keep pressing the strips close together, because squeezing in more strips results in a fuller wreath! I actually had enough strips to make 2 wreaths from 2 tablecloths.
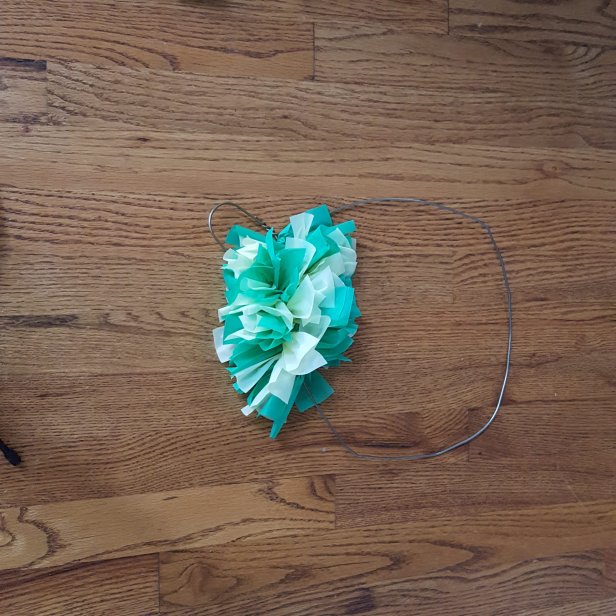
- Continue tying on strips until the entire wire frame is covered.

Step 5 – Hang it Up!
- Your wreath is now ready to hang on your front door, on your tailgating tent, or in the family room or den.
- Make the matching Tassel Garland too (find the tutorial HERE)
Comment below and let me know if you decided to make one!
Until next week,
Carrie
P.S. Summer is almost over, and so is the opportunity to enter my summer giveaway. Join my VIP club, so you are entered for the September 1st drawing for FREE jewelry!