Hey sports fans!
Did you try out the No Sew Fleece Hat project that I shared last week? If you did, I’d love to know what color or pattern you chose, and how it turned out, so comment below!
This week, as promised, I’m back with a No Sew Fleece Infinity Scarf that I think you are going to love. You can wear it by itself, or paired with the hat.
And you will be amazed at just how easy this scarf is to make!

Let’s get started!
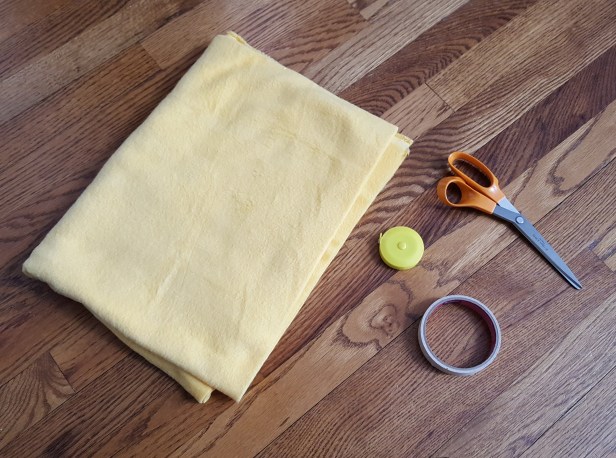
Step 1 – Gather the Supplies
Here’s what you need:
- ¼ to ½ yard of 60” wide fleece fabric (depending on how wide you want your scarf)
- Sharp scissors (I recommend a fabric scissors)
- Measuring tape or ruler (optional)
- Masking tape
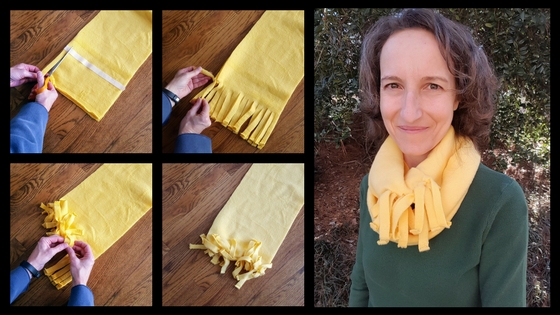
Step 2 – Measure and Cut the Fleece
- Fold your piece of fleece in half
- Measure and mark the width of your scarf
- Use 10″ or 12” for a wider scarf, or 8” for a narrower scarf
- My fleece was pretty thick, so I cut it 8” wide
- Cut along the marks


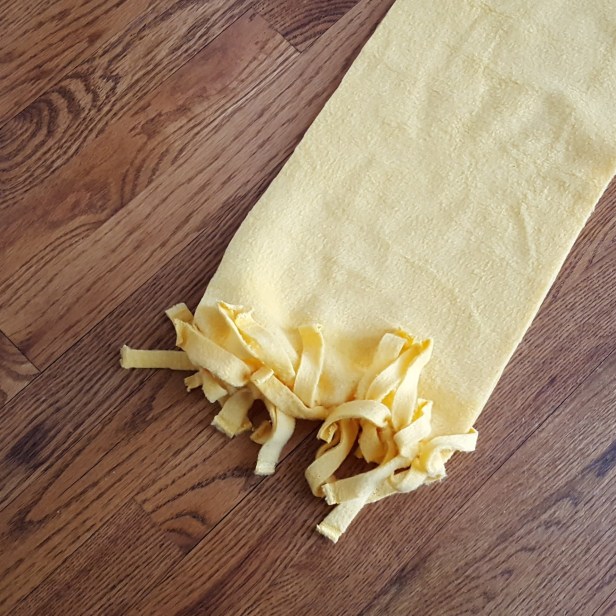
Step 3 –Cut the Fringes
- Keep the fleece folded in half, making sure the short ends are aligned

- Measure 4” in from the short ends and mark with masking tape

- Cut fringes about every ½”, using the masking tape as the stopping point
- No need to measure – eyeballing ½” is close enough!


- No need to measure – eyeballing ½” is close enough!
- Remove the masking tape

Step 4 – Knot the fringes to tie the ends together
- Tie the fringes together (one from the top layer and one from the bottom layer) to create knots.

- Work your across the end of the scarf until all fringes are knotted.

- That’s it! How was that for easy-peasy?
Your new scarf is ready to wear! You can wear it in a long single layer with the fringes hanging down, or on colder days, wrap it around twice for extra warmth.

And in case you missed it, check out last week’s No Sew Fleece Hat project to wear with your new scarf!

")
Until next week,
Carrie

